Note
Access to this page requires authorization. You can try signing in or changing directories.
Access to this page requires authorization. You can try changing directories.
SIM groups allow you to sort SIMs into categories for easier management. Each SIM must be a member of a SIM group, but can't be a member of more than one. If you only have a small number of SIMs, you might want to add them all to the same SIM group. Alternatively, you can create multiple SIM groups to sort your SIMs. For example, you could categorize your SIMs by their purpose (such as SIMs used by specific UE types like cameras or cellphones), or by their on-site location. In this how-to guide, you'll learn how to create, delete, and view SIM groups using the Azure portal.
Prerequisites
- Ensure you can sign in to the Azure portal using an account with access to the active subscription you identified in Complete the prerequisite tasks for deploying a private mobile network. This account must have the built-in Contributor role at the subscription scope.
- Identify the name of the Mobile Network resource corresponding to your private mobile network.
View existing SIM groups
You can view your existing SIM groups in the Azure portal.
Sign in to the Azure portal.
Search for and select the Mobile Network resource representing the private mobile network to which you want to add a SIM group.
In the Resource menu, select SIM groups to see a list of existing SIM groups.

Create a SIM group
You can create new SIM groups in the Azure portal. As part of creating a SIM group, you're given the option of provisioning new SIMs to add to your new SIM group. If you want to provision new SIMs, you need to Collect SIM and SIM Group values before you start.
To create a new SIM group:
Navigate to the list of SIM groups in your private mobile network, as described in View existing SIM groups.
Select Create.
Do the following on the Basics configuration tab.
Enter a name for the new SIM group into the SIM group name field.
In the Region field, select the region in which you deployed the private mobile network.
Select your private mobile network from the Mobile network drop-down menu.

Select Next: Encryption.
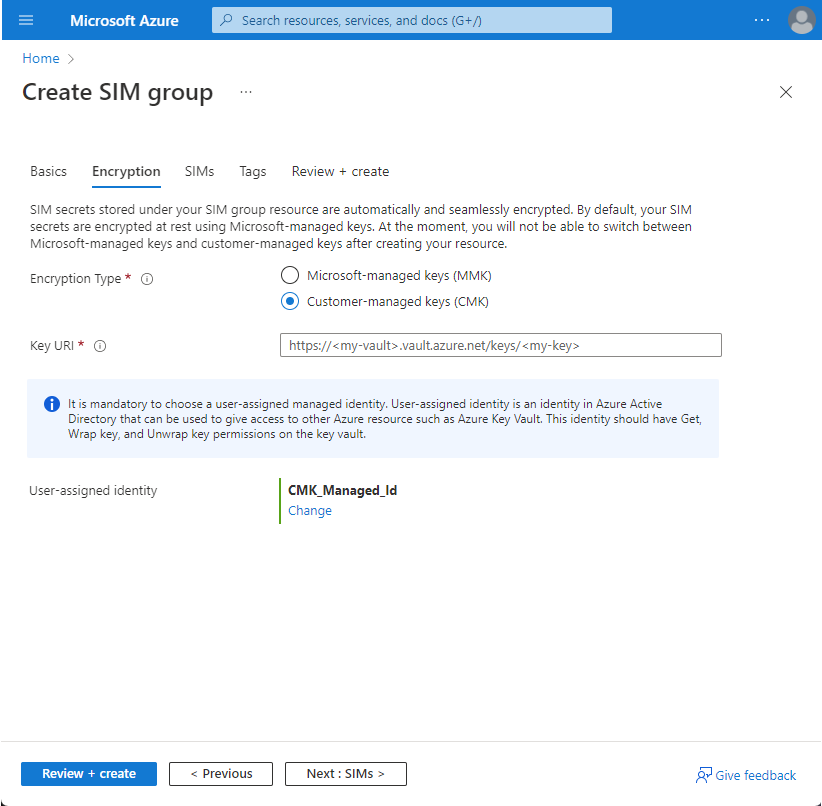
On the Encryption configuration tab, select your chosen encryption type next to Encryption Type. By default, Microsoft-managed keys (MMK) is selected. Once created, you cannot change the encryption type of a SIM group.
- If you leave Microsoft-managed keys (MMK) selected, you do not need to enter any more configuration information on this tab.
- If you select Customer-managed Keys (CMK), a new set of fields appear. You need to provide the Key URI and User-assigned identity created or collected in Collect SIM and SIM Group values. These values can be updated as required after SIM group creation.
Select Next: SIMs.
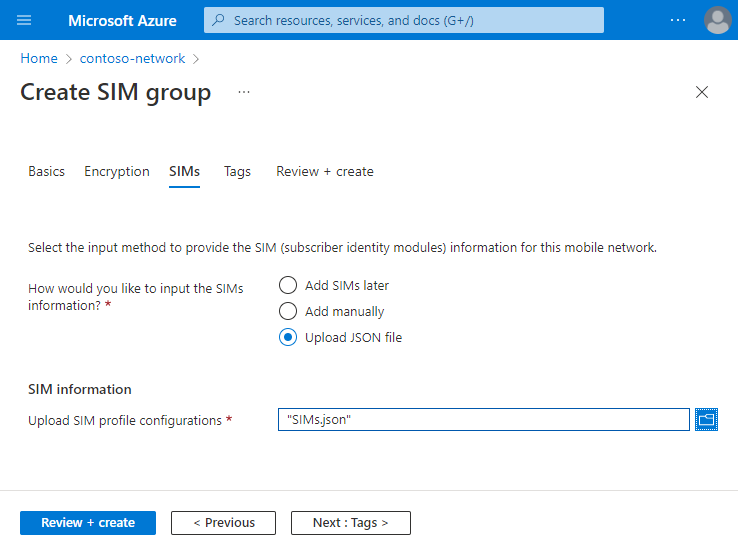
On the SIMs configuration tab, select your chosen input method by selecting the appropriate option next to How would you like to input the SIMs information?. You can then input the information you collected for your SIMs.
- If you decided that you don't want to provision any SIMs at this point, select Add SIMs later.
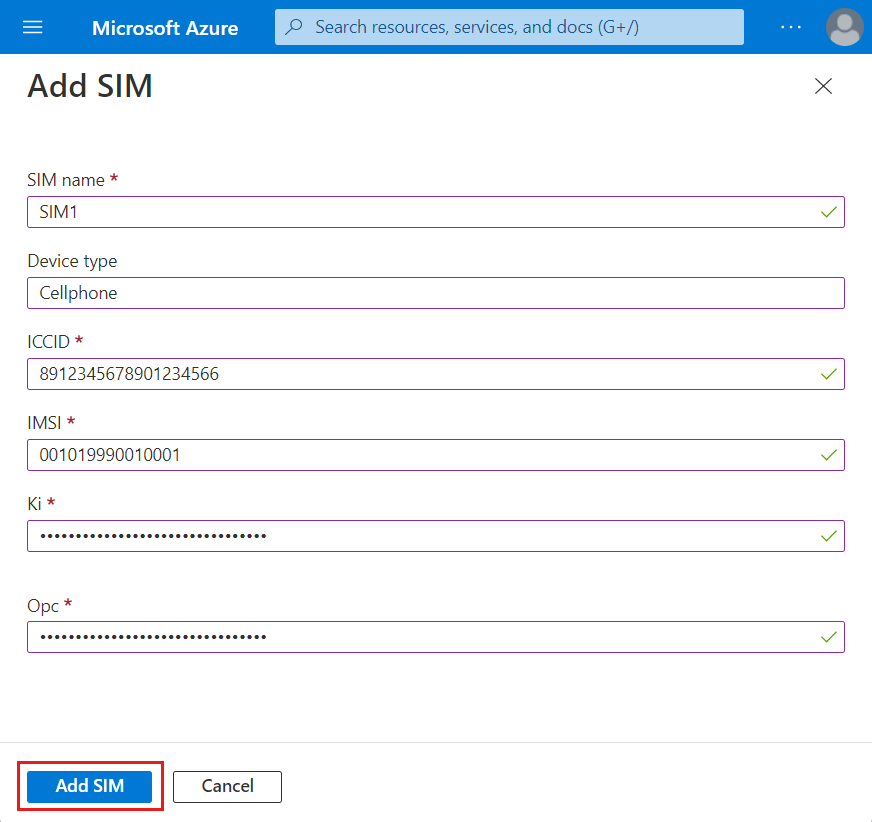
- If you select Add manually, a new Add SIM button appears under Enter SIM profile configurations. Select it, fill out the fields with the correct settings for the first SIM you want to provision, and select Add SIM. Repeat this process for every additional SIM you want to provision.
If you select Upload JSON file, the Upload SIM profile configurations field appears. Use this field to upload your chosen JSON file.
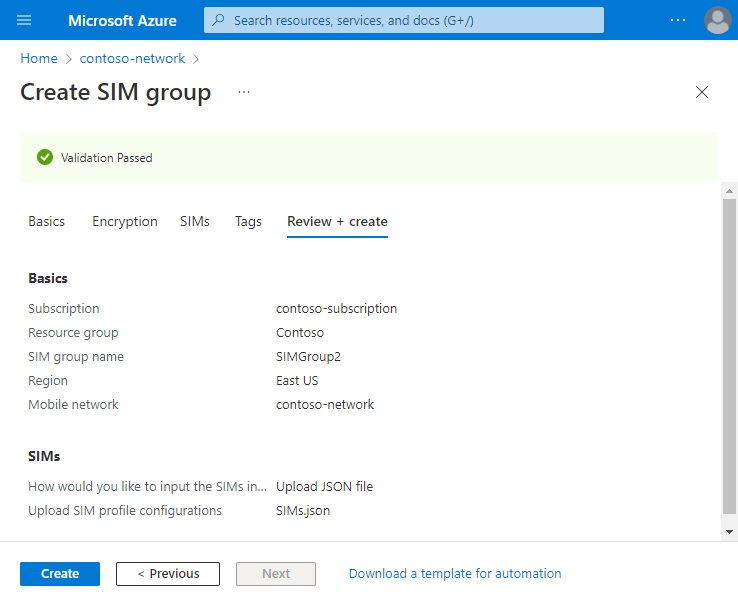
Select Review + create.
Azure will now validate the configuration values you've entered. You should see a message indicating that your values have passed validation.
If the validation fails, you'll see an error message and the Configuration tab(s) containing the invalid configuration will be flagged with red dots. Select the flagged tab(s) and use the error messages to correct invalid configuration before returning to the Review + create tab.
Once your configuration has been validated, you can select Create to create the SIM group. The Azure portal displays the following confirmation screen when the SIM group has been created.
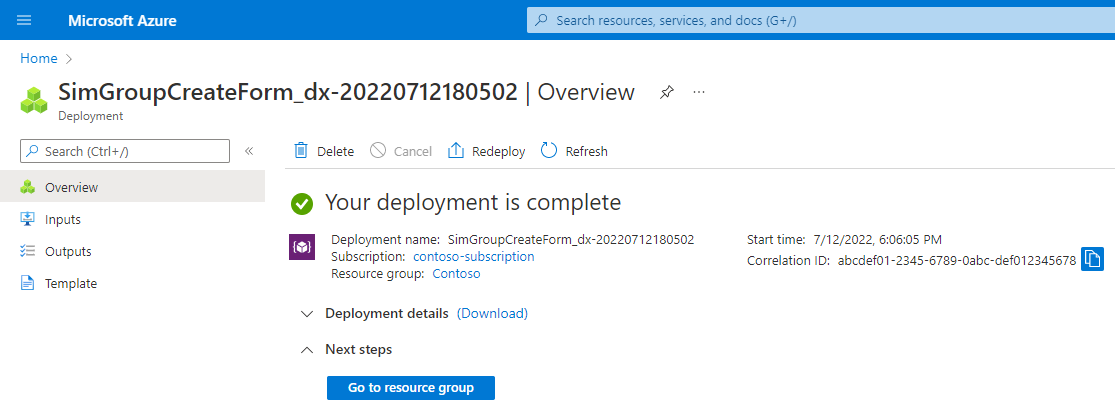
Click Go to resource group and then select your new SIM group from the list of resources. You'll be shown your new SIM group and any SIMs you've provisioned.
At this point, your SIMs do not have any assigned SIM policies and so won't be brought into service. If you want to begin using the SIMs, assign a SIM policy to them. If you've configured static IP address allocation for your packet core instance(s), you might also want to assign static IP addresses to the SIMs you've provisioned.
Modify a SIM group
If you have configured CMK encryption for your SIM group, you can modify the key URI and user-assigned identity through the Azure portal.
Navigate to the list of SIM groups in your private mobile network, as described in View existing SIM groups.
Select the SIM group you want to modify.
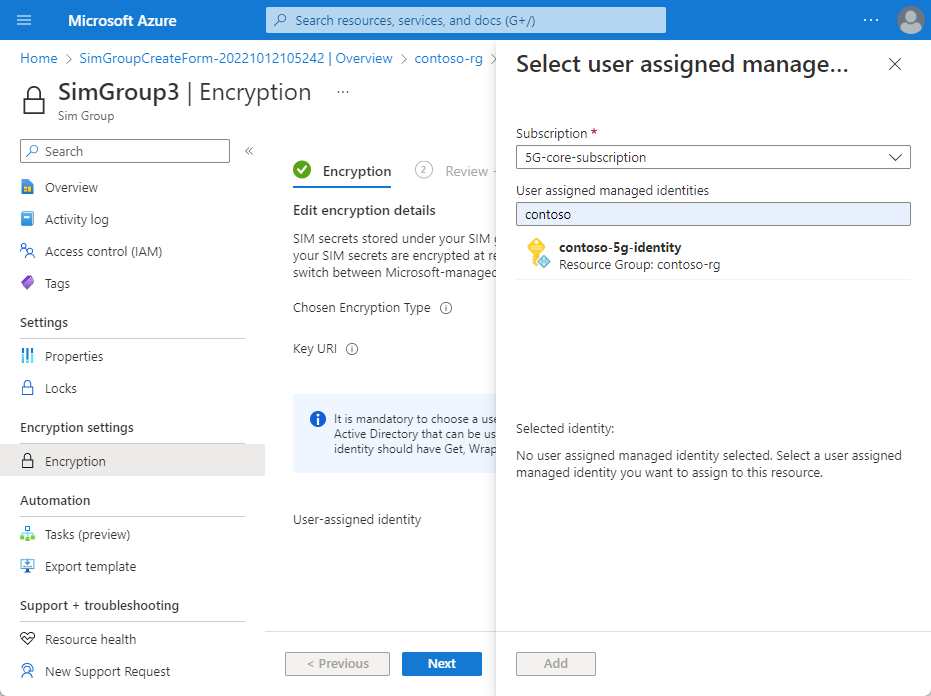
Select the Encryption blade.

If you want to change the key URI, enter the new value in the Key URI field using the values you collected in Collect SIM and SIM group values.
If you want to change the user-assigned identity, click the current User-assigned identity hyperlink. This expands a new window to select the new identity. Select the identity created in Collect SIM and SIM group values and select Add.
Select Next.
Review your changes. If they are correct, select Create.


Delete a SIM group
You can delete SIM groups through the Azure portal.
- Navigate to the list of SIM groups in your private mobile network, as described in View existing SIM groups.
- Make sure any SIMs in the SIM group are no longer needed. When you delete the SIM group, all SIMs that it contains will be deleted.
- Select the checkbox next to the SIM group you want to delete.
- Select Delete from the Command bar.
- In the pop-up that appears, select Delete to confirm you want to delete the SIM group.
Next steps
Learn more about how to manage the SIMs in your SIM groups.