Note
Access to this page requires authorization. You can try signing in or changing directories.
Access to this page requires authorization. You can try changing directories.
When you run a quantum program in Azure Quantum, you create and run a job. The steps to create and run a job depend on the job type and the provider and target that you configure for the workspace.
Job properties
All jobs have the following properties in common:
| Property | Description |
|---|---|
| ID | A unique identifier for the job. It must be unique within the workspace. |
| Provider | Who you want to run your job. |
| Target | What you want to run your job on. For example, the exact quantum hardware or quantum simulator offered by the provider. |
| Name | A user-defined name to help organize your jobs. |
| Parameters | Optional input parameters for targets. See the documentation for the selected target for a definition of available parameters. |
Once you create a job, various metadata is available about its state and run history.
Job lifecycle
Once you've written your quantum program, you can select a target and submit your job.
This diagram shows the basic workflow after you submit your job:
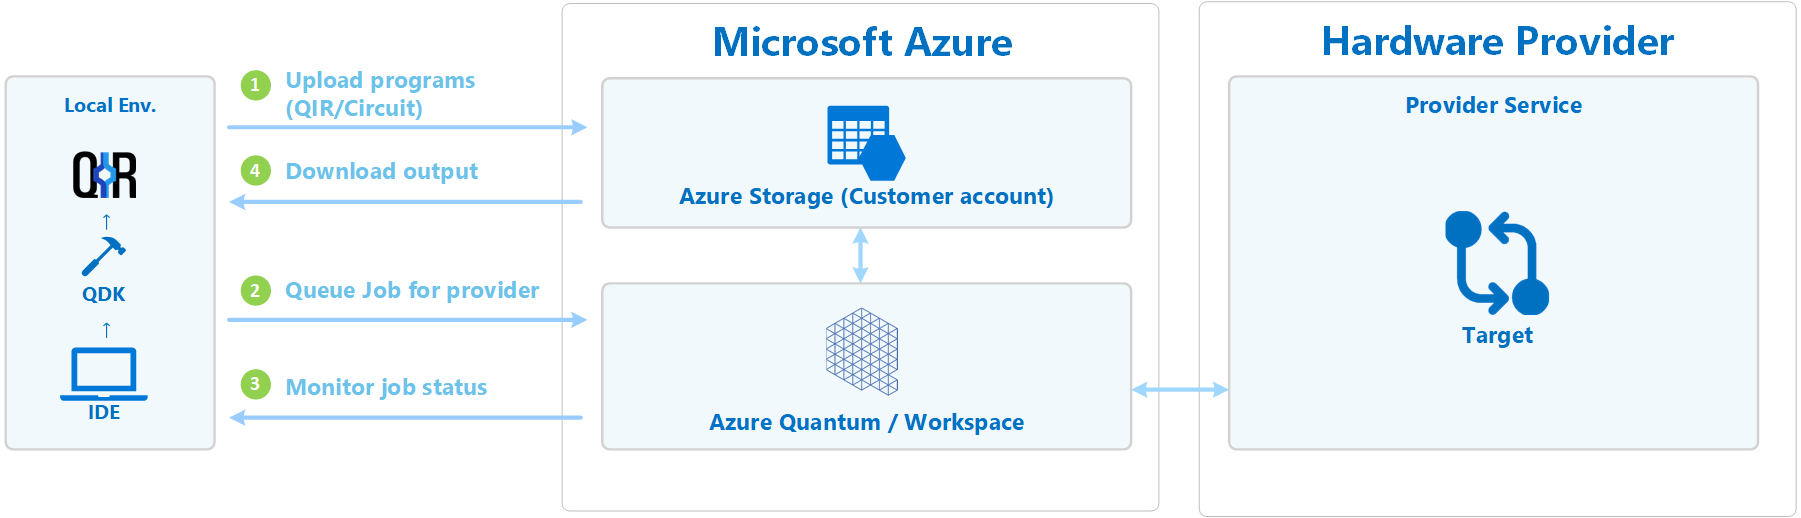
First, Azure Quantum uploads the job to the Azure Storage account that you configured in the workspace. Then, the job is added to the job queue for the provider that you specified in the job. Azure Quantum then downloads your program and translates it for the provider. The provider processes the job and returns the output to Azure Storage, where it is available for download.
Monitoring jobs
Once you submit a job, you can monitor the status of the job. Jobs have the following possible states:
| Status | Description |
|---|---|
| waiting | The job is waiting to run. Some jobs will perform pre-processing tasks in the waiting state. waiting is always the first state, however, a job may move to the executing state before you can observe it in waiting. |
| executing | The target is currently running the job. |
| succeeded | The job has succeeded, and output is available. This is a final state. |
| failed | The job has failed, and error information is available. This is a final state. |
| cancelled | The user requested to cancel the job run. This is a final state. For more information, see Job Cancellation in this article. |
The succeeded, failed, and cancelled states are considered final states. Once a job is in one of these states, no more updates occur, and the corresponding job output data does not change.
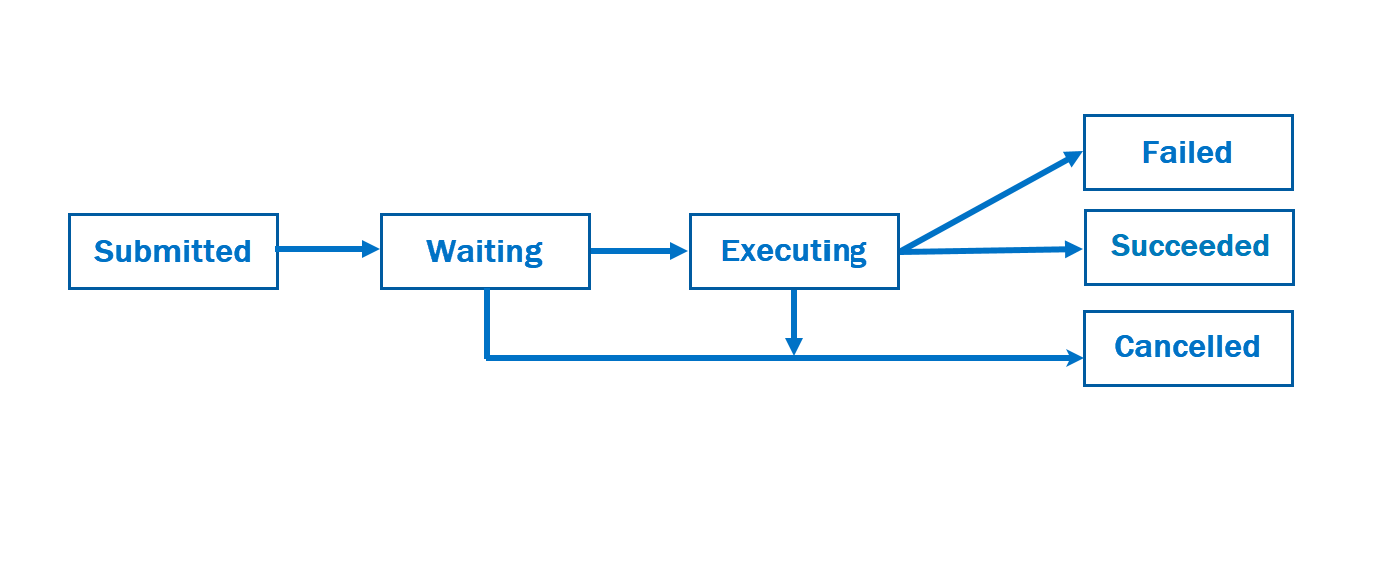
This diagram shows the possible job state transitions:
After a job completes successfully, it displays a link to the output data in your Azure Storage account. How you access this data depends on the SDK or tool you used to submit the job.
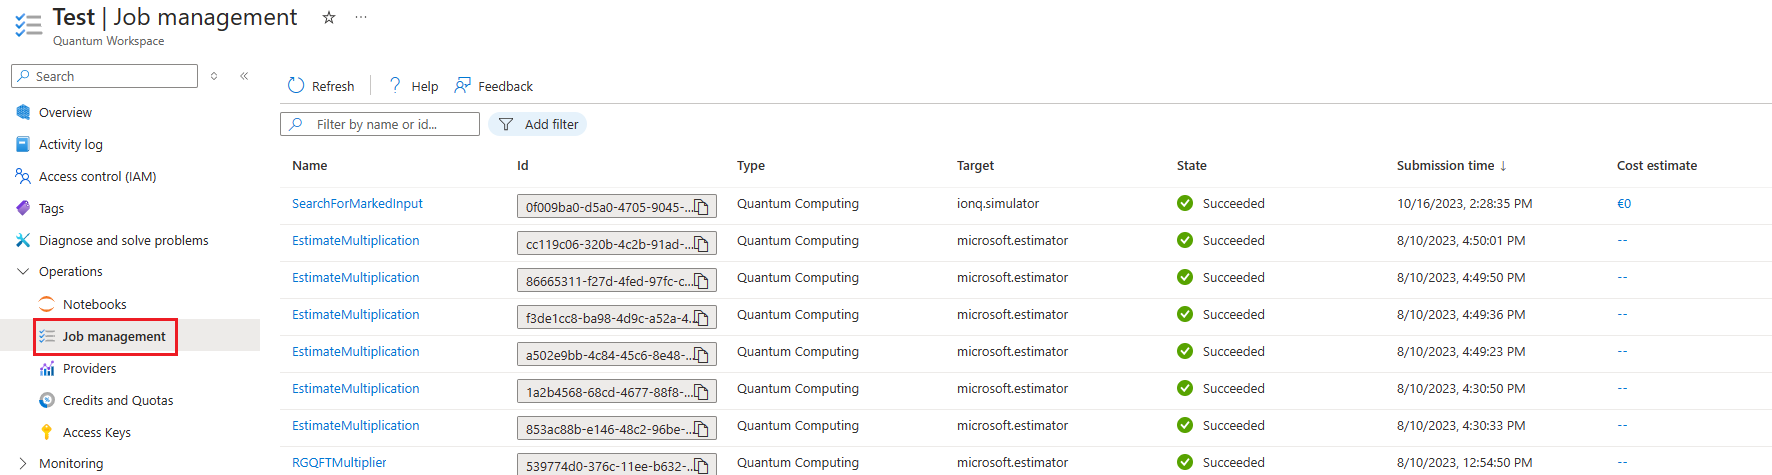
How to monitor jobs
You can monitor jobs through Python, the Azure portal, and Azure CLI.
All the properties of the job are accessible in job.details. For example, you can access the job name, status, and ID as follows:
print(job.details)
print("\nJob name:", job.details.name)
print("Job status:", job.details.status)
print("Job ID:", job.details.id)
{'additional_properties': {'isCancelling': False}, 'id': '0fc396d2-97dd-11ee-9958-6ca1004ff31f', 'name': 'MyPythonJob', 'provider_id': 'rigetti'...}
Job name: MyPythonJob
Job status: Succeeded
Job ID: fc396d2-97dd-11ee-9958-6ca1004ff31f
Job counts
To get counts that result from a large number of jobs, you may want to perform a local install of the Quantum Development Kit tools. With a local install, you can store the job IDs locally.
You can copy the following code to get the list of jobs and their results:
for job in workspace.list_jobs():
    print(job.id, job.details.name, job.details.output_data_uri)
Job cancellation
When a job is not yet in a final state (for example, succeeded, failed, or cancelled), you can request to cancel the job. All providers will cancel your job if it is in the waiting state. However, not all providers support cancellation if your job is in the executing state.
Note
If you cancel a job after it has started running, your account may still be billed a partial or full amount for that job. See the billing documentation for your selected provider