Note
Access to this page requires authorization. You can try signing in or changing directories.
Access to this page requires authorization. You can try changing directories.
Learn how to run Q# code in a Jupyter Notebook in the Azure Quantum portal. A Jupyter Notebook is a document that contains both rich text and code and can run in your browser using Q# and Python code. Notebooks can be created directly in the Azure Quantum portal, and offer features such as preloaded connection information and a preconfigured Q# and Python development environment.
In this article, you will run a sample notebook in the Azure portal that executes a simple quantum random number generator written in Q# and Python.
For more information about using Jupyter Notebooks with the Azure Quantum service, see Work with Jupyter Notebooks in an Azure Quantum workspace.
Prerequisites
Before you begin, you need the following prerequisites to use Jupyter Notebooks in an Azure Quantum workspace.
- An Azure account with an active subscription. If you don’t have an Azure account, register for free and sign up for a pay-as-you-go subscription.
- An Azure Quantum workspace. See Create an Azure Quantum workspace.
Copy a sample notebook
To get started, copy a sample notebook from the notebook gallery.
Log in to the Azure portal and select your Azure Quantum workspace.
Select Notebooks.
In the Sample gallery, locate the Hello, world: Q# notebook tile, select either the IonQ, Quantinuum, or Rigetti provider (the sample code is identical) and select Copy to my notebooks.
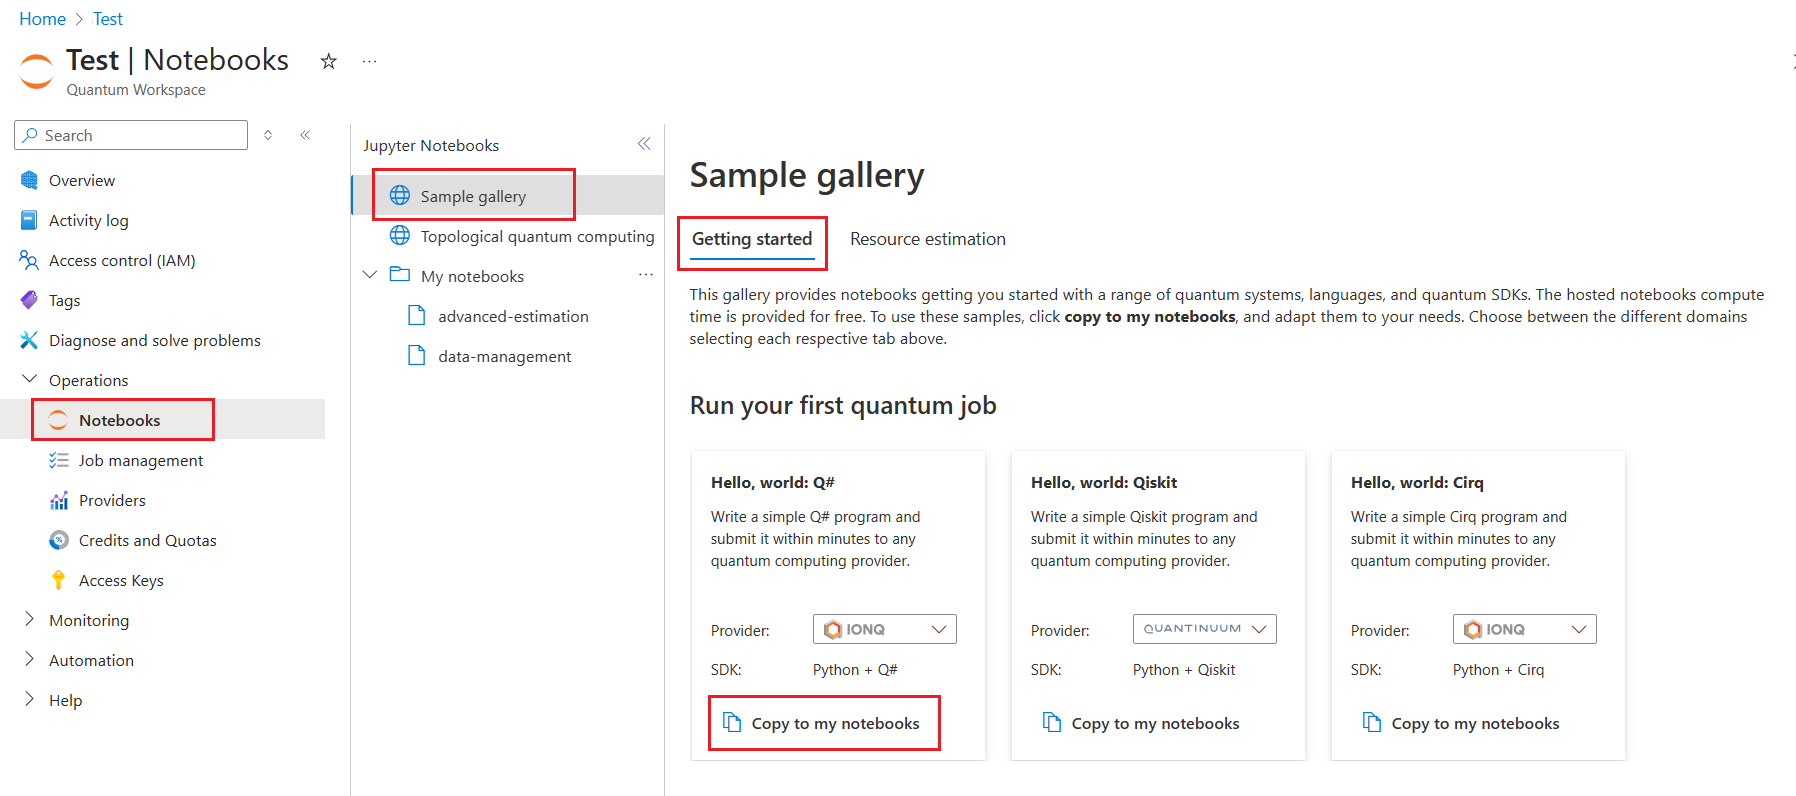
The sample notebook can be found under My notebooks and you can now run the notebook.

Run the notebook
To run the sample notebook, follow these steps for your selected provider.
Note
Jupyter Notebooks don't display program results by default, so you must use the Message statement. For more information, see Structure of a Q# program.
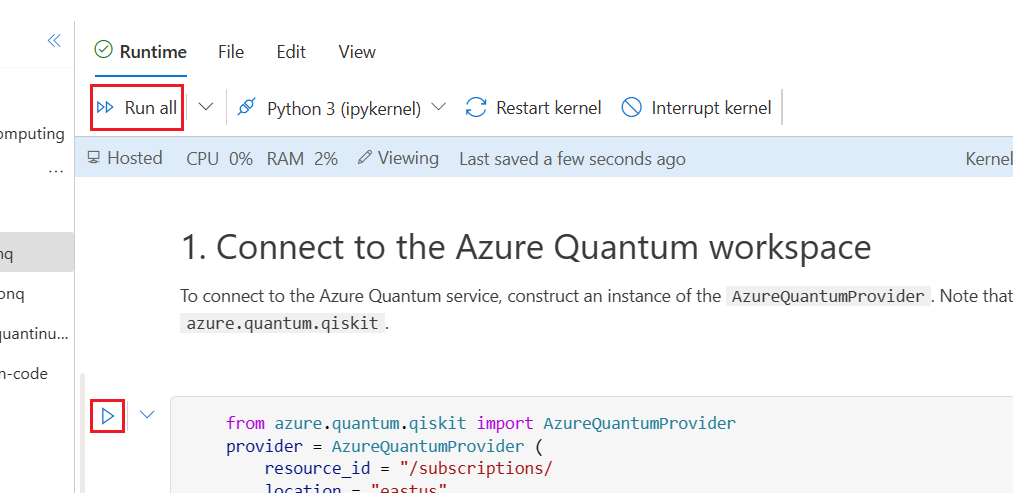
In My notebooks, select the hello-world-qsharp-ionq notebook.
To run the full program from top to bottom, select Run all.
To walk through the example and run each cell individually from top to bottom, select the cell you want to run and select the run icon.
Stepping through the program on IonQ
The hello world program runs a simple quantum random number generator and displays a histogram of the results.
Some things to note:
- 1st cell: Preloads your subscription information to connect to the Azure Quantum service.
- 2nd cell: Retrieves the available targets (quantum computers and simulators) in your workspace.
- 3rd cell: Imports the
qsharppackage and sets the base profile for the compiler. - 4th cell: The Q# code that defines the program. Note the
%%qsharpmagic command which allows you to enter Q# code directly into the Python notebook cell. - 5th cell: Compiles the qsharp operation using the base profile to submit to Azure Quantum.
- 6th and 7th cells: Sets the target, submits the job, and plots and displays the result. The results should be roughly split between 0 and 1.
Note
If you have any questions or run into any issue using Azure Quantum, you can contact AzureQuantumInfo@microsoft.com.