Note
Access to this page requires authorization. You can try signing in or changing directories.
Access to this page requires authorization. You can try changing directories.
The Microsoft Quantum Development Kit (QDK) extension for Visual Studio Code (VS Code) includes QDK Learning, a set of educational resources that teach you how to use the QDK for quantum development. QDK Learning contains the Quantum Katas, a series of lessons that help you learn the fundamentals of quantum computing.
What is the Quantum Katas?
Kata is the Japanese word for "form", a pattern of learning and practicing new skills. The Quantum Katas are self-paced learning tutorials that teach quantum computing concepts and quantum programming in the Q# language. Each lesson, or kata, includes quantum computing theory and hands-on interactive coding exercises that let you apply your knowledge.
With the QDK extension in VS Code, the Katas lets you:
- Track and save your progress.
- Save your exercises as Q# files that you can use later.
- Get help from the QDK Learning Copilot agent.
Prerequisites
To get started with QDK Learning and the Quantum Katas, You need to have the following tools installed.
- VS Code from the VS Code website or the Microsoft Store app.
- The QDK extension in VS Code.
Get started with the Katas for the first time
To get started with the Katas, follow these steps.
In VS Code, open the Microsoft Quantum panel.
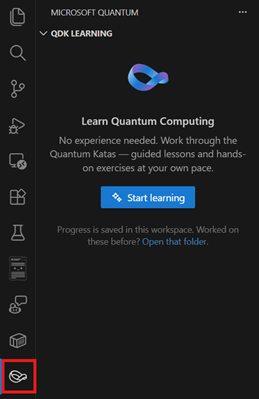
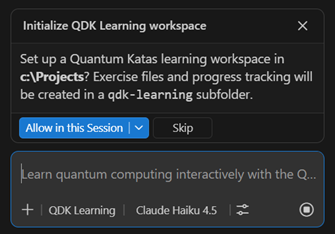
From the QDK LEARNING dropdown, select the Start learning button. The QDK Learning Copilot chat window opens, and Copilot prompts you to initialize your VS Code workspace.
To start the Katas from the beginning, select the first section, Getting Started. A Lesson tab opens for the Welcome to Quantum Katas lesson.
To go to the next lesson, select the Next button. The next lesson is a coding exercise, so a new tab opens with a
.qsQ# file. Complete the lesson, and then select Next to complete the first module.
If you want to keep learning, continue on with the next lessons. QDK Learning automatically saves your progress in a file called qdk-learning.json, so you can return to the Katas at any time. You don't have to do the lessons in order, so feel free to skip topics that you already know or go to topics that interest you.
How to navigate lessons
The Katas have two types of lessons, theory lessons and exercise lessons. Theory lessons teach you concepts, and exercise lessons let you apply concepts through Q# code.
Theory lessons have three buttons:
- Next: Mark the current lesson as complete and go to the next lesson.
- Explain: Prompt Copilot to teach you more about the concept.
- Back: Go to the previous lesson.
Exercise lessons have four buttons:
- Check: Check whether your code is the correct solution.
- Hint: Prompt Copilot to help you figure out the correct solution.
- Reset: Reset your code to the original state, and reset your progress for completed exercises.
- Back: Go to the previous lesson.
If your solution is correct, the Explain button becomes the Next button. If your solution is incorrect, a Check failed pop-up opens with more information. Select What went wrong? to get help from Copilot.
Use Copilot to support your learning
When you open the Katas in the Microsoft Quantum panel, the QDK sets Copilot to be the QDK Learning agent. You can use this agent with all the available Copilot models. Choose the model that you want to use, and then ask the QDK Learning agent about quantum computing, Q#, or the Katas lessons. For example, try some of the following prompts.
Navigate the Katas content
Copilot can take you to the content that you're interested in with a prompt like this.
I'm interested in learning about Grover's algorithm. Take me to the Grover's content.
Create new learning content
Copilot can create new content for you in a Jupyter notebook with a prompt like this.
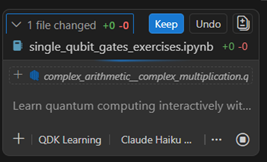
Can you create new exercises to test my knowledge about basic single-qubit quantum gates?
When you ask Copilot to make content, a confirmation box opens. To allow Copilot to create the new file and save it to your current working directory, select the Keep button.