Note
Access to this page requires authorization. You can try signing in or changing directories.
Access to this page requires authorization. You can try changing directories.
Azure Resource Manager enforces two types of vCPU quotas for virtual machines:
- standard vCPU quotas
- spot vCPU quotas
Standard vCPU quotas apply to pay-as-you-go VMs and reserved VM instances. They're enforced at two tiers, for each subscription, in each region:
- The first tier is the total regional vCPU quota.
- The second tier is the VM-family vCPU quota such as D-series vCPUs.
This article shows how to request regional vCPU quota increases for all VMs in a given region. You can also request increases for VM-family vCPU quotas or spot vCPU quotas.
Special considerations
When considering your vCPU needs across regions, keep in mind the following:
Regional vCPU quotas are enforced across all VM series in a given region. As a result, decide how many vCPUs you need in each region in your subscription. If you don't have enough vCPU quota in each region, submit a request to increase the vCPU quota in that region. For example, if you need 30 vCPUs in West Europe and you don't have enough quota, specifically request a quota for 30 vCPUs in West Europe. When you do so, the vCPU quotas in your subscription in other regions aren't increased. Only the vCPU quota limit in West Europe is increased to 30 vCPUs.
When you request an increase in the vCPU quota for a VM series, Azure increases the regional vCPU quota limit by the same amount.
When you create a new subscription, the default value for the total number of vCPUs in a region might not be equal to the total default vCPU quota for all individual VM series. This can result in a subscription without enough quota for each individual VM series that you want to deploy. However, there might not be enough quota to accommodate the total regional vCPUs for all deployments. In this case, you must submit a request to explicitly increase the quota limit of the regional vCPU quotas.
Request an increase for regional vCPU quotas
To request quota increases, you must have an Azure account with the Contributor role (or another role that includes Contributor access).
To view the Quotas page, sign in to the Azure portal and enter "quotas" into the search box, then select Quotas.
Tip
After you've accessed Quotas, the service will appear at the top of Azure Home in the Azure portal. You can also add Quotas to your Favorites list so that you can quickly go back to it.
On the Overview page, select Compute.
On the My quotas page, select Region and then unselect All.
In the Region list, select the regions you want to include for the quota increase request.
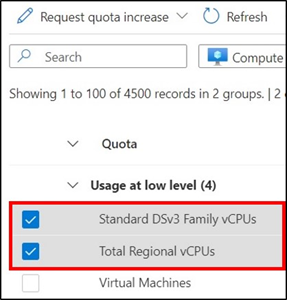
Filter for any other requirements, such as Usage, as needed.
Select the quota(s) that you want to increase.
Near the top of the page, select New Quota Request, then select the way you'd like to increase the quota(s): Enter a new limit or Adjust the usage %.
Tip
For quotas with very high usage, we recommend choosing Adjust the usage %. This option allows you to select one usage percentage to apply to all the selected quotas without requiring you to calculate an absolute number (limit) for each quota.
If you selected Enter a new limit: In the New Quota Request pane, enter a numerical value for each new quota limit.
If you selected Adjust the usage %: In the New Quota Request pane, adjust the slider to a new usage percent. Adjusting the percentage automatically calculates the new limit for each quota to be increased. This option is particularly useful when the selected quotas have very high usage.
When you're finished, select Submit.
Your request will be reviewed, and you'll be notified if the request can be fulfilled. This usually happens within a few minutes. If your request isn't fulfilled, you'll see a link where you can open a support request so that a support engineer can assist you with the increase.
Next steps
- Learn more about vCPU quotas.
- Learn more in Quotas overview.
- Learn about Azure subscription and service limits, quotas, and constraints.
- Review the list of Azure regions and their locations.