Note
Access to this page requires authorization. You can try signing in or changing directories.
Access to this page requires authorization. You can try changing directories.
Sometimes you need to check what access a user has to an Azure resource. You check their access by listing their assignments. A quick way to check the access for a single user is to use the Check access feature on the Access control (IAM) page.
Step 1: Open the Azure resource
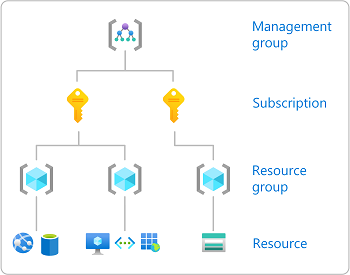
To check the access for a user, you first need to open the Azure resource you want to check access for. Azure resources are organized into levels that are typically called the scope. In Azure, you can specify a scope at four levels from broad to narrow: management group, subscription, resource group, and resource.
Follow these steps to open the Azure resource that you want to check access for.
Open the Azure portal.
Open the Azure resource you want to check access for, such as Management groups, Subscriptions, Resource groups, or a particular resource.
Select the specific resource in that scope.
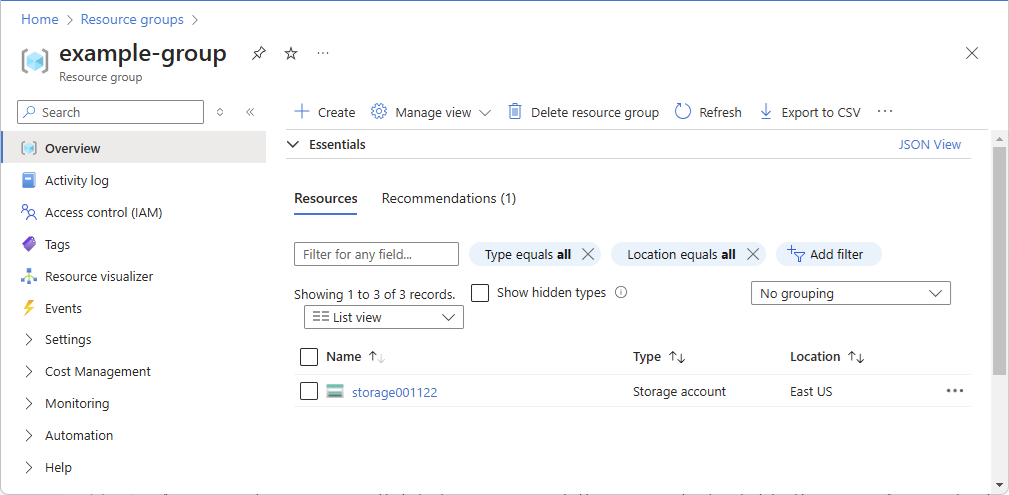
The following shows an example resource group.

Step 2: Check your access
Follow these steps to check your access to the previously selected Azure resource.
If you have a Microsoft Entra ID P2 or Microsoft Entra ID Governance license, Microsoft Entra Privileged Identity Management (PIM) functionality is integrated so you should follow the steps on the PIM tab.
Select Access control (IAM).
The following shows an example of the Access control (IAM) page for a resource group.
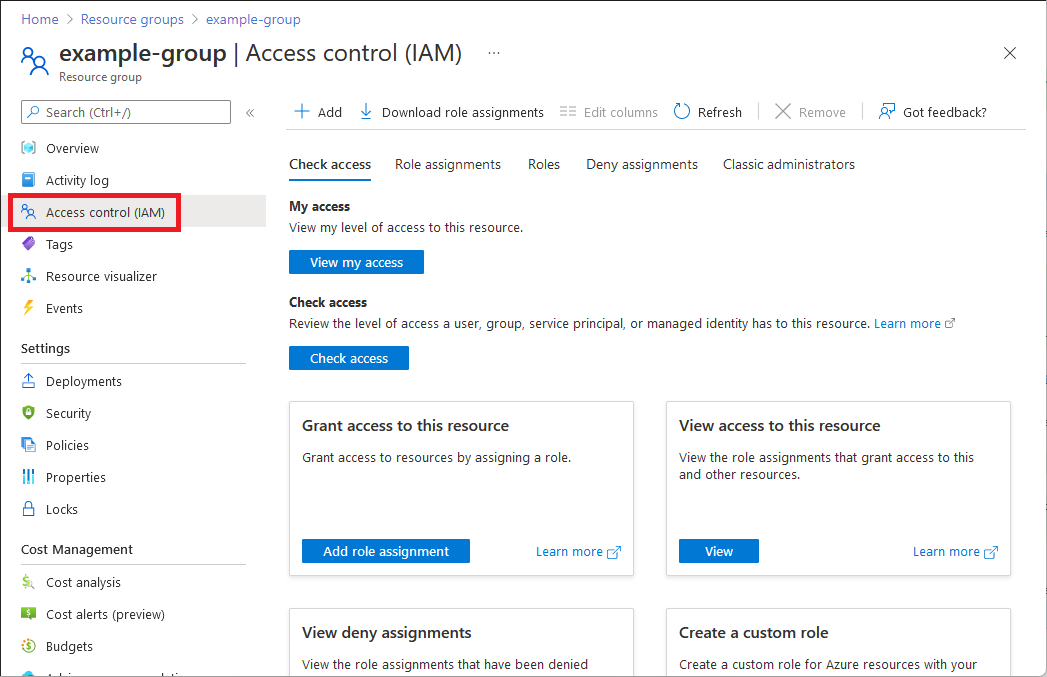
On the Check access tab, select the View my access button.
An assignments pane appears that lists your access at this scope and inherited to this scope. Assignments at child scopes aren't listed.


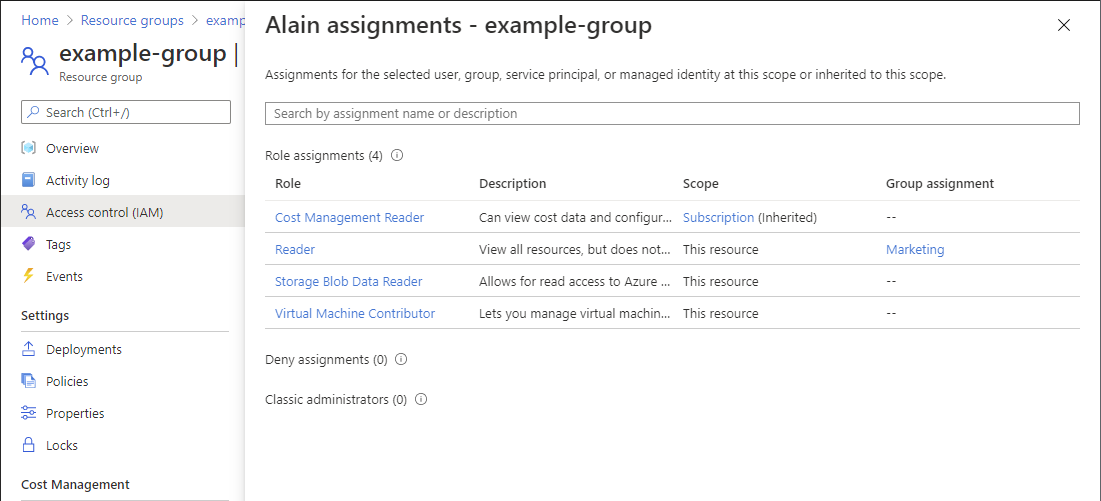
Step 3: Check access for a user
Follow these steps to check the access for a single user, group, service principal, or managed identity to the previously selected Azure resource.
Select Access control (IAM).
On the Check access tab, select the Check access button.
A Check access pane appears.
Select User, group, or service principal.
In the search box, enter a string to search the directory for name or email addresses.

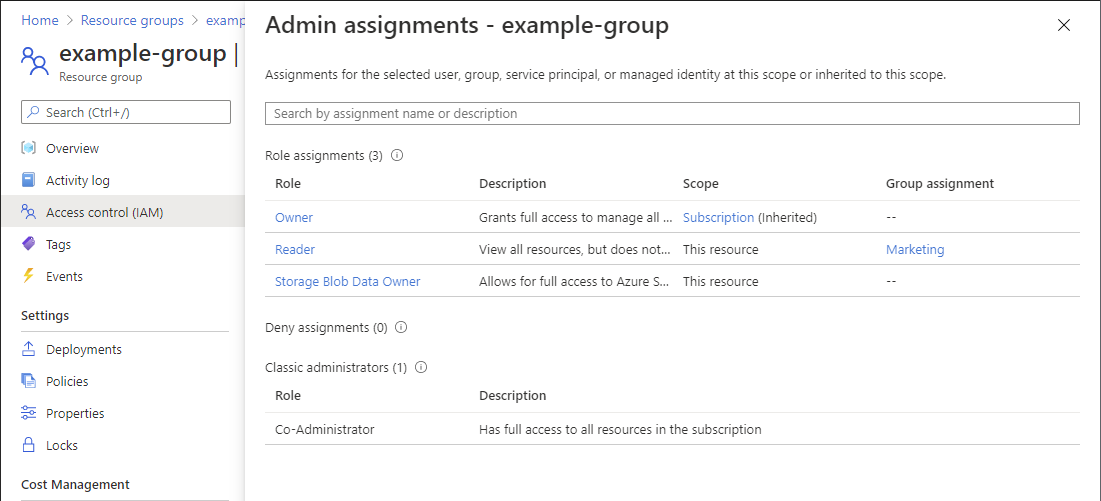
Select the user to open the assignments pane.
On this pane, you can see the access for the selected user at this scope and inherited to this scope. Assignments at child scopes aren't listed. You see the following assignments:
- Role assignments added with Azure RBAC.
- Deny assignments added using Azure Blueprints or Azure managed apps.
If there are any eligible or time-bound role assignments, you can view these assignments on the Eligible assignments tab.