Add or edit Azure role assignment conditions using the Azure portal
Article
An Azure role assignment condition is an optional check that you can add to your role assignment to provide more fine-grained access control. For example, you can add a condition that requires an object to have a specific tag to read the object. This article describes how to add, edit, view, or delete conditions for your role assignments using the Azure portal.
Prerequisites
For information about the prerequisites to add or edit role assignment conditions, see Conditions prerequisites.
There are two ways that you can add a condition. You can add a condition when you add a new role assignment or you can add a condition to an existing role assignment.
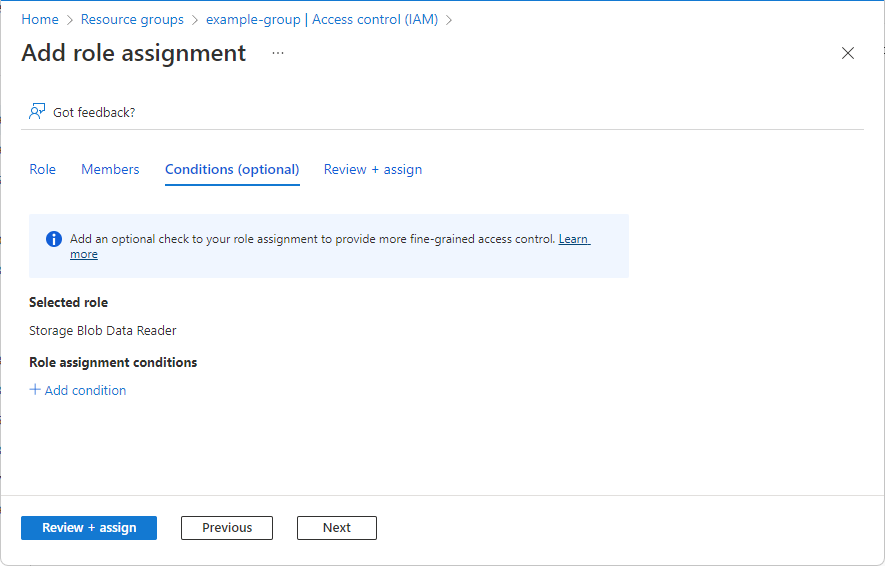
On the Conditions (optional) tab, click Add condition.
If you don't see the Conditions (optional) tab, be sure you selected a role that supports conditions.
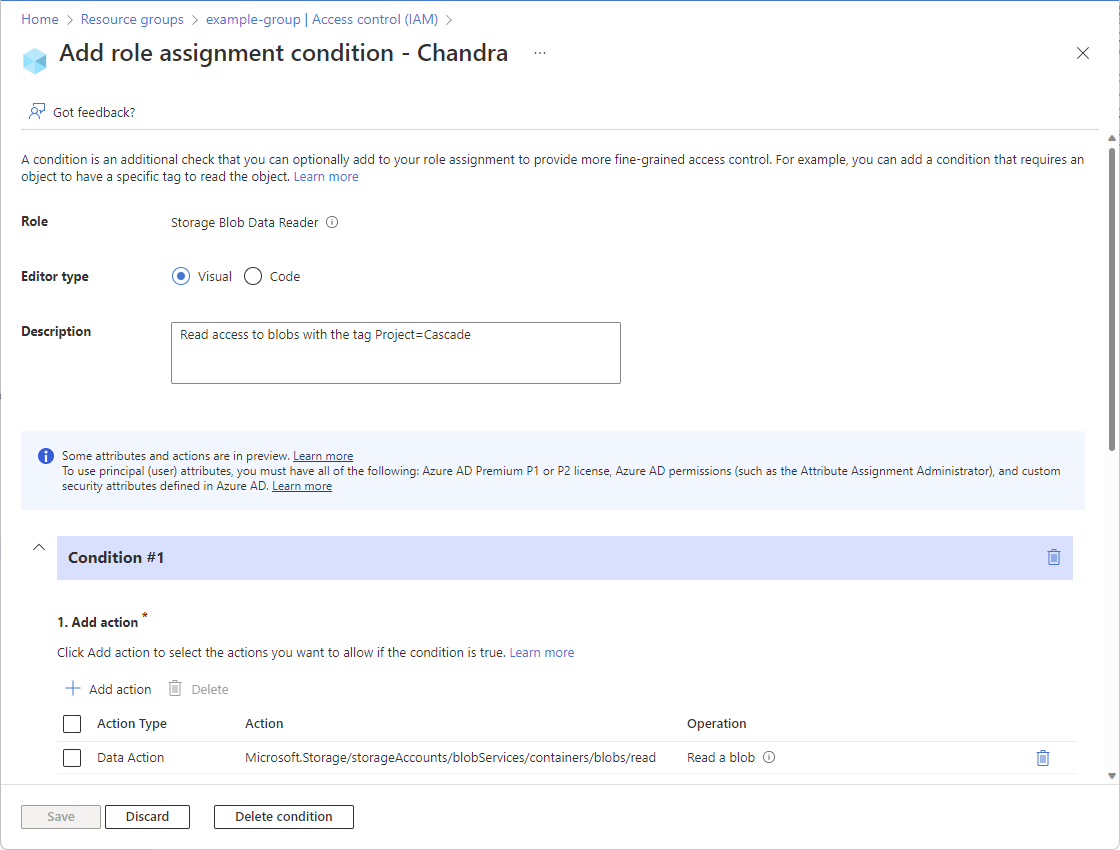
The Add role assignment condition page appears.
Existing role assignment
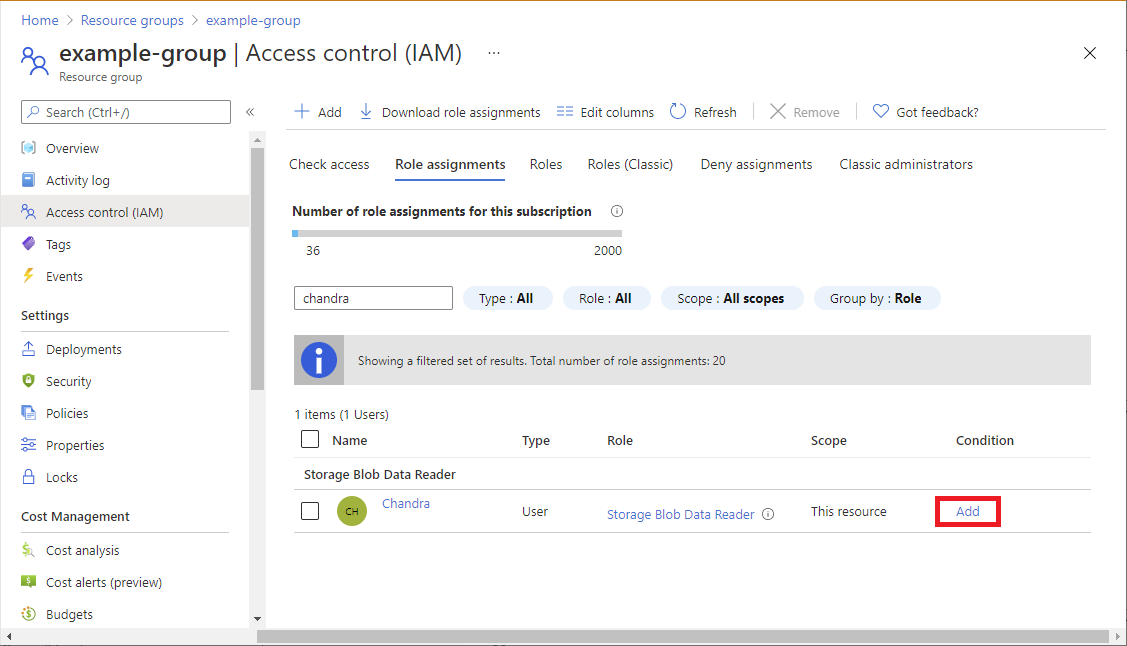
In the Azure portal, open Access control (IAM) at the scope where you want to add a condition. For example, you can open a subscription, resource group, or a resource.
Currently, you can't use the Azure portal to add, view, edit, or delete a condition add at a management group scope.
Click the Role assignments tab to view all the role assignments at this scope.
Find a role assignment that has storage data actions that you want to add a condition to.
In the Condition column, click Add.
If you don't see the Add link, be sure you're looking at the same scope as the role assignment.
The Add role assignment condition page appears.
Step 3: Review basics
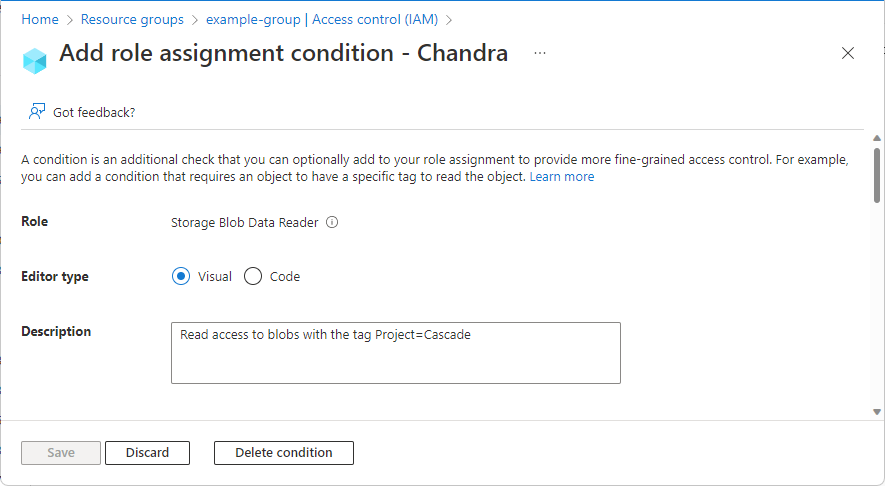
Once you have the Add role assignment condition page open, you can review the basics of the condition. Role indicates the role that the condition will be added to.
For the Editor type option, leave the default Visual selected.
Once you add a condition, you can toggle between Visual and Code.
(Optional) If the Description box appears, enter a description.
Depending on how you chose to add a condition, you might not see the Description box. A description can help you understand and remember the purpose of the condition.
Step 4: Add actions
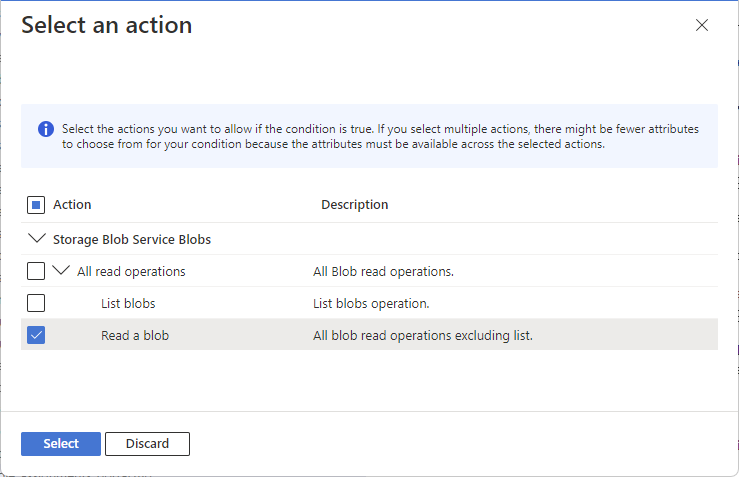
In the Add action section, click Add action.
The Select an action pane appears. This pane is a filtered list of data actions based on the role assignment that will be the target of your condition. For more information, see Azure role assignment condition format and syntax.
Select the actions you want to allow if the condition is true.
If you select multiple actions for a single condition, there might be fewer attributes to choose from for your condition because the attributes must be available across the selected actions.
Click Select.
The selected actions appear in the action list.
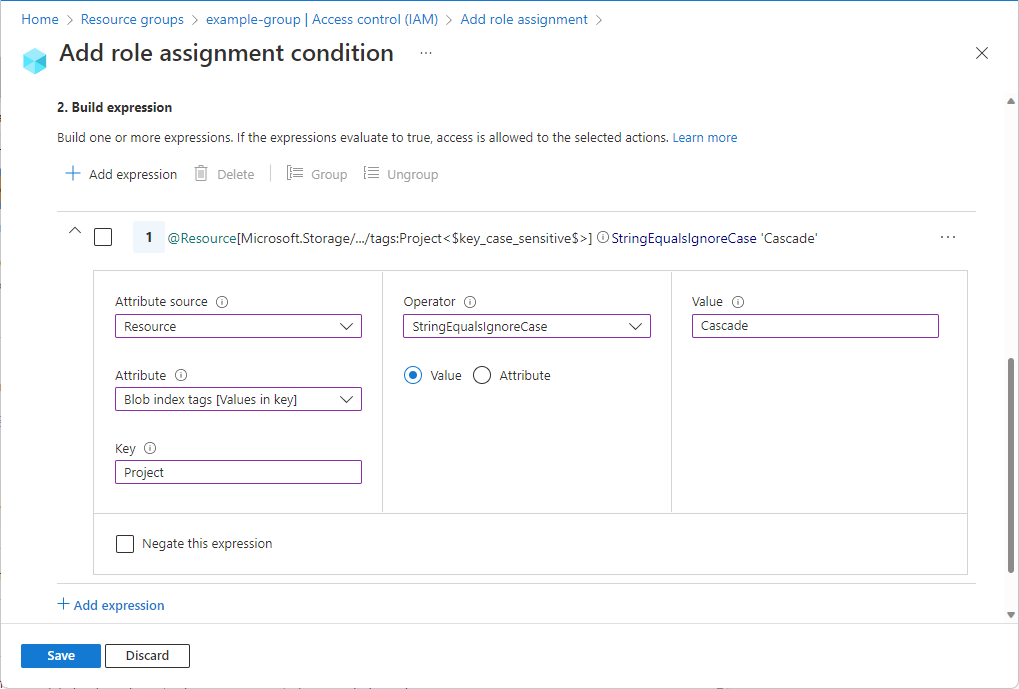
Step 5: Build expressions
In the Build expression section, click Add expression.
The Expressions section expands.
In the Attribute source list, select where the attribute can be found.
Environment indicates that the attribute is associated with the network environment over which the resource is accessed such as a private link, or the current date and time.
Resource indicates that the attribute is on the resource, such as container name.
Request indicates that the attribute is part of the action request, such as setting the blob index tag.
Principal indicates that the attribute is a Microsoft Entra custom security attribute principal, such as a user, enterprise application (service principal), or managed identity.
In the Attribute list, select an attribute for the left side of the expression.
For more information about supported attribute sources and individual attributes, see Attributes.
Depending on the attribute you select, boxes might be added to specify additional attribute details or operators. For example, some attributes support the Exists function operator, which you can use to test whether the attribute is currently associated with the resource such as an encryption scope.
In the Value box, enter a value for the right side of the expression.
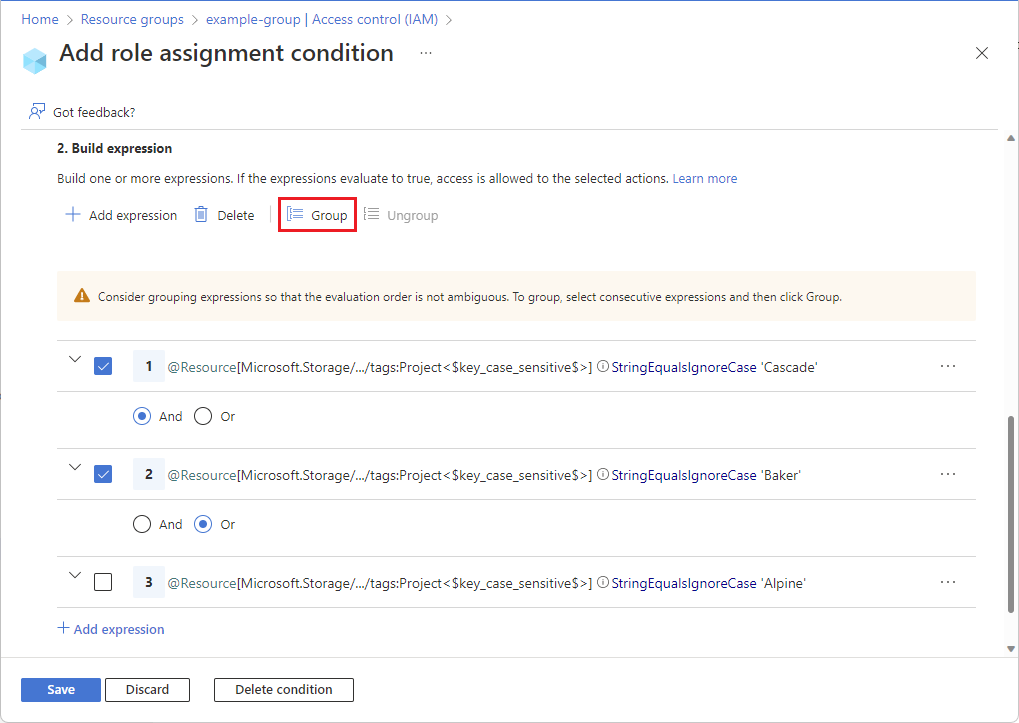
Add more expressions as needed.
If you add three or more expressions, you might need to group them with parentheses so the connecting logical operators are evaluated correctly. Add check marks next to the expressions you want to group and then select Group. To remove grouping, select Ungroup.
Step 6: Review and add condition
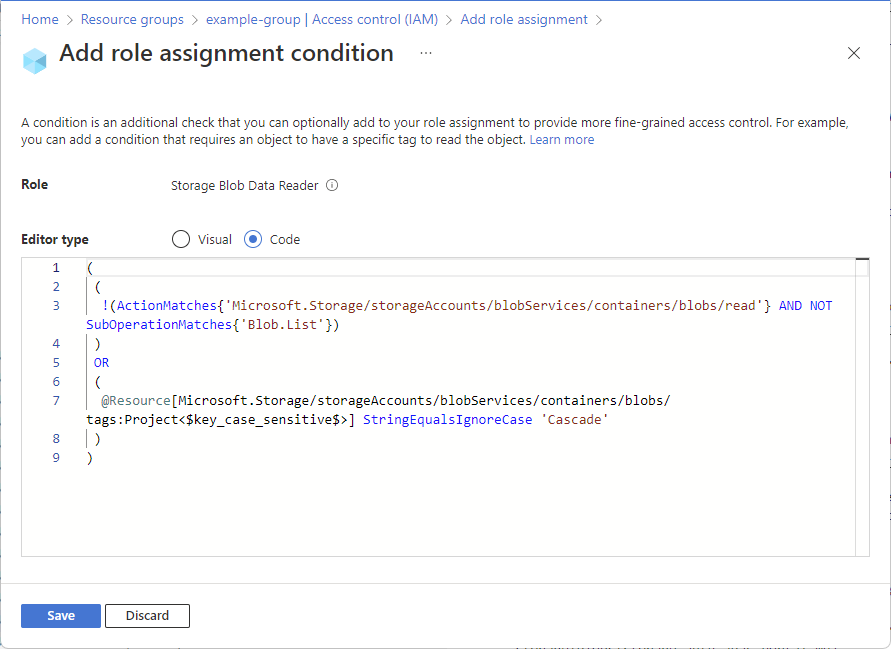
Scroll up to Editor type and click Code.
The condition is displayed as code. You can make changes to the condition in this code editor. The code editor can be useful for pasting sample code, or for adding more operators or logic to build more complex conditions. To go back to the visual editor, click Visual.
Click Save to add the condition to the role assignment.
View, edit, or delete a condition
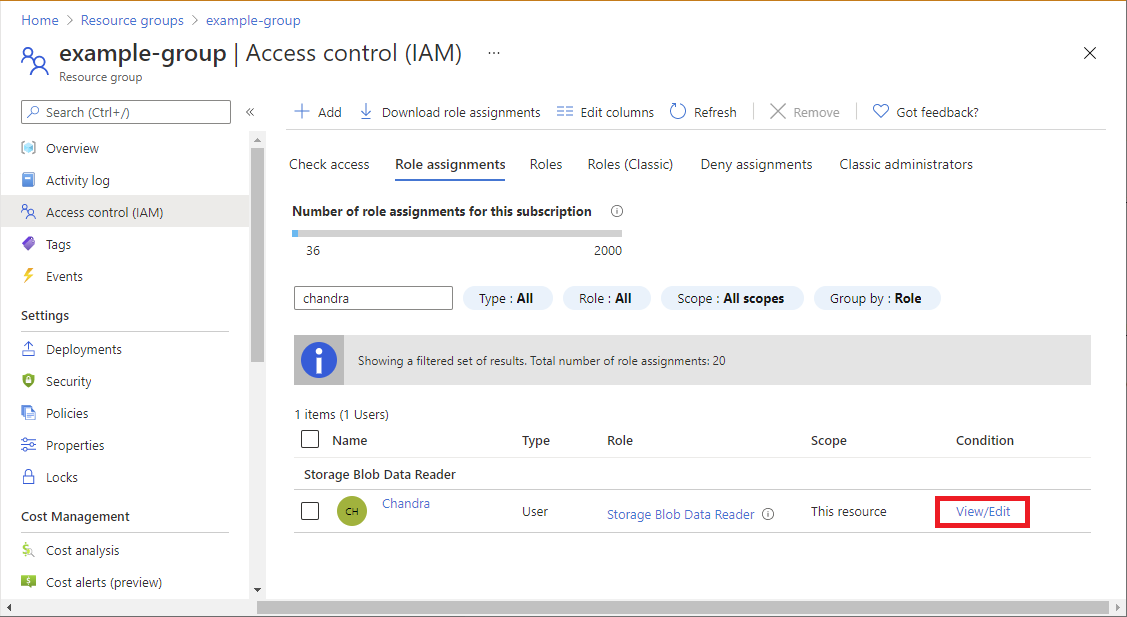
In the Azure portal, open Access control (IAM) for the role assignment that has a condition that you want to view, edit, or delete.
Click the Role assignments tab and find the role assignment.
In the Condition column, click View/Edit.
If you don't see the View/Edit link, be sure you're looking at the same scope as the role assignment.
The Add role assignment condition page appears.
Use the editor to view or edit the condition.
When finished, click Save. To delete the entire condition, click Delete condition. Deleting the condition does not remove the role assignment.
Conditional Access gives a fine granularity of control over which users can do specific activities, access which resources, and how to ensure data and systems are safe.