Note
Access to this page requires authorization. You can try signing in or changing directories.
Access to this page requires authorization. You can try changing directories.
Datasets are collections of objects that are used as sources for data extraction from the business application. Business Process Solutions provides prebuilt templates to accelerate analytics for selected functional areas. You can also create custom datasets to cover other requirements.
This article describes the steps that are required to configure a dataset in Business Process Solutions. It also shows how you can set up the dataset by importing template datasets depending on the source system that you configure in your Business Process Solutions item.
Prebuilt Power BI dashboards in Business Process Solutions rely on specific datasets as their foundation. The following table shows the required mapping between dashboards and datasets.
| Power BI dashboard | Dataset |
|---|---|
| Record to Report - Financial Insights | Record to Report - Financial Insights |
| Record to Report - Accounts Payable | Record to Report - Accounts Payable Insights |
| Record to Report - Accounts Receivable | Record to Report - Accounts Receivable Insights |
| Procure to Pay - Spend Insights | Procure to Pay - Spend Insights |
| Order to Cash - Sales Insights | Order to Cash - Sales Insights |
| Order to Cash - Opportunity Insights | Order to Cash - Opportunities Insights |
Import a dataset from a template
Before you start data extraction, enable the datasets that represent the functional areas that you want to process. To import a dataset from a template, follow these steps:
Open your Business Process Solutions item and select Set up your Datasets.

Select Import from template to use an existing template.
After the dialog opens, select your source system and enter the name of the dataset. Make sure to enter a unique name.
Select the dataset that you want to enable, and then select Import.

After the dataset creation finishes successfully, the dataset is in a Disabled state. You need to enable this dataset. Select the dataset, and then select Activate datasets.

Your dataset is now ready for extraction and processing.


Modify dataset tables and relationships
Note
The following sections describe how to update dataset tables and relationships. These steps are optional, and you can skip them if you don't want to make any changes to the dataset.
After the dataset deploys, you can view it and explore the enabled tables. You can also review the relationships between fact and dimension tables.
Update dataset tables
To update the dataset tables, follow these steps:
Open your Business Process Solutions item.
Select Set up your datasets.
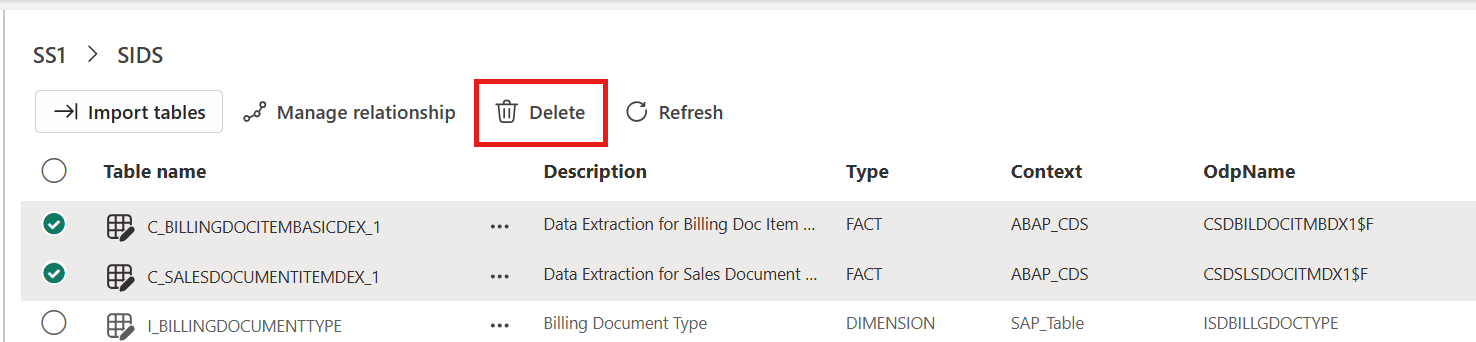
To view the tables enabled for extraction, expand the source system and dataset on the Explorer menu.

You can delete tables by selecting multiple tables and selecting Delete.
You can also change the table details by opening the context menu and selecting Edit.
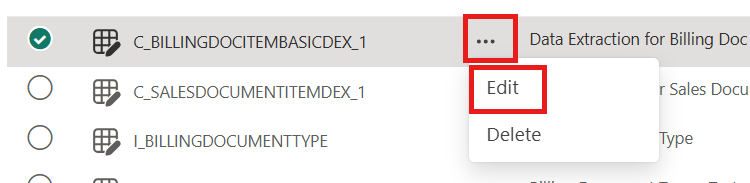
Select Save to save the changes.


Add a new table in a dataset
You can add a new table in an existing dataset or import a table from the existing tables. To add or import a new table in your dataset, follow these steps:
Open your Business Process Solutions item.
Select Set up your datasets.
To view the tables enabled for extraction, expand the source system and dataset on the Explorer menu.
Select Import tables.

In the Import Tables dialog, you can either select an existing table to import to your dataset or add a new table.
To add a new table, select New Table.
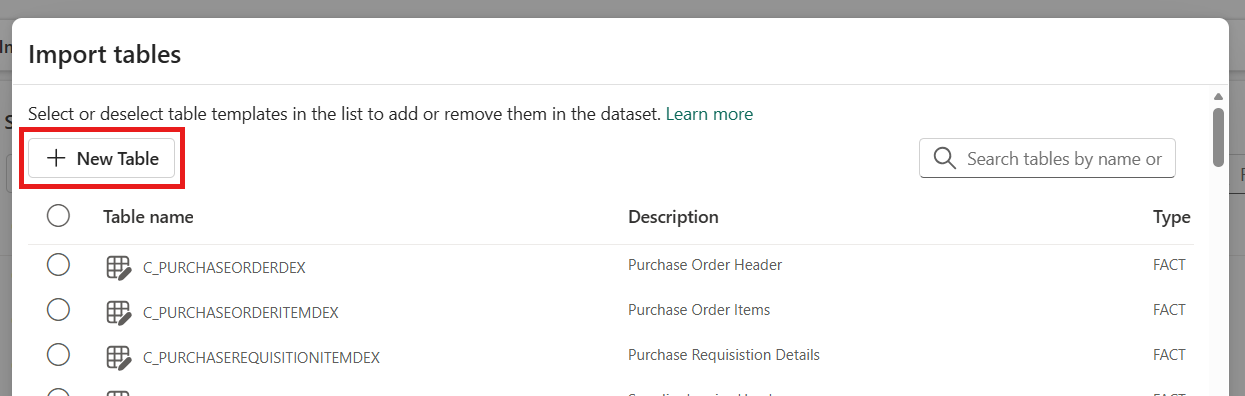
Enter the details of the new table and select Save.


Create new relationships
To create new relationships between tables, follow these steps:
Open your Business Process Solutions item.
Select Set up your datasets.
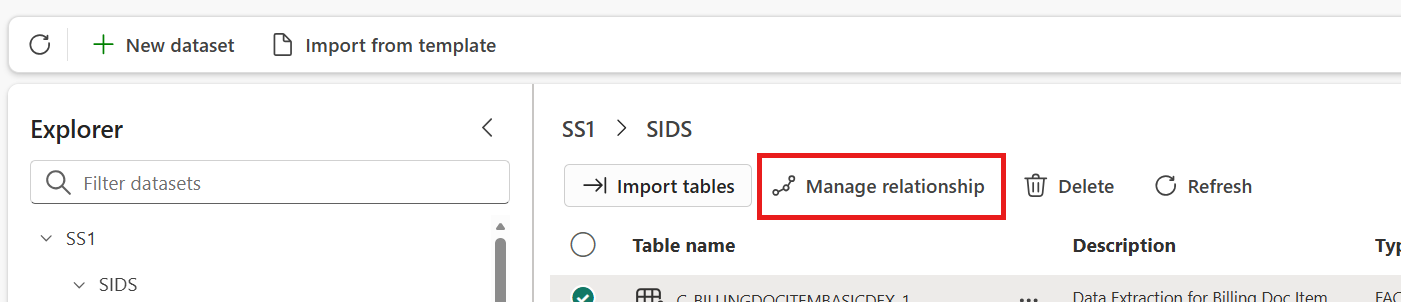
To view the tables enabled for extraction, expand the source system and dataset on the Explorer menu.
Select Manage relationship.
In the Manage Relationships dialog, select New relationship.

Enter the inputs for the relationship, like fact table name, dimension table name, and surrogate column name, that you want to create. Enter the join condition that refers to the example mentioned in the dialog. Finally, if you want to copy a column from a dimension table to a fact table, add the column names in import columns input.
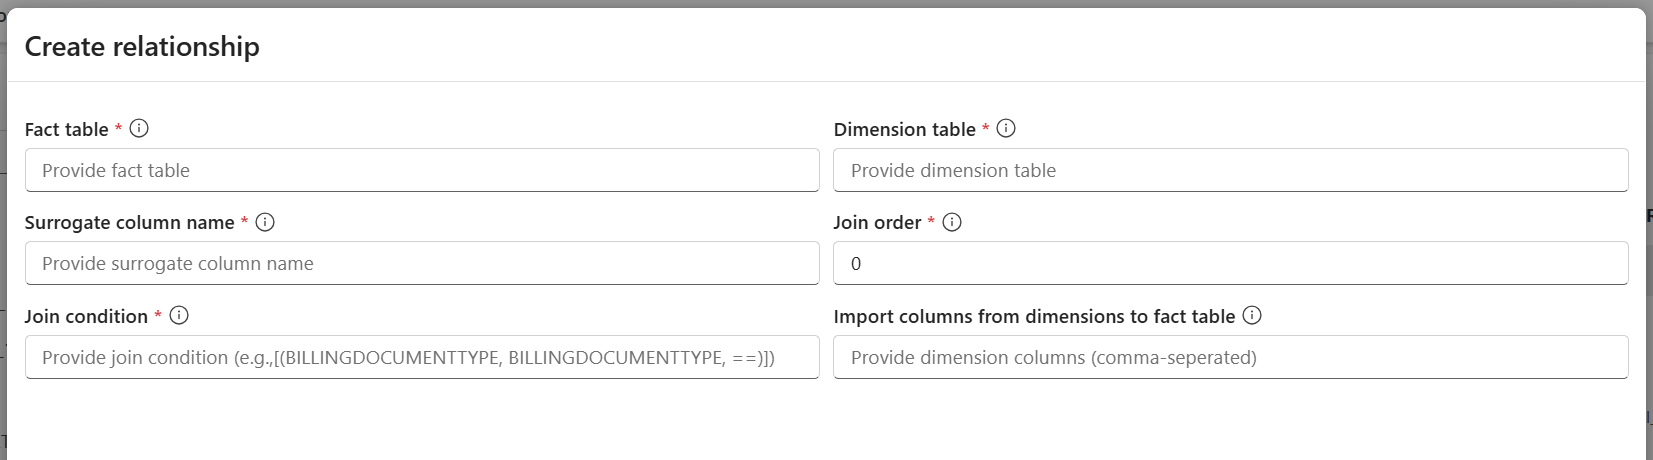
Select Save to create the relationship.


Delete relationships
To delete existing relationships between tables, select the relationship and select Delete. This step removes the relationship from the dataset, but it doesn't delete the surrogate keys, which are already created in the fact tables.

Edit relationships
To edit existing relationships between tables, select the relationship, scroll toward the Action column, and select Edit. Then you can modify the relationship details.
