Note
Access to this page requires authorization. You can try signing in or changing directories.
Access to this page requires authorization. You can try changing directories.
In this Azure AI Search tutorial, you learn how to index and query large data loaded from a Spark cluster. You set up a Jupyter Notebook to:
- Load various forms (invoices) into a data frame in an Apache Spark session
- Analyze the forms to determine their features
- Assemble the resulting output into a tabular data structure
- Write the output to a search index hosted in Azure AI Search
- Explore and query over the content you created
This tutorial takes a dependency on SynapseML, an open-source library that supports massively parallel machine learning over big data. In SynapseML, search indexing and machine learning are exposed through transformers that perform specialized tasks. Transformers tap into a wide range of AI capabilities. In this exercise, you use the AzureSearchWriter APIs for analysis and AI enrichment.
Although Azure AI Search has native AI enrichment, this tutorial shows you how to access AI capabilities outside of Azure AI Search. By using SynapseML instead of indexers or skills, you're not subject to data limits or other constraints associated with those objects.
Tip
Watch a short video of this demo. The video expands on this tutorial with more steps and visuals.
Prerequisites
You need the synapseml library and several Azure resources. If possible, use the same subscription and region for your Azure resources and put everything into one resource group for simple cleanup later. The following links are for portal installs. The sample data is imported from a public site.
- SynapseML package 1
- Azure AI Search (any tier) 2
- Azure AI services multi-service account (any tier) with an API Kind of
AIServices3 - Azure Databricks (any tier) with Apache Spark 3.3.0 runtime 4
1 This link resolves to a tutorial for loading the package.
2 You can use the Free tier to index the sample data, but choose a higher tier if your data volumes are large. For billable tiers, provide the search API key in the Set up dependencies step further on.
3 This tutorial uses Azure AI Document Intelligence and Azure AI Translator. In the instructions that follow, provide a multi-service account key and the region. The same key works for both services. For this tutorial, it's important that you use an Azure AI services multi-service account with an API kind of AIServices. You can check the API kind in the Azure portal on the Overview section of your Azure AI services multi-service account page. For more information about API kind, see Attach an Azure AI services multi-service resource in Azure AI Search.
4 In this tutorial, Azure Databricks provides the Spark computing platform. We used the portal instructions to set up the cluster and workspace.
Note
The preceding Azure resources support security features in the Microsoft Identity platform. For simplicity, this tutorial assumes key-based authentication, using endpoints and keys copied from the Azure portal pages of each service. If you implement this workflow in a production environment or share the solution with others, remember to replace hard-coded keys with integrated security or encrypted keys.
Create a Spark cluster and notebook
In this section, you create a cluster, install the synapseml library, and create a notebook to run the code.
In the Azure portal, find your Azure Databricks workspace and select Launch workspace.
On the left menu, select Compute.
Select Create compute.
Accept the default configuration. It takes several minutes to create the cluster.
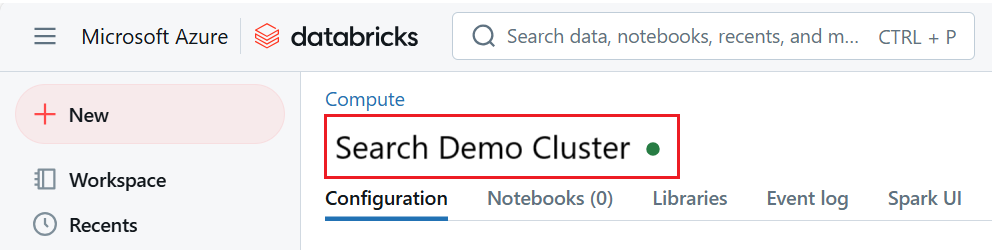
Verify the cluster is operational and running. A green dot by the cluster name confirms its status.
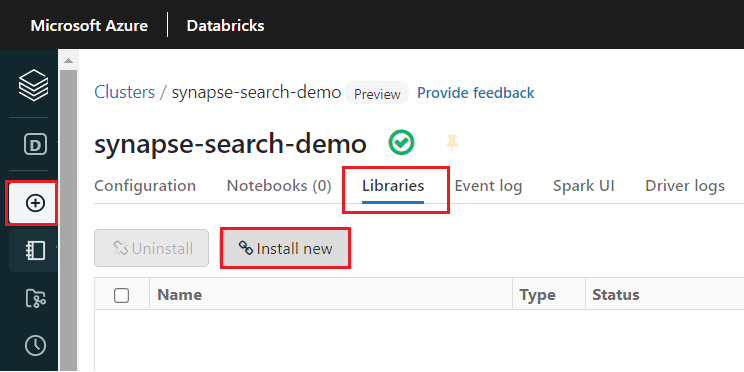
After the cluster is created, install the
synapsemllibrary:Select Libraries from the tabs at the top of the cluster's page.
Select Install new.
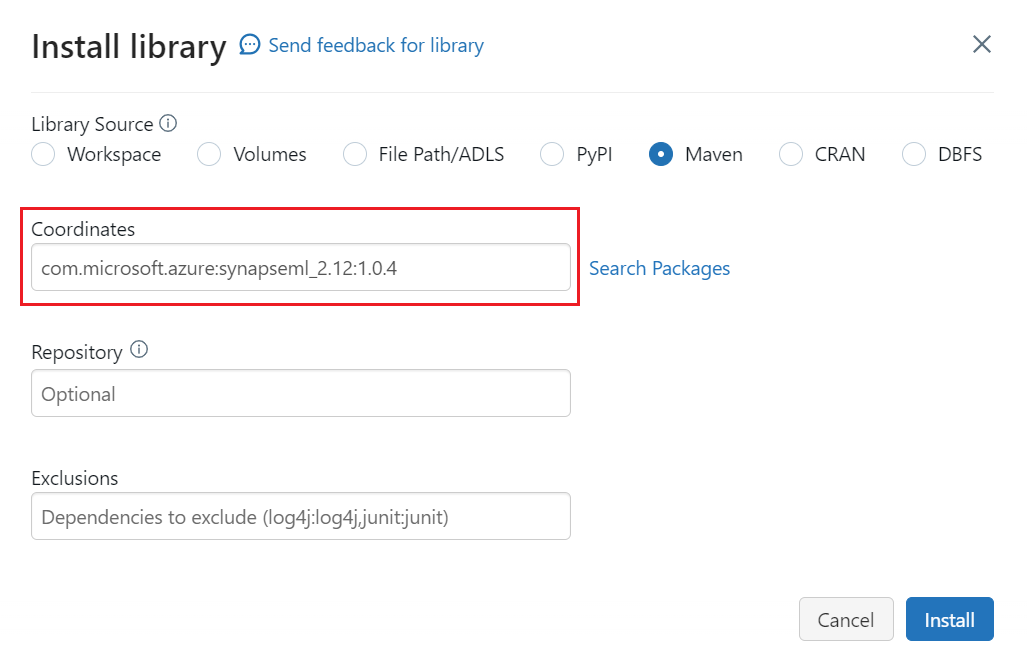
Select Maven.
In Coordinates, search for
com.microsoft.azure:synapseml_2.12:1.0.9.Select Install.
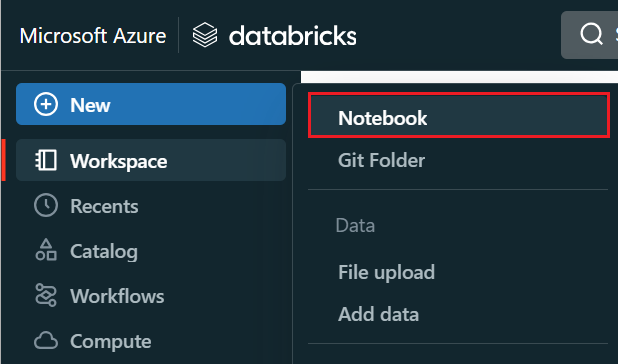
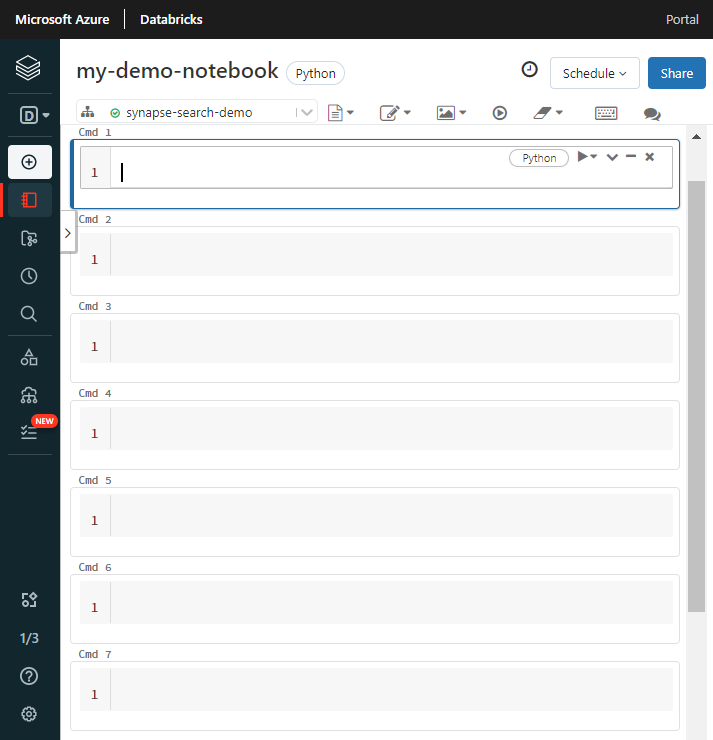
On the left menu, select Create > Notebook.
Give the notebook a name, select Python as the default language, and select the cluster that has the
synapsemllibrary.Create seven consecutive cells. In the following sections, you paste code in these cells.
Set up dependencies
Paste the following code into the first cell of your notebook.
Replace the placeholders with endpoints and access keys for each resource. Provide a name for a new search index to be created for you. No other modifications are required, so run the code when you're ready.
This code imports multiple packages and sets up access to the Azure resources used in this tutorial.
import os
from pyspark.sql.functions import udf, trim, split, explode, col, monotonically_increasing_id, lit
from pyspark.sql.types import StringType
from synapse.ml.core.spark import FluentAPI

cognitive_services_key = "placeholder-azure-ai-services-multi-service-key"
cognitive_services_region = "placeholder-azure-ai-services-region"

search_service = "placeholder-search-service-name"
search_key = "placeholder-search-service-admin-api-key"
search_index = "placeholder-for-new-search-index-name"
Load data into Spark
Paste the following code into the second cell. No modifications are required, so run the code when you're ready.
This code loads a few external files from an Azure storage account. The files are various invoices that are read into a data frame.
def blob_to_url(blob):
    [prefix, postfix] = blob.split("@")
    container = prefix.split("/")[-1]
    split_postfix = postfix.split("/")
    account = split_postfix[0]
    filepath = "/".join(split_postfix[1:])
    return "https://{}/{}/{}".format(account, container, filepath)


df2 = (spark.read.format("binaryFile")
    .load("wasbs://publicwasb@mmlspark.blob.core.windows.net/form_subset/*")
    .select("path")
    .limit(10)
    .select(udf(blob_to_url, StringType())("path").alias("url"))
    .cache())

display(df2)
Add document intelligence
Paste the following code into the third cell. No modifications are required, so run the code when you're ready.
This code loads the AnalyzeInvoices transformer and passes a reference to the data frame containing the invoices. It calls the prebuilt invoice model of Azure AI Document Intelligence to extract information from the invoices.
from synapse.ml.services import AnalyzeInvoices
analyzed_df = (AnalyzeInvoices()
.setSubscriptionKey(cognitive_services_key)
.setLocation(cognitive_services_region)
.setImageUrlCol("url")
.setOutputCol("invoices")
.setErrorCol("errors")
.setConcurrency(5)
.transform(df2)
.cache())
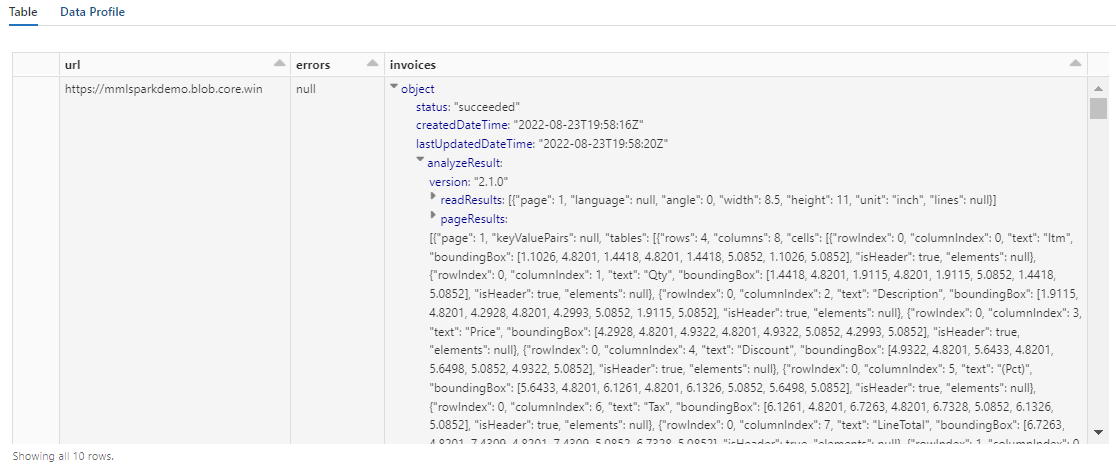
display(analyzed_df)
The output should look similar to the following screenshot. Notice how the forms analysis is packed into a densely structured column, which is difficult to work with. The next transformation resolves this issue by parsing the column into rows and columns.
Restructure document intelligence output
Paste the following code into the fourth cell and run it. No modifications are required.
This code loads FormOntologyLearner, a transformer that analyzes the output of Document Intelligence transformers and infers a tabular data structure. The output of AnalyzeInvoices is dynamic and varies based on the features detected in your content. Furthermore, the transformer consolidates the output into a single column. Because the output is dynamic and consolidated, it's difficult to use in downstream transformations that require more structure.
FormOntologyLearner extends the utility of the AnalyzeInvoices transformer by looking for patterns that can be used to create a tabular data structure. Organizing the output into multiple columns and rows makes the content consumable in other transformers, like AzureSearchWriter.
from synapse.ml.cognitive import FormOntologyLearner
itemized_df = (FormOntologyLearner()
.setInputCol("invoices")
.setOutputCol("extracted")
.fit(analyzed_df)
.transform(analyzed_df)
.select("url", "extracted.*").select("*", explode(col("Items")).alias("Item"))
.drop("Items").select("Item.*", "*").drop("Item"))
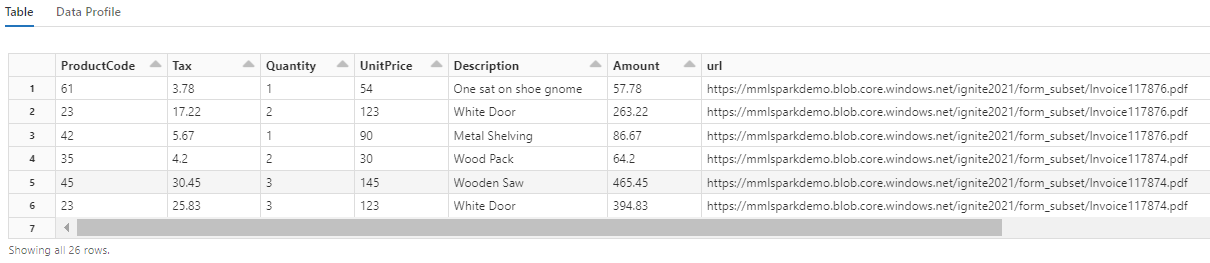
display(itemized_df)
Notice how this transformation recasts the nested fields into a table, which enables the next two transformations. This screenshot is trimmed for brevity. If you're following along in your own notebook, you have 19 columns and 26 rows.
Add translations
Paste the following code into the fifth cell. No modifications are required, so run the code when you're ready.
This code loads Translate, a transformer that calls the Azure AI Translator service in Azure AI services. The original text, which is in English in the "Description" column, is machine-translated into various languages. All of the output is consolidated into the "output.translations" array.
from synapse.ml.cognitive import Translate
translated_df = (Translate()
.setSubscriptionKey(cognitive_services_key)
.setLocation(cognitive_services_region)
.setTextCol("Description")
.setErrorCol("TranslationError")
.setOutputCol("output")
.setToLanguage(["zh-Hans", "fr", "ru", "cy"])
.setConcurrency(5)
.transform(itemized_df)
.withColumn("Translations", col("output.translations")[0])
.drop("output", "TranslationError")
.cache())
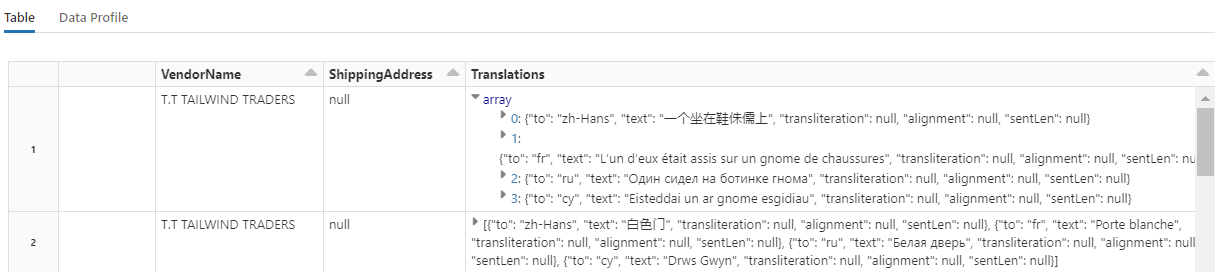
display(translated_df)
Tip
To check for translated strings, scroll to the end of the rows.
Add a search index with AzureSearchWriter
Paste the following code in the sixth cell and run it. No modifications are required.
This code loads AzureSearchWriter. It consumes a tabular dataset and infers a search index schema that defines one field for each column. Because the translations structure is an array, it's articulated in the index as a complex collection with subfields for each language translation. The generated index has a document key and uses the default values for fields created using the Create Index REST API.
from synapse.ml.cognitive import *

(translated_df.withColumn("DocID", monotonically_increasing_id().cast("string"))
    .withColumn("SearchAction", lit("upload"))
    .writeToAzureSearch(
        subscriptionKey=search_key,
        actionCol="SearchAction",
        serviceName=search_service,
        indexName=search_index,
        keyCol="DocID",
    ))
To explore the index definition created by AzureSearchWriter, check the search service pages in the Azure portal.
Note
If you can't use the default search index, you can provide an external custom definition in JSON, passing its URI as a string in the "indexJson" property. Generate the default index first so that you know which fields to specify, and then follow with customized properties if you need specific analyzers, for example.
Query the index
Paste the following code into the seventh cell and run it. No modifications are required, except that you might want to vary the syntax or try more examples to further explore your content:
There's no transformer or module that issues queries. This cell is a simple call to the Search Documents REST API.
This particular example is searching for the word "door" ("search": "door"). It also returns a "count" of the number of matching documents and selects just the contents of the "Description' and "Translations" fields for the results. If you want to see the full list of fields, remove the "select" parameter.
import requests

url = "https://{}.search.windows.net/indexes/{}/docs/search?api-version=2024-07-01".format(search_service, search_index)
requests.post(url, json={"search": "door", "count": "true", "select": "Description, Translations"}, headers={"api-key": search_key}).json()
The following screenshot shows the cell output for sample script.

Clean up resources
When you're working in your own subscription, at the end of a project, it's a good idea to remove the resources that you no longer need. Resources left running can cost you money. You can delete resources individually or delete the resource group to delete the entire set of resources.
You can find and manage resources in the Azure portal, using the All resources or Resource groups link in the left-navigation pane.
Next steps
In this tutorial, you learned about the AzureSearchWriter transformer in SynapseML, which is a new way of creating and loading search indexes in Azure AI Search. The transformer takes structured JSON as an input. FormOntologyLearner can provide the necessary structure for output produced by the Document Intelligence transformers in SynapseML.
As a next step, review the other SynapseML tutorials that produce transformed content you might want to explore through Azure AI Search: