Note
Access to this page requires authorization. You can try signing in or changing directories.
Access to this page requires authorization. You can try changing directories.
Note
Azure AI Search is available through the Azure portal, REST APIs, and Azure SDKs. It also underpins Foundry IQ, the managed knowledge layer that transforms enterprise content into reusable, permission-aware knowledge bases for agents in the Microsoft Foundry portal.
Continue to build your search-enabled website by following these steps:
- Create a new index
- Load data
The program uses Azure.Search.Documents in the Azure SDK for .NET:
Before you start, make sure you have room on your search service for a new index. The free tier limit is three indexes. The Basic tier limit is 15.
Prepare the bulk import script for Search
In Visual Studio Code, open the
Program.csfile in the subdirectory,azure-search-static-web-app/bulk-insert, replace the following variables with your own values to authenticate with the Azure Search SDK.- YOUR-SEARCH-SERVICE-NAME (not the full URL)
- YOUR-SEARCH-ADMIN-API-KEY (see Find API keys)
using Azure;
using Azure.Search.Documents;
using Azure.Search.Documents.Indexes;
using Azure.Search.Documents.Indexes.Models;
using AzureSearch.BulkInsert;
using ServiceStack;

const string BOOKS_URL = "https://raw.githubusercontent.com/Azure-Samples/azure-search-sample-data/main/good-books/books.csv";
const string SEARCH_ENDPOINT = "https://YOUR-SEARCH-RESOURCE-NAME.search.windows.net";
const string SEARCH_KEY = "YOUR-SEARCH-ADMIN-KEY";
const string SEARCH_INDEX_NAME = "good-books";

Uri searchEndpointUri = new(SEARCH_ENDPOINT);

SearchClient client = new(
    searchEndpointUri,
    SEARCH_INDEX_NAME,
    new AzureKeyCredential(SEARCH_KEY));

SearchIndexClient clientIndex = new(
    searchEndpointUri,
    new AzureKeyCredential(SEARCH_KEY));

await CreateIndexAsync(clientIndex);
await BulkInsertAsync(client);

static async Task CreateIndexAsync(SearchIndexClient clientIndex)
{
    Console.WriteLine("Creating (or updating) search index");
    SearchIndex index = new BookSearchIndex(SEARCH_INDEX_NAME);
    var result = await clientIndex.CreateOrUpdateIndexAsync(index);

    Console.WriteLine(result);
}

static async Task BulkInsertAsync(SearchClient client)
{
    Console.WriteLine("Download data file");
    using HttpClient httpClient = new();

    var csv = await httpClient.GetStringAsync(BOOKS_URL);

    Console.WriteLine("Reading and parsing raw CSV data");
    var books =
        csv.ReplaceFirst("book_id", "id").FromCsv<List<BookModel>>();

    Console.WriteLine("Uploading bulk book data");
    _ = await client.UploadDocumentsAsync(books);

    Console.WriteLine("Finished bulk inserting book data");
}
Open an integrated terminal in Visual Studio Code for the project directory's subdirectory,
azure-search-static-web-app/bulk-insert.Run the following command to install the dependencies.
dotnet restore
Run the bulk import script for Search
Still in the same subdirectory (
azure-search-static-web-app/bulk-insert), run the program:dotnet runAs the code runs, the console displays progress. You should see the following output.
 Creating (or updating) search index
 Status: 201, Value: Azure.Search.Documents.Indexes.Models.SearchIndex
 Download data file
 Reading and parsing raw CSV data
 Uploading bulk book data
 Finished bulk inserting book data
Review the new search index
Once the upload completes, the search index is ready to use. Review your new index in Azure portal.
Go to your search service in the Azure portal.
On the left, select Search Management > Indexes, and then select the good-books index.
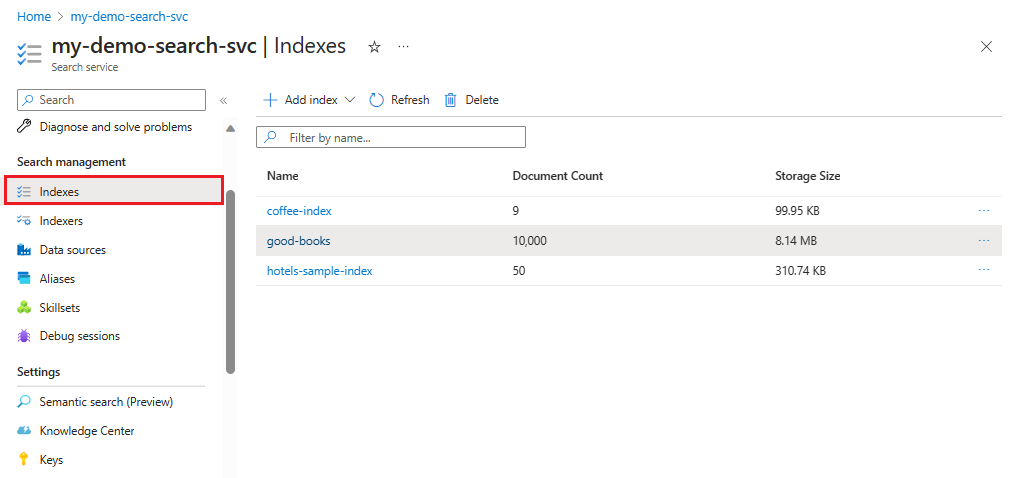
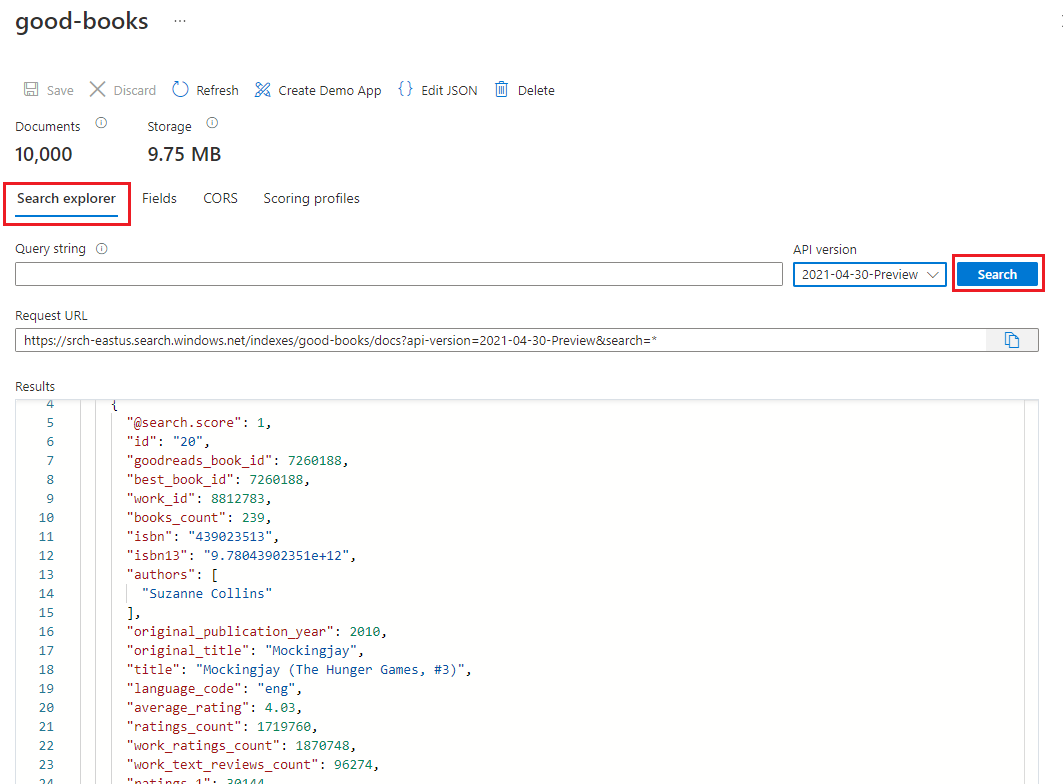
By default, the index opens in the Search Explorer tab. Select Search to return documents from the index.


Rollback bulk import file changes
Use the following git command in the Visual Studio Code integrated terminal at the bulk-insert directory to roll back the changes to the Program.cs file. They aren't needed to continue the tutorial and you shouldn't save or push your API keys or search service name to your repo.
git checkout .