Note
Access to this page requires authorization. You can try signing in or changing directories.
Access to this page requires authorization. You can try changing directories.
Automation integrations introduce a centralized catalog of prebuilt integrations for Microsoft and third-party apps, so you can select a provider, configure it with simple authentication, and use it in your playbooks without custom setup.
Automation integrations reduce manual setup work for SOC engineers, automation administrators, and advanced security analysts who build or maintain automated response workflows.
Important
After March 31, 2027, Microsoft Sentinel will no longer be supported in the Azure portal and will be available only in the Microsoft Defender portal. All customers using Microsoft Sentinel in the Azure portal will be redirected to the Defender portal and will use Microsoft Sentinel in the Defender portal only.
If you're still using Microsoft Sentinel in the Azure portal, we recommend that you start planning your transition to the Defender portal to ensure a smooth transition and take full advantage of the unified security operations experience offered by Microsoft Defender.
How automation integrations work
Microsoft Sentinel playbooks are based on workflows built in Azure Logic Apps. A playbook can use connectors and integrations to interact with other services during an automated workflow.
Automation integrations provide a guided way to configure the connection inputs required by supported providers. The required inputs depend on the provider and authentication type. After you configure an integration, use it in supported playbook or automation scenarios to connect the workflow to the target service.
Automation integrations can support:
- First-party services, such as Microsoft services used by your SOC.
- Third-party services, such as partner or vendor services used for enrichment, ticketing, communication, or response.
- Out-of-the-box scenarios, where Microsoft Sentinel provides the automation experience and prompts you for the minimum required connection details.
Important
Provider-specific setup steps, values, permissions, and troubleshooting guidance are owned by each provider. Use the provider's official documentation when you need detailed setup steps for a specific service.
Prerequisites
Before you configure an automation integration, make sure you have:
- The required permissions to create the integration in Microsoft Sentinel.
- The required permissions in the provider service to authenticate and perform the necessary actions for the automation scenario.
Supported authentication types
The authentication options available for an integration depend on the selected provider. Microsoft Sentinel prompts you for the fields required by the selected authentication type.
Common authentication patterns include:
| Authentication type | Use when | Typical inputs |
|---|---|---|
| API key | The provider issues a key or token that authorizes requests to its API. | API key or token, and sometimes a service URL or region. |
| OAuth 2.0 | The provider supports delegated or app-based authorization through an OAuth flow. | Sign-in, consent, client details, scopes, or redirect configuration, depending on the provider. |
Store and rotate credentials according to your organization's security requirements and the provider's guidance. Use the least-privileged permissions needed for the automation scenario.
Integration setup
Use the following high-level workflow to create an automation integration:
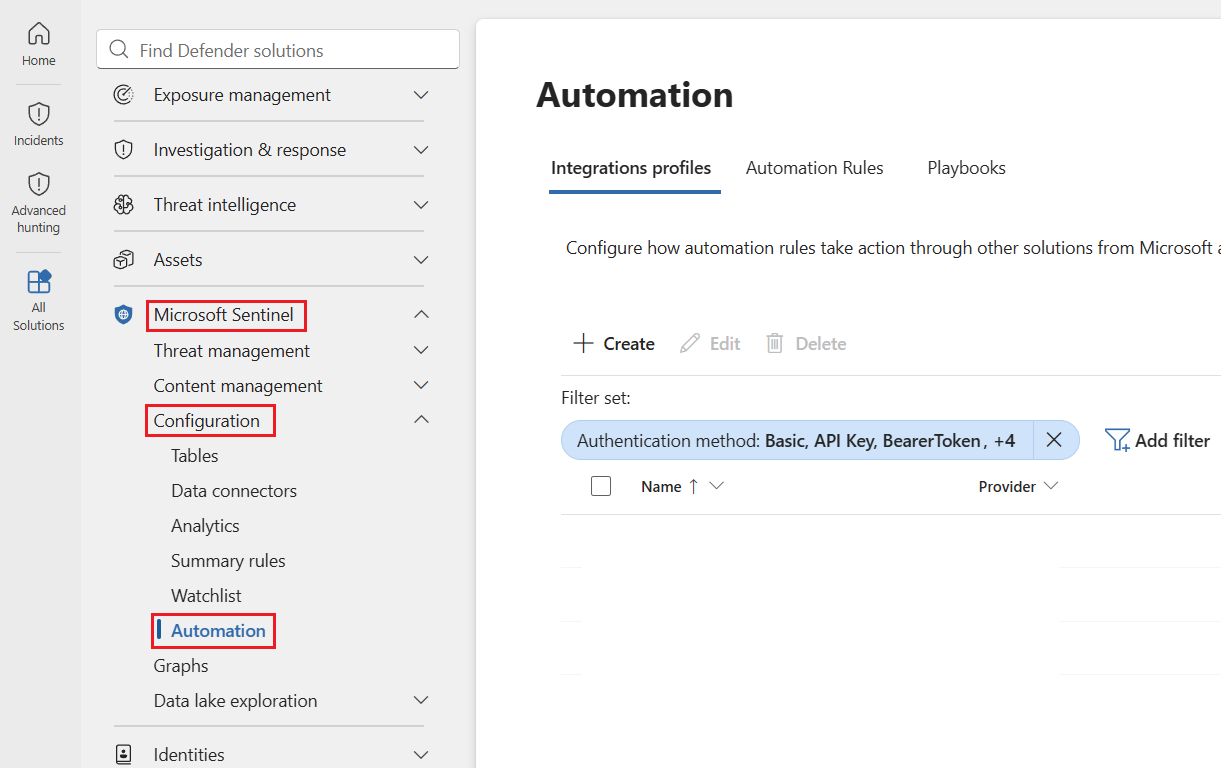
Go to the Automation page at Microsoft Sentinel > Configuration > Automation.
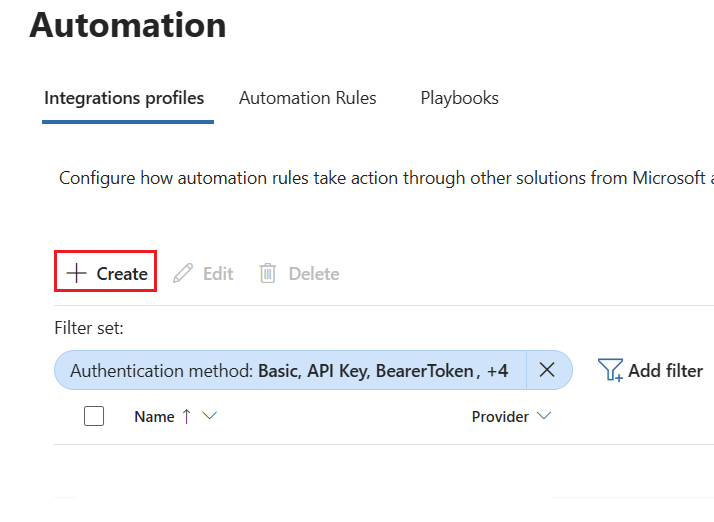
Select + Create.
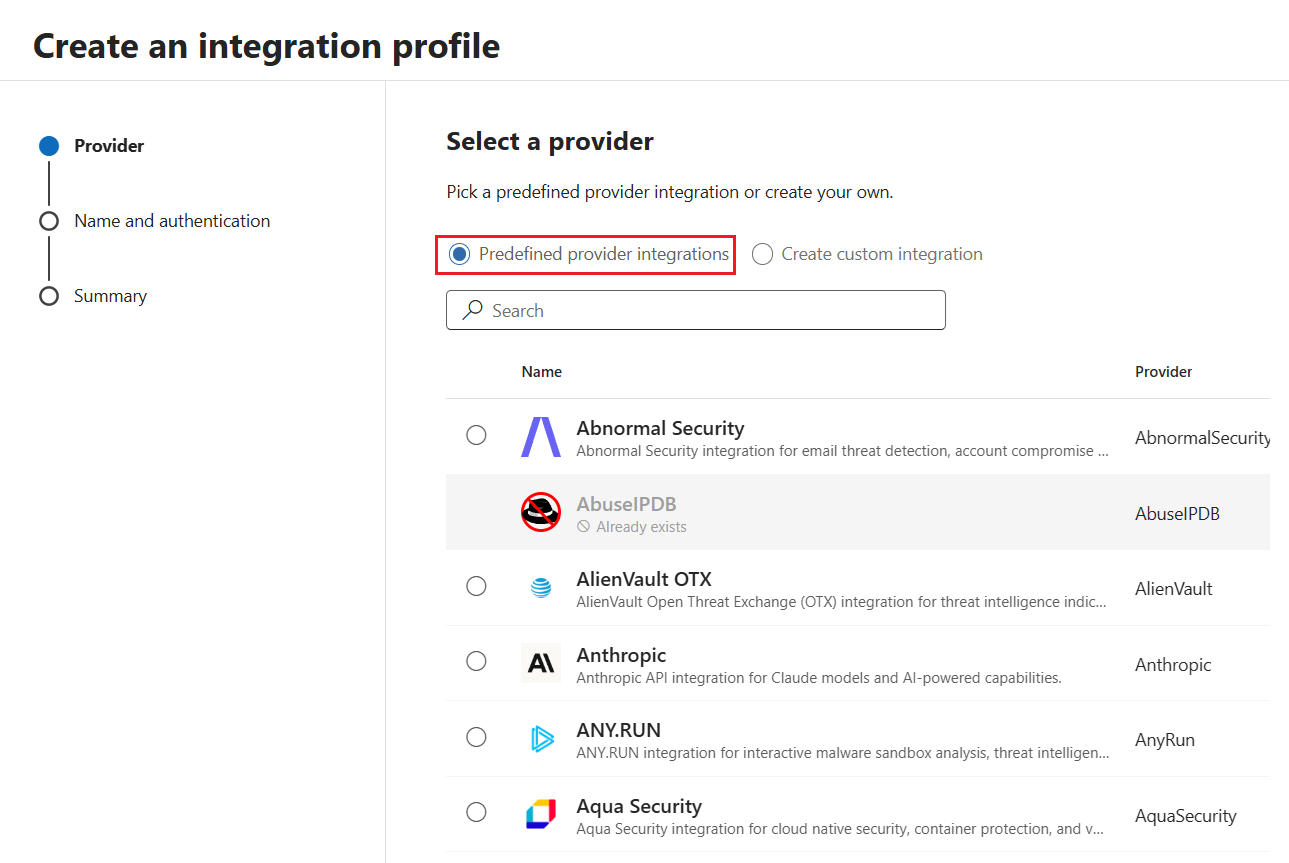
From the Predefined provider integrations list, select the provider you want to connect to, then select Next.
In the Name and authentication section, provide:
- Integration name (required): Enter a name to identify the integration in your environment.
- Description (optional): Enter a description to help your team understand the integration's purpose.
- Authentication details (required): Enter the specific fields required for the selected authentication type.
The available authentication options depend on the provider. A provider might support API key authentication, OAuth 2.0 authentication, or both. Select the Learn more link in the authentication details section for an external link to provider-specific guidance.
Select Next and review the summary page. If you need to make changes, select Back to edit the details. Otherwise, select Create.
Security considerations
Before you use an automation integration in production, review the following considerations:
- Permissions: Grant only the permissions required for the specific playbook actions.
- Credential storage: Store secrets in approved secure locations. Don't hard-code secrets in playbooks or documentation.
- Credential rotation: Rotate API keys, client secrets, and tokens according to your organization's policy.
- Auditability: Use named service accounts or app identities when possible so your team can audit automated actions.
- Scope: Limit the integration to the tenants, workspaces, queues, or resources required by the automation scenario.
- Testing: Test integrations with nonproduction incidents or sample data before you use them in active response workflows.
When to use provider documentation
Use Microsoft Sentinel documentation to understand the automation integration experience, authentication patterns, and high-level setup flow. Use provider documentation when you need:
- Exact API key creation steps.
- OAuth app registration values.
- Provider-specific permission names.
- Region-specific endpoints.
- Troubleshooting steps for provider-side errors.