Note
Access to this page requires authorization. You can try signing in or changing directories.
Access to this page requires authorization. You can try changing directories.
This quickstart shows you how to create a Service Bus namespace and a queue using the Azure portal. It also shows you how to get authorization credentials that a client application can use to send/receive messages to/from the queue.
What are Service Bus queues?
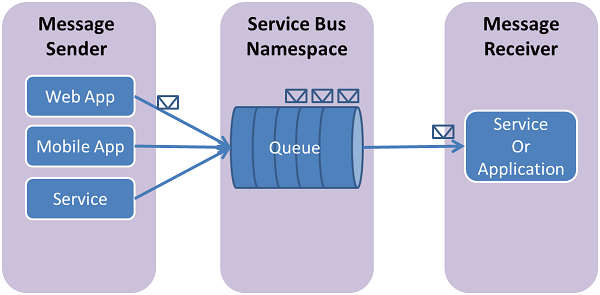
Service Bus queues support a brokered messaging communication model. When you use queues, components of a distributed application don't communicate directly with each other; instead they exchange messages via a queue, which acts as an intermediary (broker). A message producer (sender) hands off a message to the queue and then continues its processing. Asynchronously, a message consumer (receiver) pulls the message from the queue and processes it. The producer doesn't have to wait for a reply from the consumer in order to continue to process and send further messages. Queues offer First In, First Out (FIFO) message delivery to one or more competing consumers. That is, messages are typically received and processed by the receivers in the order in which they were added to the queue, and each message is received and processed by only one message consumer.
Service Bus queues are a general-purpose technology that can be used for a wide variety of scenarios:
- Communication between web and worker roles in a multi-tier Azure application.
- Communication between on-premises apps and Azure-hosted apps in a hybrid solution.
- Communication between components of a distributed application running on-premises in different organizations or departments of an organization.
Using queues enables you to scale your applications more easily, and enable more resiliency to your architecture.
Prerequisites
To complete this quickstart, make sure you have an Azure subscription. If you don't have an Azure subscription, you can create a free account before you begin.
Create a namespace in the Azure portal
To begin using Service Bus messaging entities in Azure, create a namespace with a name that is unique across Azure. A namespace provides a scoping container for Service Bus resources, such as queues and topics, in your application.
To create a namespace:
Sign in to the Azure portal.
Select the flyout menu from the top left and navigate to the All services page.
On the left navigation bar, select Integration.
Scroll down to Messaging services > Service Bus and select Create.

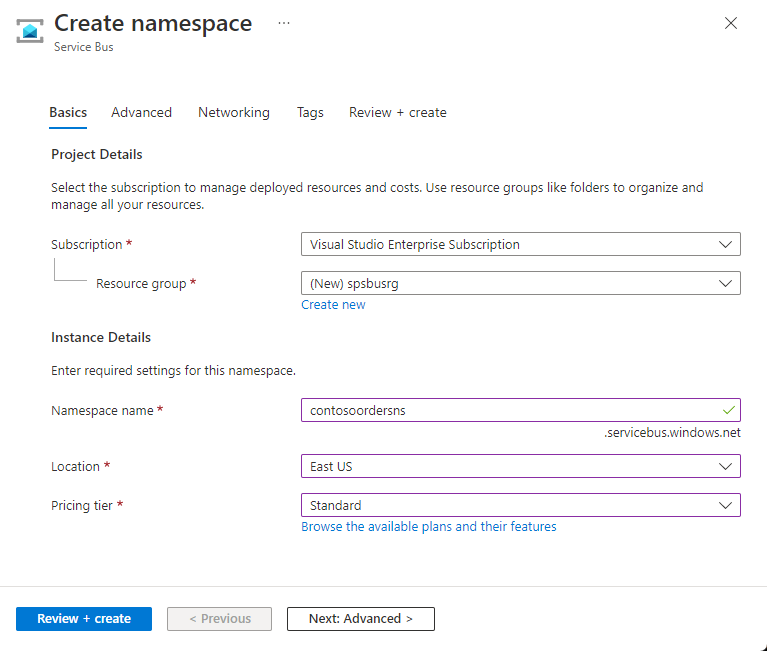
In the Basics tab of the Create namespace page, follow these steps:
For Subscription, choose an Azure subscription in which to create the namespace.
For Resource group, choose an existing resource group, or create a new one.
Enter a Namespace name that meets the following naming conventions:
- The name must be unique across Azure. The system immediately checks to see if the name is available.
- The name length is at least 6 and at most 50 characters.
- The name can contain only letters, numbers, hyphens
-. - The name must start with a letter and end with a letter or number.
- The name doesn't end with
-sbor-mgmt.
For Location, choose the region to host your namespace.
For Pricing tier, select the pricing tier (Basic, Standard, or Premium) for the namespace. For this quickstart, select Standard.
If you select Premium tier, you can enable geo-replication for the namespace. The geo-replication feature ensures that the metadata and data of a namespace are continuously replicated from a primary region to one or more secondary regions.
Important
If you want to use topics and subscriptions, choose either Standard or Premium. Topics and subscriptions aren't supported in the Basic pricing tier.
If you selected the Premium pricing tier, specify the number of messaging units. The premium tier provides resource isolation at the CPU and memory level so that each workload runs in isolation. This resource container is called a messaging unit. A premium namespace has at least one messaging unit. You can select 1, 2, 4, 8 or 16 messaging units for each Service Bus Premium namespace. For more information, see Service Bus premium messaging tier.
Select Review + create at the bottom of the page.
On the Review + create page, review settings, and select Create.
After the deployment of the resource is successful, select Go to resource on the deployment page.
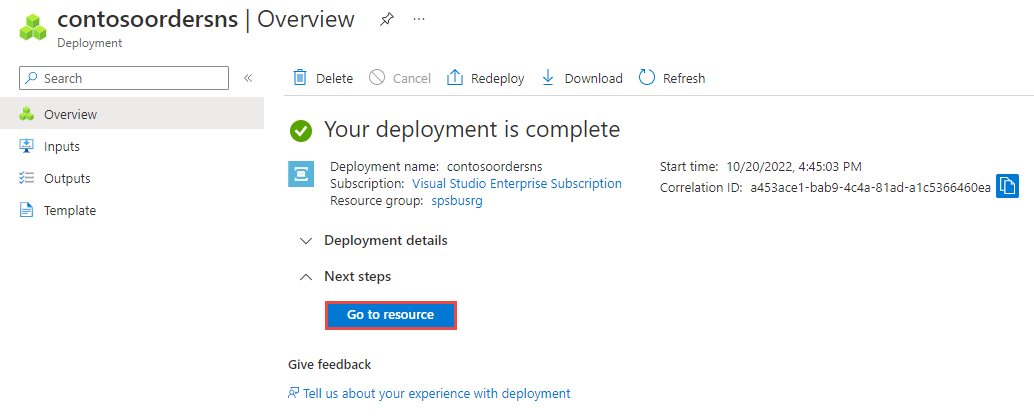
You see the home page for your service bus namespace.
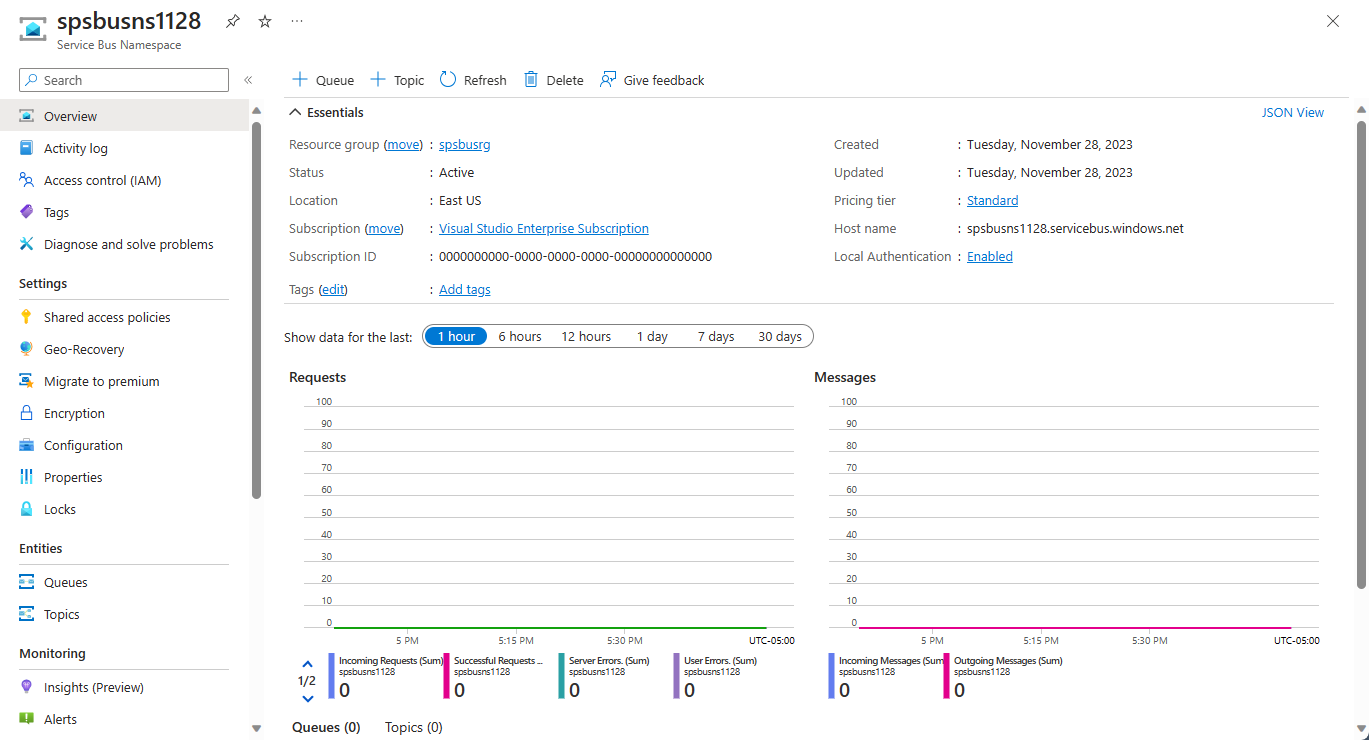


Create a queue in the Azure portal
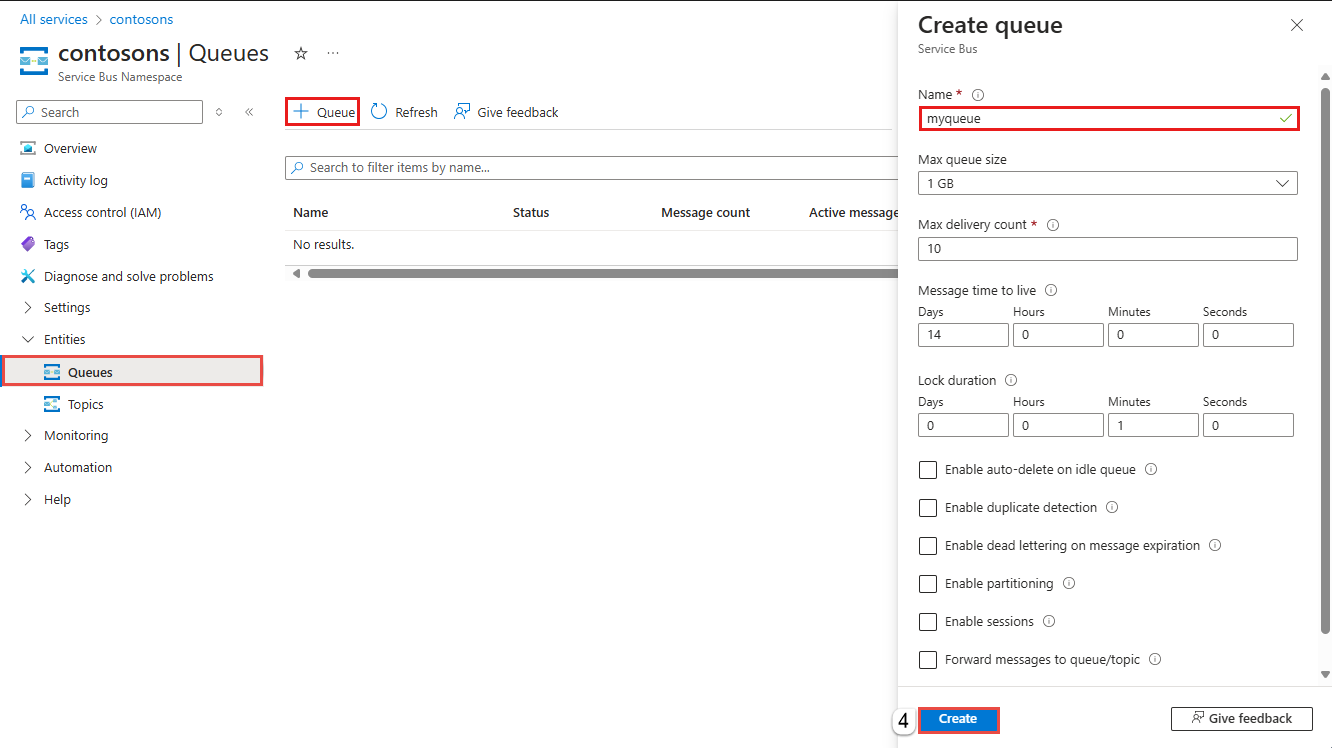
On the Service Bus Namespace page, expand Entities on the navigational menu to the left, and select Queues.
On the Queues page, on the toolbar, select + Queue.
Enter a name for the queue. Leave the other values with their defaults.
Select Create.

Next steps
In this article, you created a Service Bus namespace and a queue in the namespace. To learn how to send/receive messages to/from the queue, see one of the following quickstarts in the Send and receive messages section.