Note
Access to this page requires authorization. You can try signing in or changing directories.
Access to this page requires authorization. You can try changing directories.
In this guide, learn about the different authentication options available in Service Connector, and how to customize environment variables.
Prerequisites
- An Azure subscription - create one for free.
- An Azure App Service, Azure Container Apps or Azure Spring Apps instance.
- This guide assumes that you already know how the basics of connecting services using Service Connector. To review our quickstarts, go to App Service, Container Apps or Azure Spring Apps.
Start creating a new connection
- Within your App Service, Container Apps or Azure Spring Apps instance, open Service Connector and fill out the form in the Basics tab with the required information about your compute and target services.
- Select Next : Authentication.
Select an authentication option
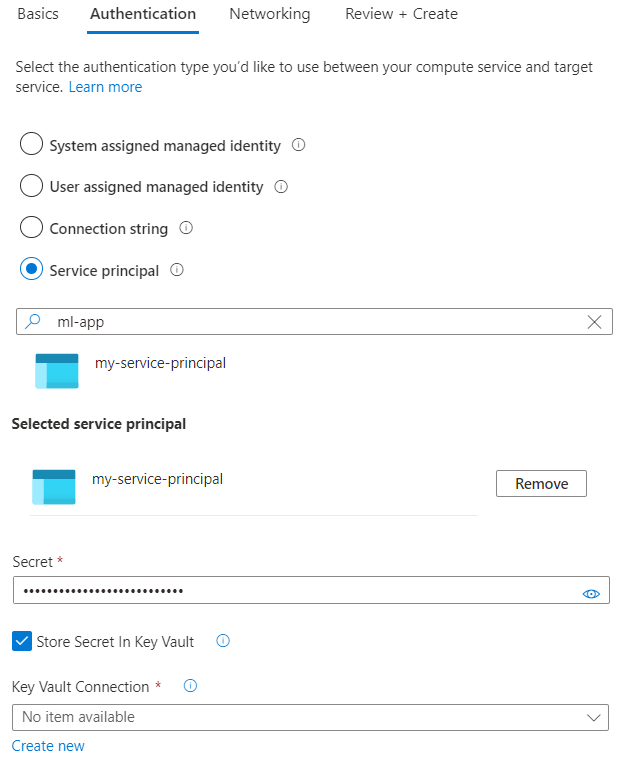
Select one of the four different authentication options offered by Service Connector to connect your Azure services together:
- System assigned managed identity: provides an automatically managed identity tied to the resource in Microsoft Entra ID
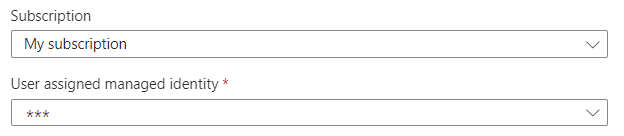
- User assigned managed identity: provides an identity that can be used on multiple resources
- Connection string: provides one or multiple key-value pairs with secrets or tokens
- Service principal: creates a service principal that defines the access policy and permissions for the user/application in the Microsoft Entra tenant
Service Connector offers the following authentication options:
| Target resource | System assigned managed identity | User assigned managed identity (Workload identity) | Connection string | Service principal |
|---|---|---|---|---|
| Azure AI services | Yes | Yes | Yes | Yes |
| Azure App Configuration | Yes | Yes | Yes | Yes |
| Azure Blob Storage | Yes | Yes | Yes | Yes |
| Azure Cache for Redis | No | No | Yes | No |
| Azure Cache for Redis Enterprise | No | No | Yes | No |
| Azure Cosmos DB for Apache Cassandra | Yes | Yes | Yes | Yes |
| Azure Cosmos DB for Apache Gremlin | Yes | Yes | Yes | Yes |
| Azure Cosmos DB for MongoDB | Yes | Yes | Yes | Yes |
| Azure Cosmos DB for NoSQL | Yes | Yes | Yes | Yes |
| Azure Cosmos DB for Table | Yes | Yes | Yes | Yes |
| Azure Database for MySQL single server | Yes | No | No | No |
| Azure Database for MySQL Flexible Server | Yes | No | Yes | No |
| Azure Database for PostgreSQL single server | Yes | No | Yes | No |
| Azure Database for PostgreSQL Flexible Server | Yes | No | Yes | No |
| Azure Event Hubs | Yes | Yes | Yes | Yes |
| Azure Files | No | No | Yes | No |
| Azure Key Vault | Yes | Yes | No | Yes |
| Azure Queue Storage | Yes | Yes | Yes | Yes |
| Azure Service Bus | Yes | Yes | Yes | Yes |
| Azure SignalR Service | Yes | Yes | Yes | Yes |
| Azure SQL Database | Yes | No | Yes | No |
| Azure Table Storage | No | No | Yes | No |
| Azure Web PubSub | Yes | Yes | Yes | Yes |
| MongoDB Atlas (Preview) | No | No | Yes | No |
Review or update authentication configuration
When using a system-assigned managed identity, optionally review or update its authentication configuration by following these steps:
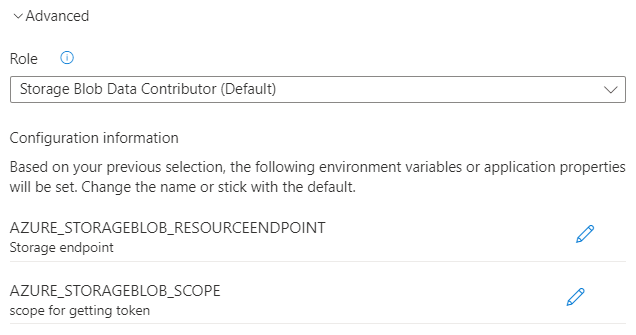
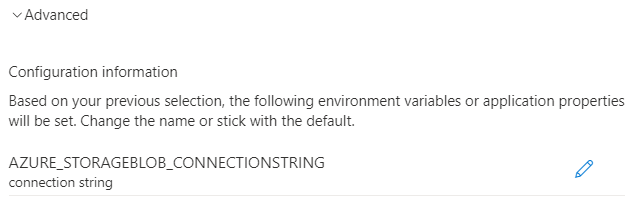
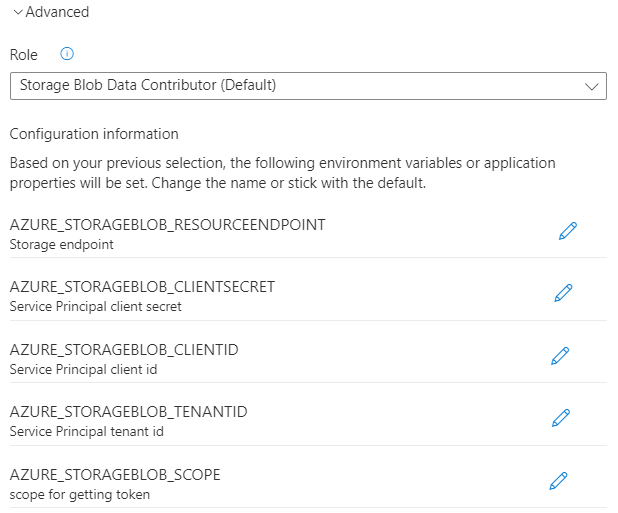
Select Advanced to display more options.
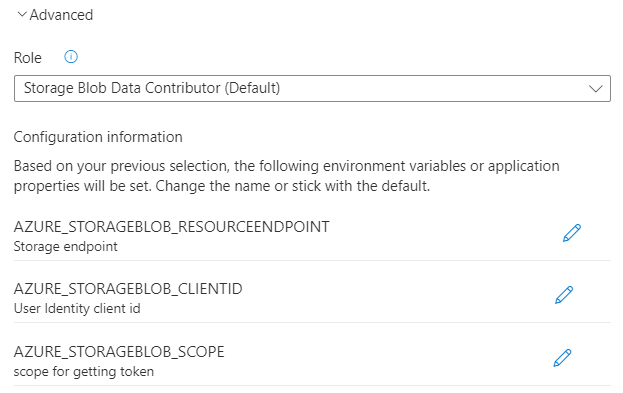
Under Role, review the default role selected for your source service or choose another one from the list.
Under Configuration information, Service Connector lists a series of configuration settings that will be generated when you create the connection. This list consists of environment variables or application properties. It varies depending on the target resource and authentication method selected. Optionally select the edit button in front of each configuration setting to edit its key.
Select Done to confirm.

Check authentication configuration
You can review authentication configuration on the following pages in the Azure portal:
When creating the connection, select the Review + Create tab and check the information listed under Authentication.
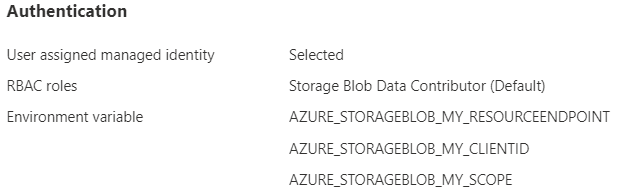
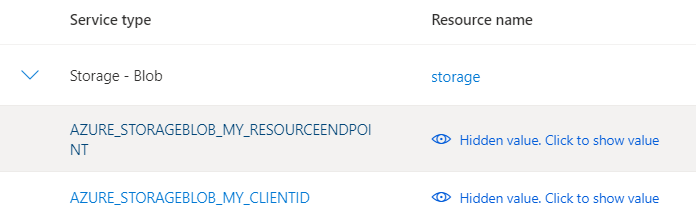
After you've created the connection, in the Service connector page, configuration keys are listed.