Note
Access to this page requires authorization. You can try signing in or changing directories.
Access to this page requires authorization. You can try changing directories.
Service Fabric standalone clusters offer you the option to choose your own environment and create a cluster as part of the "any OS, any cloud" approach that Service Fabric is taking. In this tutorial series, you create a standalone cluster hosted on AWS and install an application into it.
This tutorial is part one of a series. In this article, you generate the AWS resources required to host your standalone cluster of Service Fabric. In future articles you need install the Service Fabric standalone suite, install a sample application into your cluster, and finally, clean up your cluster.
In part one of the series, you learn how to:
- Create a set of EC2 instances
- Modify the security group
- Sign in to one of the instances
- Prep the instance for Service Fabric
Prerequisites
To complete this tutorial, you need an AWS account. If you don't already have an account, go to the AWS console to create one.
Create EC2 instances
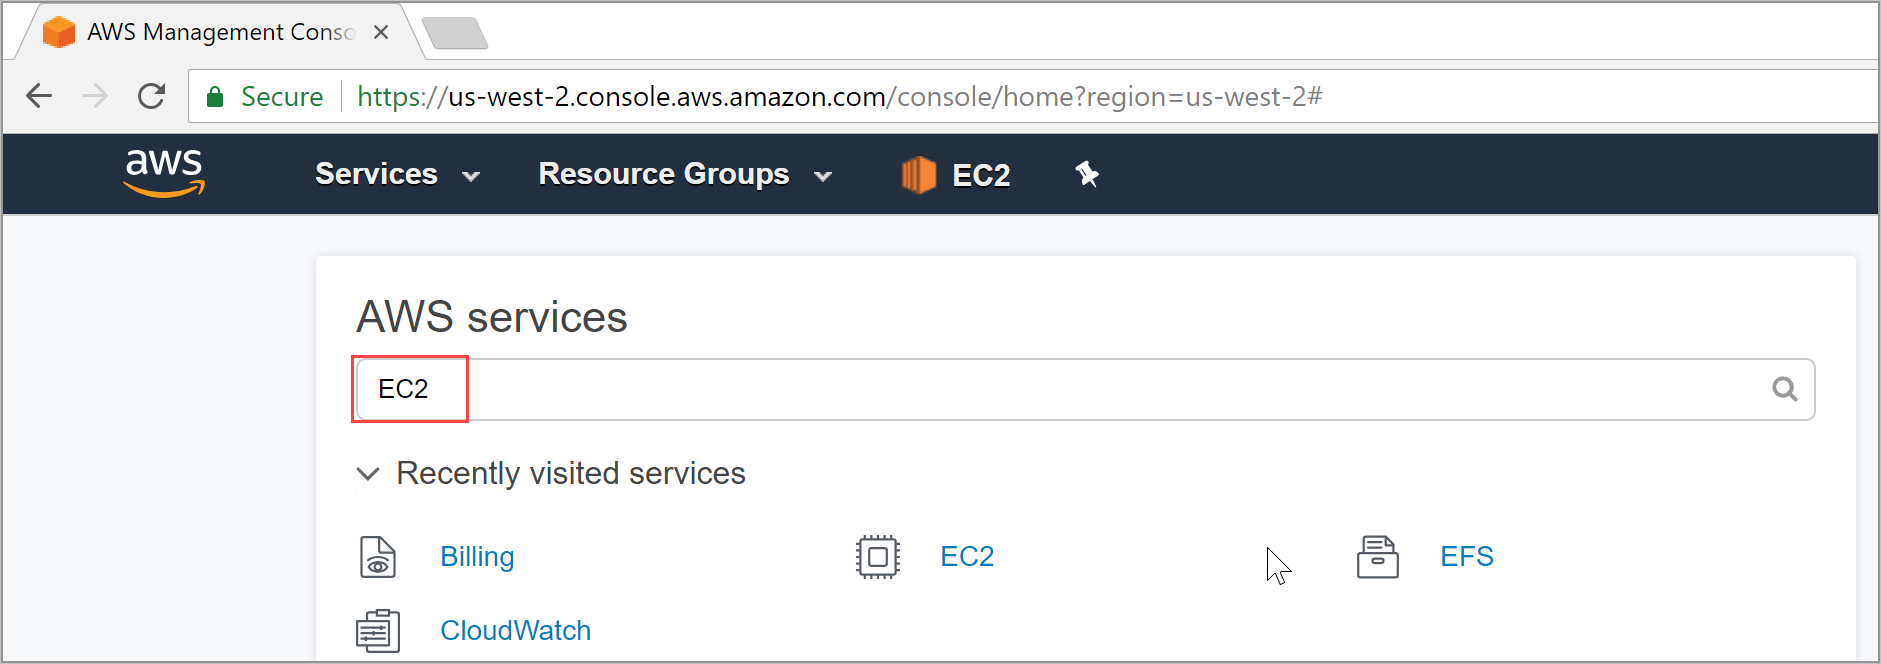
Sign in to the AWS Console > Enter EC2 in the search box > EC2 Virtual Servers in the Cloud
Select Launch Instance, on the next screen choose Select next to Microsoft Windows Server 2016 Base.

Select t2.medium, then select Next: Configure Instance Details, on the next screen change the number of instances to 3, then select Advanced Details to expand that section.
To connect your virtual machines together in Service Fabric, the VMs that are hosting your infrastructure need to have the same credentials. There are two common ways to get consistent credentials: join them all to the same domain, or set the same administrator password on each VM. For this tutorial, you use a user data script to set the EC2 instances to all have the same password. In a production environment, joining the hosts to a windows domain is more secure.
Enter the following script in the user data field on the console:
<powershell>
$user = [adsi]"WinNT://localhost/Administrator,user"
$user.SetPassword("serv1ceF@bricP@ssword")
$user.SetInfo()
netsh advfirewall firewall set rule group="File and Printer Sharing" new enable=Yes
New-NetFirewallRule -DisplayName "Service Fabric Ports" -Direction Inbound -Action Allow -RemoteAddress LocalSubnet -Protocol TCP -LocalPort 135, 137-139, 445
</powershell>
Once you've entered the PowerShell script select Review and Launch

On the review screen, select Launch. Then change the drop-down to Proceed without a key pair and select the checkbox indicating that you know the password.
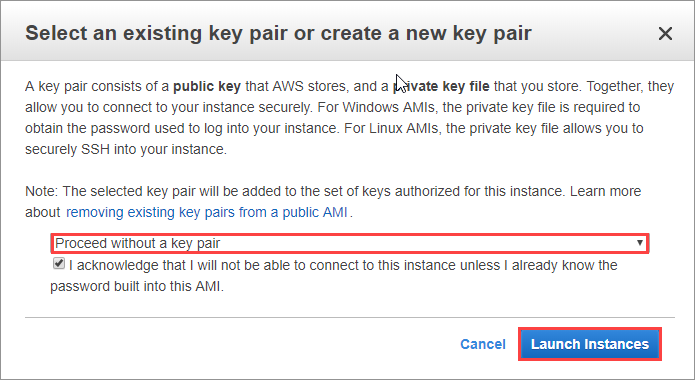
Finally, select Launch Instances, and then View Instances. You have the basis for your Service Fabric cluster created, now you need to add a few final configurations to the instances themselves to prep them for the Service Fabric configuration.
Modify the security group
Service Fabric requires a number of ports open between the hosts in your cluster. To open these ports in the AWS infrastructure, select one of the instances that you created. Then select the name of the security group, for example, launch-wizard-1. Now, select the Inbound tab.
To avoid opening these ports to the world, you instead open them only for hosts in the same security group. Take note of the security group ID, in the example it's sg-c4fb1eba. Then select Edit.
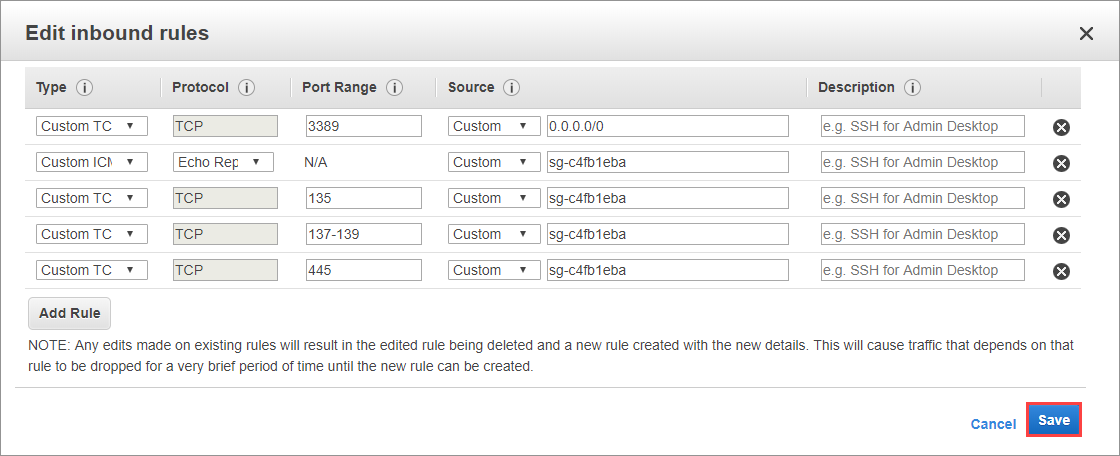
Next, add four rules to the security group for service dependencies, and then three more for Service Fabric itself. The first rule is to allow ICMP traffic, for basic connectivity checks. The others rules open the required ports to enable SMB and Remote Registry.
For the first rule select Add Rule, then from the dropdown menu selects All ICMP - IPv4. Select the entry box next to custom and enter your security group ID from above.
For the last three dependencies, you need to follow a similar process. Select Add Rule, from the drop-down select Custom TCP Rule, in the port range enter one of 135, 137-139, and 445 for each rule. Finally, in the source box enter your security group ID.
Now that the ports for the dependencies are open, you need to do the same thing for the ports that Service Fabric itself uses to communicate. Select Add Rule, from the drop-down select Custom TCP Rule, in the port range enter 20001-20031 enter the security group in the source box.
Next, add a rule for the ephemeral port range. Select Add Rule, from the drop-down select Custom TCP Rule, in the port range enter 20606-20861. Finally, in the source box enter your security group ID.
For the final two rules for Service Fabric, open it up to the world so you can manage your service fabric cluster from your personal computer. Select Add Rule, from the drop-down select Custom TCP Rule, in the port range enter one of 19000-19003, and 19080-19081 then change the Source drop down to Anywhere.
Finally, we just need to open up port 8080 so you can see the application when it's deployed. Select Add Rule, from the drop-down select Custom TCP Rule, in the port range enter 8080 then change the Source drop down to Anywhere.
All of the rules are now entered. Select Save.
Connect to an instance and validate connectivity
From the security group tab, select Instances from the left-hand menu. Select each of the instances that you've created and note their private IP addresses for the examples below will use 172.31.21.141 and 172.31.20.163.
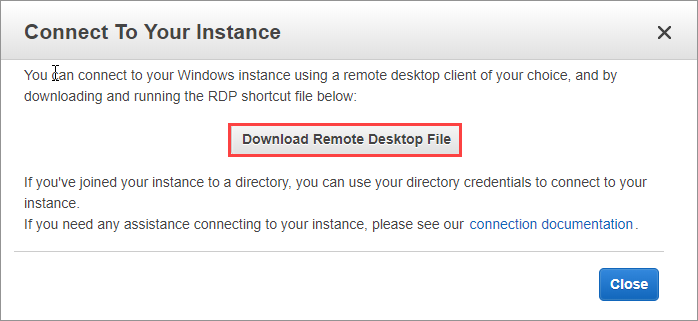
Once you have all of the IP addresses select one of the instances to connect to, right-click on the instance and select Connect. From here, you can download the RDP file for this particular instance. Select Download Remote Desktop File, and then open the file that is downloaded to establish your remote desktop connection (RDP) to this instance. When prompted enter your password serv1ceF@bricP@ssword.
Once you have successfully connected to your instance validate that you can connect between them and also share files. You've gathered the IP addresses for all the instances, select one that you are not currently connected to. Go to Start, enter cmd and select Command Prompt.
In these examples the RDP connection was established to the following IP address: 172.31.21.141. All connectivity test then occur to the other IP address: 172.31.20.163.
To validate that basic connectivity works, use the ping command.
ping 172.31.20.163
If your output looks like Reply from 172.31.20.163: bytes=32 time<1ms TTL=128 repeated four times then your connection between the instances is working. Now validate that your SMB sharing works with the following command:
net use * \\172.31.20.163\c$
It should return Drive Z: is now connected to \\172.31.20.163\c$. as the output.
Prep instances for Service Fabric
If you were creating this from scratch, you'd need to take a couple extra steps. Namely, you'd need to validate that remote registry was running, enable SMB, and open the requisite ports for SMB and remote registry.
To make it easier you embedded all of this work when you bootstrapped the instances with your user data script.
To enable SMB, this is the PowerShell command you used:
netsh advfirewall firewall set rule group="File and Printer Sharing" new enable=Yes
To open the ports in the firewall here is the PowerShell command:
New-NetFirewallRule -DisplayName "Service Fabric Ports" -Direction Inbound -Action Allow -RemoteAddress LocalSubnet -Protocol TCP -LocalPort 135, 137-139, 445
Next steps
In part one of the series, you learned how to launch three EC2 instances and get them configured for the Service Fabric installation:
- Create a set of EC2 instances
- Modify the security group
- Sign in to one of the instances
- Prep the instance for Service Fabric
Advance to part two of the series to configure Service Fabric on your cluster.