Set up a staging environment in Azure Spring Apps
Note
The Basic, Standard, and Enterprise plans will be deprecated starting from mid-March, 2025, with a 3 year retirement period. We recommend transitioning to Azure Container Apps. For more information, see the Azure Spring Apps retirement announcement.
The Standard consumption and dedicated plan will be deprecated starting September 30, 2024, with a complete shutdown after six months. We recommend transitioning to Azure Container Apps. For more information, see Migrate Azure Spring Apps Standard consumption and dedicated plan to Azure Container Apps.
This article applies to: ✔️ Java ❌ C#
This article applies to: ❌ Basic ✔️ Standard ✔️ Enterprise
This article explains how to set up a staging deployment by using the blue-green deployment pattern in Azure Spring Apps. Blue-green deployment is an Azure DevOps continuous delivery pattern that relies on keeping an existing (blue) version live while a new (green) one is deployed. This article shows you how to put that staging deployment into production without changing the production deployment.
Prerequisites
- An existing Azure Spring Apps instance on the Standard plan.
- Azure CLI.
This article uses an application built from Spring Initializr. If you want to use a different application for this example, make a change in a public-facing portion of the application to differentiate your staging deployment from the production deployment.
Tip
Azure Cloud Shell is a free interactive shell that you can use to run the instructions in this article. It has common, preinstalled Azure tools, including the latest versions of Git, JDK, Maven, and the Azure CLI. If you're signed in to your Azure subscription, start your Cloud Shell instance. To learn more, see Overview of Azure Cloud Shell.
To set up blue-green deployment in Azure Spring Apps, follow the instructions in the next sections.
Install the Azure CLI extension
Install the Azure Spring Apps extension for the Azure CLI by using the following command:
az extension add --name spring
Prepare the app and deployments
To build the application, follow these steps:
Generate the code for the sample app by using Spring Initializr with this configuration.
Download the code.
Add the following HelloController.java source file to the folder *\src\main\java\com\example\hellospring*:
package com.example.hellospring;
import org.springframework.web.bind.annotation.RestController;
import org.springframework.web.bind.annotation.RequestMapping;

@RestController

public class HelloController {

@RequestMapping("/")

  public String index() {
      return "Greetings from Azure Spring Apps!";
  }

}
Build the .jar file:
mvn clean package -DskipTestsCreate the app in your Azure Spring Apps instance:
az spring app create \ --resource-group <resource-group-name> \ --service <Azure-Spring-Apps-instance-name> \ --name demo \ --runtime-version Java_17 \ --assign-endpointDeploy the app to Azure Spring Apps:
az spring app deploy \
    --resource-group <resource-group-name> \
    --service <Azure-Spring-Apps-instance-name> \
    --name demo \
    --artifact-path target\hellospring-0.0.1-SNAPSHOT.jar
Modify the code for your staging deployment:
package com.example.hellospring;
import org.springframework.web.bind.annotation.RestController;
import org.springframework.web.bind.annotation.RequestMapping;

@RestController

public class HelloController {

@RequestMapping("/")

  public String index() {
      return "Greetings from Azure Spring Apps! THIS IS THE GREEN DEPLOYMENT";
  }

}
Rebuild the .jar file:
mvn clean package -DskipTestsCreate the green deployment:
az spring app deployment create \
    --resource-group <resource-group-name> \
    --service <Azure-Spring-Apps-instance-name> \
    --app demo \
    --name green \
    --runtime-version Java_17 \
    --artifact-path target\hellospring-0.0.1-SNAPSHOT.jar
View apps and deployments
Use the following steps to view deployed apps.
Go to your Azure Spring Apps instance in the Azure portal.
From the navigation pane, open the Apps pane to view apps for your service instance.
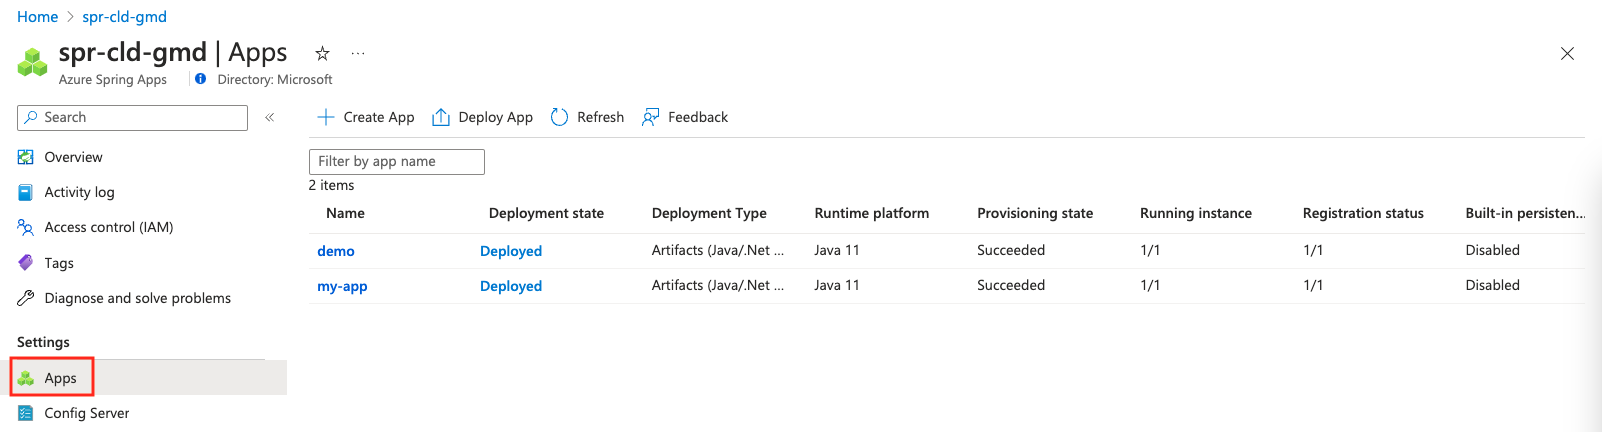
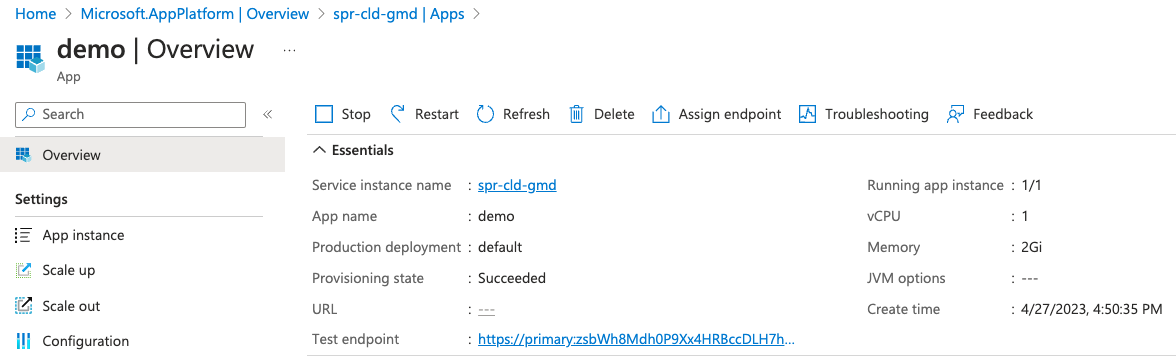
Select an app to view details.
Open Deployments to see all deployments of the app. The grid shows both production and staging deployments.
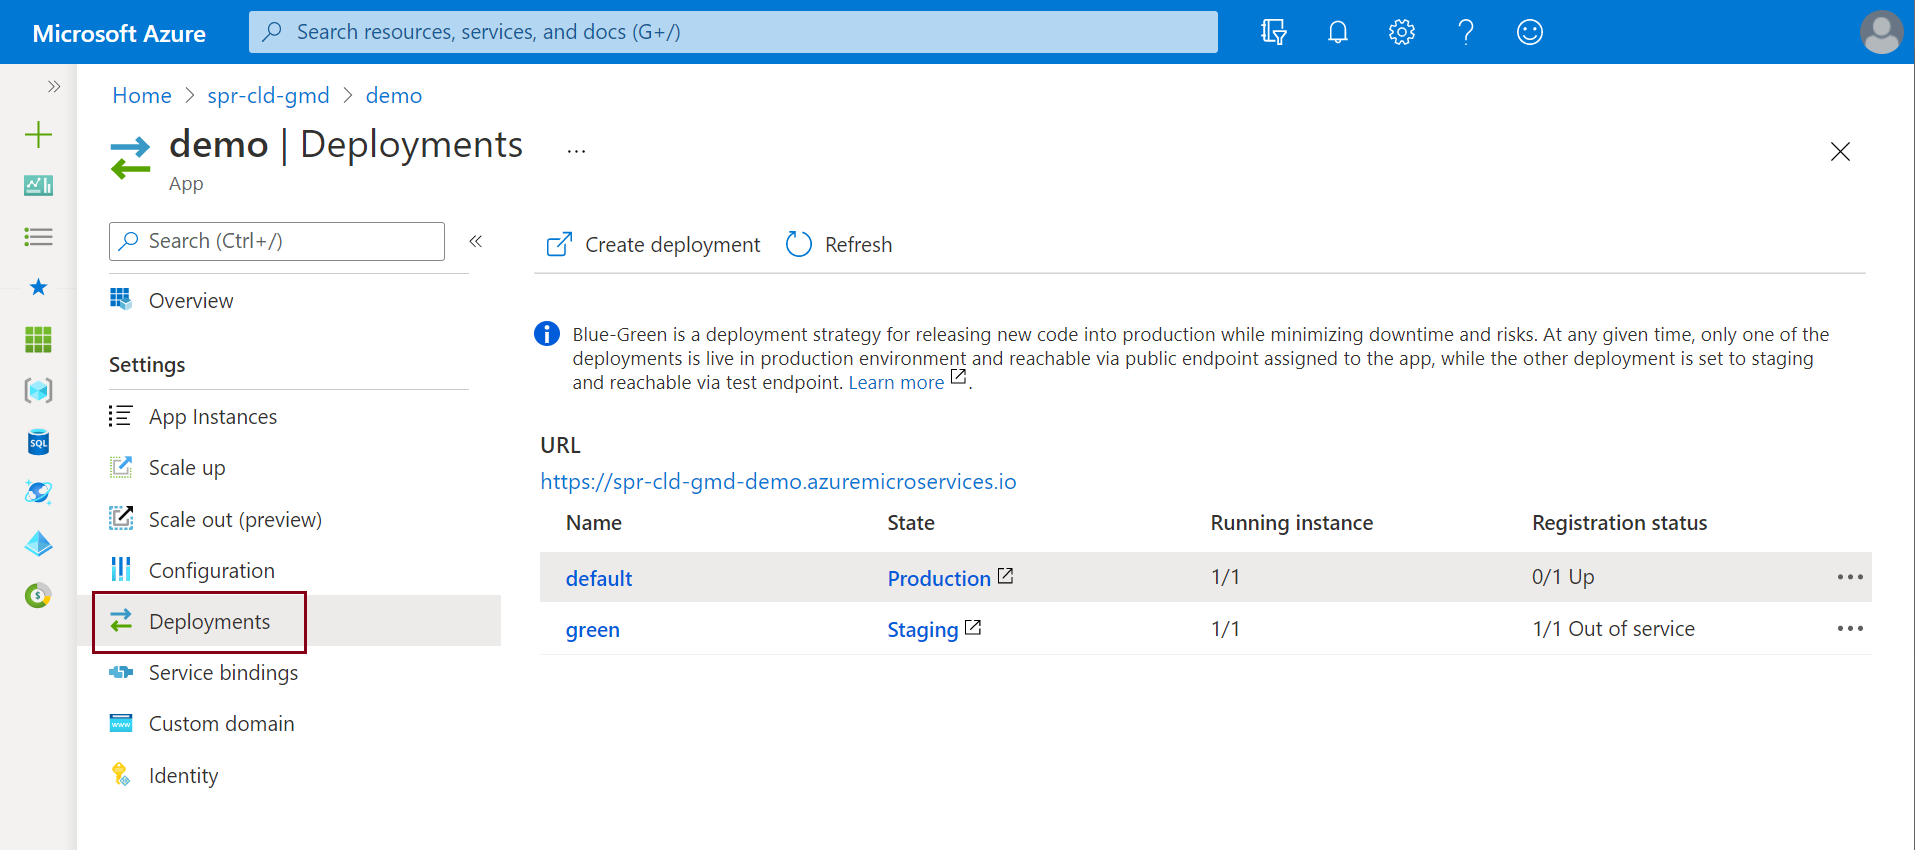
Select the URL to open the currently deployed application.

Select Production in the State column to see the default app.

Select Staging in the State column to see the staging app.


Tip
Confirm that your test endpoint ends with a slash (/) to ensure that the CSS file is loaded correctly. If your browser requires you to enter login credentials to view the page, use URL decode to decode your test endpoint. URL decode returns a URL in the format https://\<username>:\<password>@\<cluster-name>.test.azuremicroservices.io/demo/green. Use this format to access your endpoint. If you want to disable basic authentication for your test endpoint, run the following Azure CLI command: az spring app update --resource-group <resource-group-name> --service <Azure-Spring-Apps-instance-name> --name demo --disable-test-endpoint-auth true
Note
Configuration server settings apply to both your staging environment and your production environment. For example, if you set the context path (server.servlet.context-path) for your app demo in the configuration server as somepath, the path to your green deployment changes to https://\<username>:\<password>@\<cluster-name>.test.azuremicroservices.io/demo/green/somepath/....
If you visit your public-facing app demo at this point, you should see the old page without your new change.
Set the green deployment as the production environment
After you've verified your change in your staging environment, you can push it to production. On the Apps > Deployments page, select the application currently in Production.
Select the ellipsis after Registration status of the green deployment, and then select Set as production.
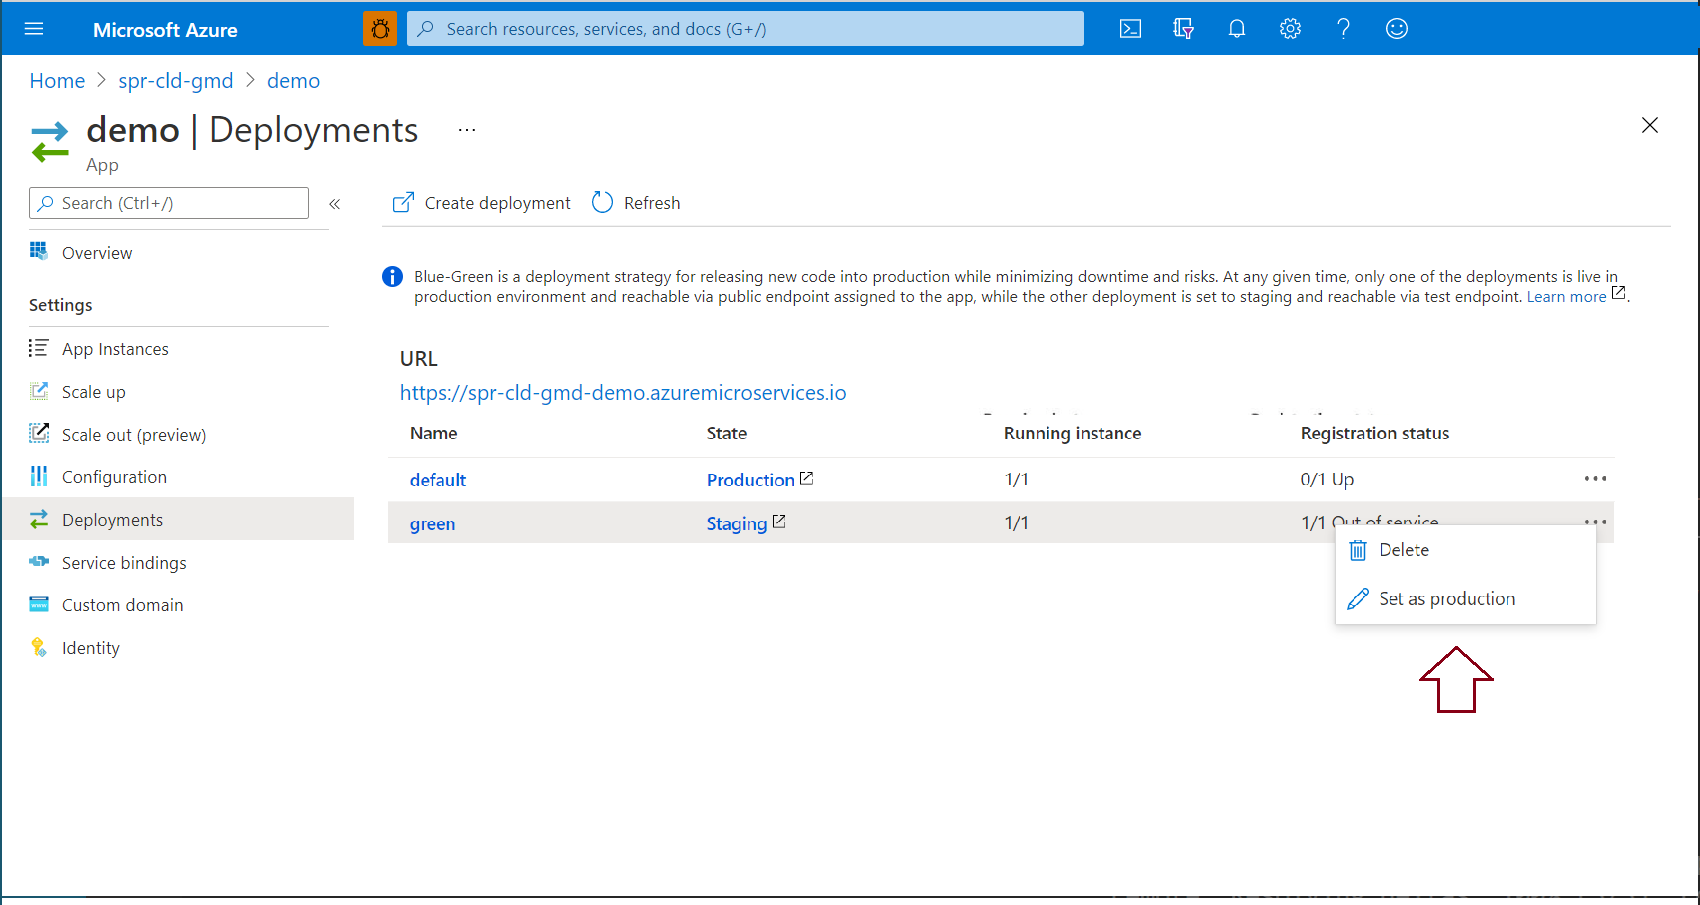
Confirm that the URL of the app displays your changes.


Note
After you've set the green deployment as the production environment, the previous deployment becomes the staging deployment.
Modify the staging deployment
If you're not satisfied with your change, you can modify your application code, build a new .jar package, and upload it to your green deployment by using the Azure CLI:
az spring app deploy \
    --resource-group <resource-group-name> \
    --service <service-instance-name> \
    --name demo \
    --deployment green \
    --artifact-path demo.jar
Delete the staging deployment
To delete your staging deployment from the Azure portal, go to the page for your staging deployment and select the Delete button.
Alternatively, delete your staging deployment from the Azure CLI by running the following command:
az spring app deployment delete \
    --resource-group <resource-group-name> \
    --service <service-instance-name> \
    --name <staging-deployment-name> \
    --app demo