Note
Access to this page requires authorization. You can try signing in or changing directories.
Access to this page requires authorization. You can try changing directories.
In this article, you learn to deploy an Angular application to Azure Static Web Apps using the Azure portal.
Prerequisites
| Resource | Notes |
|---|---|
| Azure subscription | If you don't have an Azure subscription, create a free trial account. |
| GitHub account | If you don't have a GitHub account, you can create one for free. |
| Resource | Notes |
|---|---|
| Azure subscription | If you don't have an Azure subscription, create a free trial account. |
| Azure DevOps account | If you don't have a GitHub account, you can create one. |
Create a repository
This article uses a GitHub template repository to make it easy for you to get started. The template features a starter app to deploy to Azure Static Web Apps.
Navigate to the following location to create a new repository:
Name your repository my-first-static-web-app
Select Create repository from template.
This article uses an Azure DevOps repository to make it easy for you to get started. The repository features a starter app used to deploy using Azure Static Web Apps.
Sign in to Azure DevOps.
Select New repository.
In the Create new project window, expand the Advanced menu, and make the following selections:
Setting Value Project Enter my-first-web-static-app. Visibility Select Private. Version control Select Git. Work item process Select the option that best suits your development methods. Select Create.
Select the Repos menu item.
Select the Files menu item.
Under the Import repository card, select Import.
Copy a repository URL for the framework of your choice, and paste it into the Clone URL box.
Select Import and wait for the import process to complete.
Create a static web app
Now that the repository is created, you can create a static web app from the Azure portal.
- Go to the Azure portal.
- Select Create a Resource.
- Search for Static Web App.
- Select Static Web App.
- Select Create.
In the Basics section, begin by configuring your new app and linking it to a GitHub repository.

| Setting | Value |
|---|---|
| Subscription | Select your Azure subscription. |
| Resource Group | Select the Create new link, and enter static-web-apps-test in the textbox. |
| Name | Enter my-first-static-web-app in the textbox. |
| Plan type | Select Free. |
| Source | Select GitHub and sign in to GitHub if necessary. |
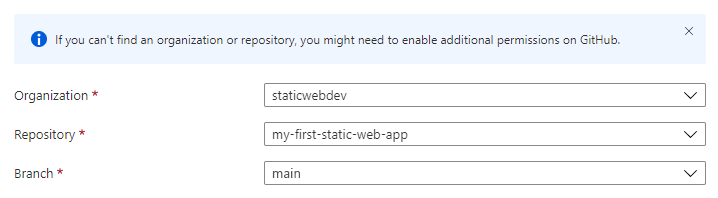
Once you are signed in with GitHub, enter the repository information.
| Setting | Value |
|---|---|
| Organization | Select your organization. |
| Repository | Select my-first-web-static-app. |
| Branch | Select main. |
Note
If you don't see any repositories:
- You may need to authorize Azure Static Web Apps in GitHub. Browse to your GitHub repository and go to Settings > Applications > Authorized OAuth Apps, select Azure Static Web Apps, and then select Grant.
- You may need to authorize Azure Static Web Apps in your Azure DevOps organization. You must be an owner of the organization to grant the permissions. Request third-party application access via OAuth. For more information, see Authorize access to REST APIs with OAuth 2.0.
In the Basics section, begin by configuring your new app and linking it to an Azure DevOps repository.
| Setting | Value |
|---|---|
| Subscription | Select your Azure subscription. |
| Resource Group | Select the Create new link, and enter static-web-apps-test in the textbox. |
| Name | Enter my-first-static-web-app in the textbox. |
| Plan type | Select Free. |
| Source | Select DevOps. |
| Organization | Select your organization. |
| Project | Select your project. |
| Repository | Select my-first-web-static-app. |
| Branch | Select main. |
Note
Make sure the branch you are using is not protected, and that you have sufficient permissions to issue a push command. To verify, browse to your DevOps repository and go to Repos -> Branches and select More options. Next, select your branch, and then Branch policies to ensure required policies aren't enabled.
In the Build Details section, add configuration details specific to your preferred front-end framework.
Select Angular from the Build Presets dropdown.
Keep the default value in the App location box.
Leave the Api location box empty.
Type dist/angular-basic in the Output location box.
Note
If you are using these instructions with your own code and Angular 17 or above, the output location value needs to end with /browser.
Select Review + create.

Note
You can edit the workflow file to change these values after you create the app.
Select Create.

Select Go to resource.

View the website
There are two aspects to deploying a static app. The first creates the underlying Azure resources that make up your app. The second is a workflow that builds and publishes your application.
Before you can go to your new static site, the deployment build must first finish running.
The Static Web Apps Overview window displays a series of links that help you interact with your web app.
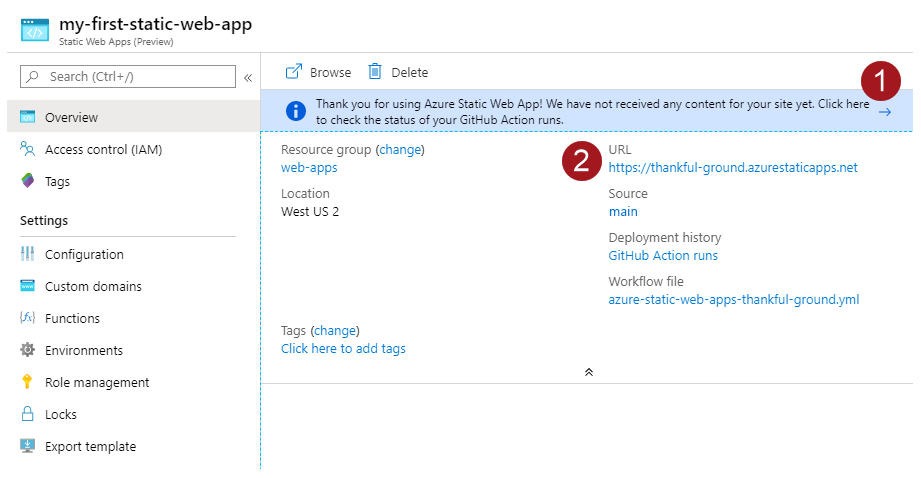
Selecting GitHub Action runs in the Overview takes you to the GitHub Actions running against your repository. Verify that the deployment action is complete before continuing.
Once the GitHub Actions workflow is complete, you can select the URL link to open the website in new tab.
Once the workflow is complete, you can select the URL link to open the website in new tab.
Clean up resources
If you're not going to continue to use this application, you can delete the Azure Static Web Apps instance through the following steps:
- Open the Azure portal.
- Search for my-first-web-static-app from the top search bar.
- Select the app name.
- Select Delete.
- Select Yes to confirm the delete action (this action may take a few moments to complete).