Note
Access to this page requires authorization. You can try signing in or changing directories.
Access to this page requires authorization. You can try changing directories.
This article explains how to deploy and configure Azure Elastic SAN Next Generation preview. An Elastic SAN has three main components: the SAN itself, volume groups, and volumes. SAN capacity includes a performance baseline. General purpose workloads can use the capacity-included baseline at no extra performance charge. You can provision extra SAN IOPS and throughput independently of capacity. The provisioned performance is shared across the SAN's volumes.
Use the Azure portal, Azure PowerShell, or Azure CLI procedures in this article to deploy Elastic SAN Next Generation. For Elastic SAN (Classic), see Deploy an Elastic SAN.
Important
Azure Elastic SAN Next Generation is currently in preview. See the Supplemental Terms of Use for Microsoft Azure Previews for legal terms that apply to Azure features that are in beta, preview, or otherwise not yet released into general availability.
Prerequisites
- An Azure subscription and a resource group for your deployment.
- Access to Elastic SAN Next Generation preview. Complete preview signup and subscription registration before deployment.
- A region supported for Elastic SAN Next Generation preview.
- If you use PowerShell, install Azure PowerShell. After preview approval, install or update the preview-compatible
Az.ElasticSanmodule before running the creation commands in this article. - If you use Azure CLI, install the latest Azure CLI. After preview approval, install or update the
elastic-sanextension before running the creation commands in this article.
Register for the preview
Sign up for the preview.
For the Direct Attach example in this article, register your subscription for ElasticSanPlusAccess in Microsoft.ElasticSan and ESANDataDiskAttach in Microsoft.Compute. Submitting a registration request isn't the same as receiving approval. Complete the preview approval process and confirm that both features are Registered before deployment.
Use either Azure PowerShell or Azure CLI to register your subscription for the preview.
Limitations
- Only locally redundant storage (LRS) is supported during the preview.
- The autoscaling scale-up limit can't exceed the maximum SAN capacity supported in the selected region. See Elastic SAN Next Generation scale targets.
- A Business critical volume group supports only direct-attach connections.
- Across all Business critical volume groups in a SAN, total reserved IOPS and total reserved throughput can each be up to 80% of their corresponding SAN-level provisioned values. Each group's reserved performance is available only to volumes within that group; it isn't shared with other Business critical volume groups.
- Direct-attach volume groups support only platform-managed encryption keys.
- You can't change a volume group's connection type or QoS tier after you create it.
Create the SAN
Choose the tab for your deployment tool. Use the same subscription, resource group, location, and resource names throughout the steps for that tool.
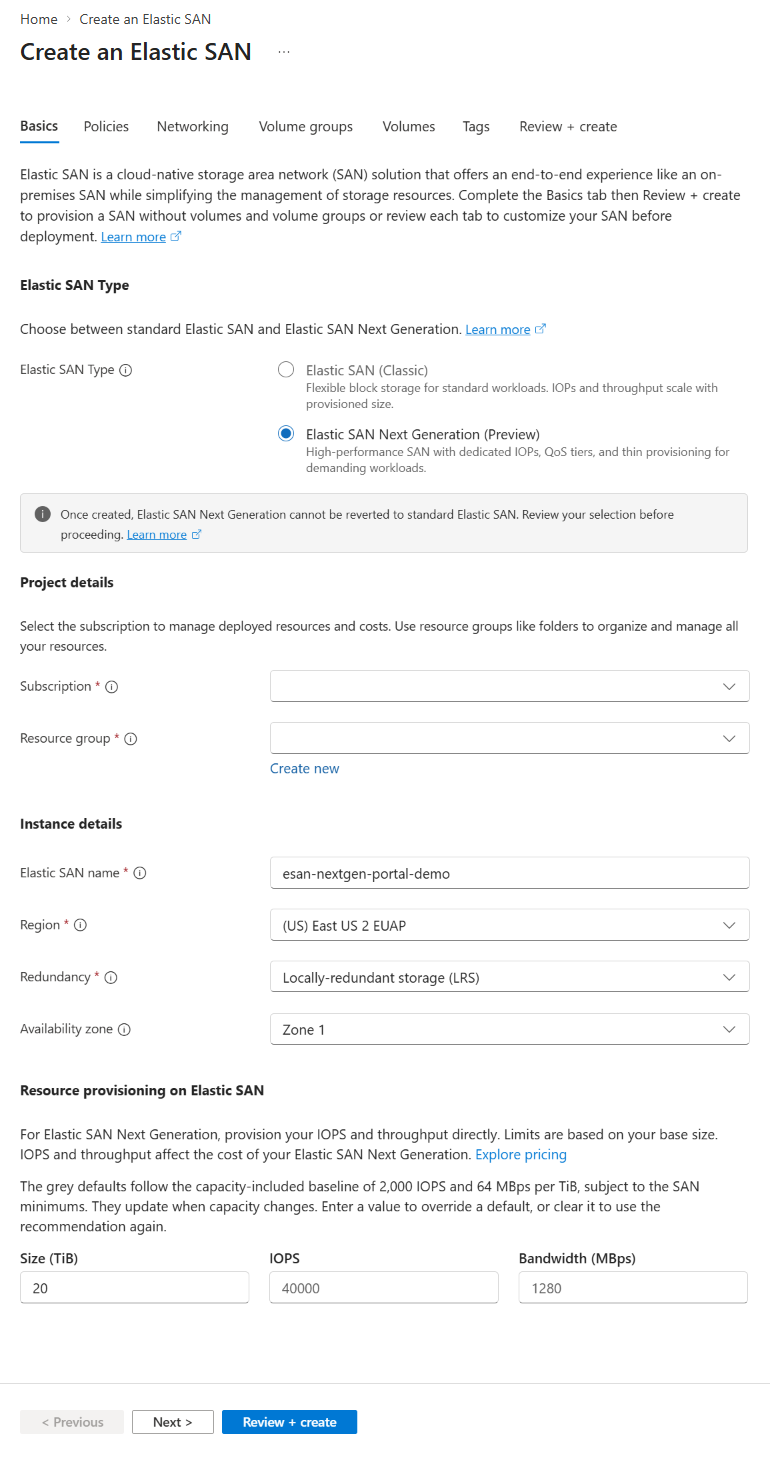
The portal steps create a Next Generation SAN, a volume group, and a volume in a single deployment. The screenshots show example settings; they don't define required defaults. Select the subscription, resource group, and supported preview region for your deployment.
In the Azure portal, search for Elastic SANs. In Storage center, open Elastic SAN, select Resources, and select Create.
On the Basics tab, under Elastic SAN Type, select Elastic SAN Next Generation (Preview), not Elastic SAN (Classic).
Important
After creation, you can't revert an Elastic SAN Next Generation to a classic SAN.
Under Project details, select your Subscription and Resource group.
Under Instance details, enter an Elastic SAN name, select a supported Region, and select Locally-redundant storage (LRS) for Redundancy. Review the Availability zone for your deployment.
The SAN name must be between 3 and 24 characters long. It can contain only lowercase letters, numbers, hyphens, and underscores, and must begin and end with a letter or number. Each hyphen and underscore must be preceded and followed by a letter or number.
Under Resource provisioning on Elastic SAN, set Size (TiB), IOPS, and Bandwidth (MBps). Each provisioned TiB includes a baseline of 2,000 IOPS and 64 MB/s. You can provision extra IOPS and throughput independently of capacity.
To use the portal's recommended performance, leave the IOPS and bandwidth fields at their gray values. These recommendations update when you change capacity. The following example uses 20 TiB, 40,000 IOPS, 1,280 MBps, and Zone 1. These settings are examples, not requirements for every deployment.
Elastic SAN Next Generation uses thin provisioning. The combined provisioned size of all volumes can't exceed either five times the SAN's provisioned capacity or the configured autoscale maximum, whichever is lower. Capacity is consumed as data is written to the volumes.
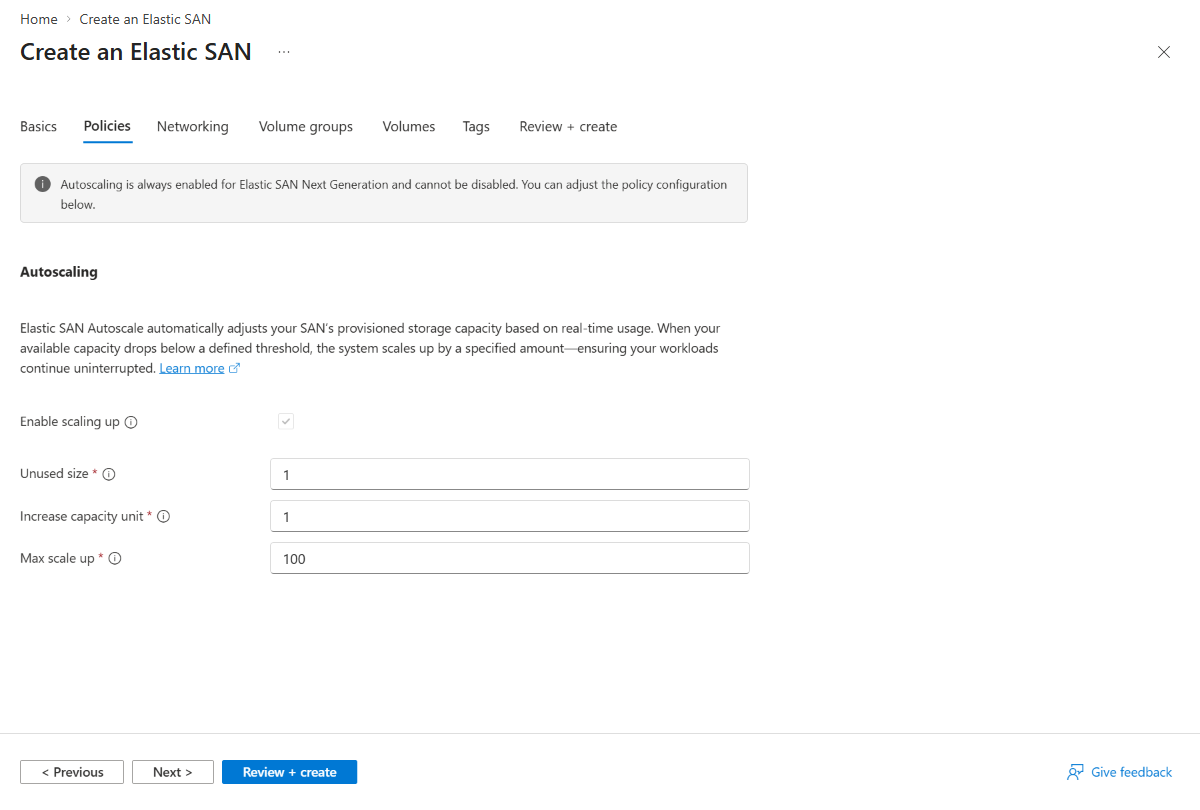
Select Next to open Policies. Autoscaling is always enabled for Next Generation SANs and can't be disabled. Review the following fields:
- Unused size: The amount of unused capacity that triggers an automatic capacity increase when available capacity drops below the threshold.
- Increase capacity unit: The amount of capacity that the SAN adds when autoscaling is triggered.
- Max scale up: The maximum capacity that autoscaling can provision. Enter a value within the range accepted by the portal.
The following example uses an unused capacity threshold of 1 TiB, a capacity increase of 1 TiB, and a scale-up limit of 100 TiB. Choose supported values for your deployment.
When you approach your unused capacity threshold, your SAN automatically provisions the specified capacity increase amount. This process repeats as needed until the SAN reaches the scale-up limit. You can modify all three autoscaling values after deployment.
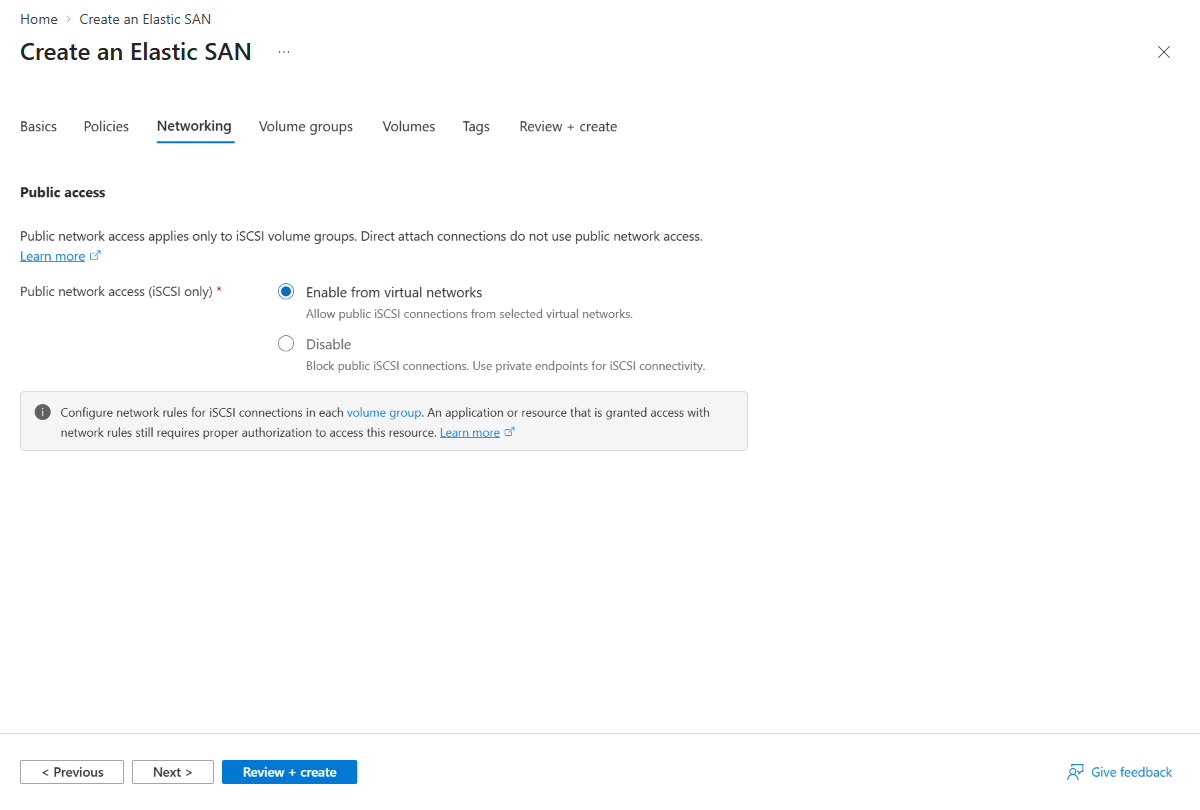
Select Next to open Networking. Review Public network access (iSCSI only). This setting applies only to iSCSI volume groups, not direct-attach connections.
For iSCSI, configure network rules in each volume group. If you disable public network access, use private endpoints for iSCSI connectivity. The following example selects Enable from virtual networks and uses a direct-attach volume group, which doesn't require virtual network configuration.
Select Next to open Volume groups and continue with the next section. To deploy only the SAN, skip volume groups and volumes and proceed to Review and deploy.
Create a volume group
PowerShell and Azure CLI use the parameter value PerformanceCritical to select the Business critical tier. This executable value differs from the customer-facing tier name.
On the Volume groups tab, select Create volume group.
On the volume group's Basics tab, enter a Volume group name, such as
volume-group-01.The volume group name must be between 3 and 63 characters long. It can contain only lowercase letters, numbers, and hyphens, and must begin and end with a letter or number. Each hyphen must be preceded and followed by a letter or number. You can't change the volume group name after you create it.
Select a QoS tier:
- General Purpose (default): Shares performance and supports direct-attach and iSCSI connections.
- Business Critical: Supports direct-attach connections. Specify the IOPS and throughput to reserve for the volume group. The group's reserved performance is available only to volumes within that group. Across all Business Critical volume groups in the SAN, total reserved IOPS and total reserved throughput can each be up to 80% of their corresponding SAN-level provisioned values.
Select a Connection type. The example keeps Direct attach, the default. Direct attach doesn't require networking configuration, so the volume group's Networking tab is disabled.
If you select General Purpose with iSCSI, configure virtual network access control lists (ACLs) or private endpoints. Enable CRC Protection unless you plan to connect the volume group to Azure VMware Solution or use clients running Fedora or a downstream Linux distribution such as Red Hat Enterprise Linux or CentOS.
Note
CRC protection only applies to iSCSI connections.
For iSCSI network setup, see Configure service endpoints or Configure private endpoints.
Review Encryption type. For direct attach, keep Platform-managed key; Customer-managed key isn't available. For iSCSI, you can use platform-managed or customer-managed keys. Before you choose a customer-managed key for an iSCSI volume group, complete the customer-managed key prerequisites and setup, including the required key vault, key, and managed identity permissions.
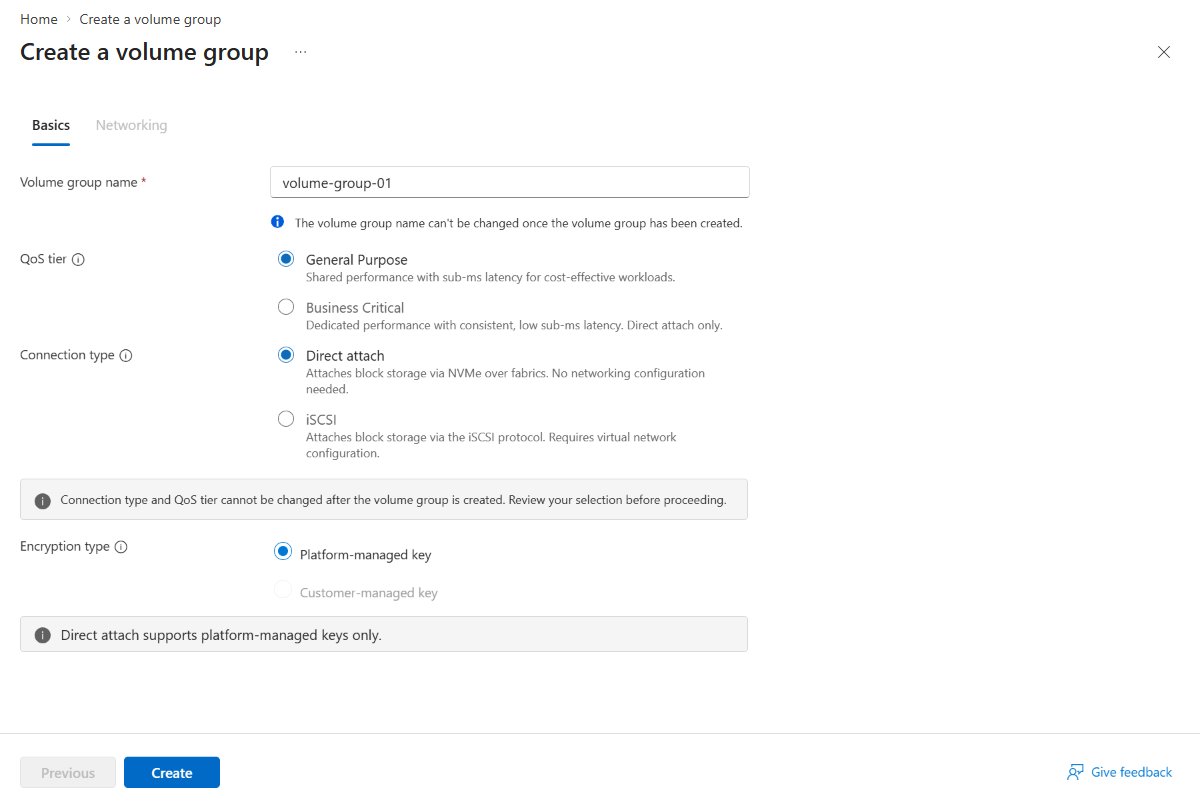
Select Create to add the volume group to the pending SAN configuration. On the SAN's Volume groups tab, verify that your group appears, then select Next to open Volumes.
Create a volume
On the Volumes tab, enter a volume name in the Volumes column, such as
volume-01.Select the Volume group where you want to create the volume. The example uses
volume-group-01.Enter Volume size (GiB). This field has no default. Volume capacity is provisioned in 1-GiB increments, and you can create a volume as small as 1 GiB. The example uses 1 GiB.
The volume inherits the encryption and connection settings of its volume group. The portal displays Maximum IOPS and Maximum bandwidth (MBps) based on the volume size.
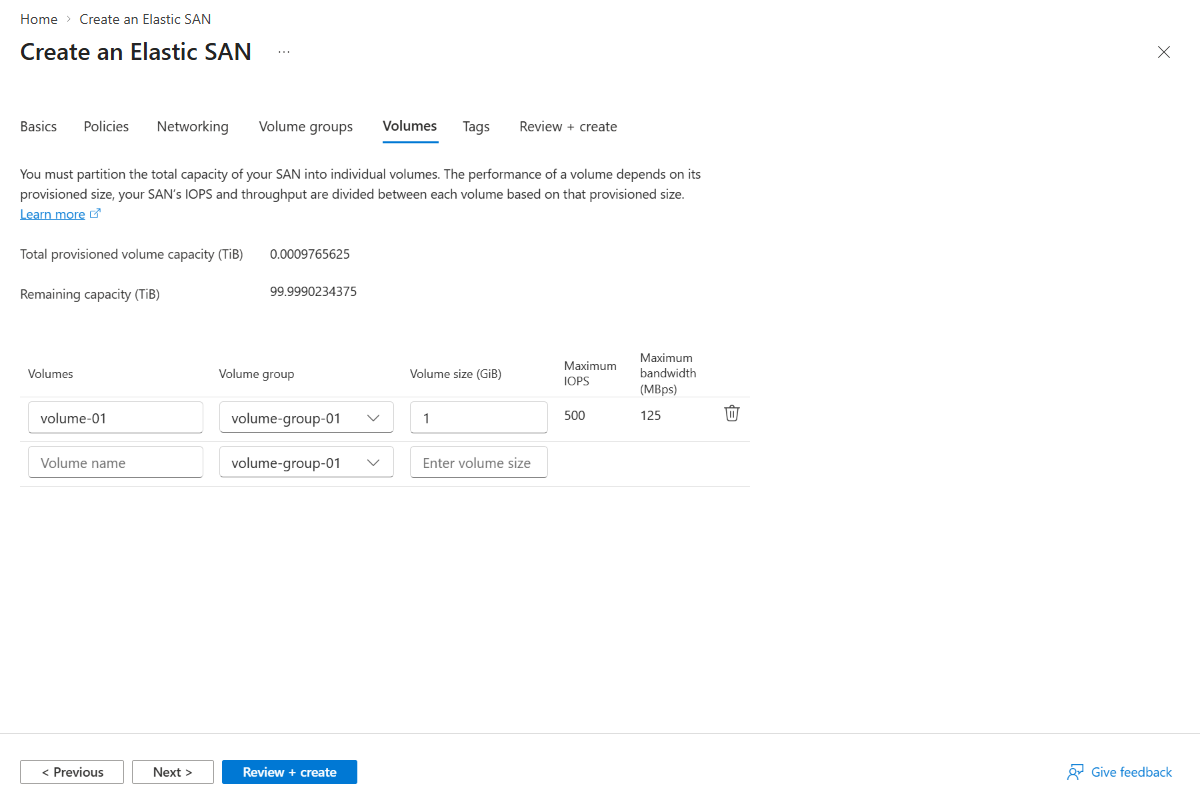
Leave the extra empty row blank unless you want to add another volume. Select Next to open Tags.
Review and deploy
For an Azure portal deployment, review and submit the pending configuration. For PowerShell or Azure CLI, verify the resources created in the preceding sections.
On Tags, optionally add name/value pairs. To keep the default values, leave the fields blank.
Select Next to open Review + create. Wait for Validation passed, then review the SAN type, location, redundancy, capacity, performance, autoscaling policy, volume group, and volume.
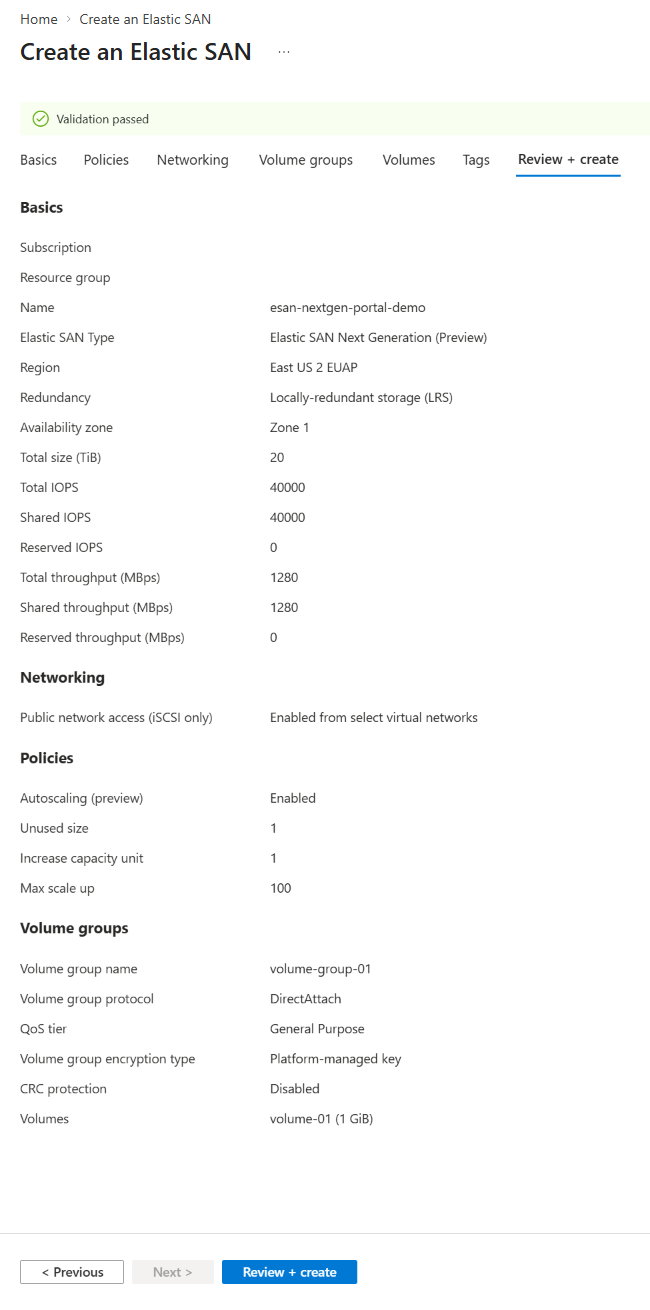
Select Review + create at the bottom of the review page to submit the deployment.
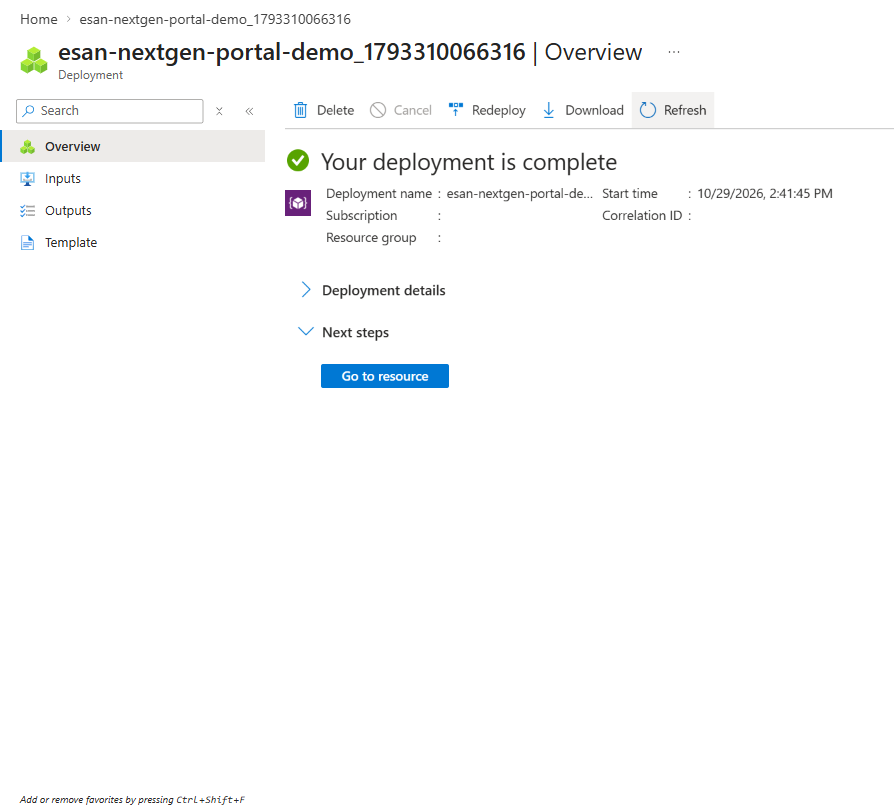
Wait until the deployment page displays Your deployment is complete. Select Go to resource to open the SAN.
Next steps
Creating the resources doesn't attach a volume to a VM or configure a guest operating system. Continue with the guide for your connection type:
- Direct Attach: Attach and detach Elastic SAN Next Generation volumes.
- iSCSI on Windows: Connect to Elastic SAN volumes from Windows.
- iSCSI on Linux: Connect to Elastic SAN volumes from Linux.
- iSCSI with Azure VMware Solution: Use Azure VMware Solution with Azure Elastic SAN.