Install Update 5 on your StorSimple device\

Caution

ACTION REQUIRED: StorSimple Data Manager, StorSimple Device Manager, StorSimple 1200, and StorSimple 8000 have reached their end of support. End of support details were published in 2019 on the Microsoft Lifecycle Policy and Azure Communications pages. Additional notifications were also sent via email and posted on the Azure portal and StorSimple documentation site. Contact Microsoft Support for additional details.

Overview

This tutorial explains how to install Update 5 on a StorSimple device running an earlier software version via the Azure portal and using the hotfix method. The hotfix method is used when you are trying to install Update 5 on a device running pre-Update 3 versions. The hotfix method is also used when a gateway is configured on a network interface other than DATA 0 of the StorSimple device and you are trying to update from a pre-Update 1 software version.

Update 5 includes device software, Storport and Spaceport, OS security updates and OS updates, and disk firmware updates. The device software, Spaceport, Storport, security, and other OS updates are non-disruptive updates. The non-disruptive or regular updates can be applied via the Azure portal or via the hotfix method. The disk firmware updates are disruptive updates and are applied when the device is in maintenance mode via the hotfix method using the Windows PowerShell interface of the device.

Important

  • Update 5 is a mandatory update and should be installed immediately. For more information, see Update 5 release notes.
  • A set of manual and automatic pre-checks are done prior to the install to determine the device health in terms of hardware state and network connectivity. These pre-checks are performed only if you apply the updates from the Azure portal.
  • We strongly recommend that when updating a device running versions prior to Update 3, you install the updates using hotfix method. If you encounter any issues, log a support ticket.
  • We recommend that you install the software and other regular updates via the Azure portal. You should only go to the Windows PowerShell interface of the device (to install updates) if the pre-update gateway check fails in the portal. Depending upon the version you are updating from, the updates may take 4 hours (or greater) to install. The maintenance mode updates must be installed via the Windows PowerShell interface of the device. As maintenance mode updates are disruptive updates, these result in a down time for your device.
  • If running the optional StorSimple Snapshot Manager, ensure that you have upgraded your Snapshot Manager version to Update 5 prior to updating the device.

Preparing for updates

You will need to perform the following steps before you scan and apply the update:

  1. Take a cloud snapshot of the device data.

  2. Ensure that your controller fixed IPs are routable and can connect to the Internet. These fixed IPs will be used to service updates to your device. You can test this by running the following cmdlet on each controller from the Windows PowerShell interface of the device:

    Test-Connection -Source <Fixed IP of your device controller> -Destination <Any IP or computer name outside of datacenter network>

    Sample output for Test-Connection when fixed IPs can connect to the Internet

    Controller0>Test-Connection -Source 10.126.173.91 -Destination bing.com
    
    Source      Destination     IPV4Address      IPV6Address
    ----------------- -----------  -----------
    HCSNODE0  bing.com        204.79.197.200
    HCSNODE0  bing.com        204.79.197.200
    HCSNODE0  bing.com        204.79.197.200
    HCSNODE0  bing.com        204.79.197.200
    
    Controller0>Test-Connection -Source 10.126.173.91 -Destination  204.79.197.200
    
    Source      Destination       IPV4Address    IPV6Address
    ----------------- -----------  -----------
    HCSNODE0  204.79.197.200  204.79.197.200
    HCSNODE0  204.79.197.200  204.79.197.200
    HCSNODE0  204.79.197.200  204.79.197.200
    HCSNODE0  204.79.197.200  204.79.197.200
    

After you have successfully completed these manual pre-checks, you can proceed to scan and install the updates.

Install Update 5 via the Azure portal

Perform the following steps to update your device to Update 5.

Note

Microsoft pulls additional diagnostic information from the device. As a result, when our operations team identifies devices that are having problems, we are better equipped to collect information from the device and diagnose issues.

To install an update from the Azure portal

  1. On the StorSimple service page, select your device.

    Select device

  2. Navigate to Device settings > Device updates.

    Click Device updates

  3. A notification appears if new updates are available. Alternatively, in the Device updates blade, click Scan Updates. A job is created to scan for available updates. You are notified when the job completes successfully.

    Click Device updates 2

  4. We recommend that you review the release notes before you apply an update on your device. To apply updates, click Install updates. In the Confirm regular updates blade, review the prerequisites to complete before you apply updates. Select the checkbox to indicate that you are ready to update the device and then click Install.

    Click Device updates 3

  5. A set of prerequisite checks starts. These checks include:

    • Controller health checks to verify that both the device controllers are healthy and online.

    • Hardware component health checks to verify that all the hardware components on your StorSimple device are healthy.

    • DATA 0 checks to verify that DATA 0 is enabled on your device. If this interface is not enabled, you must enable it and then retry.

      The update is downloaded and installed only if all the checks are successfully completed. You are notified when the checks are in progress. If the prechecks fail, then you will be provided with the reasons for failure. Address those issues and then retry the operation. You may need to contact Microsoft Support if you cannot address these issues by yourself.

  6. After the prechecks are successfully completed, an update job is created. You are notified when the update job is successfully created.

    Update job creation

    The update is then applied on your device.

  7. The update takes a few hours to complete. Select the update job and click Details to view the details of the job at any time.

    Update job creation 2

    You can also monitor the progress of the update job from Device settings > Jobs. On the Jobs blade, you can see the update progress.

    Update job creation 3

  8. After the job is complete, navigate to the Device settings > Device updates. The software version should now be updated.

Verify that your device is running StorSimple 8000 Series Update 5 (6.3.9600.17845). The Last updated date should be modified.

You will now see that the Maintenance mode updates are available (this message might continue to be displayed for up to 24 hours after you install the updates). The steps to install maintenance mode update are detailed in the next section.

Install maintenance mode updates via Windows PowerShell for StorSimple

When you apply maintenance mode updates to StorSimple device, all I/O requests are paused. Services such as non-volatile random access memory (NVRAM) or the clustering service are stopped. Both controllers reboot when you enter or exit this mode. When you exit this mode, all the services resume and are healthy. (This may take a few minutes.)

Important

  • Before entering maintenance mode, verify that both device controllers are healthy in the Azure portal. If the controller is not healthy, Contact Microsoft Support for the next steps.
  • When you are in maintenance mode, you need to first update one controller and then the other controller.
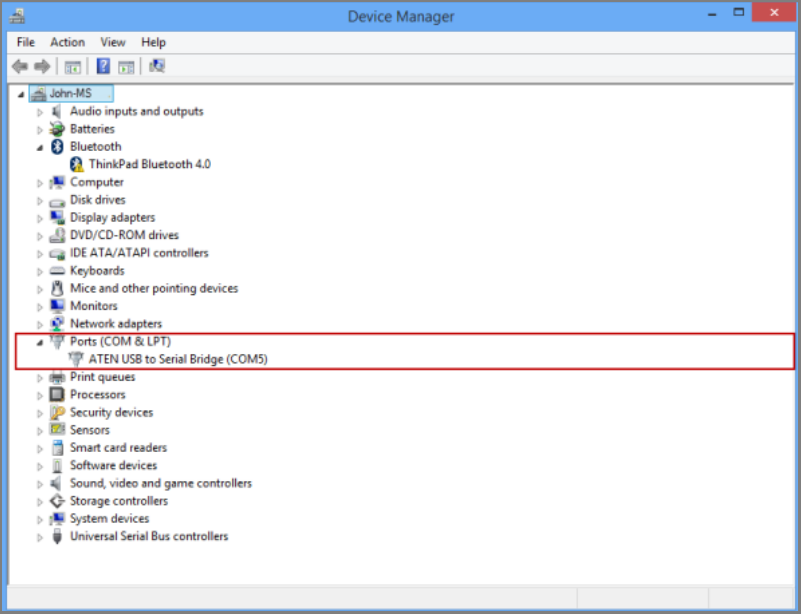
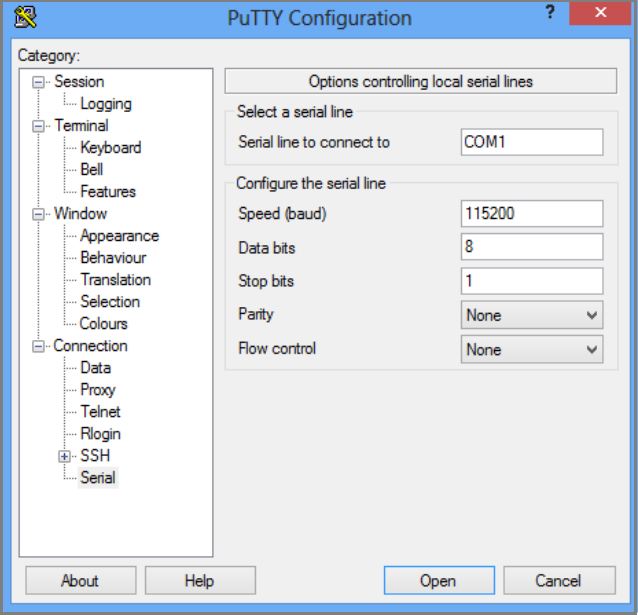
  1. Use PuTTY to connect to the serial console. Follow the detailed instructions in Use PuTTy to connect to the serial console. At the command prompt, press Enter. Select Option 1, Log in with full access.

  2. To place the controller in maintenance mode, type:

    Enter-HcsMaintenanceMode

    Both the controllers restart into maintenance mode.

  3. Install your maintenance mode updates. Type:

    Start-HcsUpdate

    You are prompted for confirmation. After you confirm the updates, they are installed on the controller that you are currently accessing. After the updates are installed, the controller restarts.

  4. Monitor the status of updates. Sign in to the peer controller as the current controller is updating and is not able to process any other commands. Type:

    Get-HcsUpdateStatus

    If the RunInProgress is True, the update is still in progress. If RunInProgress is False, it indicates that the update has completed.

  5. After the disk firmware updates are successfully applied and the updated controller has restarted, verify the disk firmware version. On the updated controller, type:

    Get-HcsFirmwareVersion

    The expected disk firmware versions are: XMGJ, XGEG, KZ50, F6C2, VR08, N003, 0107

  6. Exit the maintenance mode. Type the following command for each device controller:

    Exit-HcsMaintenanceMode

    The controllers restart when you exit maintenance mode.

  7. Return to the Azure portal. The portal may not show that you installed the maintenance mode updates for 24 hours.

Install Update 5 as a hotfix

The software versions that can be upgraded using the hotfix method are:

  • Update 0.1, 0.2, 0.3
  • Update 1, 1.1, 1.2
  • Update 2, 2.1, 2.2
  • Update 3, 3.1
  • Update 4

Note

The recommended method to install Update 5 is via the Azure portal when trying to update from Update 3 and later version. When updating a device running versions prior to Update 3, use this procedure. You can also use this procedure if you fail the gateway check when trying to install the updates through the Azure portal. The check fails when you have a gateway assigned to a non-DATA 0 network interface and your device is running a software version earlier than Update 1.

The hotfix method involves the following three steps:

  1. Download the hotfixes from the Microsoft Update Catalog.
  2. Install and verify the regular mode hotfixes.
  3. Install and verify the maintenance mode hotfix.

Download updates for your device

You must download and install the following hotfixes in the prescribed order and the suggested folders:

Order KB Description Update type Install time Install in folder
1. KB4037264 Software update
Download both HcsSoftwareUpdate.exe and CisMSDAgent.exe
Regular

Non-disruptive
~ 25 mins FirstOrderUpdate

If updating from a device running Update 4, you only need to install the OS cumulative updates as second order updates.

Order KB Description Update type Install time Install in folder
2A. KB4025336 OS cumulative updates package
Download Windows Server 2012 R2 version
Regular

Non-disruptive
- SecondOrderUpdate

If installing from a device running Update 3 or earlier, install the following in addition to the cumulative updates.

Order KB Description Update type Install time Install in folder
2B. KB4011841
KB4011842
LSI driver and firmware updates
USM firmware update (version 3.38)
Regular

Non-disruptive
~ 3 hrs
(includes 2A. + 2B. + 2C.)
SecondOrderUpdate
2C. KB3139398
KB3142030
KB3108381
KB3153704
KB3174644
KB3139914
OS security updates package
Download Windows Server 2012 R2 version
Regular

Non-disruptive
- SecondOrderUpdate
2D. KB3146621
KB3103616
KB3121261
KB3123538
OS updates package
Download Windows Server 2012 R2 version
Regular

Non-disruptive
- SecondOrderUpdate

You may also need to install disk firmware updates on top of all the updates shown in the preceding tables. You can verify whether you need the disk firmware updates by running the Get-HcsFirmwareVersion cmdlet. If you are running these firmware versions: XMGJ, XGEG, KZ50, F6C2, VR08, N003, 0107, then you do not need to install these updates.

Order KB Description Update type Install time Install in folder
3. KB4037263 Disk firmware Maintenance

Disruptive
~ 30 mins ThirdOrderUpdate


Important

  • If updating from Update 4, the total install time is close to 4 hours.
  • Before using this procedure to apply the update, make sure that both the device controllers are online and all the hardware components are healthy.

Perform the following steps to download and install the hotfixes.

To download hotfixes

Perform the following steps to download the software update from the Microsoft Update Catalog.

  1. Start Internet Explorer and navigate to http://catalog.update.microsoft.com.

  2. If this is your first time using the Microsoft Update Catalog on this computer, click Install when prompted to install the Microsoft Update Catalog add-on.

    Install catalog

  3. In the search box of the Microsoft Update Catalog, enter the Knowledge Base (KB) number of the hotfix you want to download, for example 4037264, and then click Search.

    The hotfix listing appears, for example, Cumulative Software Bundle Update 5.0 for StorSimple 8000 Series.

    Search catalog

  4. Click Download. Specify or Browse to a local location where you want the downloads to appear. Click the files to download to the specified location and folder. The folder can also be copied to a network share that is reachable from the device.

  5. Search for any additional hotfixes listed in the table above (4037266), and download the corresponding files to the specific folders as listed in the preceding table.

Note

The hotfixes must be accessible from both controllers to detect any potential error messages from the peer controller.

The hotfixes must be copied in 3 separate folders. For example, the device software/Cis/MDS agent update can be copied in FirstOrderUpdate folder, all the other non-disruptive updates could be copied in the SecondOrderUpdate folder, and maintenance mode updates copied in ThirdOrderUpdate folder.

To install and verify regular mode hotfixes

Perform the following steps to install and verify regular-mode hotfixes. If you already installed them using the Azure portal, skip ahead to install and verify maintenance mode hotfixes.

  1. To install the hotfixes, access the Windows PowerShell interface on your StorSimple device serial console. Follow the detailed instructions in Use PuTTy to connect to the serial console. At the command prompt, press Enter.

  2. Select option 1, Log in with full access. We recommend that you install the hotfix on the passive controller first.

  3. To install the hotfix, at the command prompt, type:

    Start-HcsHotfix -Path <path to update file> -Credential <credentials in domain\username format>

    Use IP rather than DNS in share path in the above command. The credential parameter is used only if you are accessing an authenticated share.

    We recommend that you use the credential parameter to access shares. Even shares that are open to “everyone” are typically not open to unauthenticated users.

  4. Supply the password when prompted. A sample output for installing the first order updates is shown below. For the first order update, you need to point to the specific file.

    Note

    You should install the HcsSoftwareUpdate.exe first. After this install has completed, then install CisMdsAgentUpdate.exe.

    Controller0>Start-HcsHotfix -Path \\10.100.100.100\share
    \FirstOrderUpdate\HcsSoftwareUpdate.exe -Credential contoso\John
    
    Confirm
    
    This operation starts the hotfix installation and could reboot one or
    both of the controllers. If the device is serving I/Os, these will not
    be disrupted. Are you sure you want to continue?
    [Y] Yes [N] No [?] Help (default is "Y"): Y
    
    
  5. Type Y when prompted to confirm the hotfix installation.

  6. Monitor the update by using the Get-HcsUpdateStatus cmdlet. The update will first complete on the passive controller. Once the passive controller is updated, there will be a failover and the update will then get applied on the other controller. The update is complete when both the controllers are updated.

    The following sample output shows the update in progress. The RunInprogress is True when the update is in progress.

    Controller0>Get-HcsUpdateStatus
    RunInprogress       : True
    LastHotfixTimestamp :
    LastUpdateTimestamp : 07/28/2017 2:04:02 AM
    Controller0Events   :
    Controller1Events   :
    

    The following sample output indicates that the update is finished. The RunInProgress is False when the update is complete.

    Controller0>Get-HcsUpdateStatus
    RunInprogress       : False
    LastHotfixTimestamp : 07/28/2017 9:15:55 AM
    LastUpdateTimestamp : 07/28/2017 9:06:07 AM
    Controller0Events   :
    Controller1Events   :
    

    Note

    Occasionally, the cmdlet reports False when the update is still in progress. To ensure that the hotfix is complete, wait for a few minutes, rerun this command and verify that the RunInProgress is False. If it is, then the hotfix has completed.

  7. After the software update is complete, verify the system software versions. Type:

    Get-HcsSystem

    You should see the following versions:

    • FriendlySoftwareVersion: StorSimple 8000 Series Update 5.0

    • HcsSoftwareVersion: 6.3.9600.17845

      If the version number does not change after applying the update, it indicates that the hotfix has failed to apply. Should you see this, please contact Microsoft Support for further assistance.

      Important

      You must restart the active controller via the Restart-HcsController cmdlet before applying the next update.

  8. Repeat steps 3-6 to install the CisMDSAgentupdate.exe agent downloaded to your FirstOrderUpdate folder.

  9. Repeat steps 3-6 to install the second order updates.

    Note

    For second order updates, multiple updates can be installed by just running the Start-HcsHotfix cmdlet and pointing to the folder where second order updates are located. The cmdlet will execute all the updates available in the folder. If an update is already installed, the update logic will detect that and not apply that update.

    After all the hotfixes are installed, use the Get-HcsSystem cmdlet. The versions should be:

    • CisAgentVersion: 1.0.9724.0
    • MdsAgentVersion: 35.2.2.0
    • Lsisas2Version: 2.0.78.00

To install and verify maintenance mode hotfixes

Use KB4037263 to install disk firmware updates. These are disruptive updates and take around 30 minutes to complete. You can choose to install these in a planned maintenance window by connecting to the device serial console.

Note

If your disk firmware is already up-to-date, you won't need to install these updates. Run the Get-HcsUpdateAvailability cmdlet from the device serial console to check if updates are available and whether the updates are disruptive (maintenance mode) or non-disruptive (regular mode) updates.

To install the disk firmware updates, follow the instructions below.

  1. Place the device in the maintenance mode.

    Note

    Do not use Windows PowerShell remoting when connecting to a device in maintenance mode. Instead run this cmdlet on the device controller when connected through the device serial console.

    To place the controller in maintenance mode, type:

    Enter-HcsMaintenanceMode

    A sample output is shown below.

    Controller0>Enter-HcsMaintenanceMode
    Checking device state...
    
    In maintenance mode, your device will not service IOs and will be disconnected from the Microsoft Azure StorSimple Manager service. Entering maintenance mode will end the current session and reboot both controllers, which takes a few minutes to complete. Are you sure you want to enter maintenance mode?
    [Y] Yes [N] No (Default is "Y"): Y
    
    -----------------------MAINTENANCE MODE------------------------
    Microsoft Azure StorSimple Appliance Model 8600
    Name: Update4-8600-mystorsimple
    Copyright (C) 2014 Microsoft Corporation. All rights reserved.
    You are connected to Controller0 - Passive
    ---------------------------------------------------------------
    
    Serial Console Menu
    [1] Log in with full access
    [2] Log into peer controller with full access
    [3] Connect with limited access
    [4] Change language
    Please enter your choice>
    

    Both the controllers then restart into maintenance mode.

  2. To install the disk firmware update, type:

    Start-HcsHotfix -Path <path to update file> -Credential <credentials in domain\username format>

    A sample output is shown below.

    Controller1>Start-HcsHotfix -Path \\10.100.100.100\share\ThirdOrderUpdates\ -Credential contoso\john
    Enter Password:
    WARNING: In maintenance mode, hotfixes should be installed on each controller sequentially. After the hotfix is installed on this controller, install it on the peer controller.
    Confirm
    This operation starts a hotfix installation and could reboot one or both of the controllers. By installing new updates you agree to, and accept any additional terms associated with, the new functionality listed in the release notes (https://go.microsoft.com/fwLink/?LinkID=613790). Are you sure you want to continue?
    [Y] Yes [N] No (Default is "Y"): Y
    WARNING: Installation is currently in progress. This operation can take several minutes to complete.
    
  3. Monitor the install progress using Get-HcsUpdateStatus command. The update is complete when the RunInProgress changes to False.

  4. After the installation is complete, the controller on which the maintenance mode hotfix was installed restarts. Sign in as option 1, Log in with full access, and verify the disk firmware version. Type:

    Get-HcsFirmwareVersion

    The expected disk firmware versions are:

    XMGJ, XGEG, KZ50, F6C2, VR08, N003, 0107

    A sample output is shown below.

       -----------------------MAINTENANCE MODE------------------------
       Microsoft Azure StorSimple Appliance Model 8600
       Name: Update4-8600-mystorsimple
       Software Version: 6.3.9600.17845
       Copyright (C) 2014 Microsoft Corporation. All rights reserved.
       You are connected to Controller1
       ---------------------------------------------------------------
    
       Controller1>Get-HcsFirmwareVersion
    
       Controller0 : TalladegaFirmware
        ActiveBIOS:0.45.0010
           BackupBIOS:0.45.0006
           MainCPLD:17.0.000b
           ActiveBMCRoot:2.0.001F
           BackupBMCRoot:2.0.001F
           BMCBoot:2.0.0002
           LsiFirmware:20.00.04.00
           LsiBios:07.37.00.00
           Battery1Firmware:06.2C
           Battery2Firmware:06.2C
           DomFirmware:X231600
           CanisterFirmware:3.5.0.56
           CanisterBootloader:5.03
           CanisterConfigCRC:0x9134777A
           CanisterVPDStructure:0x06
           CanisterGEMCPLD:0x19
           CanisterVPDCRC:0x142F7DC2
           MidplaneVPDStructure:0x0C
           MidplaneVPDCRC:0xA6BD4F64
           MidplaneCPLD:0x10
           PCM1Firmware:1.00|1.05
           PCM1VPDStructure:0x05
           PCM1VPDCRC:0x41BEF99C
           PCM2Firmware:1.00|1.05
           PCM2VPDStructure:0x05
           PCM2VPDCRC:0x41BEF99C
    
        EbodFirmware
           CanisterFirmware:3.5.0.56
           CanisterBootloader:5.03
           CanisterConfigCRC:0xB23150F8
           CanisterVPDStructure:0x06
           CanisterGEMCPLD:0x14
           CanisterVPDCRC:0xBAA55828
           MidplaneVPDStructure:0x0C
           MidplaneVPDCRC:0xA6BD4F64
           MidplaneCPLD:0x10
           PCM1Firmware:3.11
           PCM1VPDStructure:0x03
           PCM1VPDCRC:0x6B58AD13
           PCM2Firmware:3.11
           PCM2VPDStructure:0x03
           PCM2VPDCRC:0x6B58AD13
    
        DisksFirmware
           SmrtStor:TXA2D20800GA6XYR:KZ50
           SmrtStor:TXA2D20800GA6XYR:KZ50
           SmrtStor:TXA2D20800GA6XYR:KZ50
           SmrtStor:TXA2D20800GA6XYR:KZ50
           SmrtStor:TXA2D20800GA6XYR:KZ50
           WD:WD4001FYYG-01SL3:VR08
           WD:WD4001FYYG-01SL3:VR08
           WD:WD4001FYYG-01SL3:VR08
           WD:WD4001FYYG-01SL3:VR08
           WD:WD4001FYYG-01SL3:VR08
           WD:WD4001FYYG-01SL3:VR08
           WD:WD4001FYYG-01SL3:VR08
           WD:WD4001FYYG-01SL3:VR08
           WD:WD4001FYYG-01SL3:VR08
           WD:WD4001FYYG-01SL3:VR08
           WD:WD4001FYYG-01SL3:VR08
           WD:WD4001FYYG-01SL3:VR08
           WD:WD4001FYYG-01SL3:VR08
           WD:WD4001FYYG-01SL3:VR08
           WD:WD4001FYYG-01SL3:VR08
           WD:WD4001FYYG-01SL3:VR08
           WD:WD4001FYYG-01SL3:VR08
           WD:WD4001FYYG-01SL3:VR08
           WD:WD4001FYYG-01SL3:VR08
    

    Run the Get-HcsFirmwareVersion command on the second controller to verify that the software version has been updated. You can then exit the maintenance mode. To do so, type the following command for each device controller:

    Exit-HcsMaintenanceMode

  5. The controllers restart when you exit maintenance mode. After the disk firmware updates are successfully applied and the device has exited maintenance mode, return to the Azure portal. Note that the portal might not show that you installed the maintenance mode updates for 24 hours.

Troubleshooting update failures

What if you see a notification that the pre-upgrade checks have failed?

If a pre-check fails, make sure that you have looked at the detailed notification bar at the bottom of the page. This provides guidance as to which pre-check has failed. For instance, you receive a notification that the controller health check and hardware component health check have failed. Go to Monitor > Hardware health. You need to make sure that both controllers are healthy and online. You also need to make sure that all the hardware components in the StorSimple device are shown to be healthy in this blade. You can then try to install updates. If you are not able to fix the hardware component issues, then you will need to contact Microsoft Support for next steps.

What if you receive a "Could not install updates" error message, and the recommendation is to refer to the update troubleshooting guide to determine the cause of the failure?

One likely cause for this could be that you do not have connectivity to the Microsoft Update servers. This is a manual check that needs to be performed. If you lose connectivity to the update server, your update job would fail. You can check the connectivity by running the following cmdlet from the Windows PowerShell interface of your StorSimple device:

Test-Connection -Source <Fixed IP of your device controller> -Destination <Any IP or computer name outside of datacenter>

Run the cmdlet on both controllers.

If you have verified the connectivity exists, and you continue to see this issue, please contact Microsoft Support for next steps.

What if you see an update failure when updating your device to Update 4 and both the controllers are running Update 4?

Starting Update 4, if both the controllers are running the same software version and if there is an update failure, the controllers do not go into recovery mode. This situation can arise if the device software hotfix (1st order update) is applied to both the controllers successfully but other hotfixes (2nd order and 3rd order) are yet to be applied. Starting Update 4, the controllers will go into recovery mode only if the two controllers are running different software versions.

If the user sees an update failure when both controllers are running Update 4, we recommend that they wait a few minutes and then retry updating. If the retry does not succeed, then they should contact Microsoft Support.

Next steps

Learn more about the Update 5 release.