Note
Access to this page requires authorization. You can try signing in or changing directories.
Access to this page requires authorization. You can try changing directories.
Streaming units (SUs) represent the computing resources that execute a Stream Analytics job. When you increase the number of SUs, you allocate more CPU and memory resources to your job. Stream Analytics offers two types of scaling, which you can use to run the right number of Streaming Units (SUs) to handle the load of your job.
This article explains how you can use these different scaling methods for your Stream Analytics job in the Azure portal.
The two types of scaling supported by Stream Analytics are manual scale and custom autoscale.
Manual scale allows you to maintain and adjust a fixed number of streaming units for your job.
Custom autoscale allows you to specify the minimum and maximum number of streaming units for your job to dynamically adjust based on your rule definitions. Custom autoscale examines the preconfigured set of rules. Then it determines to add SUs to handle increases in load or to reduce the number of SUs when computing resources are sitting idle. For more information about autoscale in Azure Monitor, see Overview of autoscale in Microsoft Azure.
Note
Although you can use manual scale regardless of the job's state, you can only enable custom autoscale when the job is in the running state.
Examples of custom autoscale rules include:
- Increase streaming units when the average SU% utilization of the job over the last 2 minutes goes above 75%.
- Decrease streaming units when the average SU% utilization of the job over the last 15 minutes is below 30%.
- Use more streaming units during business hours and fewer during off hours.
Autoscale limits
All Stream Analytics jobs can autoscale between 1/3, 2/3 and 1 SU V2. Autoscaling beyond 1 SU V2 requires your job to have a parallel or embarrassingly parallel topology. Parallel jobs created with less than or equal to 1 streaming unit can autoscale to the maximum SU value for that job based on the number of partitions.
Scaling your Stream Analytics job
First, follow these steps to go to the Scale page for your Azure Stream Analytics job.
- Sign in to Azure portal.
- In the list of resources, find the Stream Analytics job that you want to scale and then open it.
- In the job page, under the Configure heading, select Scale.
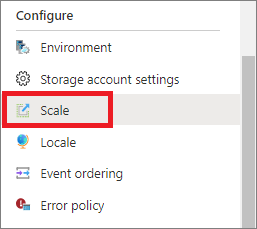
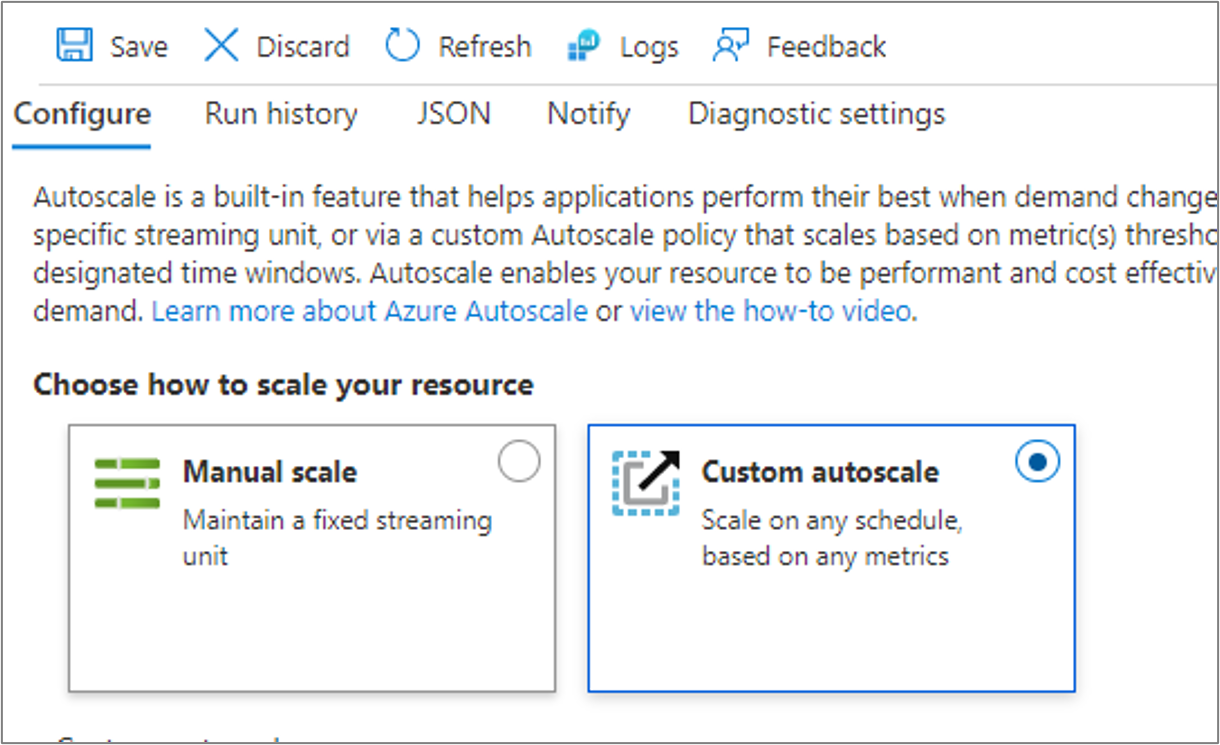
- Under Configure, you see two options for scaling: Manual scale and Custom autoscale.


Manual scale
This setting allows you to set a fixed number of streaming units for your job. The default number of SUs is 1 when creating a job.
To manually scale your job
- Select Manual scale if it isn't already selected.
- Use the Slider to set the SUs for the job or type directly into the box. You're limited to specific SU settings when the job is running. The limitation depends on your job configuration.
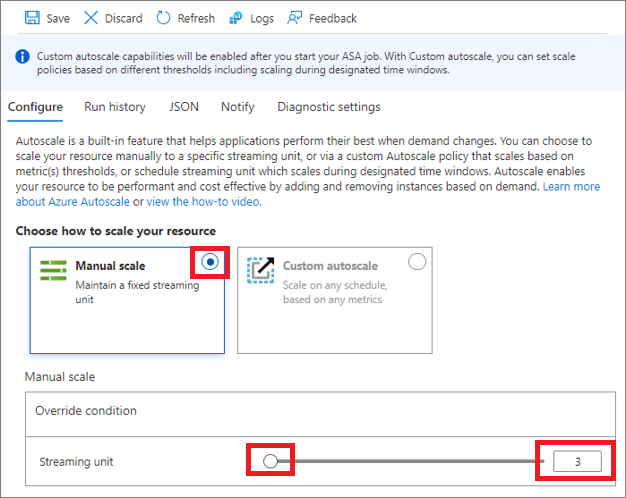
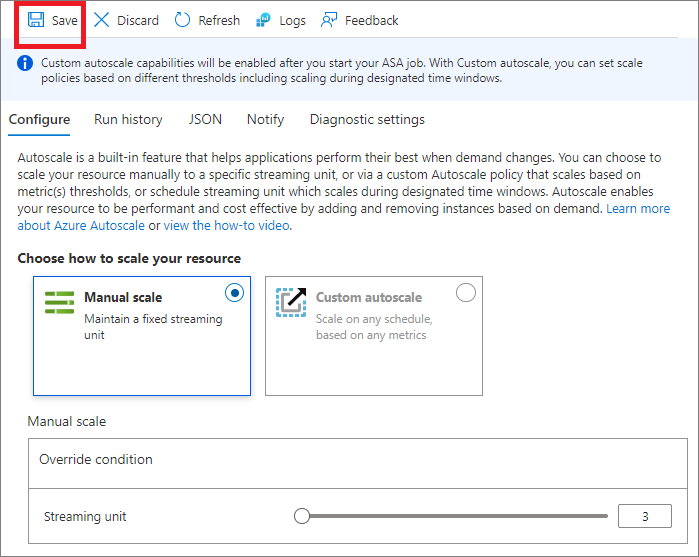
- Select Save on the toolbar to save the setting.


Custom autoscale - default condition
You can configure automatic scaling of streaming units by using conditions. The Default scale condition runs when none of the other scale conditions match. As such, you must select a Default condition for your job. You can choose a name for your Default condition or leave it as Auto created scale condition, which is prepopulated.

Set the Default condition by choosing one of the following scale modes:
- Scale based on a metric (such as CPU or memory usage)
- Scale to specific number of streaming units
Note
You can't set a Schedule within the Default condition. The Default condition only runs when none of the other schedule conditions are met.
Scale based on a metric
The following procedure shows you how to add a condition to automatically increase streaming units (scale out) when the SU (memory) usage is greater than 75%. Or how to decrease streaming units (scale in) when the SU usage is less than 25%. Increments are made from fractional units (1/3 and 2/3) to a full streaming unit (1 SU V2). Similarly, decrements are made from 1 to 2/3 to 1/3.
- On Scale, select Custom autoscale.
- In the Default section of the page, specify a name for the default condition. Select the pencil symbol to edit the text.
- Select Scale based on a metric for Scale mode.
- Select + Add a rule.

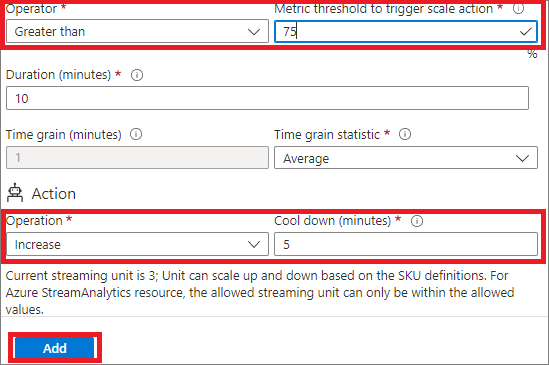
- On the Scale rule page, follow these steps:
- Under Metric Namespace, select a metric from the Metric name drop-down list. In this example, it's SU % Utilization.
- Select an operator and threshold values. In this example, they're Greater than and 75 for Metric threshold to trigger scale action.
- Select an operation in the Action section. In this example, it's set to Increase.
- Then, select Add.
- Select + Add a rule again, and follow these steps on the Scale rule page:
- Select a metric from the Metric name drop-down list. In this example, it's SU % Utilization.
- Select an operator and threshold values. In this example, they're Less than and 25 for Metric threshold to trigger scale action.
- Select an operation in the Action section. In this example, it's set to Decrease.
- Then, select Add.
- The autoscale feature decreases the streaming units for the namespace if the overall SU usage goes below 25% in this example.
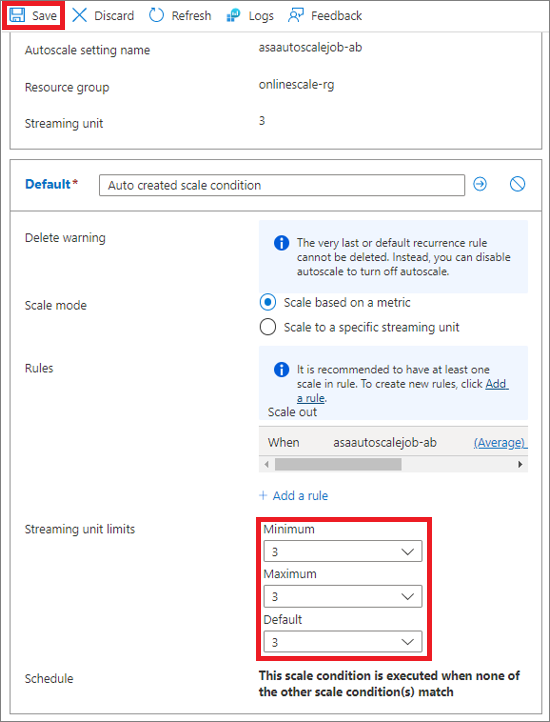
- Set the minimum, maximum, and default number of streaming units. The minimum and maximum streaming units represent the scaling limitations for your job. The default value is used in the rare instance that scaling failed. Set the default value to the number of SUs that the job is currently running with.
- Select Save.


Note
Flapping refers to a loop condition that causes a series of opposing scale events. Flapping happens when a scale event triggers the opposite scale event. For more information, see this article which describes flapping in autoscale and how to avoid it.
Scale to specific number of streaming units
Follow these steps to configure the rule to scale the job to use a specific number of streaming units. The default condition applies when none of the other scale conditions match.
- On Scale, select Custom autoscale.
- In the Default section, enter a name for the default condition.
- Select Scale to specific streaming units for Scale mode.
- For Streaming units, select the number of streaming units.
Custom autoscale – Add more scale conditions
The previous section shows how to add a default condition for the autoscale setting. This section shows how to add more conditions to the autoscale setting. For these other non-default conditions, you can set a schedule based on specific days of the week or a date range.
Scale based on a metric
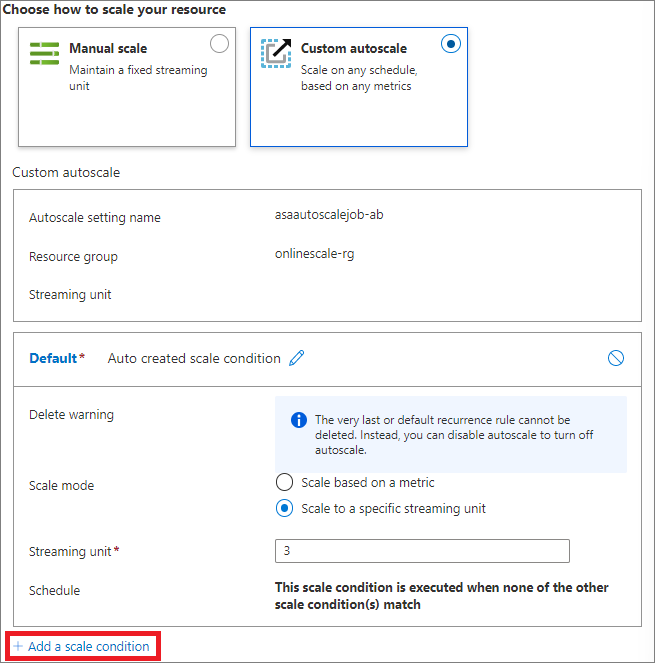
- On Scale, select Custom autoscale for the Choose how to scale your resource option.
- Select Add a scale condition under the Default block.
- Enter a name for the condition.
- Confirm that the Scale based on a metric option is selected.
- Select + Add a rule to add a rule to increase streaming units when the overall SU % utilization goes above 75%. Follow steps from the preceding Default condition section.
- Set the minimum, maximum, and default number of streaming units.
- Set Schedule, Timezone, Start date, and End date on the custom condition (but not on the default condition). You can either specify start and end dates for the condition or select Repeat specific days (Monday, Tuesday, and so on) of a week.
- If you select Specify start/end dates, select the Timezone, Start date and time, and End date and time for the condition to be in effect.
- If you select Repeat specific days, select the days of the week, timezone, start time, and end time when the condition should apply.

Scale to specific number of streaming units
- On Scale, select Custom autoscale for the Choose how to scale your resource option.
- Select Add a scale condition under the Default block.
- Enter a name for the condition.
- Select scale to specific streaming units option for Scale mode.
- Enter the number of streaming units.
- For the Schedule, specify either start and end dates for the condition or select specific days (Monday, Tuesday, and so on) of a week and times.
- If you select Specify start/end dates, select the Timezone, Start date and time, and End date and time for the condition to be in effect.
- If you select Repeat specific days, select the days of the week, timezone, start time, and end time when the condition should apply.
To learn more about how autoscale settings work, especially how it picks a profile or condition and evaluates multiple rules, see Understand Autoscale settings.