Note
Access to this page requires authorization. You can try signing in or changing directories.
Access to this page requires authorization. You can try changing directories.
Important
Dynamic autoscaling for pooled host pools with session host configuration is currently in PREVIEW. See the Supplemental Terms of Use for Microsoft Azure Previews for legal terms that apply to Azure features that are in beta, preview, or otherwise not yet released into general availability.
Autoscale lets you scale your session host virtual machines in a host pool up or down according to schedule to optimize deployment costs.
When using autoscale, you can choose from two different scaling methods: power management or dynamic. To learn more about autoscale, see Autoscale scaling plans and example scenarios in Azure Virtual Desktop.
Note
- You can't use autoscale and scale session hosts using Azure Automation and Azure Logic Apps on the same host pool. You must use one or the other.
- Power management autoscaling is available in Azure and Azure Government.
- Dynamic autoscaling is only available in Azure and isn't supported in Azure Government.
For best results, we recommend using autoscale with session hosts you deployed with Azure Virtual Desktop Azure Resource Manager templates or first-party tools from Microsoft.
Prerequisites
To use a power management scaling plan, make sure you follow these guidelines:
Scaling plan configuration data must be stored in the same Azure region as the host pool configuration. Your session host can be in any supported regions.
When using autoscale for pooled host pools, you must have a configured MaxSessionLimit parameter for that host pool. Don't use the default value. You can configure this value in the host pool settings in the Azure portal or run the New-AzWvdHostPool or Update-AzWvdHostPool PowerShell cmdlets.
You must grant Azure Virtual Desktop access to manage the power state of your session hosts. You must have the
Microsoft.Authorization/roleAssignments/writepermission on your subscriptions in order to assign the role-based access control (RBAC) role for the Azure Virtual Desktop service principal on those subscriptions. This permission is part of User Access Administrator and Owner built in roles.If you want to use personal desktop autoscale with hibernation, you need to enable hibernation feature on your session hosts. FSLogix and App Attach currently don't support hibernate. Don't enable hibernate if you're using FSLogix or App Attach for your personal host pools. For more information on using hibernation, including how hibernation works, limitations, and prerequisites, see Hibernation for Azure virtual machines.
If you're using PowerShell to create and assign your scaling plan, you need module Az.DesktopVirtualization version 4.2.0 or later.
If you're configuring a time limit policy, you need:
- For Intune: a Microsoft Entra ID account that is assigned the Policy and Profile manager built-in RBAC role and a group containing the devices you want to configure.
- For Group Policy: a domain account that has permission to create or edit Group Policy objects and a security group or organizational unit (OU) containing the devices you want to configure.
To use a dynamic scaling plan (preview):
Dynamic autoscaling can only be used for pooled host pools with session host configuration. If you want to apply an autoscaling plan to a standard host pool without session host configuration, you need to use the power management scaling method, which is already generally available.
You can't use dynamic scaling with any other scaling script on the same host pool. You must use one or the other.
Scaling plan configuration data must be stored in the same region as the host pool configuration. You can deploy session hosts in any Azure region.
When using autoscale for pooled host pools, you must have a set a custom max session limit for load balancing of that host pool. Don't use the default value. For more information, see Configure host pool load balancing.
You must grant Azure Virtual Desktop access to manage the power state of your session hosts. You must have the
Microsoft.Authorization/roleAssignments/writepermission on your subscriptions in order to assign the role-based access control (RBAC) role for the Azure Virtual Desktop service principal on those subscriptions. This permission is part of User Access Administrator and Owner built in roles.Dynamic autoscaling currently requires access to the endpoint
wvdhpustgr0prod.blob.core.windows.netto deploy the Azure Virtual Desktop Agent when it creates session hosts. Until it migrates to a required endpoint for Azure Virtual Desktop, session hosts that can't accesswvdhpustgr0prod.blob.core.windows.netfails with the errorCustomerVmNoAccessToDeploymentPackageException.If you're using PowerShell to create and assign your scaling plan, you need module Az.DesktopVirtualization version 5.4.2-preview or later preview version.
Assign permissions to the Azure Virtual Desktop service principal
Before creating your first scaling plan, you need to assign the Desktop Virtualization Power On Off Contributor RBAC role to the Azure Virtual Desktop service principal with your Azure subscription as the assignable scope. If you assign this role at any level lower than your subscription, such as the resource group, host pool, or virtual machine, it prevents autoscale from working properly.
You need to add each Azure subscription as an assignable scope that contains host pools and session hosts you want to use with autoscale. This role and assignment allows Azure Virtual Desktop to manage the power state of any session hosts in those subscriptions. It also lets the service apply actions on both host pools and session hosts when there are no active user sessions.
To learn how to assign the role to the Azure Virtual Desktop service principal, see Assign Azure RBAC roles or Microsoft Entra roles to the Azure Virtual Desktop service principals.
Assign permissions to the Azure Virtual Desktop service principal
Before creating your first scaling plan, you need to assign the Desktop Virtualization Power On Off Contributor and Desktop Virtualization Virtual Machine Contributor RBAC roles to the Azure Virtual Desktop service principal with your Azure subscription as the assignable scope. If you assign this role at any level lower than your subscription, such as the resource group, host pool, or virtual machine, it prevents autoscale from working properly.
You need to add each Azure subscription as an assignable scope that contains host pools and session hosts you want to use with autoscale. These roles and assignments allow Azure Virtual Desktop to create, delete, update, start, and stop any session hosts in those subscriptions. They also let the service apply actions on both host pools and session hosts when there are no active user sessions.
To learn how to assign these roles to the Azure Virtual Desktop service principal, see Assign Azure RBAC roles or Microsoft Entra roles to the Azure Virtual Desktop service principals.
Create a scaling plan
Now that you assigned the Desktop Virtualization Power On Off Contributor role to the service principal on your subscriptions, you can create a scaling plan. You can use the Azure portal or Azure PowerShell to create a scaling plan.
To create a power management scaling plan using the Azure portal:
Sign in to the Azure portal.
In the search bar, type Azure Virtual Desktop and select the matching service entry.
Select Scaling Plans, then select Create.
In the Basics tab, complete the following information:
Parameter Value/Description Subscription Select the subscription you want to create the host pool in from the drop-down list. Resource group Select an existing resource group or select Create new and enter a name. Scaling plan name Enter a name for the scaling plan. Optionally, you can also add a "friendly" name that is displayed to your users and a description for your plan. Location Select the Azure region where you want to create your scaling plan. Time zone Select the time zone to use with your plan. Host pool type Select the type of host pool that you want your scaling plan to apply to. Exclusion tag Enter a tag name for session hosts you don't want to include in scaling operations. For example, you might want to tag session hosts that are set to drain mode so that autoscale doesn't override drain mode during maintenance using the exclusion tag excludeFromScaling. If you add this tag on any of the session hosts in the host pool, autoscale doesn't start, stop, or change the drain mode of those particular session hosts.Scaling method This option appears if you selected Pooled for Host pool type. Select Power management autoscaling. Note
- Tagged session hosts are still considered as part of the calculation of the minimum percentage of hosts.
- Make sure not to include any sensitive information in the exclusion tags such as user principal names or other personal data.
Select Next, which should take you to the Schedules tab. Schedules let you define when autoscale turns session hosts on and off throughout the day. The schedule parameters are different based on the Host pool type you chose for the scaling plan.
Pooled host pools
In each phase of the schedule, autoscale only turns off session hosts when in doing so the used host pool capacity doesn't exceed the capacity threshold. The default values you see when you try to create a schedule are the suggested values for weekdays, but you can change them as needed.
To create or change a schedule:
In the Schedules tab, select Add schedule and complete the following information:
Parameter Value/Description Schedule name Enter a name for your schedule. Repeat on Select which days your schedule repeats on. In the Ramp up tab, fill out the following fields:
Parameter Value/Description Start time Select a time from the drop-down menu to start preparing session hosts for peak business hours. Load balancing algorithm We recommend selecting breadth-first algorithm. Breadth-first load balancing distributes users across existing session hosts to keep access times fast. The load balancing preference you select here overrides the one you selected for your original host pool settings. Minimum percentage of hosts Enter the percentage of session hosts you want to always remain on in this phase. If the percentage you enter isn't a whole number, it's rounded up to the nearest whole number. For example, in a host pool of seven session hosts, if you set the minimum percentage of session hosts during ramp-up hours to 10%, one session host stays on during ramp-up hours, and isn't turned off by autoscale. Capacity threshold Enter the percentage of available host pool capacity that triggers a scaling action to take place. For example, if two session hosts in the host pool are turned on with a max session limit of 20 sessions, the available host pool capacity is 40 sessions. If you set the capacity threshold to 75% and the session hosts have more than 30 sessions, autoscale turns on a third session host. This percentage then changes the available host pool capacity from 40 sessions to 60 sessions. In the Peak hours tab, fill out the following fields:
Parameter Value/Description Start time Enter a start time for when your usage rate is highest during the day. Make sure the time is in the same time zone you specified for your scaling plan. This time is also the end time for the ramp-up phase. Load balancing Select breadth-first or depth-first load balancing. Breadth-first load balancing distributes new user sessions across all available session hosts in the host pool. Depth-first load balancing distributes new sessions to any available session host with the highest number of connections that hasn't reached its session limit yet.
For more information about load-balancing types, see Configure the Azure Virtual Desktop load-balancing method.Note
You can't change the capacity threshold here. Instead, the setting you entered in Ramp-up carries over to this setting.
For Ramp-down, you enter values into similar fields to Ramp-up, but this time it is for when your host pool usage drops off, including:
- Start time
- Load-balancing algorithm
- Minimum percentage of hosts (%)
- Capacity threshold (%)
- Force logoff of users
Important
If you enabled autoscale to force users to sign out during ramp-down, the session host with the lowest number of user sessions (active and disconnected) is shut down. Autoscale puts the session host in drain mode, sends those user sessions a notification telling them they'll be signed out, and then signs out those users after the specified wait time is over. After autoscale signs out those user sessions, it then deallocates the VM.
If you don't enable forced sign out during ramp-down, you then need to select VMs have no active or disconnected sessions or VMs have no active sessions during ramp-down.
Whether you enable autoscale to force users to sign out during ramp-down or not, the capacity threshold and the minimum percentage of hosts are still respected, autoscale only shuts down session hosts if all existing user sessions (active and disconnected) in the host pool can be consolidated to fewer session hosts without exceeding the capacity threshold.
You can also configure a time limit policy that applies to all phases to sign out all disconnected users to reduce the used host pool capacity. For more information, see Configure a time limit policy.
Likewise, Off-peak hours works the same way as Peak hours:
- Start time, which is also the end of the ramp-down period.
- Load-balancing algorithm. We recommend choosing depth-first to gradually reduce the number of session hosts based on sessions on each VM.
- Just like peak hours, you can't configure the capacity threshold here. Instead, the value you entered in Ramp-down carries over.
Important
If you have any days unselected in your schedule, the last off-peak parameters on the selected days are carried over for the unselected days until the next ramp-up phase. For example, if you only have one schedule for Monday to Friday, then your configuration for the Friday off-peak phase is carried over until the Monday ramp-up phase.
Personal host pools
In each phase of the schedule, define whether session hosts should be deallocated based on the user session state.
To create or change a schedule:
In the Schedules tab, select Add schedule and complete the following information:
Parameter Value/Description Schedule name Enter a name for your schedule. Repeat on Select which days your schedule repeats on. In the Ramp up tab, fill out the following fields:
Parameter Value/Description Start time Select the time you want the ramp-up phase to start from the drop-down menu. Start VM on Connect Select whether you want Start VM on Connect to be enabled during ramp-up.
We highly recommend that you enable Start VM on Connect if you choose not to start your session hosts during the ramp-up phase.VMs to start Select one of the following options
- Assigned VMs only if you want only personal desktops that have a user assigned to them at the start time to be started.
- Assigned and unassigned VMs if you want all personal desktops in the host pool (regardless of user assignment) to be started
- Don't turn VMs on at start time if you don't want any personal desktops in the pool to be started.Disconnect settings For When disconnected for (min), specify the number of minutes a user session has to be disconnected before performing a specific action. This number can be anywhere between 0 and 360.
For Perform, specify what action the service should take after a user session is disconnected for the specified time. The options are to either deallocate (shut down) the VMs, hibernate the personal desktop, or do nothing.Sign out settings For When logged off for (min), specify the number of minutes a user session has to be logged off before performing a specific action. This number can be anywhere between 0 and 360.
For Perform, specify what action the service should take after a user session is logged off for the specified time. The options are to either deallocate (shut down) the VMs, hibernate the personal desktop, or do nothing.In the Peak hours, Ramp-down, and Off-peak hours tabs, fill out the following fields:
Parameter Value/Description Start time Enter a start time for each phase. This time is also the end time for the previous phase. Start VM on Connect Select whether you want Start VM on Connect to be enabled during that phase. Disconnect settings For When disconnected for (min), specify the number of minutes a user session has to be disconnected before performing a specific action. This number can be anywhere between 0 and 360.
For Perform, specify what action the service should take after a user session is disconnected for the specified time. The options are to either deallocate (shut down) the VMs, hibernate the personal desktop, or do nothing.Sign out settings For When logged off for (min), specify the number of minutes a user session has to be logged off before performing a specific action. This number can be anywhere between 0 and 360.
For Perform, specify what action the service should take after a user session is logged off for the specified time. The options are to either deallocate (shut down) the VMs, hibernate the personal desktop, or do nothing.Important
If you have any days unselected in your schedule, the last off-peak parameters on the selected days is carried over for the unselected days until the next ramp-up phase. For example, if you only have one schedule for Monday to Friday, then your configuration for the Friday off-peak phase is carried over until the Monday ramp-up phase.
Select Next to take you to the Host pool assignments tab. Select the check box next to each host pool you want to include. If you don't want to enable autoscale, unselect all check boxes. You can always return to this setting later and change it. You can only assign the scaling plan to host pools that match the host pool type specified in the plan.
Note
- When you create or update a scaling plan that's already assigned to host pools, its changes apply immediately.
After that, you'll need to enter tags. Tags are name and value pairs that categorize resources for consolidated billing. You can apply the same tag to multiple resources and resource groups. To learn more about tagging resources, see Use tags to organize your Azure resources.
Note
If you change resource settings on other tabs after creating tags, your tags are automatically updated.
Once you're done, go to the Review + create tab and select Create to create and assign your scaling plan to the host pools you selected.
Now that you assigned the Desktop Virtualization Power On Off Contributor and Desktop Virtualization Virtual Machine Contributor roles to the service principal on your subscriptions, you can create a dynamic scaling plan. You can use the Azure portal or Azure PowerShell to create a scaling plan.
To create a dynamic scaling plan using the Azure portal:
Sign in to the Azure portal.
In the search bar, type Azure Virtual Desktop and select the matching service entry.
Select Scaling Plans, then select Create.
In the Basics tab, complete the following information:
Parameter Value/Description Subscription Select the subscription you want to create the host pool in from the drop-down list. Resource group Select an existing resource group or select Create new and enter a name. Scaling plan name Enter a name for the scaling plan. Optionally, you can also add a friendly name that's displayed to your users and a description for your plan. Location Select the Azure region where you want to create your scaling plan. Time zone Select the time zone to use with your plan. Host pool type Select Pooled. Exclusion tag Enter a tag name for session hosts you don't want to include in scaling operations. For example, you might want to tag session hosts that are set to drain mode so that autoscale doesn't override drain mode during maintenance using the exclusion tag excludeFromScaling. If you add this tag on any of the session hosts in the host pool, autoscale doesn't start, stop, or change the drain mode of those particular session hosts.Scaling method Select Dynamic autoscaling. Note
- Tagged session hosts are still considered as part of the calculation of the minimum percentage of hosts.
- Make sure not to include any sensitive information in the exclusion tags such as user principal names or other personal data.
Once you complete this tab, select Next: Schedules.
In the Schedules tab, select Add schedule and complete the following information.
In the General tab, fill out the following fields:
Parameter Value/Description Schedule name Enter a name for your schedule. Repeat on Select which days your schedule repeats on. Minimum percentage of active hosts (%) Enter the percentage of minimum number of running session hosts based on the minimum host pool size that is always available. For example, if the minimum percentage of active hosts (%) is specified as 10 and the minimum host pool size is specified as 10, autoscale ensures one session host is always available to take user connections. Minimum host pool size Enter the number of session hosts to always be part of the host pool. These session hosts can either be in a running state or a stopped state. Maximum host pool size Enter the maximum number of running session hosts that can be available. Select Next.
In the Ramp up tab, fill out the following fields:
Parameter Value/Description Start time Select a time from the drop-down menu to start preparing session hosts for peak business hours. Load balancing algorithm We recommend selecting breadth-first algorithm. Breadth-first load balancing distributes users across existing session hosts to keep access times fast. The load balancing preference you select here overrides the one you selected for your original host pool settings. Capacity threshold Enter the percentage of available host pool capacity that triggers a scaling action to take place. For example, if capacity threshold is specified as 60% and your total host pool capacity is 100 sessions, autoscale turns on more session hosts once the host pool exceeds a load of 60 sessions. You can modify the virtual machine limit parameters that you filled out in the General tab. We recommend having higher Minimum percentage of active hosts (%) and Minimum host pool size in the ramp-up phase, which is carried over to the peak phase.
Select Next.
In the Peak hours tab, fill out the following fields:
Parameter Value/Description Start time Enter a start time for when your usage rate is highest during the day. Make sure the time is in the same time zone you specified for your scaling plan. This time is also the end time for the ramp-up phase. Load balancing algorithm Select breadth-first or depth-first load balancing. Breadth-first load balancing distributes new user sessions across all available session hosts in the host pool. Depth-first load balancing distributes new sessions to any available session host with the highest number of connections that hasn't reached its session limit yet.
For more information about load-balancing types, see Configure the Azure Virtual Desktop load-balancing method.Note
You can't change the capacity threshold here. Instead, the setting you entered in Ramp-up carries over to this setting.
In the Ramp-down tab, enter values into similar fields to Ramp-up, but this time it is for when your host pool usage drops off, including:
- Start time
- Load-balancing algorithm
- Capacity threshold (%)
- Force logoff users
- Minimum percentage of active hosts (%)
- Minimum host pool size
- Maximum host pool size
Important
If you enabled autoscale to force users to sign out during ramp-down, the session host with the lowest number of user sessions (active and disconnected) is shut down. Autoscale puts the session host in drain mode, sends those user sessions a notification telling them they'll be signed out, and then signs out those users after the specified wait time is over. After autoscale signs out those user sessions, it then deallocates or deletes the VM.
If you don't enable forced sign out during ramp-down, you then need to select VMs have no active or disconnected sessions or VMs have no active sessions during ramp-down.
Whether you enable autoscale to force users to sign out during ramp-down or not, the capacity threshold and the minimum percentage of hosts are still respected, autoscale only shuts down or delete session hosts if all existing user sessions (active and disconnected) in the host pool can be consolidated to fewer session hosts without exceeding the capacity threshold.
Likewise, Off-peak hours works the same way as Peak hours:
- Start time, which is also the end of the ramp-down period.
- Load-balancing algorithm. We recommend choosing depth-first to gradually reduce the number of session hosts based on sessions on each VM.
- Just like peak hours, you can't configure the capacity threshold here. Instead, the value you entered in Ramp-down carries over.
Important
If you have any days unselected in your schedule, the last off-peak parameters on the selected days are carried over for the unselected days until the next ramp-up phase. For example, if you only have one schedule for Monday to Friday, then your configuration for the Friday off-peak phase are carried over until the Monday ramp-up phase.
Select Next to take you to the Host pool assignments tab. Select the check box next to each host pool you want to include. If you don't want to enable autoscale, unselect all check boxes. You can always return to this setting later and change it. You can only assign the dynamic scaling plan to pooled host pools with session host configuration.
Note
- When you create or update a scaling plan that's already assigned to host pools, its changes apply immediately.
After that, you'll need to enter tags. Tags are name and value pairs that categorize resources for consolidated billing. You can apply the same tag to multiple resources and resource groups. To learn more about tagging resources, see Use tags to organize your Azure resources.
Note
If you change resource settings on other tabs after creating tags, your tags will be automatically updated.
Once you're done, go to the Review + create tab and select Create to create and assign your scaling plan to the host pools you selected.
Configure a time limit policy
You can configure a time limit policy that signs out all disconnected users once a set time is reached to reduce the used host pool capacity using Microsoft Intune or Group Policy. Select the relevant tab for your scenario.
To configure a time limit policy using Intune:
Sign in to the Microsoft Intune admin center.
Create or edit a configuration profile for Windows 10 and later devices, with the Session Time Limits profile type.
In the settings picker, browse to Administrative templates > Windows Components > Remote Desktop Services > Remote Desktop Session Host > Session Time Limits.
Check the box for Set time limit for disconnected sessions, then close the settings picker.
Expand the Administrative templates category, then toggle the switch for Set time limit for disconnected sessions to Enabled, then select a time value from the drop-down list.
Select Next.
Optional: On the Scope tags tab, select a scope tag to filter the profile. For more information about scope tags, see Use role-based access control (RBAC) and scope tags for distributed IT.
On the Assignments tab, select the group containing the computers providing a remote session you want to configure, then select Next.
On the Review + create tab, review the settings, then select Create.
Once the policy applies to the computers providing a remote session, restart them for the settings to take effect.
Edit an existing scaling plan
You can edit an existing scaling plan after you create it. You can change the scaling plan's friendly name, description, time zone, and exclusion tags. You can also change the host pool assignments and schedules. This section show you how to edit a scaling plan using the Azure portal or Azure PowerShell.
Select the relevant tab for your scenario.
To edit an existing scaling plan using the Azure portal:
Sign in to the Azure portal.
In the search bar, type Azure Virtual Desktop and select the matching service entry.
Select Scaling plans, then select the name of the scaling plan you want to edit. The overview blade of the scaling plan should open.
To change the scaling plan host pool assignments, under the Manage heading select Host pool assignments and then select + Assign. Select the host pools you want to assign the scaling plan to and select Assign. The host pools must be in the same Azure region as the scaling plan and the scaling plan's host pool type must match the type of host pools you're trying to assign it to.
Tip
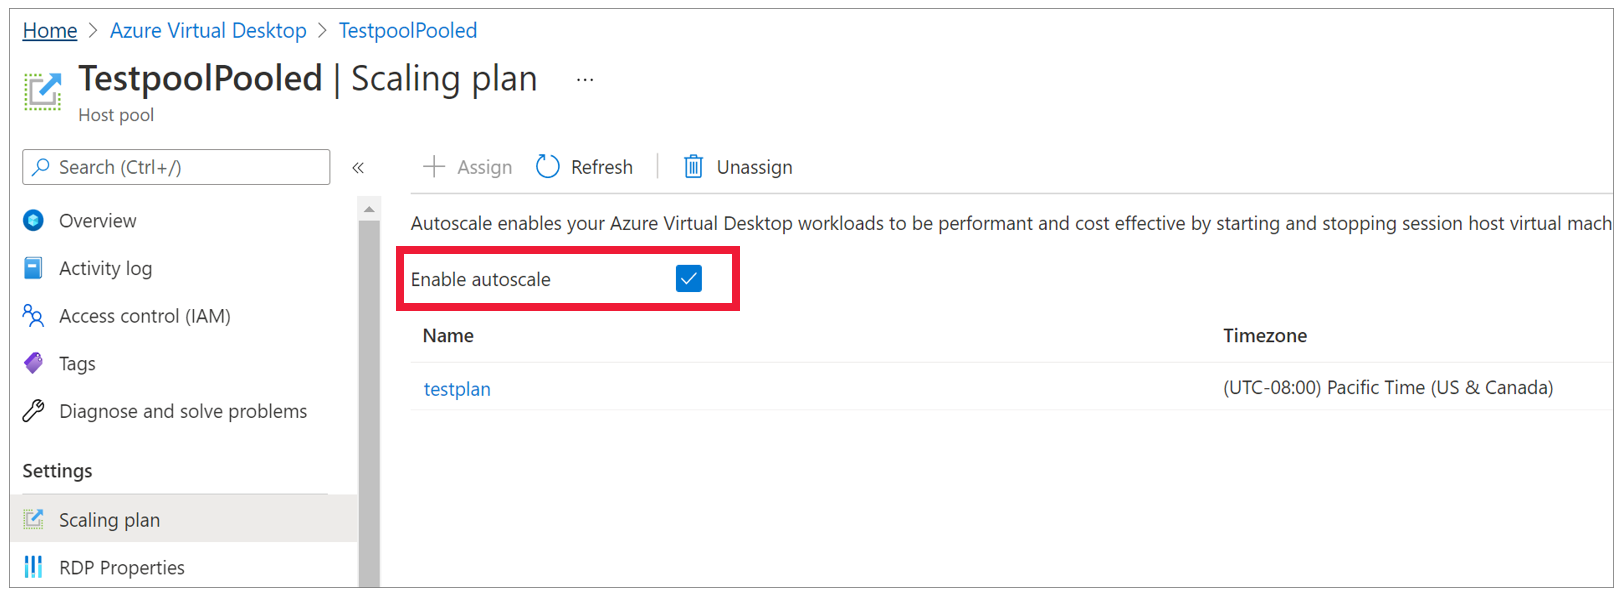
If you enabled the scaling plan during deployment, then you also have the option to disable the plan for the selected host pool in the Scaling plan menu by unselecting the Enable autoscale checkbox, as shown in the following screenshot.
To edit schedules, under the Manage heading, select Schedules.
To edit the plan's friendly name, description, time zone, or exclusion tags, go to the Properties tab.
Select the relevant tab for your scenario.
To edit an existing scaling plan using the Azure portal:
Sign in to the Azure portal.
In the search bar, type Azure Virtual Desktop and select the matching service entry.
Select Scaling plans, then select the name of the scaling plan you want to edit. The overview blade of the scaling plan should open.
To change the scaling plan host pool assignments, under the Manage heading select Host pool assignments and then select + Assign. Select the host pools you want to assign the scaling plan to and select Assign. The host pools must be in the same Azure region as the scaling plan and the scaling plan's host pool type must match the type of host pools you're trying to assign it to.
Tip
If you enabled the scaling plan during deployment, then you can also disable the plan for the selected host pool in the Scaling plan menu by unselecting the Enable autoscale checkbox, as shown in the following screenshot.
To edit schedules, under the Manage heading, select Schedules.
To edit the plan's friendly name, description, time zone, or exclusion tags, go to the Properties tab.
Next steps
Now that you created your scaling plan, here are some things you can do:
If you'd like to learn more about terms used in this article, check out our autoscale glossary. For examples of how autoscale works, see Autoscale example scenarios. You can also look at our Autoscale FAQ if you have other questions.