Note
Access to this page requires authorization. You can try signing in or changing directories.
Access to this page requires authorization. You can try changing directories.
This article describes how to migrate your Azure Virtual Machines (VMs) from availability sets to Virtual Machine Scale Sets with Flexible orchestration mode.
Important
The availability set to Virtual Machine Scale Sets migration feature is currently in preview. Previews are made available to you on the condition that you agree to the supplemental terms of use. Some aspects of this feature may change prior to general availability (GA).
Why migrate to Virtual Machine Scale Sets?
Virtual Machine Scale Sets with Flexible orchestration provide several advantages over availability sets:
| Feature | Virtual Machine Scale Sets (Flexible) | Availability sets |
|---|---|---|
| Maximum instances | Up to 1,000 VMs | Up to 200 VMs |
| Availability Zones support | Yes | No |
| Autoscaling | Yes | No |
| Rolling upgrades | Yes | No |
| Instance protection | Yes | No |
| Availability SLA | 99.95% (fault domains) or 99.99% (availability zones) | 99.95% |
| Mixed VM sizes | Yes | Yes |
| Azure Backup support | Yes | Yes |
For a complete comparison, see Orchestration modes for Virtual Machine Scale Sets.
Prerequisites
Before you begin, ensure you have the following:
- Azure subscription with the migration preview feature registered.
- Azure CLI 2.72.0 or later, or Azure PowerShell Az module installed.
- An existing availability set with VMs you want to migrate.
Register the preview feature
Register the MigrateToVmssFlex preview feature for your subscription:
# Set your subscription context
az account set --subscription "<subscriptionId>"

# Register the migration feature
az feature register --namespace Microsoft.Compute --name MigrateToVmssFlex

# Check registration status
az feature show --namespace Microsoft.Compute --name MigrateToVmssFlex --query properties.state -o tsv
Supported Migration paths
| Source | Target | Description |
|---|---|---|
| Availability set | Regional Virtual Machine Scale Set | VMs distributed across fault domains within the region |
| Availability set | Zonal Virtual Machine Scale Set | VMs placed in specific availability zones (1, 2, or 3) |
Limitations
The following configurations aren't supported for migration:
- VMs with Basic public IP addresses - Upgrade to Standard SKU before migration.
- VMs behind a Basic Load Balancer - Upgrade to Standard Load Balancer before migration.
- VMs with unmanaged disks - Convert to managed disks before migration.
Migration overview
Important
- VMs are stopped and deallocated during migration. Schedule the migration during a maintenance window where downtime is acceptable.
- Once migration starts, the availability set is locked. No other changes can be made until migration completes or is canceled.
- Migration is a one-way operation. You cannot migrate back to availability sets after completion.
The Azure portal provides a guided experience that handles validation, scale set selection (or creation), zone assignment, and migration in a streamlined flow. When migrating using the Azure portal, you can only migrate all virtual machines at the same time. If you need to migrate a single virtual machine at a time to ensure application availability, use alternative migration methods such as CLI, PowerShell, or REST.
For Azure CLI, Azure PowerShell, or REST API, the migration process consists of the following phases:
- Create target Virtual Machine Scale Set - Create a new scale set with Flexible orchestration mode (if you don't have one).
- Validate migration - Verify the availability set can be migrated.
- Start migration - Put the availability set into migration mode.
- Migrate VMs - Move each VM individually to the scale set.
- Start VMs - Power on the migrated VMs.
- Clean up - Delete the empty availability set.
Migrate using the Azure portal
Note
The portal migrates all VMs in the availability set at once. If you need to migrate VMs one at a time to maintain application uptime during the migration, use the Azure CLI, Azure PowerShell, or REST API instead.
Step 1: Start the migration process
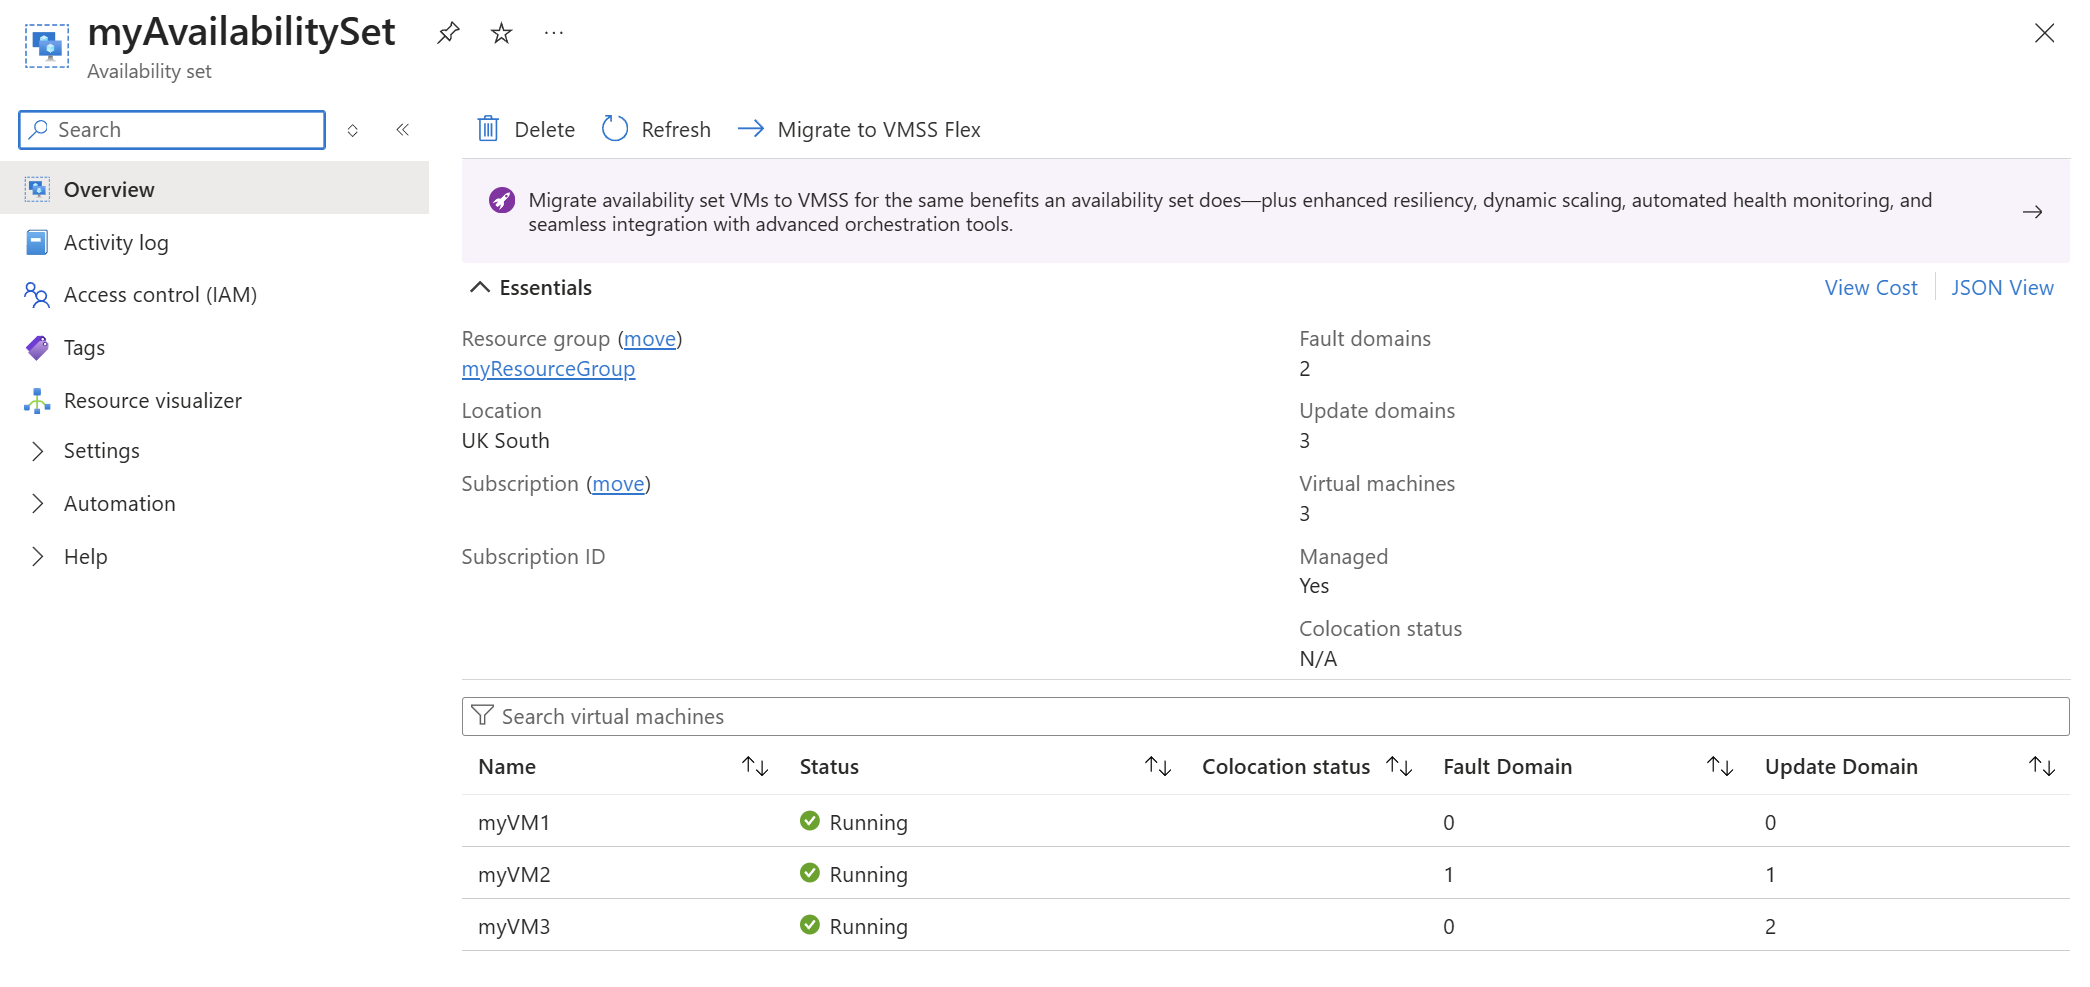
In the Azure portal, navigate to the availability set you want to migrate.
On the availability set Overview page, select the Migrate option from the toolbar.
Step 2: Select target scale set
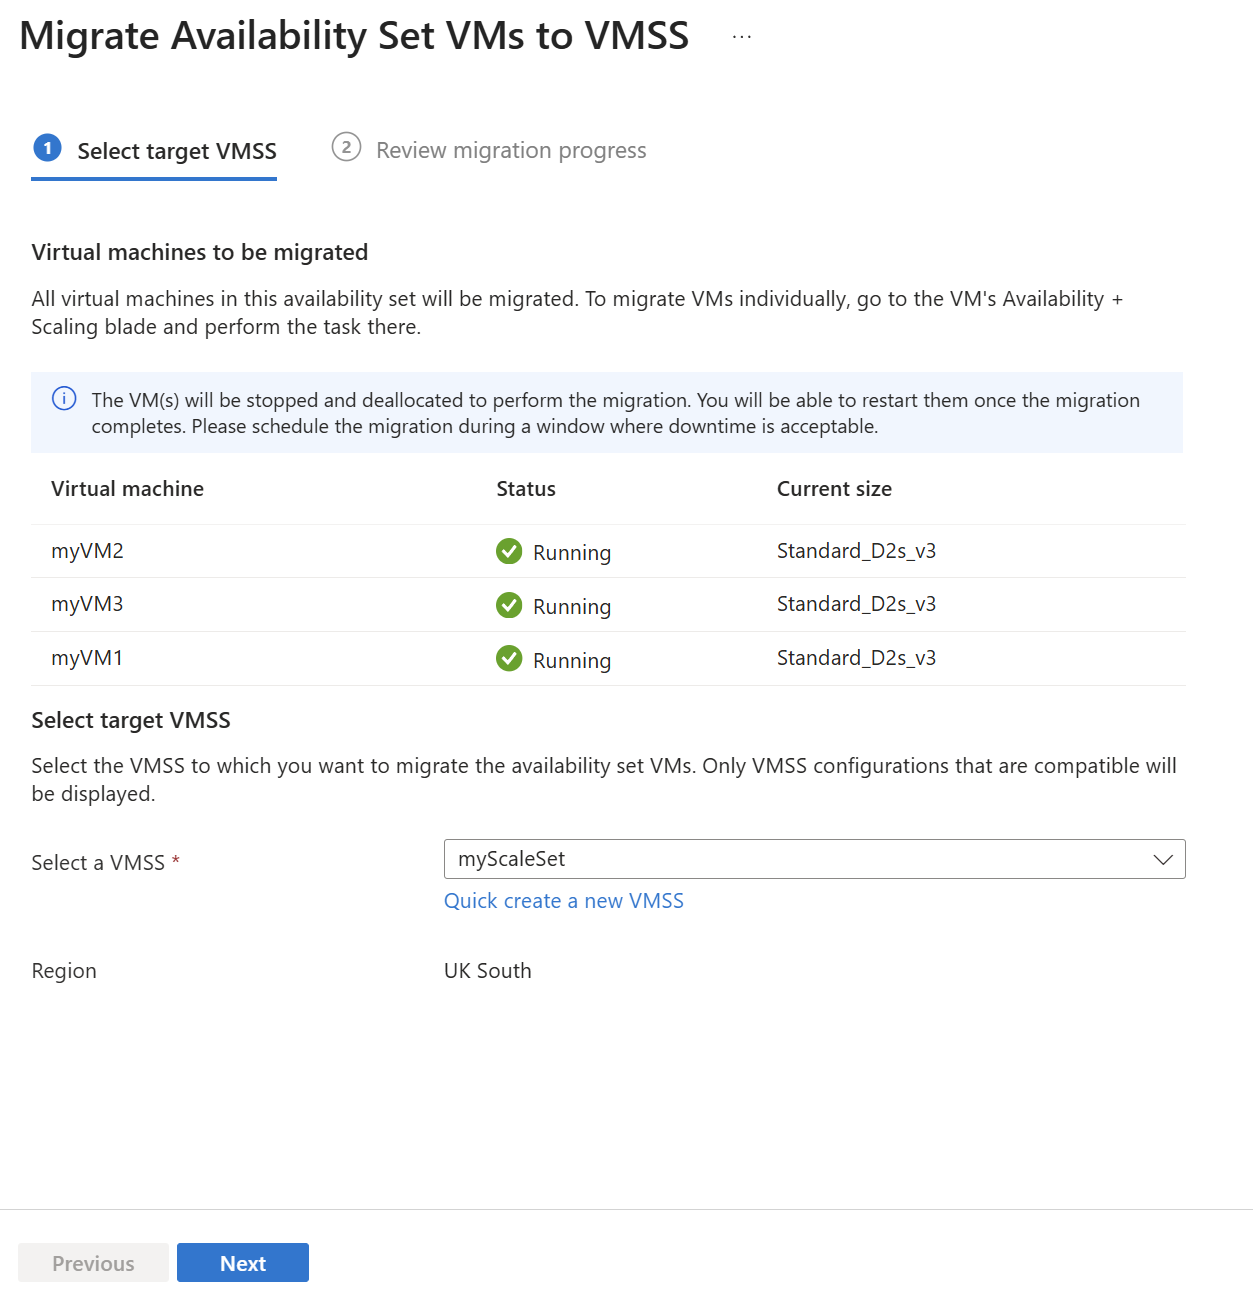
The first page lists all virtual machines in the availability set along with their current status and size.
Use an existing scale set
Under Select target scale set, choose an existing scale set from the dropdown. Only compatible scale set configurations are displayed.
Quick create a new scale set
If you don't have an existing scale set, you can create one directly from the migration experience:
- Select Quick create a new scale set below the dropdown.
- In the scale set quick create pane, provide a name for the scale set and complete the administrator account settings. The subscription, resource group, location, and VM size are prepopulated from your availability set configuration.
- Select Create a scale set to create the scale set and continue with the migration.
Step 3: Assign availability zones (zonal migration only)
If you select a zonal scale set (one configured with availability zones), an additional VM allocation section appears. Use the dropdown for each VM to assign it to a specific availability zone.
Tip
Distribute VMs across all available zones for maximum resilience. For example, assign VM1 to Zone 1, VM2 to Zone 2, and VM3 to Zone 3.

Step 4: Review and migrate
The review page displays the target scale set details and lists each VM with its migration status.

Review the VM list and zone assignments (if applicable), then select Migrate.
The status for each VM changes to Migration in progress.
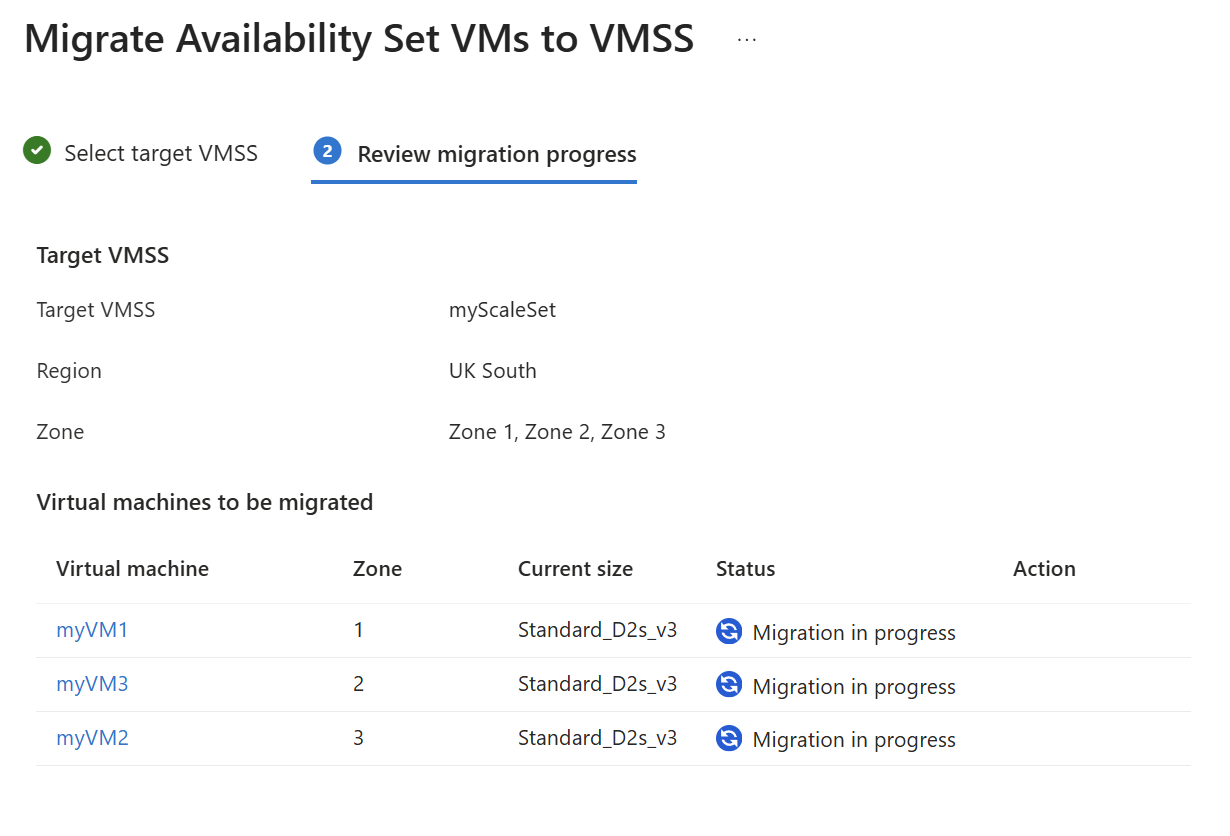
When all VMs finish migrating, the status changes to Migration completed.

Step 5: Start VMs and clean up
Select Start VMs to start all migrated VMs, or select Go to scale set instances to start them individually from the scale set.
Important
After migrating your VMs in the Azure portal and navigating to your scale set instances tab, you might notice some of the VMs missing from the list. This is just a delay from the portal viewer. The VMs have been migrated. If needed, you also can view the migrated VMs in the Virtual Machine overview blade and start them from there.
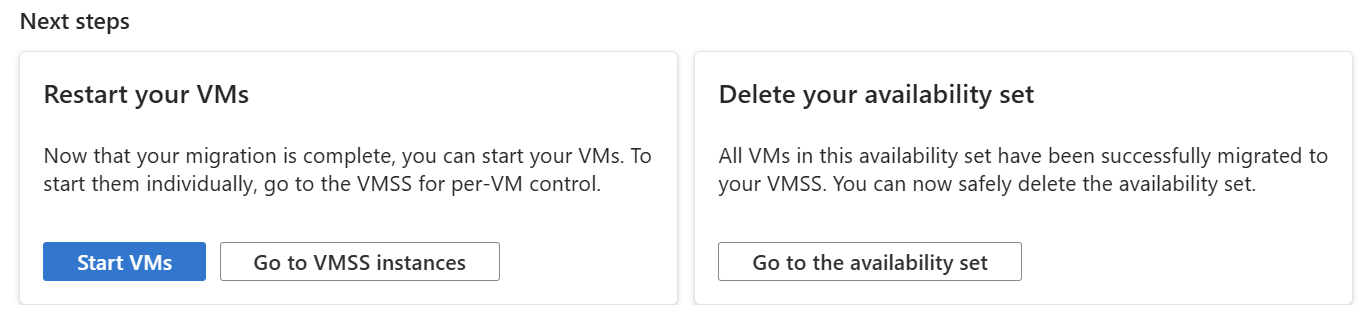
After all VMs are migrated and verified, the availability set is empty and can be safely deleted
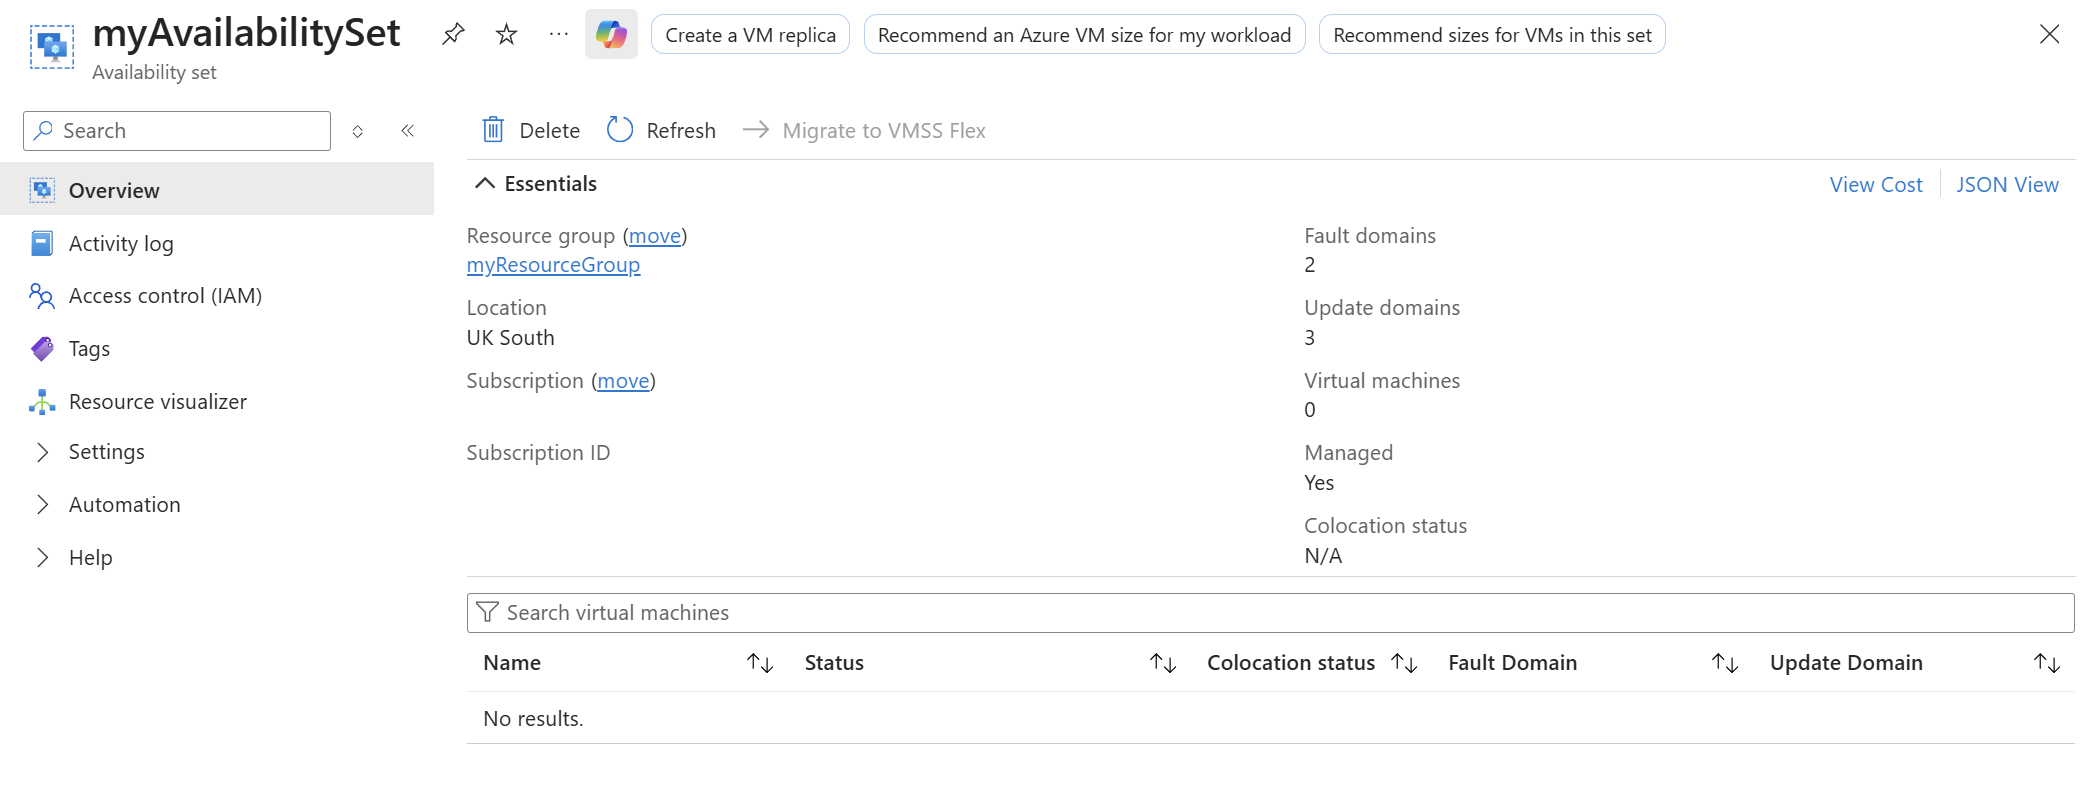
Select Delete to remove the empty availability set.
Migrate using Azure CLI, Azure PowerShell, or REST API
Step 1: Create a target Virtual Machine Scale Set
Note
Migration via the available SDKs provides additional control over the migration steps, such as migrating individual VMs at a time or canceling the migration. If you are okay migrating all VMs at once, you can opt to use the Azure portal instead. Otherwise, if you do need more control over the individual migration steps, continue with the below steps.
If you don't have an existing scale set, create one as the migration target. The scale set must use Flexible orchestration mode.
For detailed instructions on creating a scale set, see Create virtual machines in a scale set using Azure portal.
When creating the scale set for migration:
- Select Flexible orchestration mode.
- For zonal deployment (recommended for highest availability), select one or more availability zones (1, 2, 3).
- For regional deployment, don't select any availability zones.
- Set Instance count to 0 to create an empty scale set for migration.
Step 2: Validate migration
Before starting migration, validate that your availability set can be migrated to the target scale set.
az vm availability-set validate-migration-to-vmss \
  --resource-group "<resource-group-name>" \
  --name "<availability-set-name>" \
  --vmss-flexible-id "/subscriptions/<subscription-id>/resourceGroups/<resource-group-name>/providers/Microsoft.Compute/virtualMachineScaleSets/<scale-set-name>"
A successful validation returns HTTP status code 200. If validation fails, review the error message for required actions.
Step 3: Start migration
After successful validation, start the migration process. This action puts the availability set into migration mode.
Caution
After starting the migration, the availability set is locked. You can only migrate VMs, complete migration, or cancel migration until the process finishes.
az vm availability-set start-migration-to-vmss \
  --resource-group "<resource-group-name>" \
  --name "<availability-set-name>" \
  --vmss-flexible-id "/subscriptions/<subscription-id>/resourceGroups/<resource-group-name>/providers/Microsoft.Compute/virtualMachineScaleSets/<scale-set-name>"
Step 4: Migrate individual VMs
Migrate each VM from the availability set to the scale set.
Regional migration
For regional migration, VMs are distributed across fault domains automatically:
az vm migrate-to-vmss \
  --resource-group "<resource-group-name>" \
  --vm-name "<vm-name>"
Zonal migration
For zonal migration, specify the target availability zone for each virtual machine:
az vm migrate-to-vmss \
  --resource-group "<resource-group-name>" \
  --vm-name "<vm-name>" \
  --target-zone "1"
Optional: Change VM size during migration
You can optionally change the VM size during zonal migration:
Tip
To distribute VMs across availability zones for maximum resilience, assign different zones to different VMs. For example, migrate VM1 to Zone 1, VM2 to Zone 2, and VM3 to Zone 3.
{
  "targetZone": "1",
  "targetVMSize": "Standard_D4s_v5"
}
Step 5: Start migrated VMs
After migration, VMs are in a Stopped (deallocated) state. They do not start automatically. You can start VMs immediately after they reach the Stopped (deallocated) state.
az vm start --resource-group "<resource-group-name>" --name "<vm-name>"
Step 6: Clean up the empty availability set
After all VMs are migrated and verified, delete the empty availability set:
az vm availability-set delete \
  --resource-group "<resource-group-name>" \
  --name "<availability-set-name>"
Cancel migration
If you need to cancel an in-progress migration before all VMs are migrated:
Warning
VMs that have already been migrated remain in the scale set. Only VMs that haven't yet been migrated stay in the availability set.
az vm availability-set cancel-migration-to-vmss \
  --resource-group "<resource-group-name>" \
  --name "<availability-set-name>"
Troubleshooting
Feature not registered
Error:The subscription is not registered to use feature 'MigrateToVmssFlex'
Solution: Register the preview feature and wait for registration to complete. See Register the preview feature.
VM size not available in zone
Error:The requested VM size is not available in the specified location/zone
Solution: Check available VM sizes in the target zone:
az vm list-skus --location "<region>" --zone "<zone>" --resource-type virtualMachines --output table
Availability set already in migration
Error:The availability set is already in migration mode
Solution: Continue with VM migration steps, or cancel the migration if you need to make changes.
Insufficient permissions
Error:The client does not have authorization to perform action
Solution: Ensure you have Contributor role or higher on the resource group.
Basic public IP or Load Balancer
Error:VMs with Basic public IP addresses or Basic Load Balancers are not supported
Solution: Upgrade to Standard SKU resources before migration: