Note
Access to this page requires authorization. You can try signing in or changing directories.
Access to this page requires authorization. You can try changing directories.
Applies to: ✔️ Linux VMs
Azure Pipelines provides a fully featured set of CI/CD automation tools for deployments to virtual machines. This article will show you how to set up a classic release pipeline that uses the canary strategy to deploy web applications to Linux virtual machines.
Canary deployments
A canary deployment reduces risk by slowly rolling out changes to a small subset of users. As you gain confidence in the new version, you can release it to more servers in your infrastructure and route more users to it.
Using the Continuous-delivery feature, you can use the canary strategy to deploy your application from Azure portal.
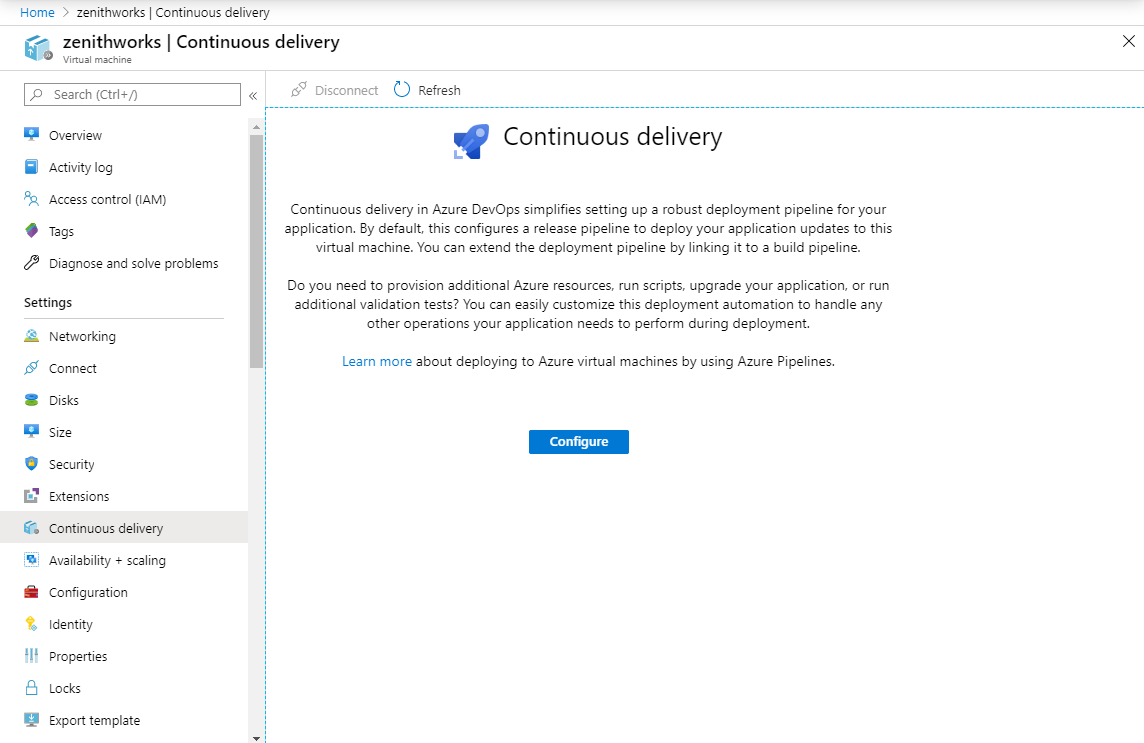
Sign in to Azure portal and navigate to a virtual machine.
Select Continuous delivery, and then select Configure.
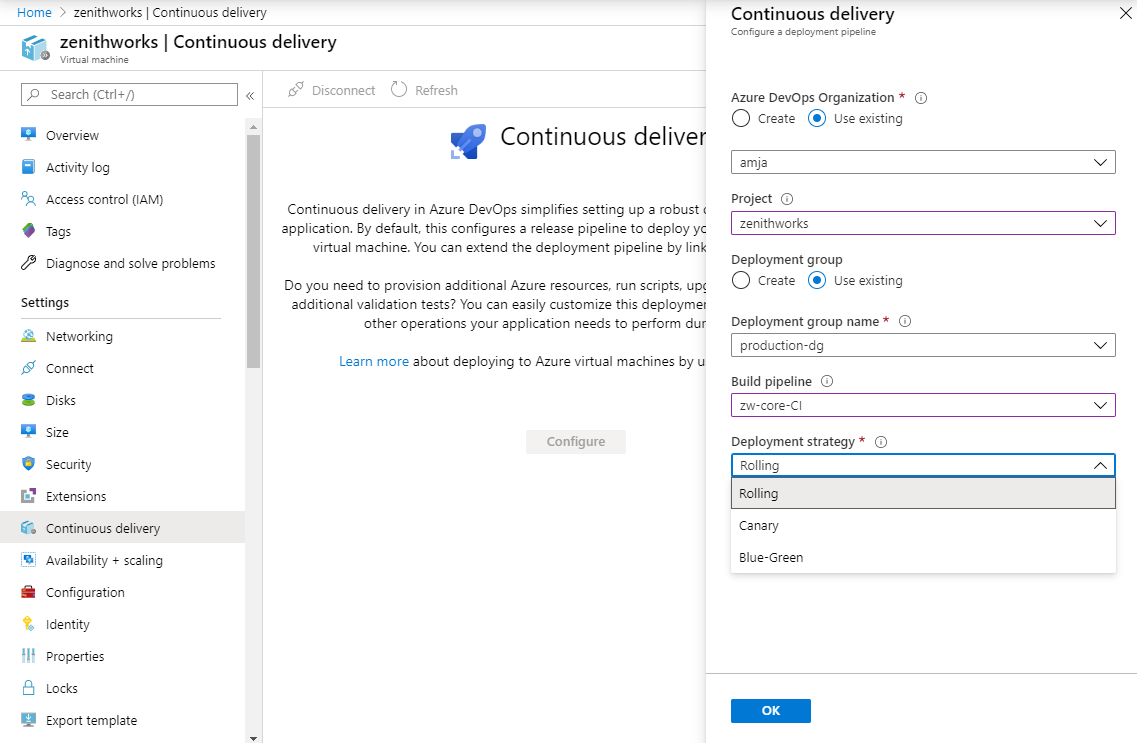
In the configuration panel, select Use existing and select your organization/project or select Create and create new ones.
Select your Deployment group name from the dropdown menu or create a new one.
Select your Build pipeline from the dropdown menu.
Select Deployment strategy, and then select Canary.
Add a "canary" tag to the VMs that will be used in the canary deployment.
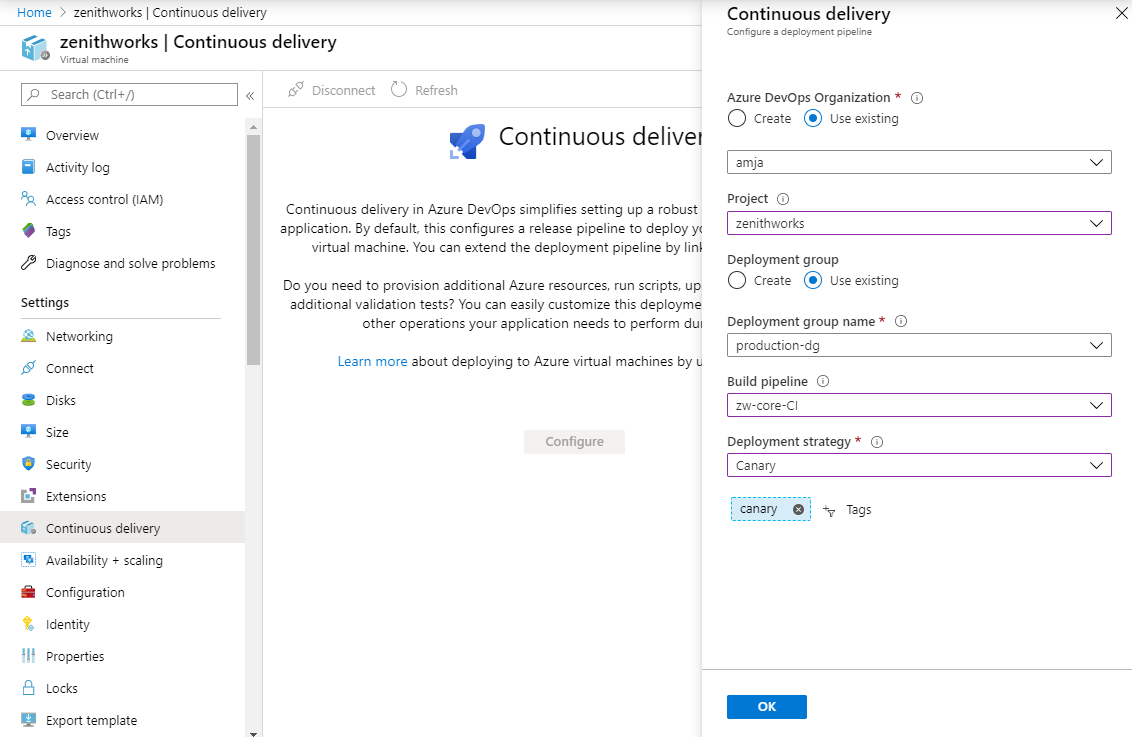
Select OK to configure the classic release pipeline to deploy to your virtual machine.
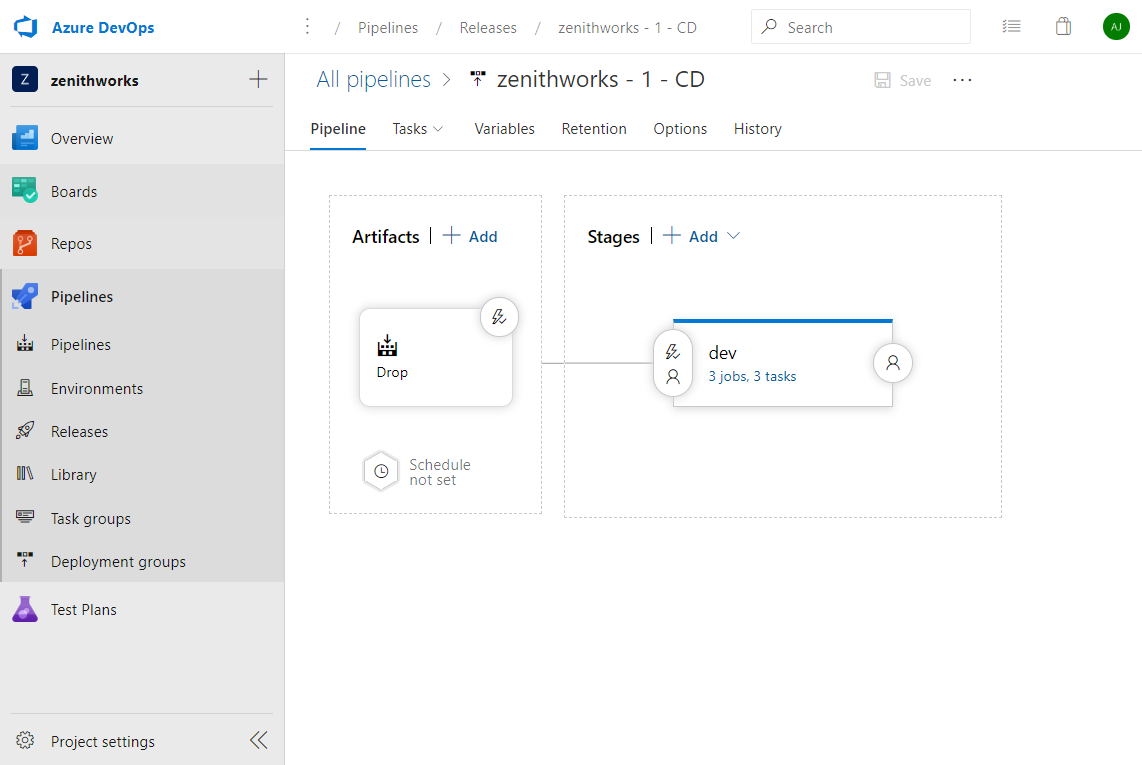
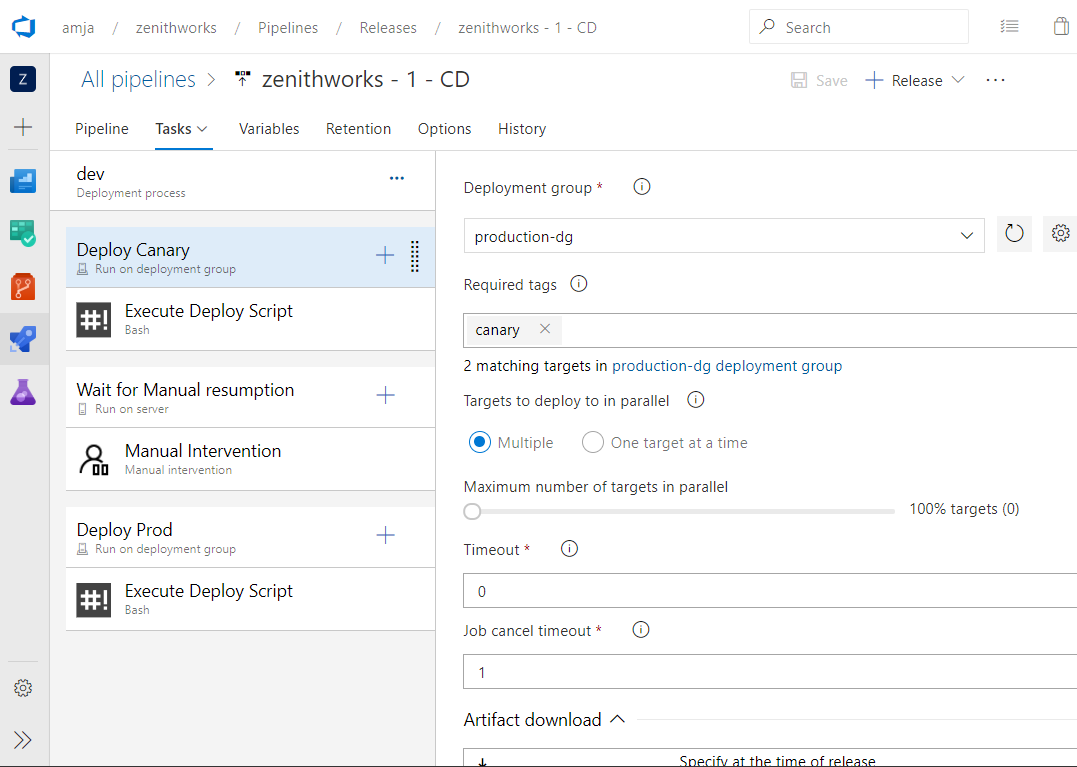
Navigate to your release pipeline and then select Edit to view the pipeline configuration. In this example, the dev stage is composed of three jobs:
- Deploy Canary: the application is deployed to VMs with a "canary" tag.
- Wait for manual resumption: the pipeline pauses and waits for manual intervention. Before resuming the pipeline, ensure that at least one VM is tagged "prod". In the next phase, the app will be deployed only to "prod" VMs.
- Deploy Prod: the application is deployed to VMs with a "prod" tag.
