Back up and recover Oracle Database on an Azure Linux VM by using Azure Backup
Applies to: ✔️ Linux VMs
This article demonstrates the use of Azure Backup to take disk snapshots of virtual machine (VM) disks, which include the Oracle Database files and the Oracle fast recovery area. By using Azure Backup, you can take full disk snapshots that are suitable as backups and are stored in a Recovery Services vault.
Azure Backup also provides application-consistent backups, which ensure that more fixes aren't required to restore the data. Application-consistent backups work with both file system and Oracle Automatic Storage Management (ASM) databases.
Restoring application-consistent data reduces restoration time, so you can quickly return to a running state. Oracle Database recovery is still necessary after restore. You facilitate the recovery by using Oracle archived redo log files that are captured and stored in a separate Azure file share.
This article walks you through the following tasks:
- Back up the database with application-consistent backup.
- Restore and recover the database from a recovery point.
- Restore the VM from a recovery point.
Prerequisites
Use the Bash environment in Azure Cloud Shell. For more information, see Quickstart for Bash in Azure Cloud Shell.

If you prefer to run CLI reference commands locally, install the Azure CLI. If you're running on Windows or macOS, consider running Azure CLI in a Docker container. For more information, see How to run the Azure CLI in a Docker container.
If you're using a local installation, sign in to the Azure CLI by using the az login command. To finish the authentication process, follow the steps displayed in your terminal. For other sign-in options, see Sign in with the Azure CLI.
When you're prompted, install the Azure CLI extension on first use. For more information about extensions, see Use extensions with the Azure CLI.
Run az version to find the version and dependent libraries that are installed. To upgrade to the latest version, run az upgrade.
To perform the backup and recovery process, you must first create a Linux VM that has an installed instance of Oracle Database 12.1 or later.
Create an Oracle Database instance by following the steps in Create an Oracle Database instance in an Azure VM.
Prepare the environment
To prepare the environment, complete these steps:
Connect to the VM
To create a Secure Shell (SSH) session with the VM, use the following command. Replace
<publicIpAddress>with the public address value for your VM.ssh azureuser@<publicIpAddress>Switch to the root user:
sudo su -Add the
oracleuser to the /etc/sudoers file:echo "oracle ALL=(ALL) NOPASSWD: ALL" >> /etc/sudoers
Set up Azure Files storage for the Oracle archived redo log files
The Oracle Database instance's archived redo log files play a crucial role in database recovery. They store the committed transactions needed to roll forward from a database snapshot taken in the past.
When the database is in ARCHIVELOG mode, it archives the contents of online redo log files when they become full and switch. Together with a backup, they're required to achieve point-in-time recovery when the database is lost.
Oracle provides the capability to archive redo log files to different locations. The industry best practice is that at least one of those destinations should be on remote storage, so it's separate from the host storage and protected with independent snapshots. Azure Files meets those requirements.
An Azure file share is storage that you an attach to a Linux or Windows VM as a regular file-system component, by using the Server Message Block (SMB) or Network File System (NFS) protocol. To set up an Azure file share on Linux (by using the SMB 3.0 protocol) for use as archive log storage, see Mount an SMB Azure file share on Linux. When you complete the setup, return to this guide and complete all remaining steps.
Prepare the databases
This part of the process assumes that you followed Create an Oracle Database instance in an Azure VM. As a result:
- You have an Oracle instance named
oratest1that's running on a VM namedvmoracle19c. - You're using the standard Oracle
oraenvscript with its dependency on the standard Oracle configuration file /etc/oratab to set up environment variables in a shell session.
Perform the following steps for each database on the VM:
Switch to the
oracleuser:sudo su - oracleSet the environment variable
ORACLE_SIDby running theoraenvscript. It prompts you to enter theORACLE_SIDname.. oraenvAdd the Azure file share as another destination for database archive log files.
This step assumes that you configured and mounted an Azure file share on the Linux VM. For each database installed on the VM, make a subdirectory named after your database security identifier (SID).
In this example, the mount point name is
/backupand the SID isoratest1. So you create the subdirectory/backup/oratest1and change ownership to theoracleuser. Substitute/backup/SIDfor your mount point name and database SID.sudo mkdir /backup/oratest1 sudo chown oracle:oinstall /backup/oratest1Connect to the database:
sqlplus / as sysdbaStart the database if it's not already running:
SQL> startupSet the first archive log destination of the database to the file-share directory that you created earlier:
SQL> alter system set log_archive_dest_1='LOCATION=/backup/oratest1' scope=both;Define the recovery point objective (RPO) for the database.
To achieve a consistent RPO, consider the frequency at which the online redo log files get archived. These factors control the frequency:
- The size of the online redo log files. As an online log file becomes full, it gets switched and archived. The larger the online log file, the longer it takes to fill up. The added time decreases the frequency of archive generation.
- The setting of the
ARCHIVE_LAG_TARGETparameter controls the maximum number of seconds permitted before the current online log file must be switched and archived.
To minimize the frequency of switching and archiving, along with the accompanying checkpoint operation, Oracle online redo log files generally have a large size (for example, 1,024M, 4,096M, or 8,192M). In a busy database environment, logs are still likely to switch and archive every few seconds or minutes. In a less active database, they might go hours or days before the most recent transactions are archived, which would dramatically decrease archival frequency.
We recommend that you set
ARCHIVE_LAG_TARGETto ensure a consistent RPO. A setting of 5 minutes (300 seconds) is a prudent value forARCHIVE_LAG_TARGET. It ensures that any database recovery operation can recover to within 5 minutes of the time of failure.To set
ARCHIVE_LAG_TARGET, run this command:SQL> alter system set archive_lag_target=300 scope=both;To better understand how to deploy highly available Oracle Database instances in Azure with zero RPO, see Reference architectures for Oracle Database.
Make sure the database is in archive log mode to enable online backups.
Check the log archive status first:
SQL> SELECT log_mode FROM v$database;

LOG_MODE
------------
NOARCHIVELOG
If it's in
NOARCHIVELOGmode, run the following commands:SQL> SHUTDOWN IMMEDIATE; SQL> STARTUP MOUNT; SQL> ALTER DATABASE ARCHIVELOG; SQL> ALTER DATABASE OPEN; SQL> ALTER SYSTEM SWITCH LOGFILE;Create a table to test the backup and restore operations:
SQL> create user scott identified by tiger quota 100M on users;
SQL> grant create session, create table to scott;
SQL> connect scott/tiger
SQL> create table scott_table(col1 number, col2 varchar2(50));
SQL> insert into scott_table VALUES(1,'Line 1');
SQL> commit;
SQL> quit
Back up your data by using Azure Backup
The Azure Backup service provides solutions to back up your data and recover it from the Microsoft Azure cloud. Azure Backup provides independent and isolated backups to guard against accidental destruction of original data. Backups are stored in a Recovery Services vault with built-in management of recovery points, so you can restore as needed.
In this section, you use Azure Backup to take application-consistent snapshots of your running VM and Oracle Database instances. The databases are placed into backup mode, which allows a transactionally consistent online backup to occur while Azure Backup takes a snapshot of the VM disks. The snapshot is a full copy of the storage and not an incremental or copy-on-write snapshot. It's an effective medium to restore your database from.
The advantage of using Azure Backup application-consistent snapshots is that they're fast to take, no matter how large your database is. You can use a snapshot for restore operations as soon as you take it, without having to wait for it to be transferred to the Recovery Services vault.
To use Azure Backup to back up the database, complete these steps:
- Understand the Azure Backup framework.
- Prepare the environment for an application-consistent backup.
- Set up application-consistent backups.
- Trigger an application-consistent backup of the VM.
Understand the Azure Backup framework
The Azure Backup service provides a framework to achieve application consistency during backups of Windows and Linux VMs for various applications. This framework involves invoking a prescript to quiesce the applications before taking a snapshot of disks. It calls a postscript to unfreeze the applications after the snapshot is completed.
Microsoft has enhanced the framework so that the Azure Backup service provides packaged prescripts and postscripts for selected applications. These prescripts and postscripts are already loaded on the Linux image, so there's nothing for you to install. You just name the application, and then Azure Backup automatically invokes the relevant scripts. Microsoft manages the packaged prescripts and postscripts, so you can be assured of the support, ownership, and validity of them.
Currently, the supported applications for the enhanced framework are Oracle 12.x or later and MySQL. For details, see Support matrix for managed Azure VM backups.
You can author your own scripts for Azure Backup to use with pre-12.x databases. Example scripts are available on GitHub.
Each time you do a backup, the enhanced framework runs the prescripts and postscripts on all Oracle Database instances installed on the VM. The configuration_path parameter in the workload.conf file points to the location of the Oracle /etc/oratab file (or a user-defined file that follows the oratab syntax). For details, see Set up application-consistent backups.
Azure Backup runs the prescripts and postscripts for each database listed in the file that configuration_path points to. Exceptions are lines that begin with # (treated as comment) or +ASM (an Oracle ASM instance).
The Azure Backup enhanced framework takes online backups of Oracle Database instances that operate in ARCHIVELOG mode. The prescripts and postscripts use the ALTER DATABASE BEGIN and END BACKUP commands to achieve application consistency.
For the database backup to be consistent, databases in NOARCHIVELOG mode must be shut down cleanly before the snapshot starts.
Prepare the environment for an application-consistent backup
Oracle Database employs job role separation to provide separation of duties by using least privilege. It associates separate operating system (OS) groups with separate database administrative roles. Users can then have different database privileges granted to them, depending on their membership in OS groups.
The SYSBACKUP database role (generic name OSBACKUPDBA) provides limited privileges to perform backup operations in the database. Azure Backup requires it.
During Oracle installation, we recommend that you use backupdba as the OS group name to associate with the SYSBACKUP role. But you can use any name, so you need to determine the name of the OS group that represents the Oracle SYSBACKUP role first.
Switch to the
oracleuser:sudo su - oracleSet the Oracle environment:
export ORACLE_SID=oratest1
export ORAENV_ASK=NO
. oraenv
Determine the name of the OS group that represents the Oracle
SYSBACKUProle:grep "define SS_BKP" $ORACLE_HOME/rdbms/lib/config.cThe output looks similar to the following example:
#define SS_BKP_GRP "backupdba"In the output, the value enclosed within double quotation marks is the name of the Linux OS group to which the Oracle
SYSBACKUProle is externally authenticated. In this example, it'sbackupdba. Note down the actual value.Verify that the OS group exists by running the following command. Substitute
<group name>with the value that the previous command returned (without the quotation marks).grep <group name> /etc/groupThe output looks similar to the following example:
backupdba:x:54324:oracleImportant
If the output doesn't match the Oracle OS group value that you retrieved in step 3, use the following command to create the OS group that represents the Oracle
SYSBACKUProle. Substitute<group name>with the group name that you retrieved in step 3.sudo groupadd <group name>Create a new backup user named
azbackupthat belongs to the OS group that you verified or created in the previous steps. Substitute<group name>with the name of the verified group. The user is also added to theoinstallgroup to enable it to open ASM disks.sudo useradd -g <group name> -G oinstall azbackupSet up external authentication for the new backup user.
The backup user
azbackupneeds to be able to access the database by using external authentication, so it isn't challenged by a password. To enable this access, you must create a database user that authenticates externally throughazbackup. The database uses a prefix for the user name, which you need to find.Perform the following steps for each database installed on the VM:
Sign in to the database by using SQL Plus, and check the default settings for external authentication:
sqlplus / as sysdba
SQL> show parameter os_authent_prefix
SQL> show parameter remote_os_authent
The output should look like this example, which shows
ops$as the database username prefix:NAME TYPE VALUE ------------------------------------ ----------- ------------------------------ os_authent_prefix string ops$ remote_os_authent boolean FALSECreate a database user named
ops$azbackupfor external authentication to theazbackupuser, and grantSYSBACKUPprivileges:SQL> CREATE USER ops$azbackup IDENTIFIED EXTERNALLY; SQL> GRANT CREATE SESSION, ALTER SESSION, SYSBACKUP TO ops$azbackup;
If you receive the error
ORA-46953: The password file is not in the 12.2 formatwhen you run theGRANTstatement, follow these steps to migrate the orapwd file to 12.2 format. Perform these steps for every Oracle Database instance on the VM.Exit SQL Plus.
Move the password file with the old format to a new name.
Migrate the password file.
Remove the old file.
Run the following commands:
mv $ORACLE_HOME/dbs/orapworatest1 $ORACLE_HOME/dbs/orapworatest1.tmp
orapwd file=$ORACLE_HOME/dbs/orapworatest1 input_file=$ORACLE_HOME/dbs/orapworatest1.tmp
rm $ORACLE_HOME/dbs/orapworatest1.tmp
Rerun the
GRANToperation in SQL Plus.
Create a stored procedure to log backup messages to the database alert log. Use the following code for each database installed on the VM:
sqlplus / as sysdba
SQL> GRANT EXECUTE ON DBMS_SYSTEM TO SYSBACKUP;
SQL> CREATE PROCEDURE sysbackup.azmessage(in_msg IN VARCHAR2)
AS
  v_timestamp     VARCHAR2(32);
BEGIN
  SELECT TO_CHAR(SYSDATE, 'YYYY-MM-DD HH24:MI:SS')
  INTO v_timestamp FROM DUAL;
  DBMS_OUTPUT.PUT_LINE(v_timestamp || ' - ' || in_msg);
  SYS.DBMS_SYSTEM.KSDWRT(SYS.DBMS_SYSTEM.ALERT_FILE, in_msg);
END azmessage;
/
SQL> SHOW ERRORS
SQL> QUIT
Set up application-consistent backups
Switch to the root user:
sudo su -Check for the /etc/azure folder. If it isn't present, create the working directory for the application-consistent backup:
if [ ! -d "/etc/azure" ]; then
   mkdir /etc/azure
fi
Check for the workload.conf file within the folder. If it isn't present, create it in the /etc/azure directory and give it the following contents. The comments must begin with
[workload]. If the file is already present, just edit the fields so that they match the following contents. Otherwise, the following command creates the file and populates the contents:echo "[workload] workload_name = oracle configuration_path = /etc/oratab timeout = 90 linux_user = azbackup" > /etc/azure/workload.confThe workload.conf file uses the following format:
- The
workload_nameparameter indicates the database workload type. In this case, setting the parameter toOracleallows Azure Backup to run the correct prescripts and postscripts (consistency commands) for Oracle Database instances. - The
timeoutparameter indicates the maximum time, in seconds, that each database must complete storage snapshots. - The
linux_userparameter indicates the Linux user account that Azure Backup uses to run database quiesce operations. You created this user,azbackup, previously. - The
configuration_pathparameter indicates the absolute path name for a text file on the VM. Each line lists a database instance running on the VM. This is typically the /etc/oratab file that Oracle generates during database installation, but it can be any file with any name that you choose. It must follow these format rules:- The file is a text file. Each field is delimited with the colon character (
:). - The first field in each line is the name for an
ORACLE_SIDinstance. - The second field in each line is the absolute path name for
ORACLE_HOMEfor thatORACLE_SIDinstance. - All text after the first two fields is ignored.
- If the line starts with a pound sign (
#), the entire line is ignored as a comment. - If the first field has the value
+ASM, denoting an Oracle ASM instance, it's ignored.
- The file is a text file. Each field is delimited with the colon character (
- The
Trigger an application-consistent backup of the VM
In the Azure portal, go to your rg-oracle resource group and select your vmoracle19c virtual machine.
On the Backup pane:
- Under Recovery Services vault, select Create new.
- For the name of the vault, use myVault.
- For Resource group, select rg-oracle.
- For Choose backup policy, use (new) DailyPolicy. If you want to change the backup frequency or retention range, select Create a new policy instead.
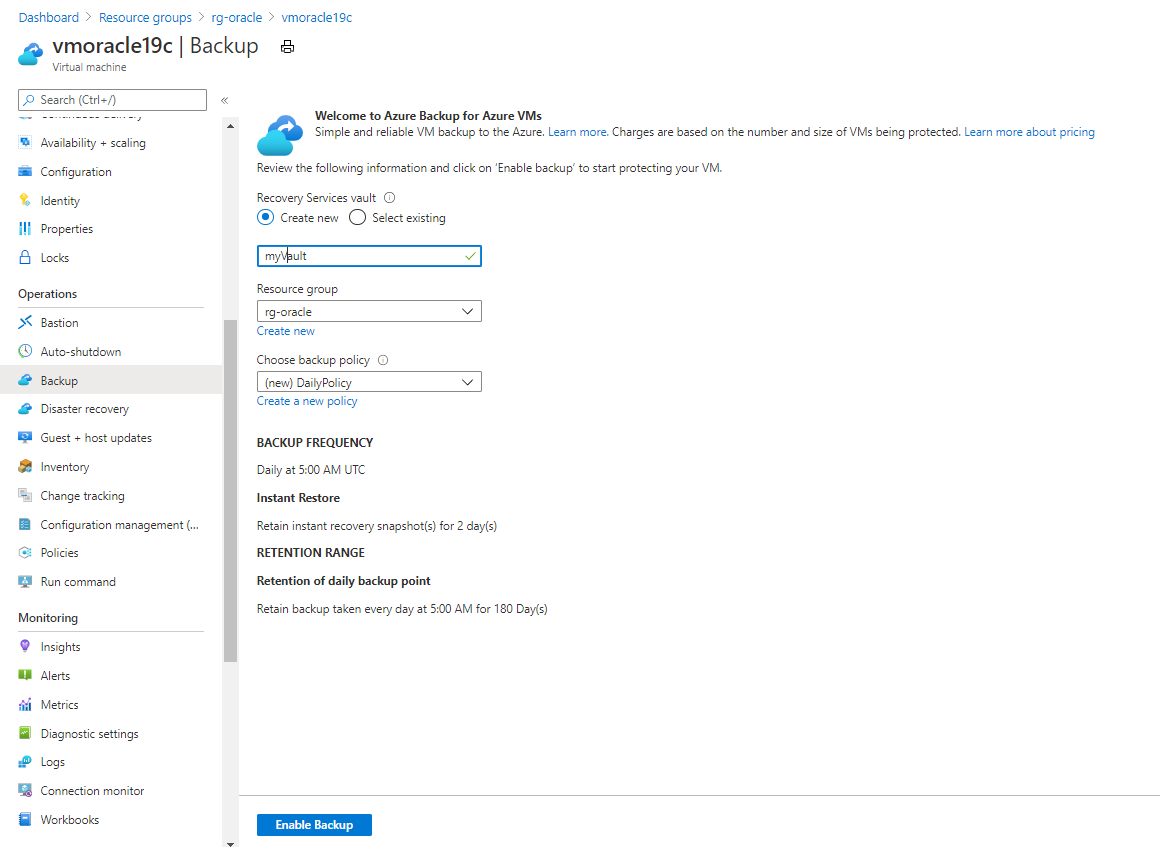
Select Enable Backup.
The backup process doesn't start until the scheduled time expires. To set up an immediate backup, complete the next step.
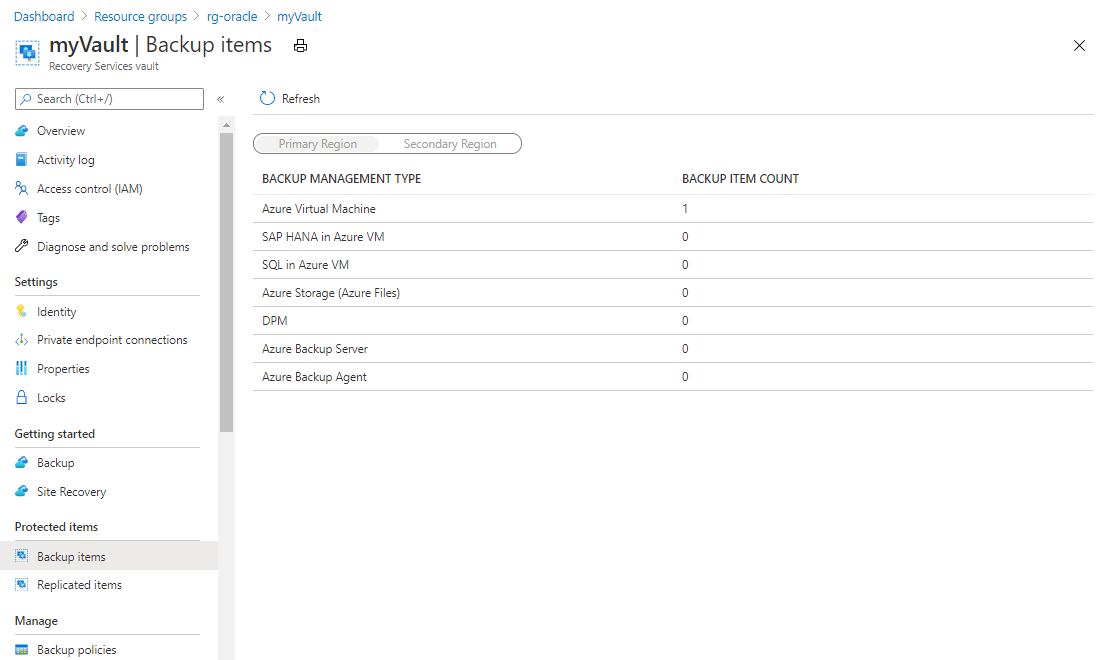
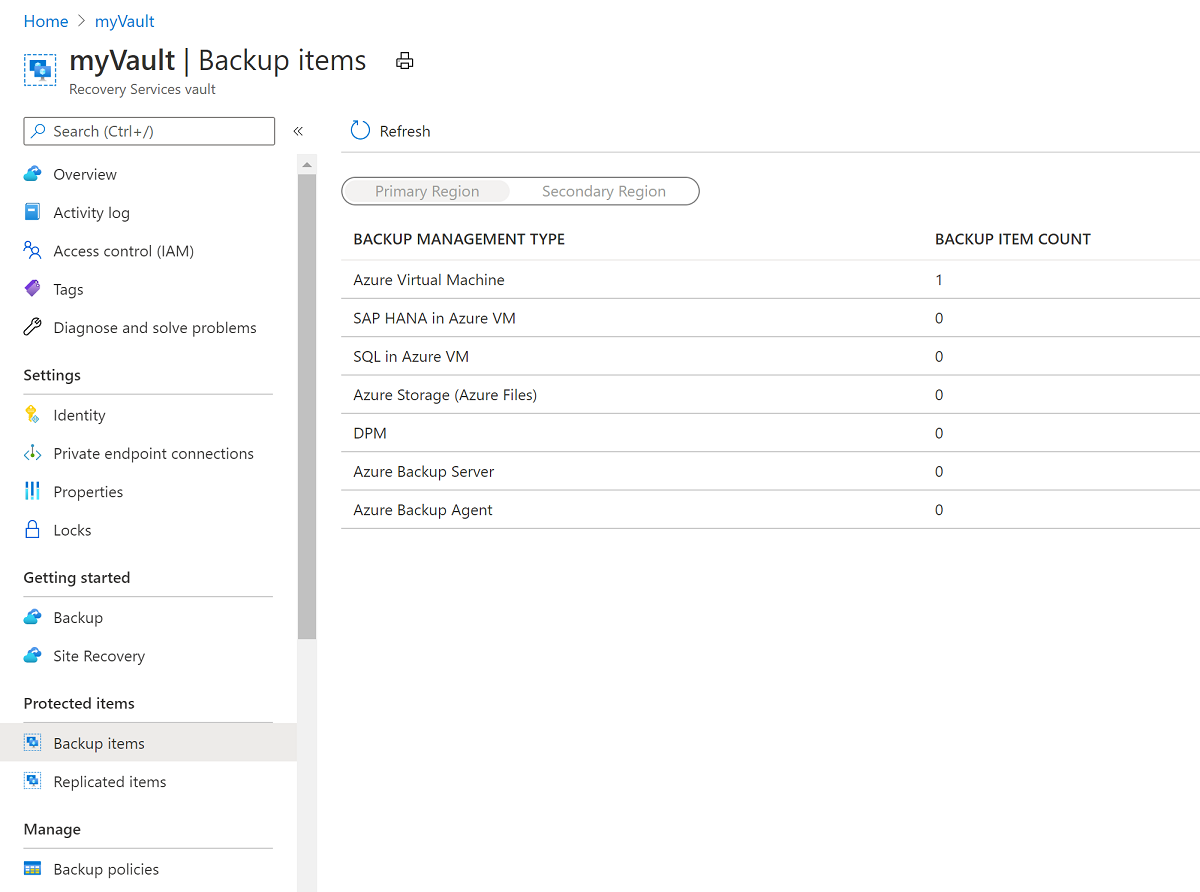
From the resource group pane, select your newly created Recovery Services vault named myVault. You might need to refresh the page to see it.
On the myVault - Backup items pane, under BACKUP ITEM COUNT, select the backup item count.
On the Backup Items (Azure Virtual Machine) pane, select the ellipsis (...) button, and then select Backup now.
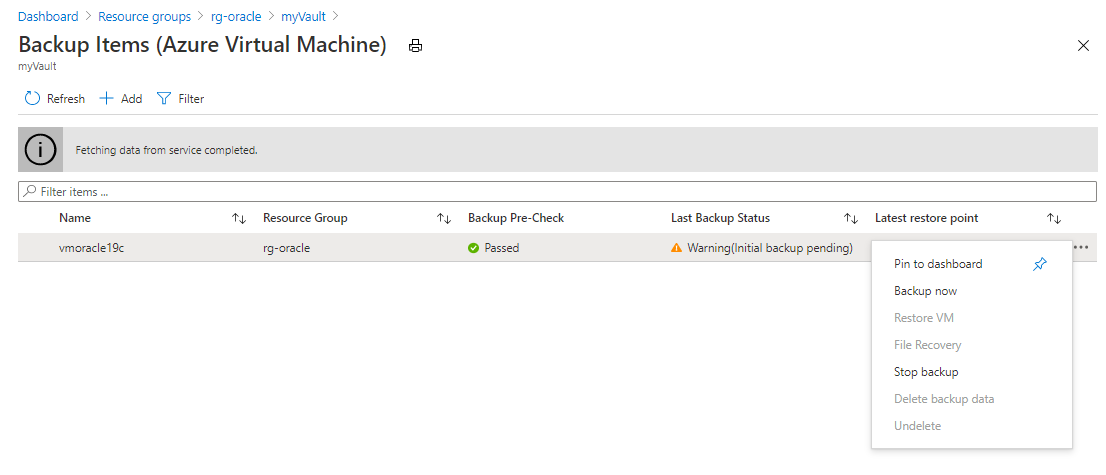
Accept the default Retain Backup Till value, and then select OK. Wait for the backup process to finish.
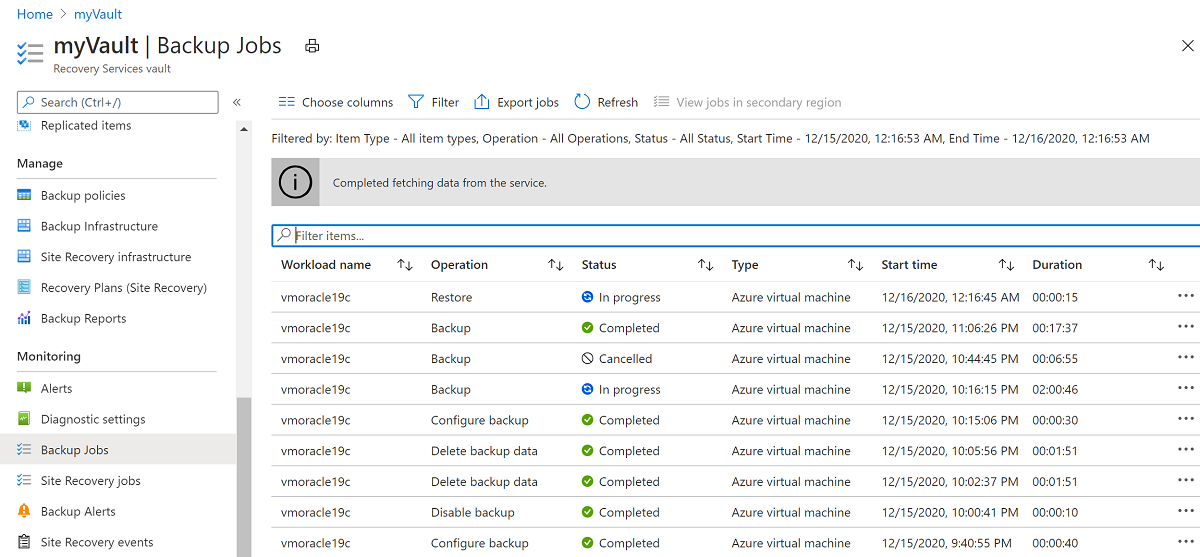
To view the status of the backup job, select Backup Jobs.
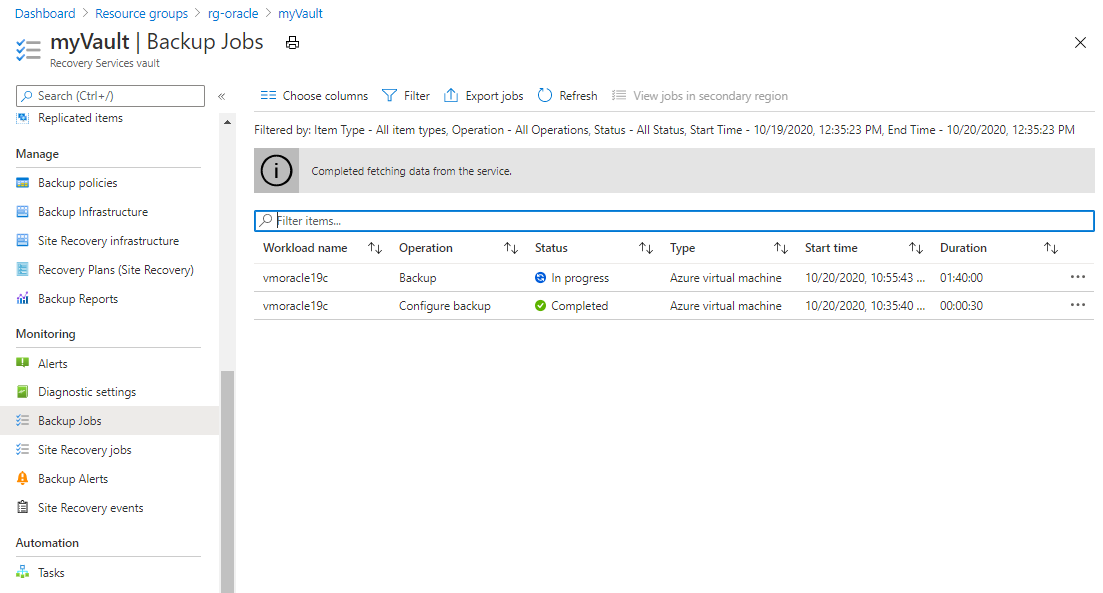
Select the backup job to see details about its status.
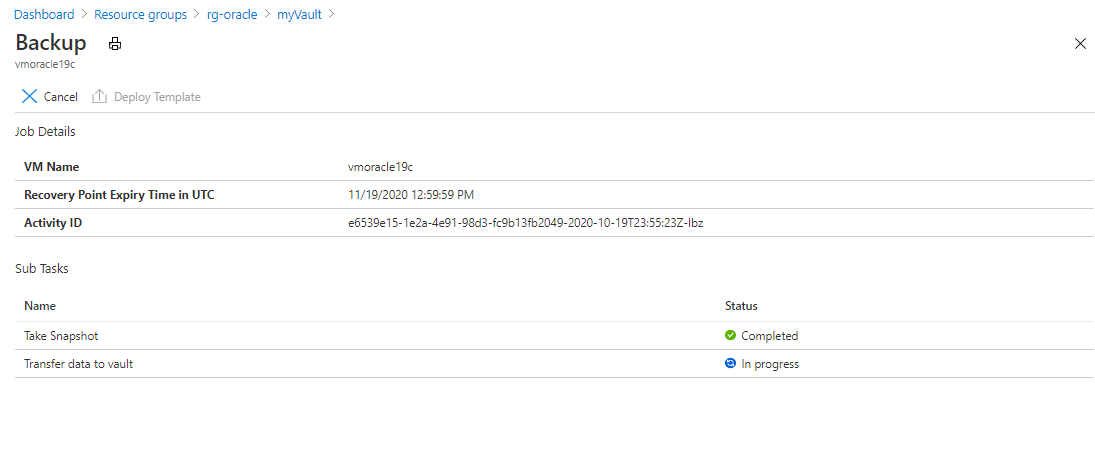
Although it takes seconds to execute the snapshot, it can take more time to transfer it to the vault. The backup job isn't completed until the transfer is finished.
For an application-consistent backup, address any errors in the log file at /var/log/azure/Microsoft.Azure.RecoveryServices.VMSnapshotLinux/extension.log.
Restore the VM
Restoring an entire VM means that you restore the VM and its attached disks to a new VM from a selected restore point. This action also restores all databases that run on the VM. Afterward, you need to recover each database.
To restore an entire VM, complete these steps:
There are two main choices when you're restoring a VM:
- Restore the VM from which the backups were originally taken.
- Restore (clone) a new VM without affecting the VM from which the backups were originally taken.
The first steps in this exercise (stopping, deleting, and then recovering the VM) simulate the first use case.
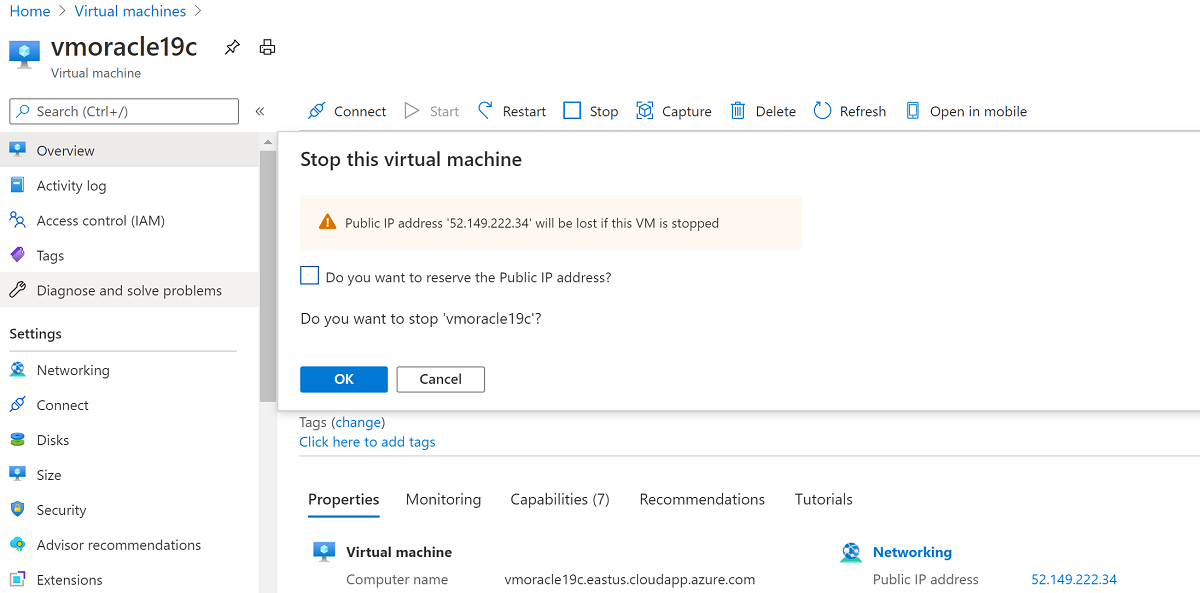
Stop and delete the VM
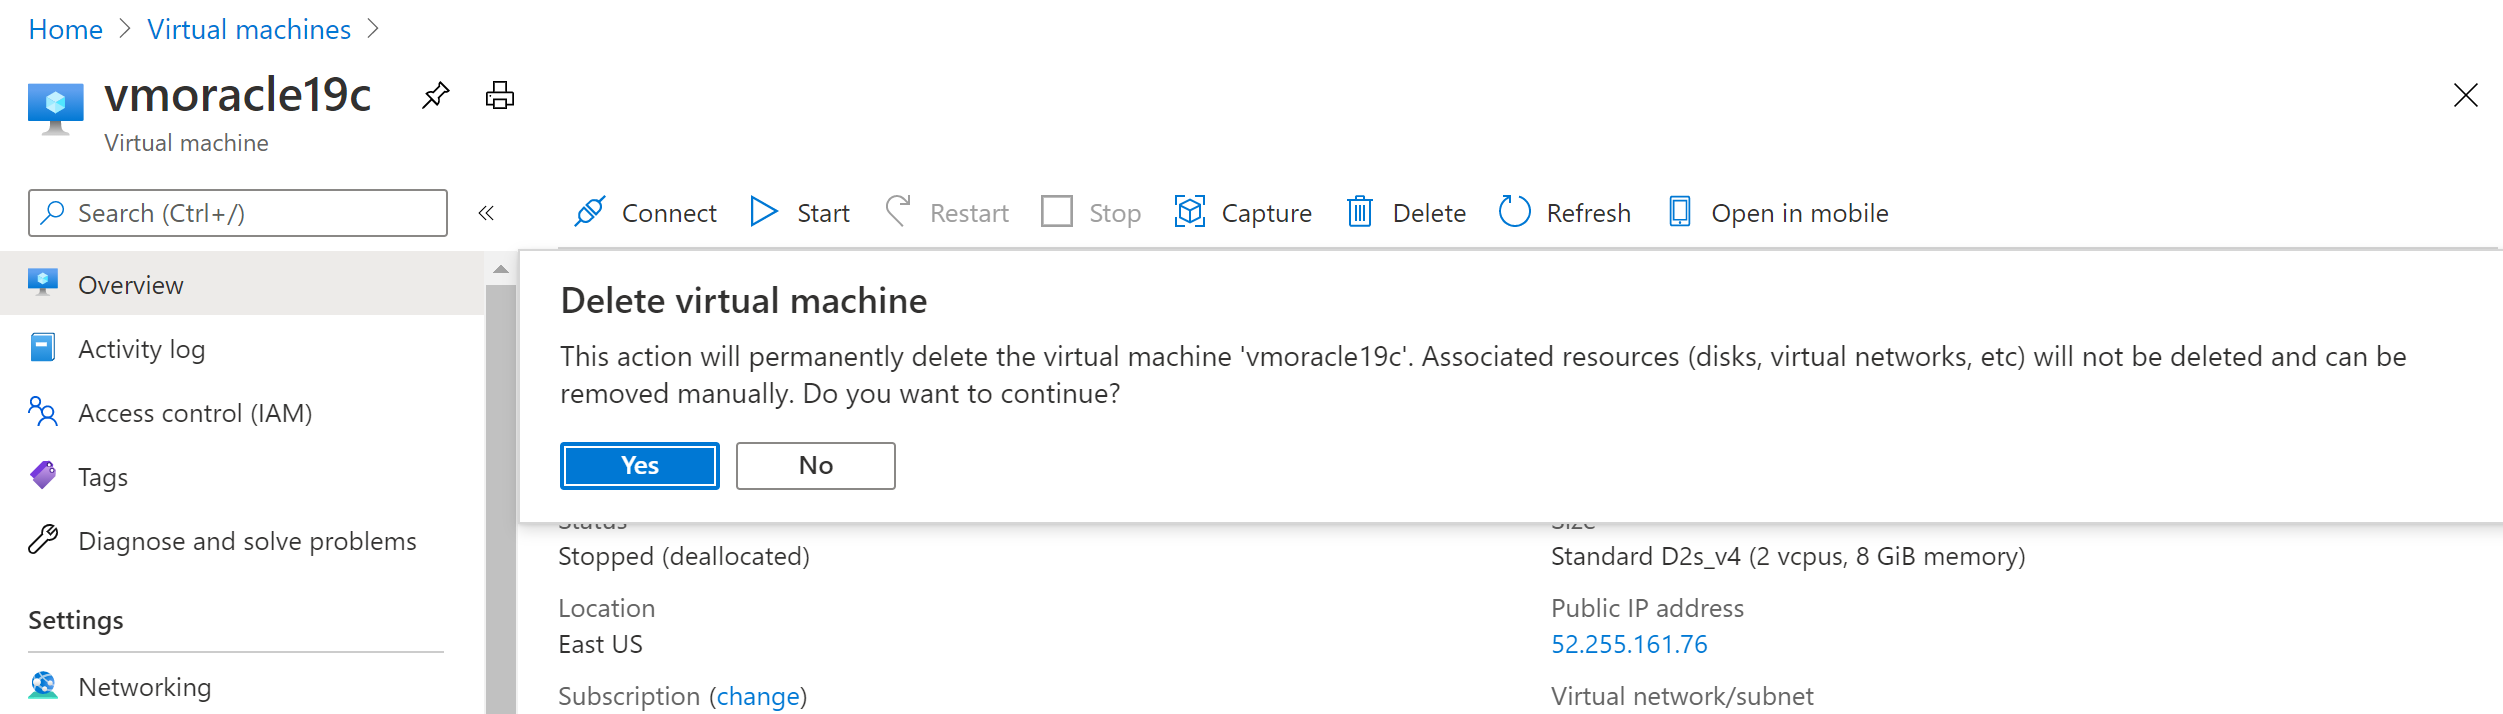
In the Azure portal, go to the vmoracle19c virtual machine, and then select Stop.
When the virtual machine is no longer running, select Delete and then Yes.
Recover the VM
Create a storage account for staging in the Azure portal:
In the Azure portal, select + Create a resource, and then search for and select Storage account.

On the Create storage account pane:
- For Resource group, select your existing resource group, rg-oracle.
- For Storage account name, enter oracrestore.
- Ensure that Location is set to the same region as all your other resources in the resource group.
- Set Performance to Standard.
- For Account kind, select StorageV2 (general purpose v2).
- For Replication, select Locally-redundant storage (LRS).
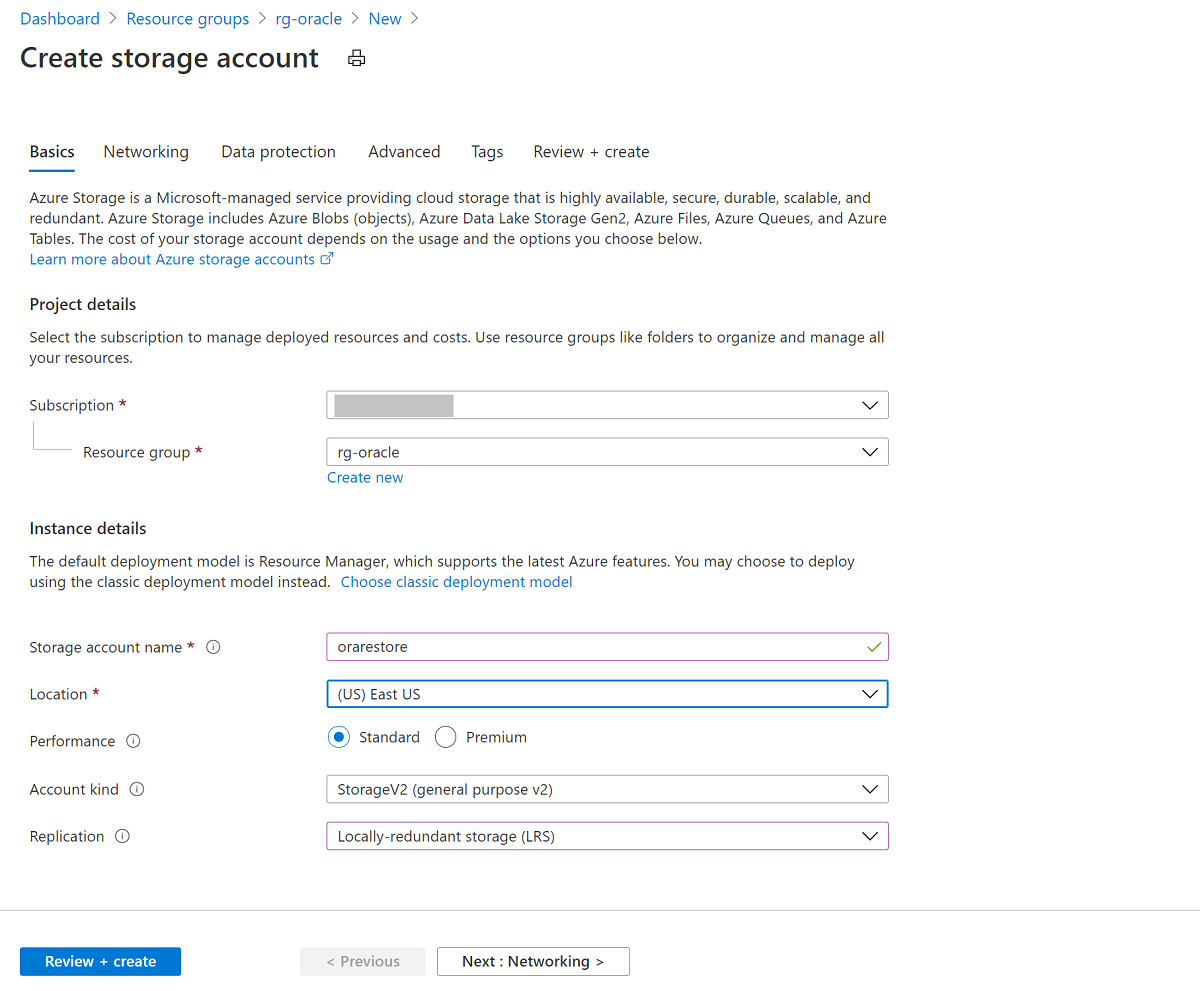
Select Review + Create, and then select Create.
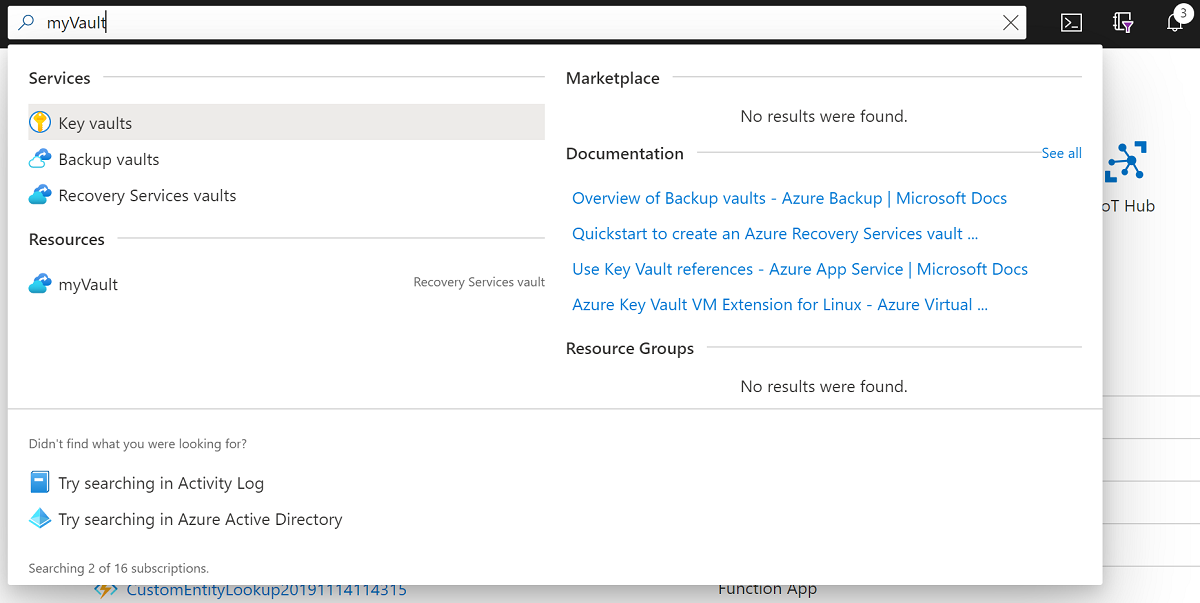
In the Azure portal, search for the myVault Recovery Services vault and select it.
On the Overview pane, select Backup items. Then select Azure Virtual Machine, which should have a nonzero number for BACKUP ITEM COUNT.
On the Backups Items (Azure Virtual Machine) pane, select the vmoracle19c VM.
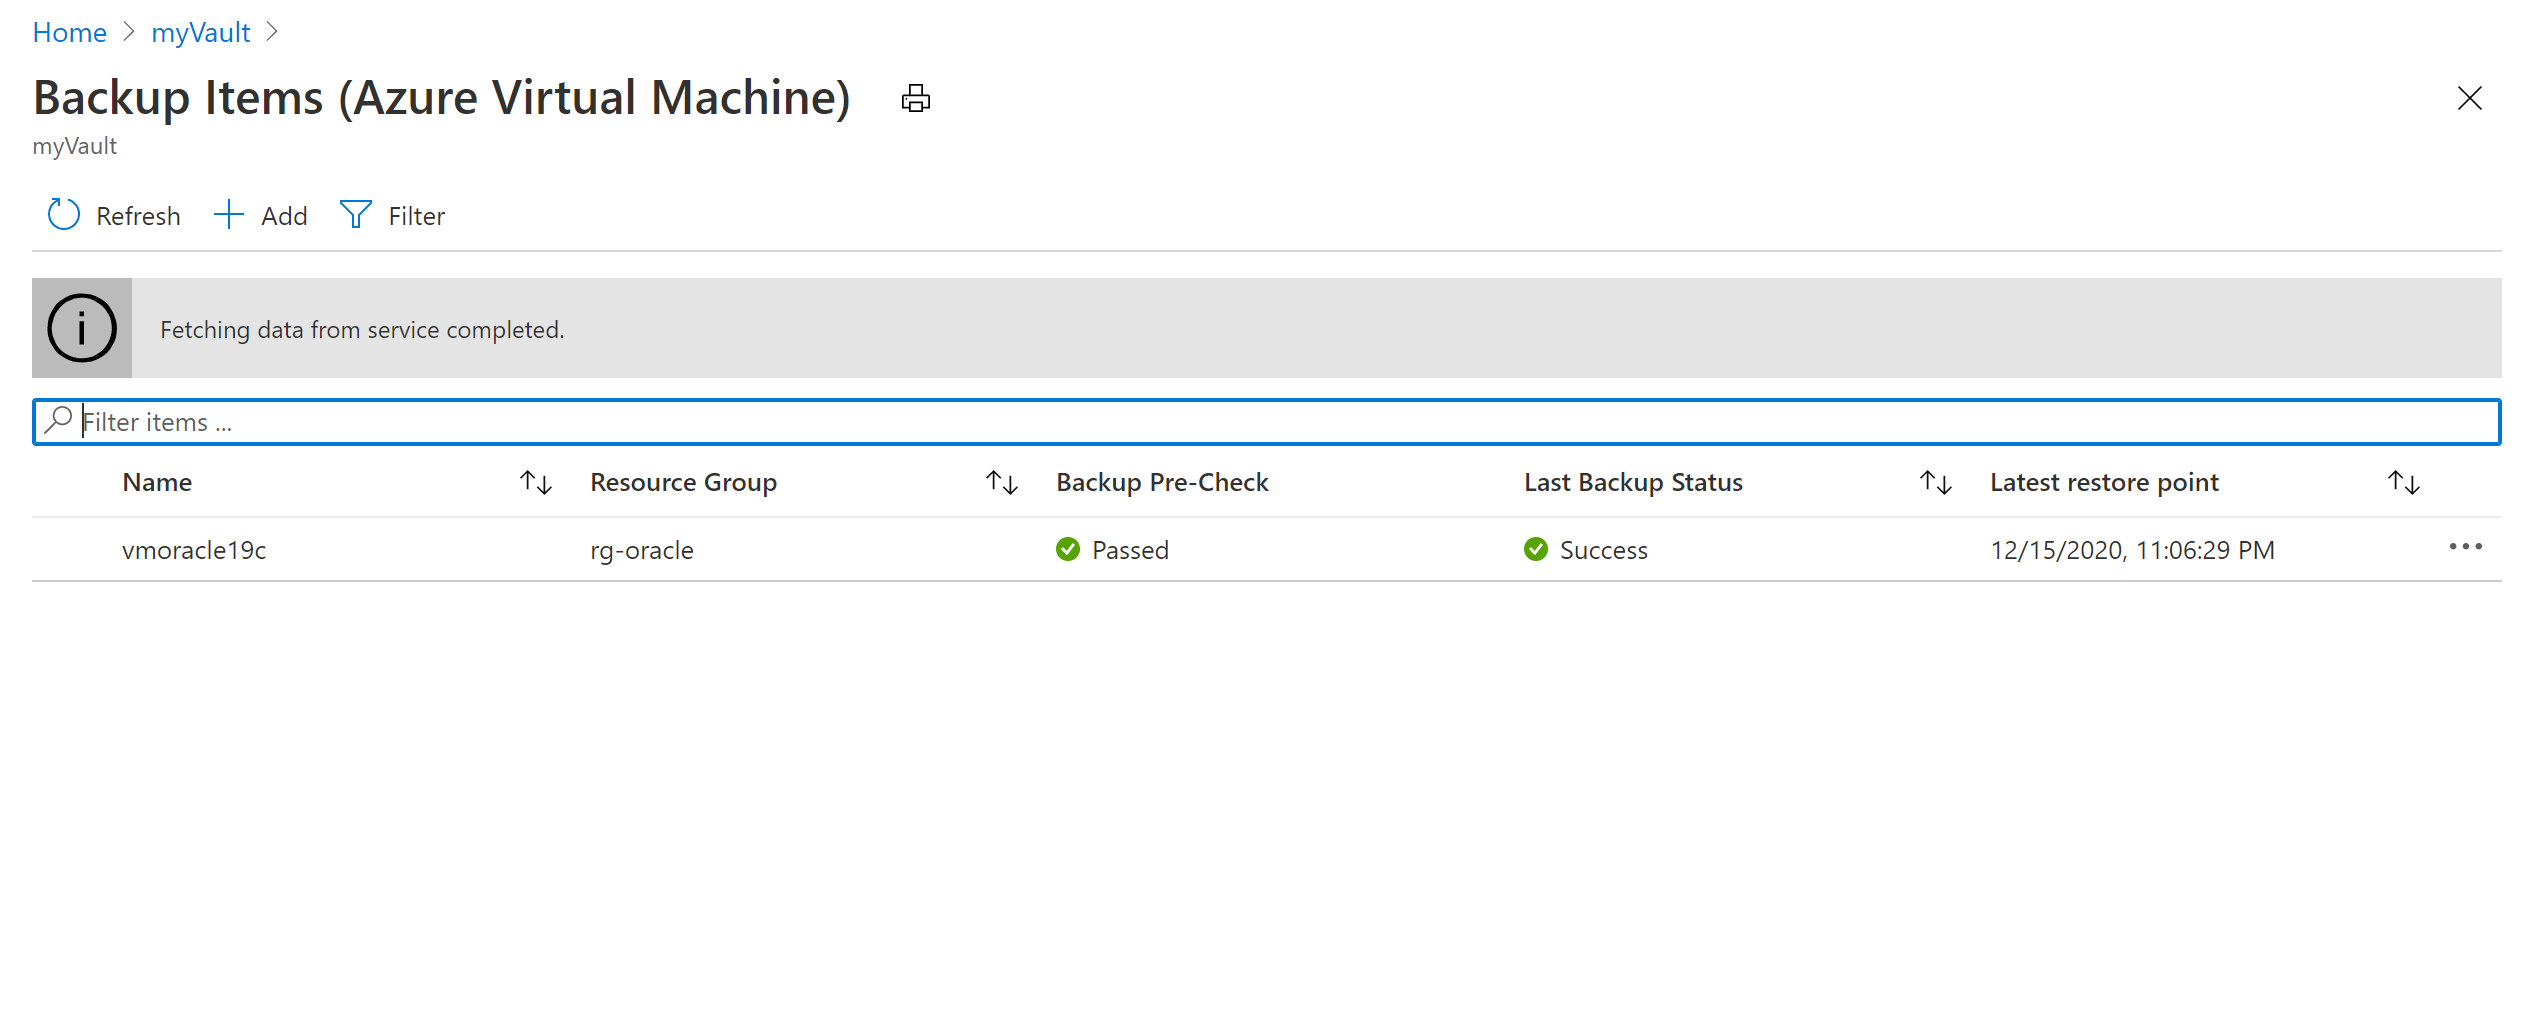
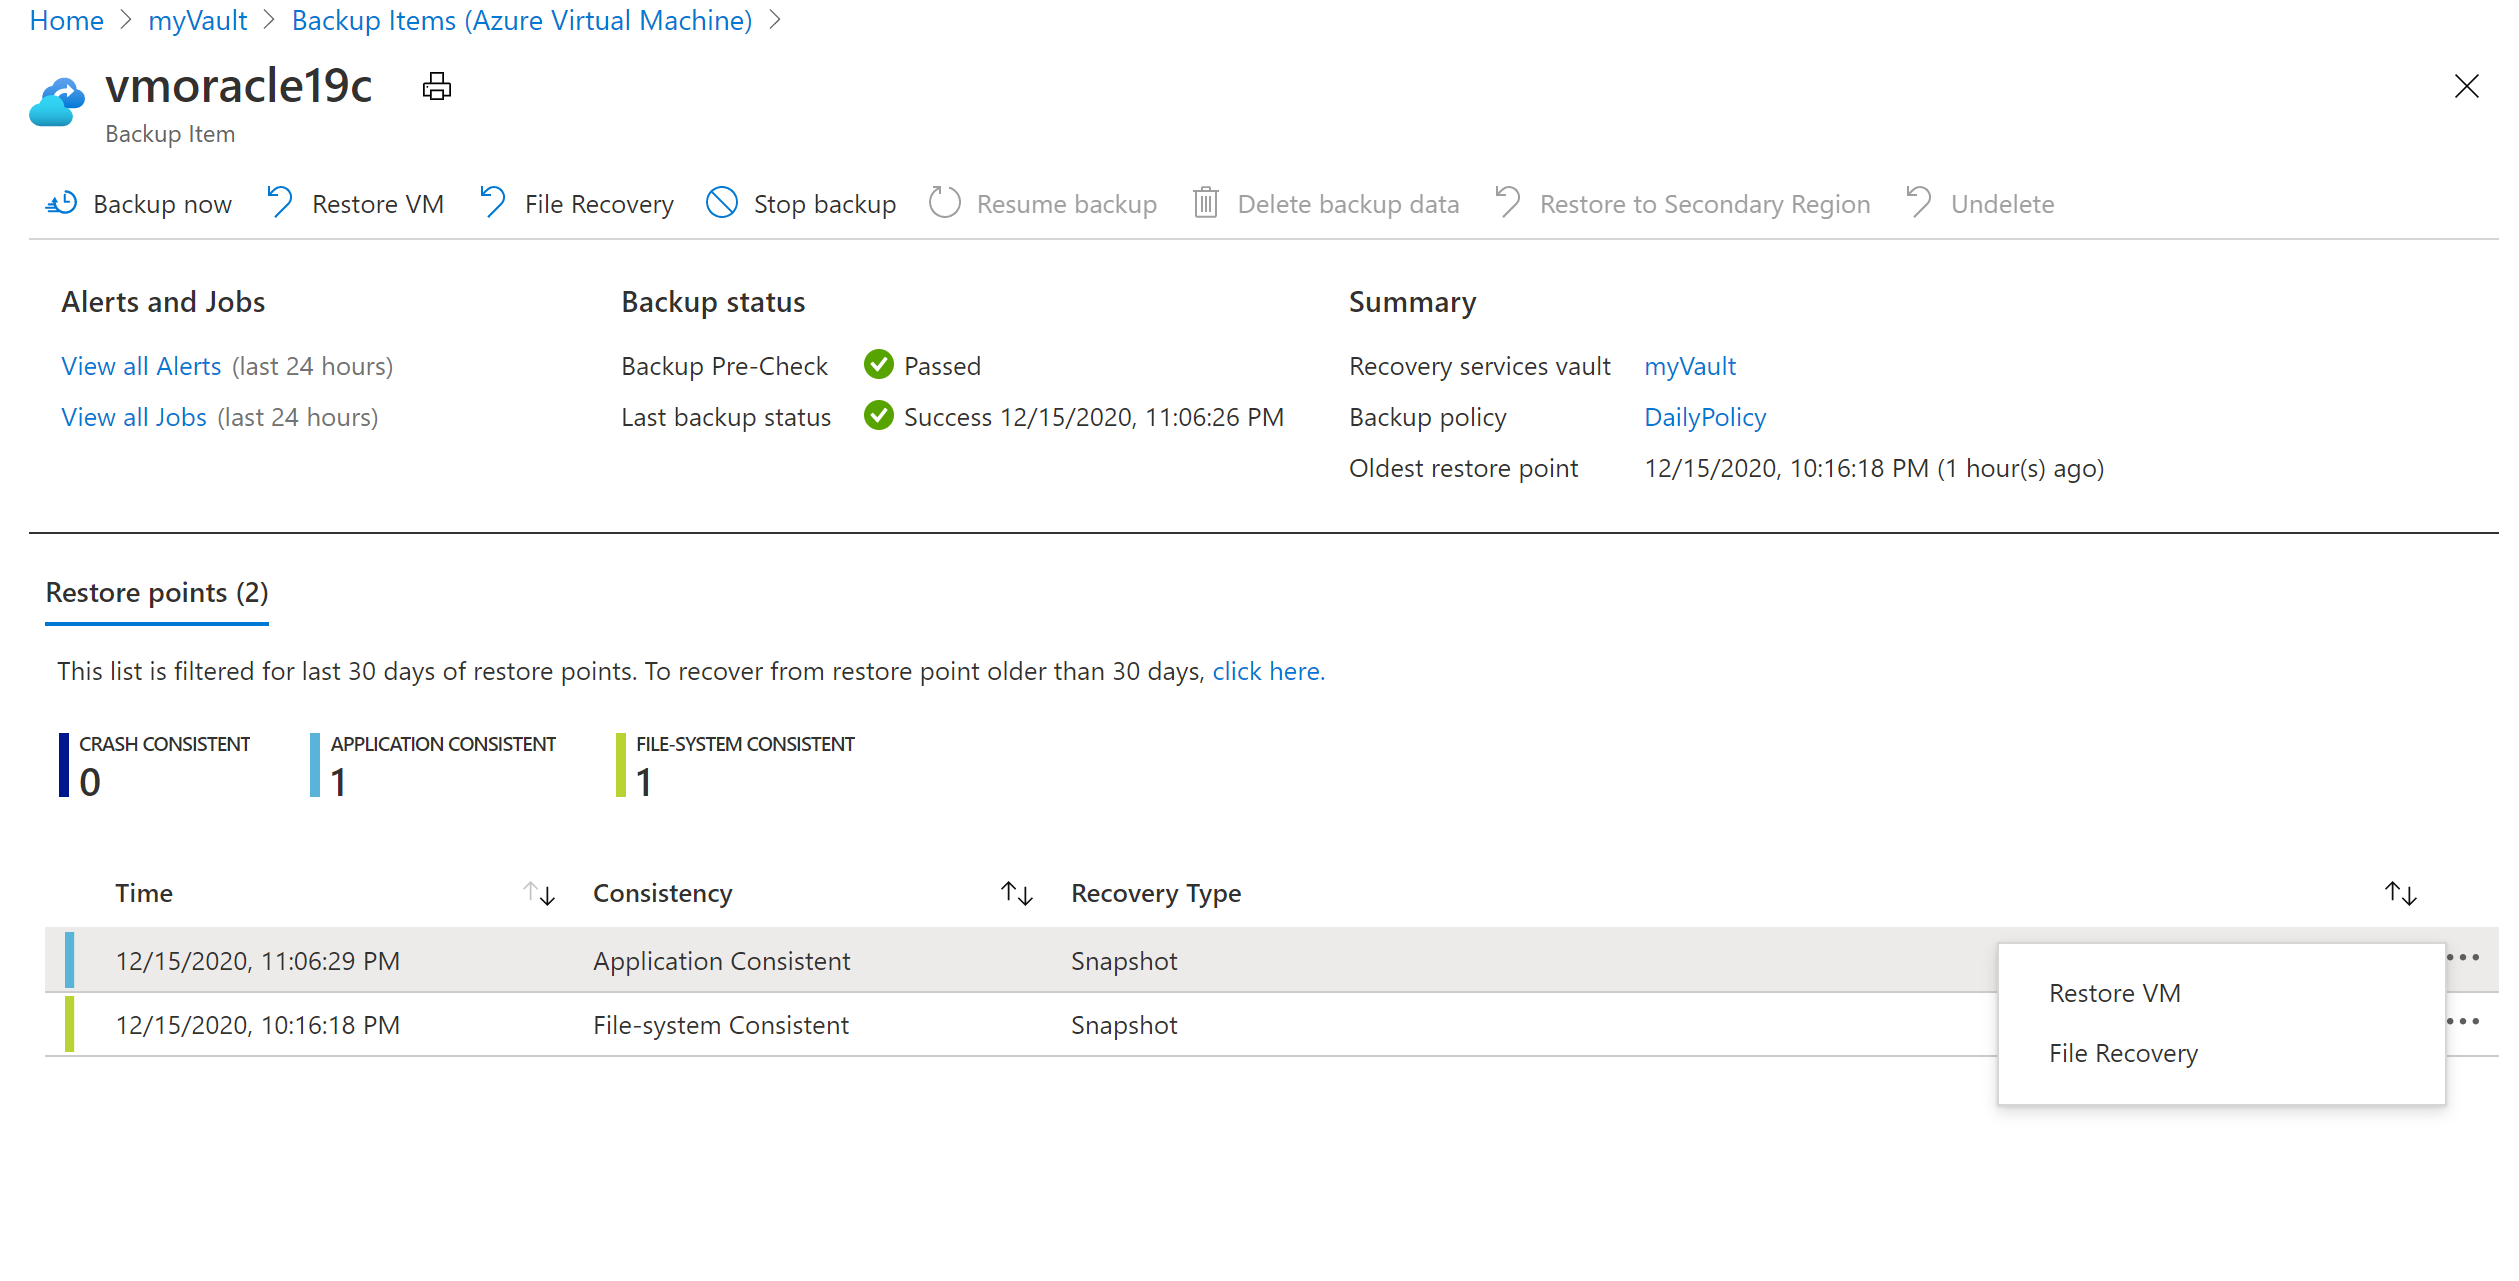
On the vmoracle19c pane, choose a restore point that has a consistency type of Application Consistent. Select the ellipsis (...), and then select Restore VM.
On the Restore Virtual Machine pane:
Select Create New.
For Restore Type, select Create new virtual machine.
For Virtual machine name, enter vmoracle19c.
For Virtual network, select vmoracle19cVNET.
The subnet is automatically populated based on your selection for the virtual network.
For Staging Location, the process of restoring a VM requires an Azure storage account in the same resource group and region. You can choose a storage account or a restore task that you set up earlier.
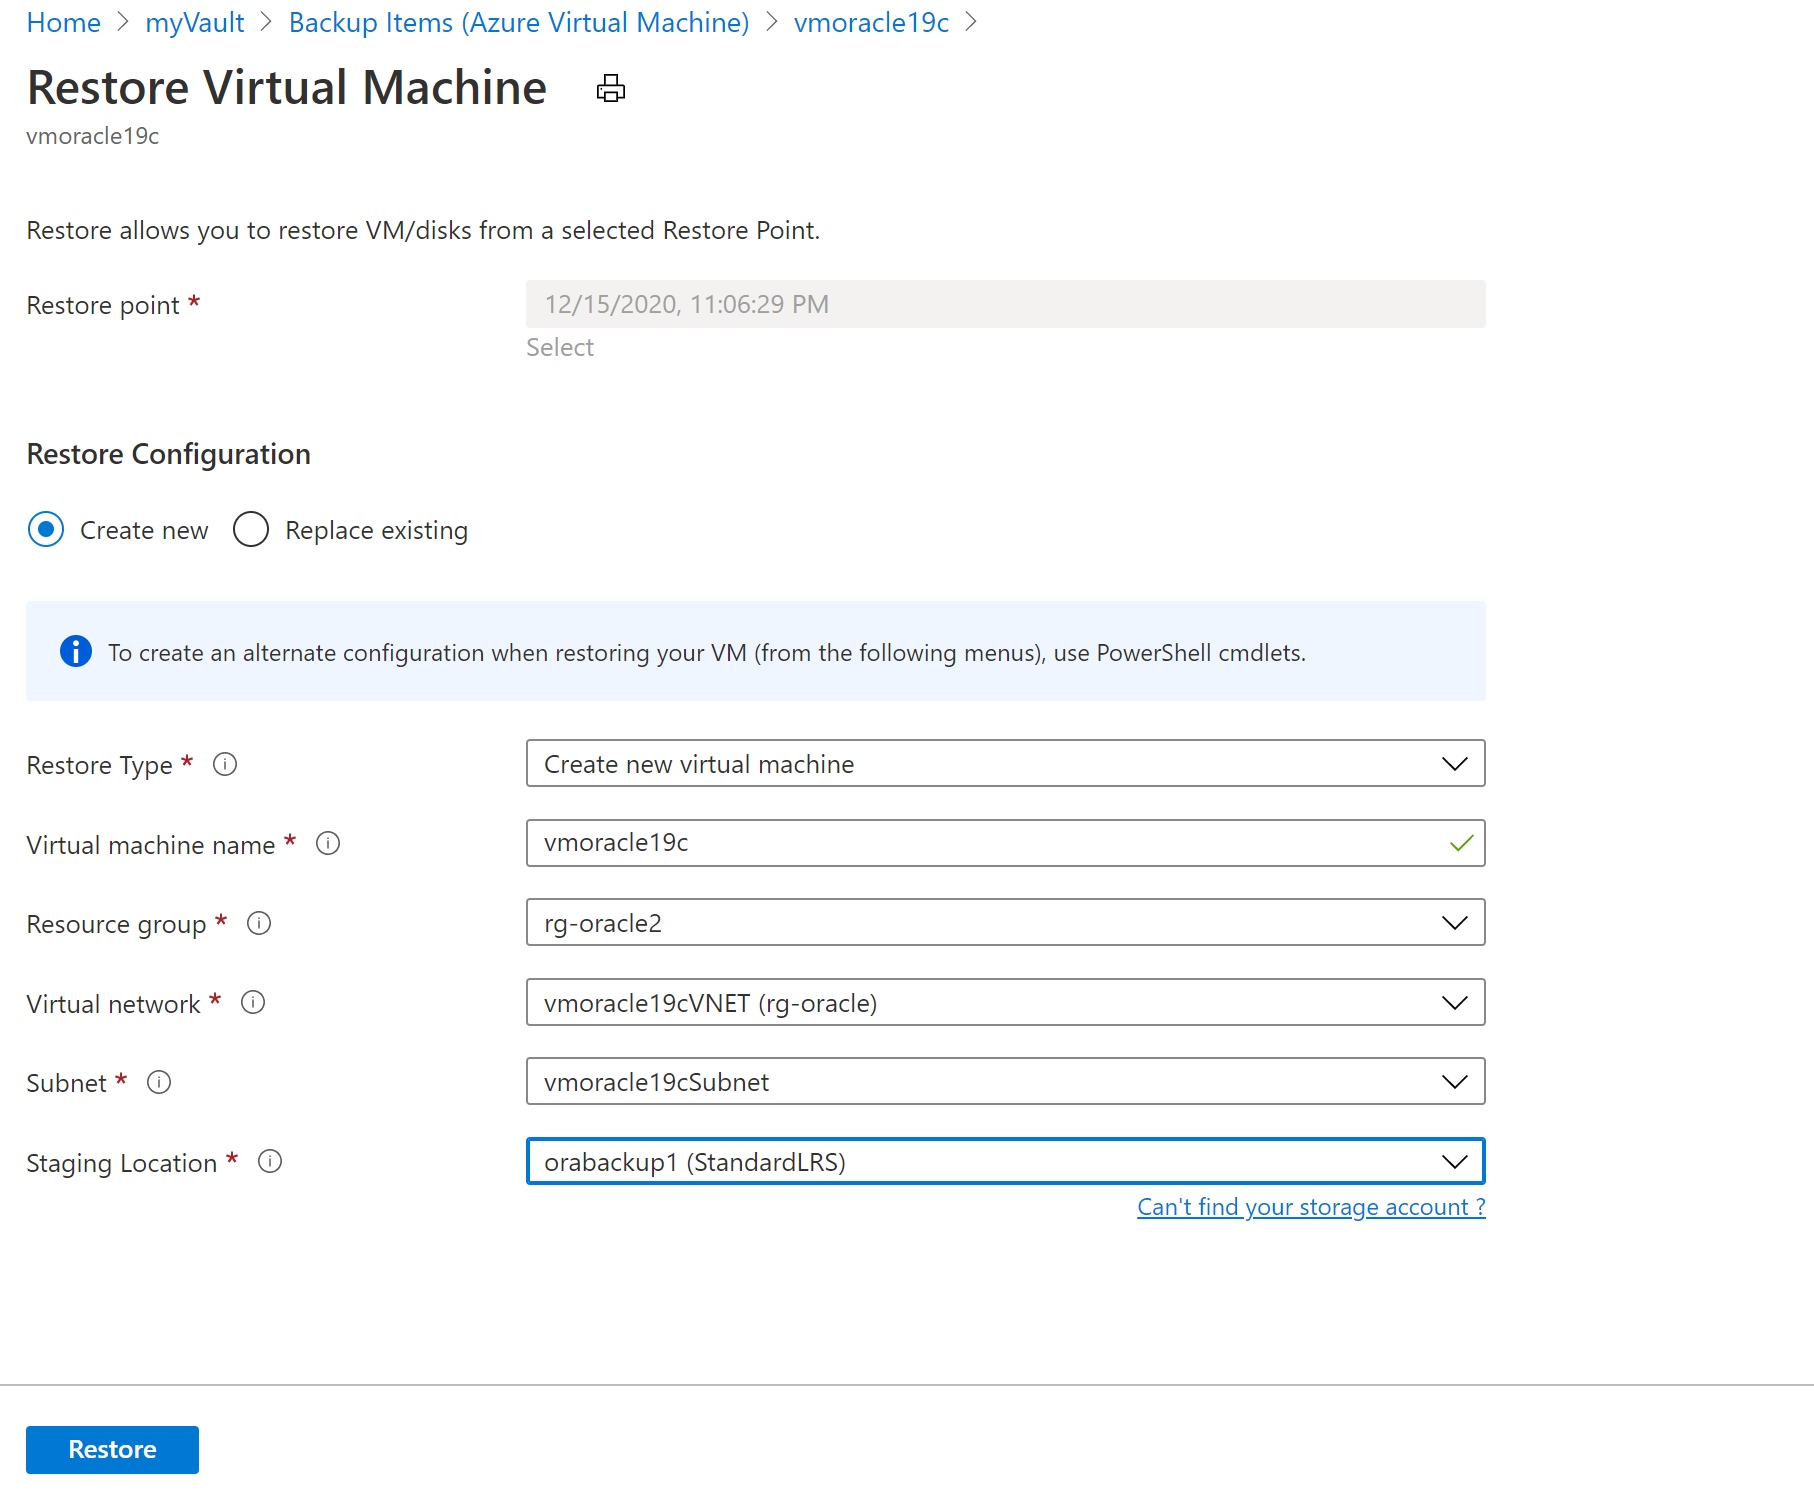
To restore the VM, select the Restore button.
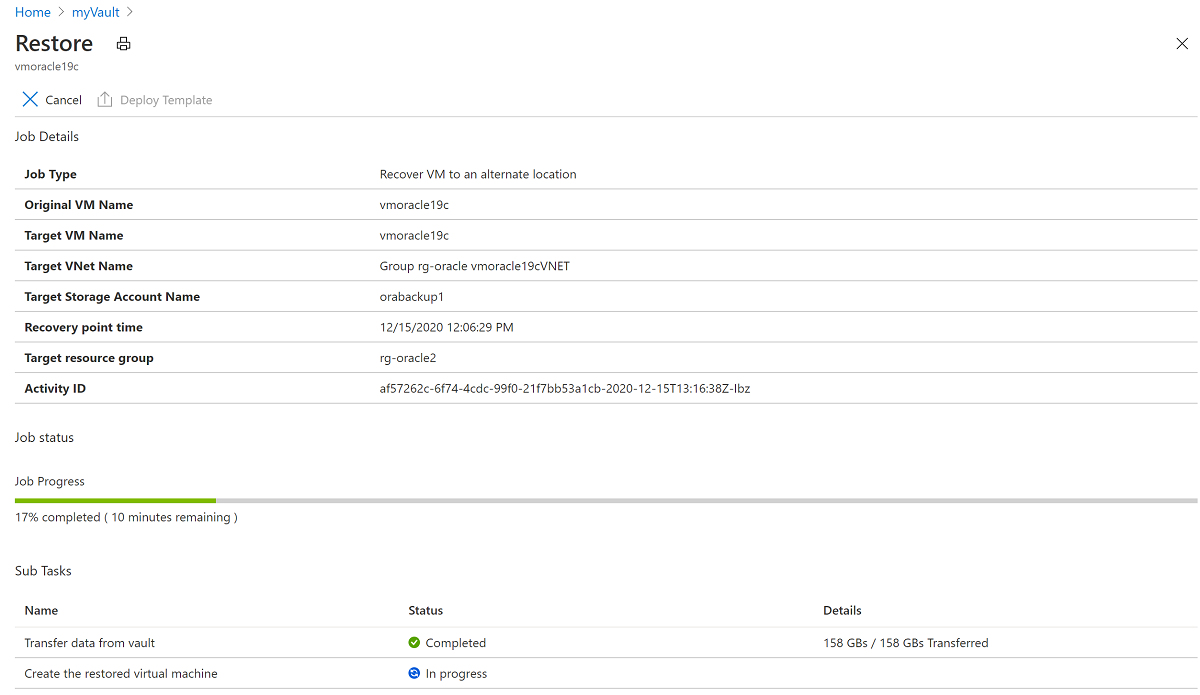
To view the status of the restore process, select Jobs, and then select Backup Jobs.
Select the In Progress restore operation to show details about the status of the restore process.
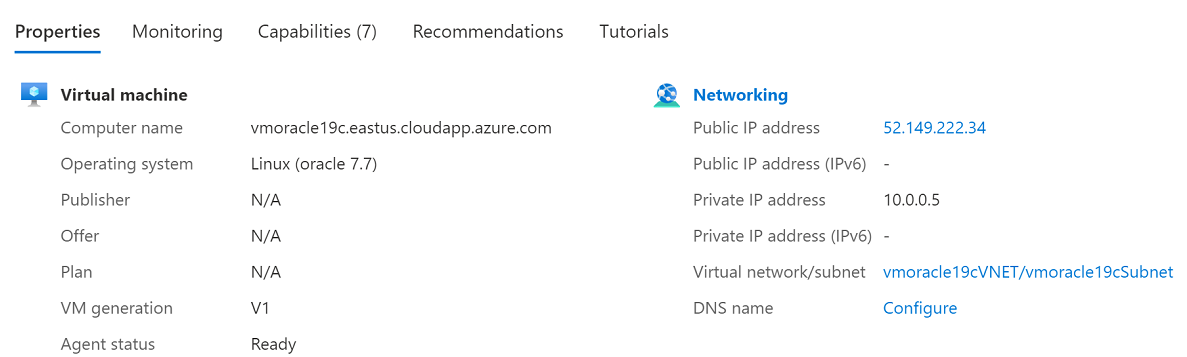
Set the public IP address
After the VM is restored, you should reassign the original IP address to the new VM.
In the Azure portal, go to your virtual machine named vmoracle19c. It gets assigned a new public IP and NIC similar to vmoracle19c-nic-XXXXXXXXXXXX, but it doesn't have a DNS address. When the original VM was deleted, its public IP and NIC were retained. The next steps reattach them to the new VM.
Stop the VM.
Go to Networking.
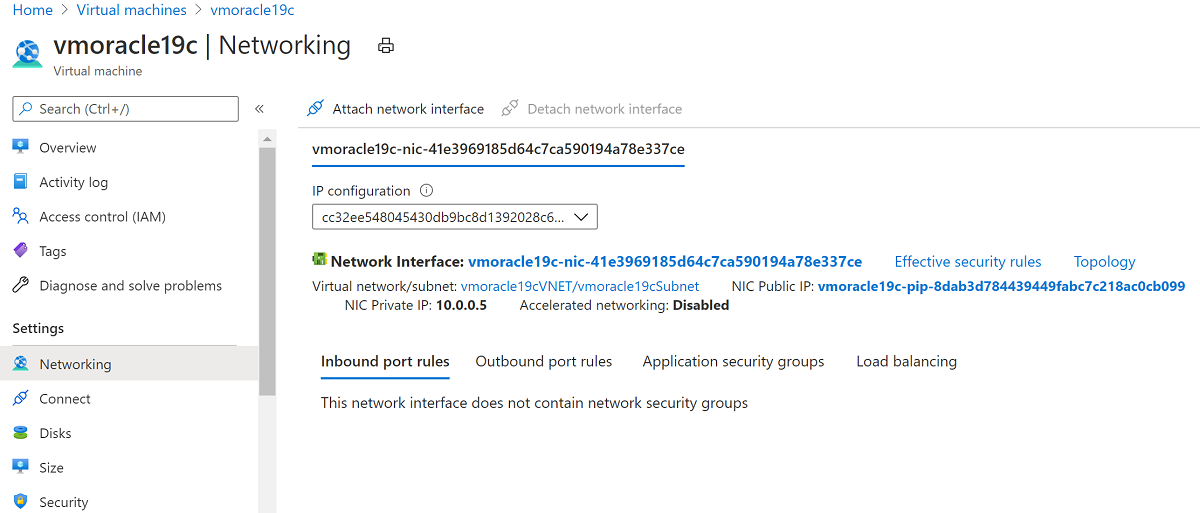
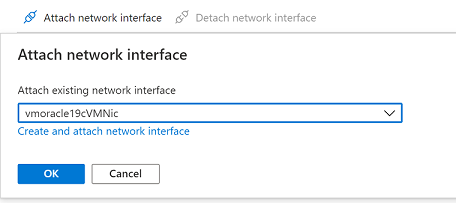
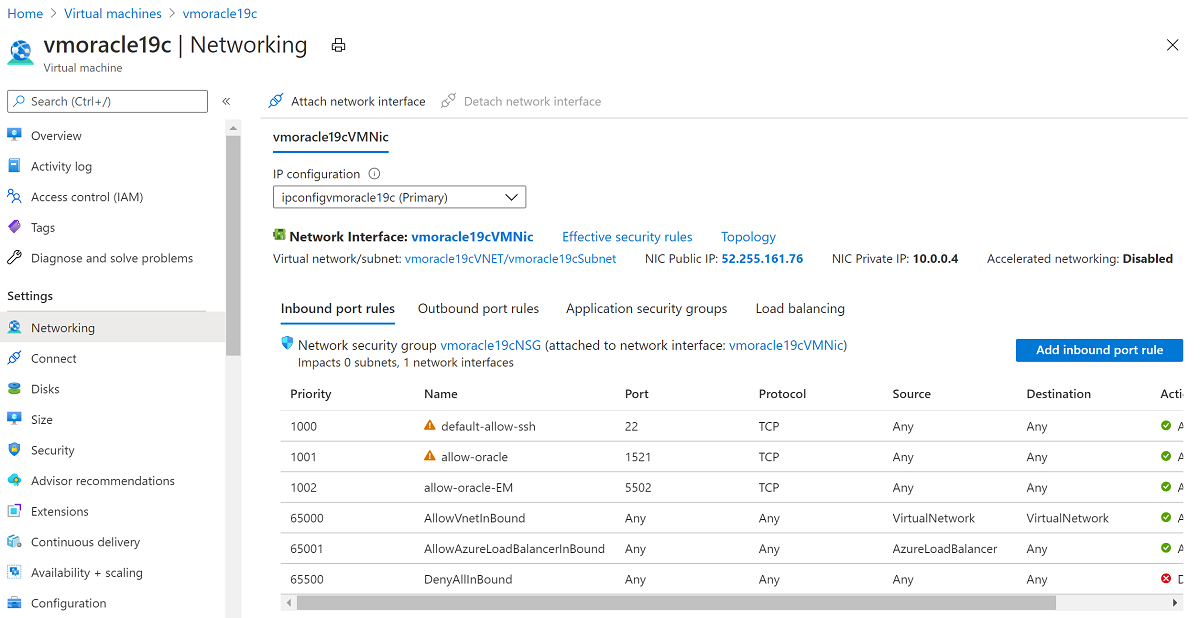
Select Attach network interface. Select the original NIC vmoracle19cVMNic, which the original public IP address is still associated with. Then select OK.
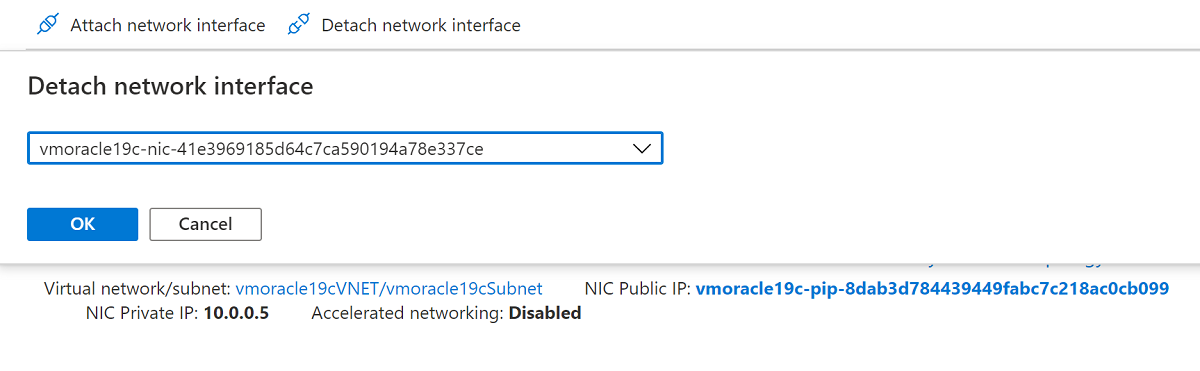
Detach the NIC that you created with the VM restore operation, because it's configured as the primary interface. Select Detach network interface, select the NIC that's similar to vmoracle19c-nic-XXXXXXXXXXXX, and then select OK.
Your re-created VM now has the original NIC, which is associated with the original IP address and network security group rules.
Go back to the Overview pane and select Start.
Recover the database
To recover a database after a complete VM restore:
Reconnect to the VM:
ssh azureuser@<publicIpAddress>When the whole VM gets restored, it's important to recover the databases on the VM by performing the following steps on each database.
You might find that the instance is running, because the autostart attempted to start the database on VM startup. However, the database requires recovery and is likely to solely be at the mount stage. Run a preparatory shutdown before starting the mount stage:
sudo su - oracle
sqlplus / as sysdba
SQL> shutdown immediate
SQL> startup mount
Perform database recovery.
It's important to specify the
USING BACKUP CONTROLFILEsyntax to inform theRECOVER AUTOMATIC DATABASEcommand that recovery shouldn't stop at the Oracle system change number (SCN) recorded in the restored database control file.The restored database control file was a snapshot, along with the rest of the database. The SCN stored within it is from the point in time of the snapshot. There might be transactions recorded after this point, and you want to recover to the point of the last transaction committed to the database.
SQL> recover automatic database using backup controlfile until cancel;When the last available archive log file gets applied, enter
CANCELto end recovery.When recovery finishes successfully, the message
Media recovery completeappears.However, when you're using the
BACKUP CONTROLFILEclause, the recover command ignores online log files. It's possible that changes in the current online redo log are required to complete point-in-time recovery. In this situation, you might see messages similar to these examples:SQL> recover automatic database until cancel using backup controlfile; ORA-00279: change 2172930 generated at 04/08/2021 12:27:06 needed for thread 1 ORA-00289: suggestion : /u02/fast_recovery_area/ORATEST1/archivelog/2021_04_08/o1_mf_1_13_%u_.arc ORA-00280: change 2172930 for thread 1 is in sequence #13 ORA-00278: log file '/u02/fast_recovery_area/ORATEST1/archivelog/2021_04_08/o1_mf_1_13_%u_.arc' no longer needed for this recovery ORA-00308: cannot open archived log '/u02/fast_recovery_area/ORATEST1/archivelog/2021_04_08/o1_mf_1_13_%u_.arc' ORA-27037: unable to obtain file status Linux-x86_64 Error: 2: No such file or directory Additional information: 7 Specify log: {<RET>=suggested | filename | AUTO | CANCEL}Important
If the current online redo log is lost or corrupted and you can't use it, you might cancel recovery at this point.
To correct this situation, you can identify which online log wasn't archived and supply the fully qualified file name to the prompt.
Open the database.
The
RESETLOGSoption is required when theRECOVERcommand uses theUSING BACKUP CONTROLFILEoption.RESETLOGScreates a new incarnation of the database by resetting the history back to the beginning, because there's no way to determine how much of the previous database incarnation was skipped in the recovery.SQL> alter database open resetlogs;Check that the database content was recovered:
SQL> select * from scott.scott_table;
The backup and recovery of Oracle Database on an Azure Linux VM are now finished.
You can find more information about Oracle commands and concepts in the Oracle documentation, including:
- Performing Oracle user-managed backups of the entire database
- Performing complete user-managed database recovery
- Oracle STARTUP command
- Oracle RECOVER command
- Oracle ALTER DATABASE command
- Oracle LOG_ARCHIVE_DEST_n parameter
- Oracle ARCHIVE_LAG_TARGET parameter
Delete the VM
When you no longer need the VM, you can use the following commands to remove the resource group, the VM, and all related resources:
Disable soft delete of backups in the vault:
az backup vault backup-properties set --name myVault --resource-group rg-oracle --soft-delete-feature-state disableStop protection for the VM and delete backups:
az backup protection disable --resource-group rg-oracle --vault-name myVault --container-name vmoracle19c --item-name vmoracle19c --delete-backup-data true --yesRemove the resource group, including all resources:
az group delete --name rg-oracle