Note
Access to this page requires authorization. You can try signing in or changing directories.
Access to this page requires authorization. You can try changing directories.
Applies to: ✔️ Linux VMs
This article demonstrates the use of Azure Files as a medium to back up and restore an Oracle database running on an Azure virtual machine (VM). The steps in this article were tested against Oracle 12.1 and later.
In this article, you use Oracle Recovery Manager (RMAN) to back up the database to an Azure file share mounted to a VM via the Server Message Block (SMB) protocol. Using Azure Files for backup media is cost-effective and performant. However, for large databases, Azure Backup provides a better solution.
Prerequisites
Use the Bash environment in Azure Cloud Shell. For more information, see Get started with Azure Cloud Shell.

If you prefer to run CLI reference commands locally, install the Azure CLI. If you're running on Windows or macOS, consider running Azure CLI in a Docker container. For more information, see How to run the Azure CLI in a Docker container.
If you're using a local installation, sign in to the Azure CLI by using the az login command. To finish the authentication process, follow the steps displayed in your terminal. For other sign-in options, see Authenticate to Azure using Azure CLI.
When you're prompted, install the Azure CLI extension on first use. For more information about extensions, see Use and manage extensions with the Azure CLI.
Run az version to find the version and dependent libraries that are installed. To upgrade to the latest version, run az upgrade.
To perform the backup and recovery process, you must first create a Linux VM that has an installed instance of Oracle Database. We recommend using Oracle 12.x or later.
Create an Oracle Database instance by following the steps in Create an Oracle Database instance in an Azure VM.
Prepare the database environment
To create a Secure Shell (SSH) session with the VM, use the following command. Replace
<publicIpAddress>with the public address value for your VM.ssh azureuser@<publicIpAddress>Switch to the root user:
sudo su -Add the
oracleuser to the /etc/sudoers file:echo "oracle ALL=(ALL) NOPASSWD: ALL" >> /etc/sudoersThis step assumes that you have an Oracle instance (test) that's running on a VM named vmoracle19c.
Switch to the
oracleuser:sudo su - oracleBefore you connect, set the environment variable
ORACLE_SID:export ORACLE_SID=test;You should also add the
ORACLE_SIDvariable to theoracleuser's .bashrc file for future sign-ins by using the following command:echo "export ORACLE_SID=test" >> ~oracle/.bashrcStart the Oracle listener if it isn't already running:
lsnrctl startThe output should look similar to the following example:
LSNRCTL for Linux: Version 19.0.0.0.0 - Production on 18-SEP-2020 03:23:49

Copyright (c) 1991, 2019, Oracle.  All rights reserved.

Starting /u01/app/oracle/product/19.0.0/dbhome_1/bin/tnslsnr: please wait...

TNSLSNR for Linux: Version 19.0.0.0.0 - Production
System parameter file is /u01/app/oracle/product/19.0.0/dbhome_1/network/admin/listener.ora
Log messages written to /u01/app/oracle/diag/tnslsnr/vmoracle19c/listener/alert/log.xml
Listening on: (DESCRIPTION=(ADDRESS=(PROTOCOL=tcp)(HOST=vmoracle19c.eastus.cloudapp.azure.com)(PORT=1521)))
Listening on: (DESCRIPTION=(ADDRESS=(PROTOCOL=ipc)(KEY=EXTPROC1521)))

Connecting to (DESCRIPTION=(ADDRESS=(PROTOCOL=TCP)(HOST=vmoracle19c.eastus.cloudapp.azure.com)(PORT=1521)))
STATUS of the LISTENER
------------------------
Alias                     LISTENER
Version                   TNSLSNR for Linux: Version 19.0.0.0.0 - Production
Start Date                18-SEP-2020 03:23:49
Uptime                    0 days 0 hr. 0 min. 0 sec
Trace Level               off
Security                  ON: Local OS Authentication
SNMP                      OFF
Listener Parameter File   /u01/app/oracle/product/19.0.0/dbhome_1/network/admin/listener.ora
Listener Log File         /u01/app/oracle/diag/tnslsnr/vmoracle19c/listener/alert/log.xml
Listening Endpoints Summary...
 (DESCRIPTION=(ADDRESS=(PROTOCOL=tcp)(HOST=vmoracle19c.eastus.cloudapp.azure.com)(PORT=1521)))
(DESCRIPTION=(ADDRESS=(PROTOCOL=ipc)(KEY=EXTPROC1521)))
The listener supports no services
The command completed successfully
Create the location for the fast recovery area:
mkdir /u02/fast_recovery_areaConnect to the database:
sqlplus / as sysdbaStart the database if it isn't already running:
SQL> startupSet database environment variables for the fast recovery area:
SQL> alter system set db_recovery_file_dest_size=4096M scope=both;
SQL> alter system set db_recovery_file_dest='/u02/fast_recovery_area' scope=both;
Verify the database is in
ARCHIVELOGmode to enable online backups.Check the log archive status:
SQL> SELECT log_mode FROM v$database;

LOG_MODE
------------
NOARCHIVELOG
If the log archive is in
NOARCHIVELOGmode, run the following commands in SQL Plus:SQL> SHUTDOWN IMMEDIATE; SQL> STARTUP MOUNT; SQL> ALTER DATABASE ARCHIVELOG; SQL> ALTER DATABASE OPEN; SQL> ALTER SYSTEM SWITCH LOGFILE;Create a table to test the backup and restore operations:
SQL> create user scott identified by tiger quota 100M on users;
SQL> grant create session, create table to scott;
SQL> connect scott/tiger
SQL> create table scott_table(col1 number, col2 varchar2(50));
SQL> insert into scott_table VALUES(1,'Line 1');
SQL> commit;
SQL> quit
Back up to Azure Files
To back up to Azure Files, complete these steps:
- Set up Azure Files.
- Mount the Azure file share to your VM.
- Back up the database.
- Restore and recover the database.
Set up Azure Files
In this section, you back up the Oracle database to Azure Files by using Oracle RMAN. Azure file shares are fully managed file shares that stay in the cloud. You can access them by using either the SMB protocol or the Network File System (NFS) protocol.
The following procedures cover creating a file share that uses the SMB protocol to mount to your VM. For information about how to mount by using NFS, see Create an NFS share.
When you're mounting the Azure file share, use the cache=none option to disable caching of file share data. To ensure that the oracle user owns the files created in the share, set the uid=oracle and gid=oinstall options.
Set up your storage account:
In the Azure portal, select + Create a resource, and then search for and select Storage Account.

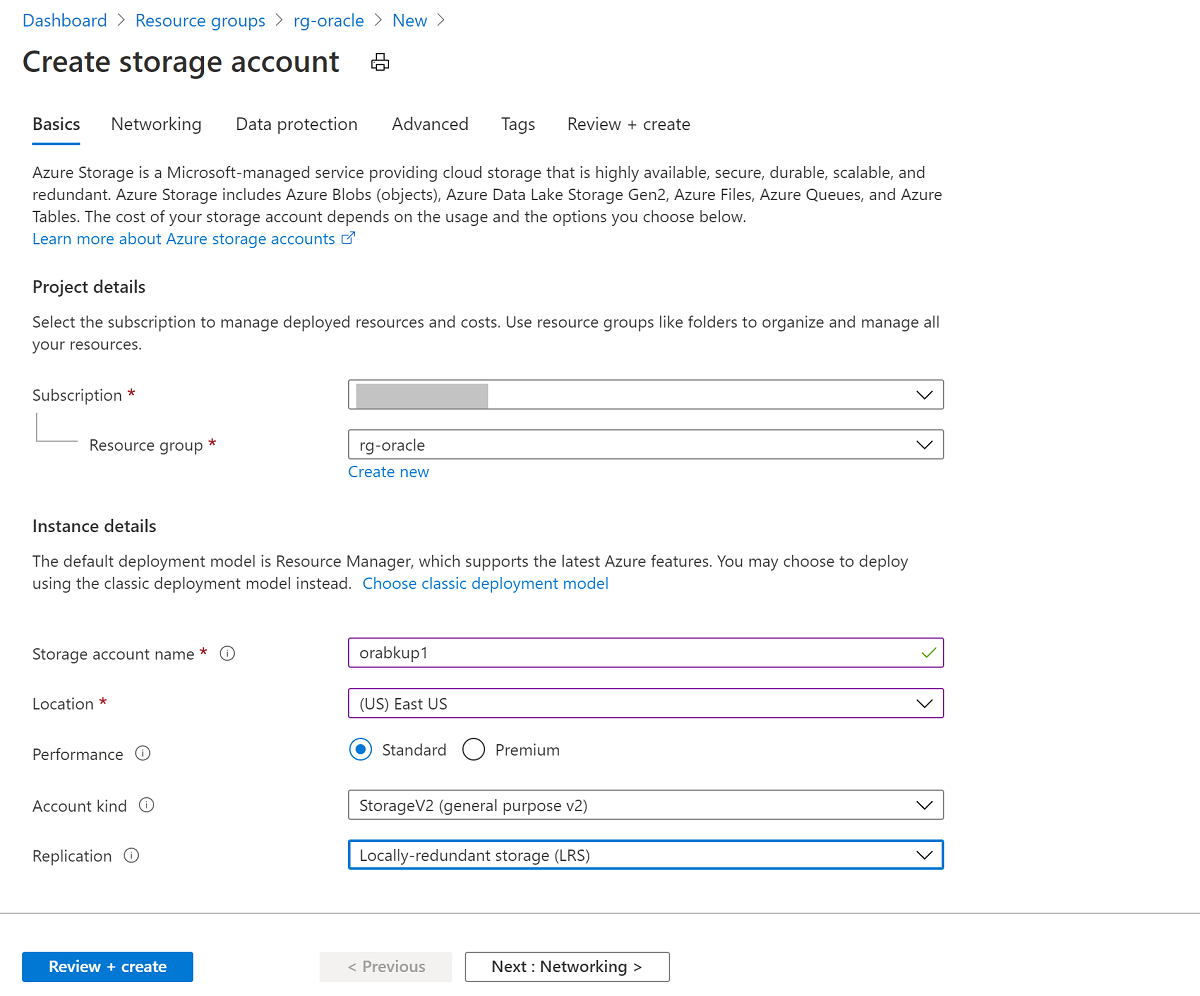
On the Create storage account pane:
- For Resource group, select your existing resource group, rg-oracle.
- For Storage account name, enter oracbkup1.
- Ensure that Location is set to the same region as all your other resources in the resource group.
- Set Performance to Standard.
- For Account kind, select StorageV2 (general purpose v2).
- For Replication, select Locally-redundant storage (LRS).
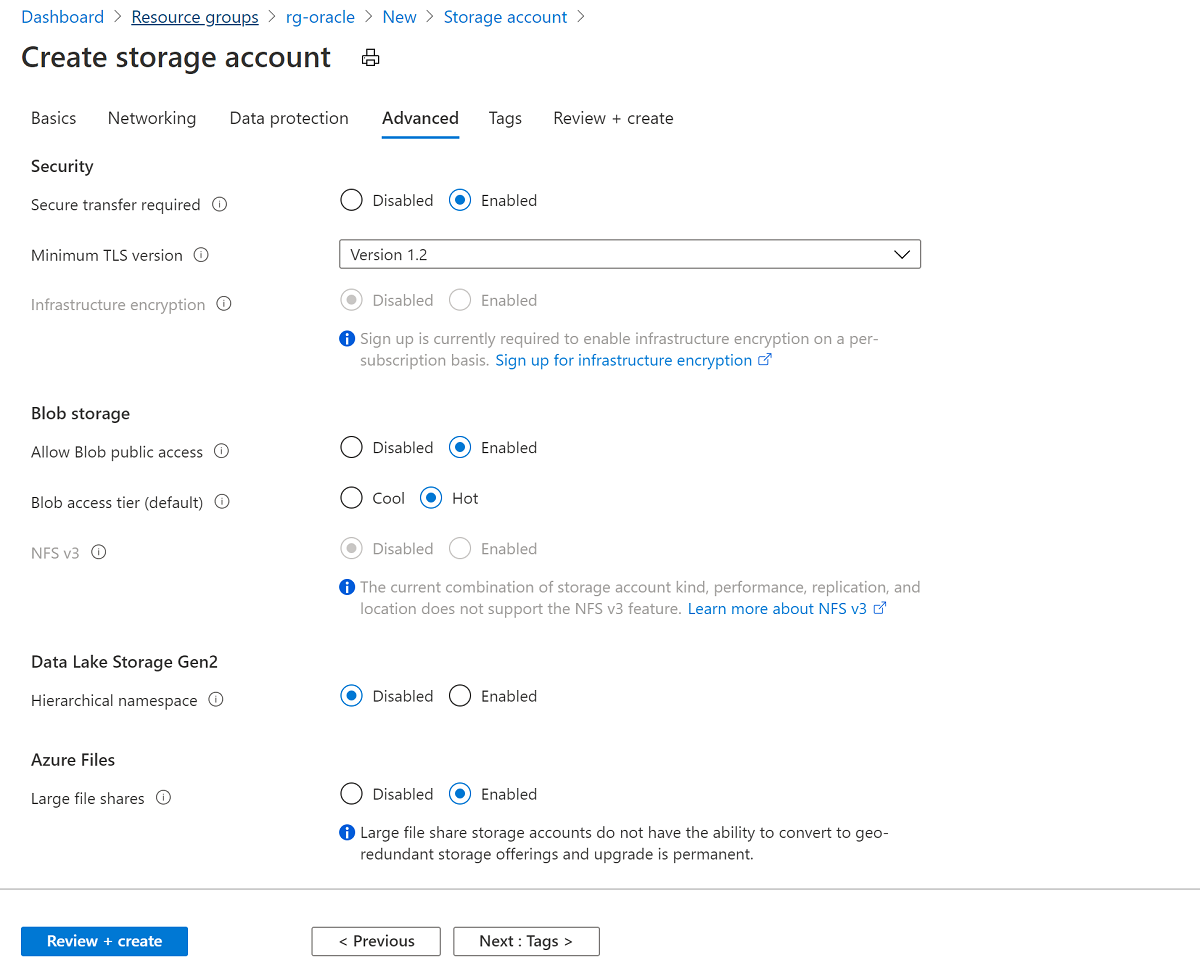
Select the Advanced tab. Under Azure Files, set Large file shares to Enabled. Select Review + Create, and then select Create.
When the storage account is created, go to the resource and select File shares.
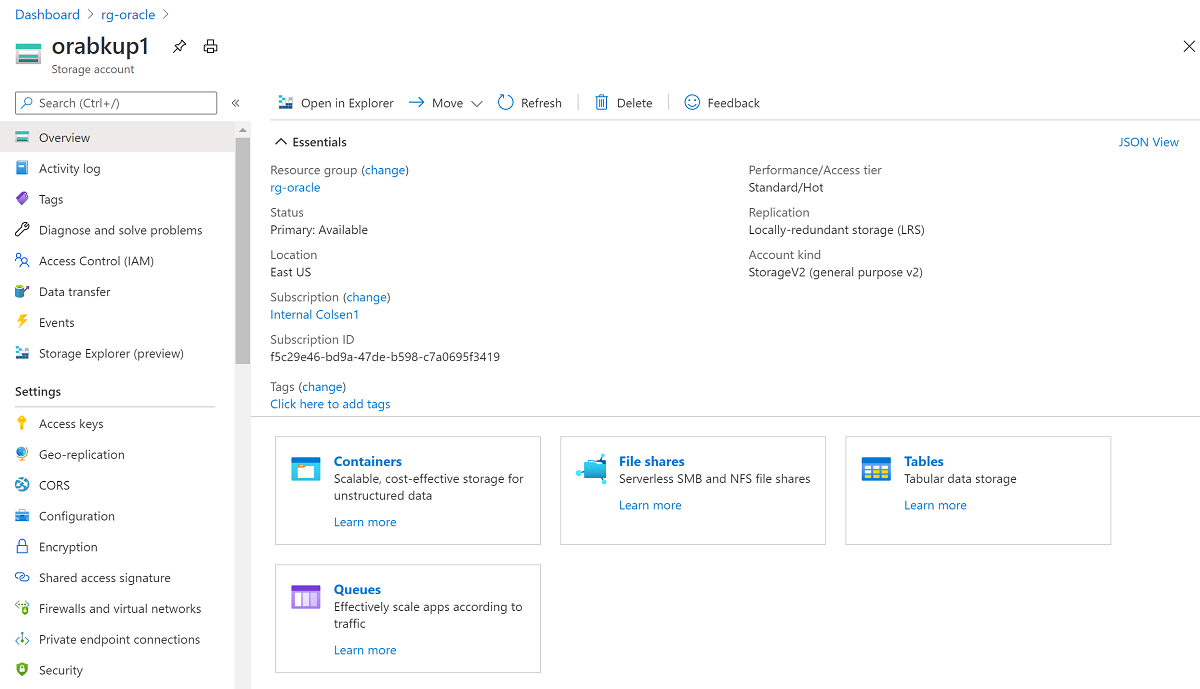
Select + File share, and then on the New file share panel:
For Name, enter orabkup1.
Set Quota to 10240 gibibytes (GiB).
The quota reflects an upper boundary that the file share can grow to. Because you're using standard storage in this example, resources are pay-as-you-go and not provisioned. Setting the quota to 10 tebibytes (TiB) doesn't incur costs beyond what you use. If your backup strategy requires more storage, set the quota to an appropriate level to hold all backups.
Under Tiers, select Transaction optimized.
Select Create.

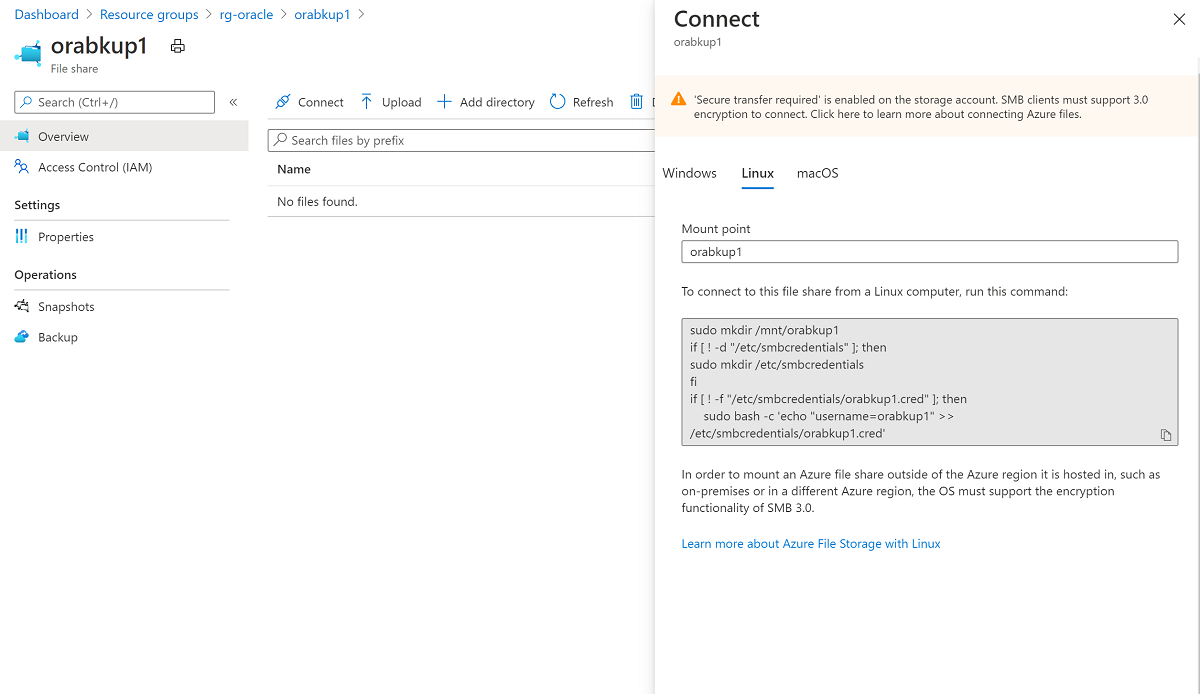
When the file share is created, select orabkup1 on the File share settings pane.
Select the Connect tab to open the Connect panel, and then select the Linux tab. Copy the provided commands to mount the file share by using the SMB protocol.
Mount the Azure file share to your VM
Create the mount point:
sudo mkdir /mnt/orabackupSet up credentials:
if [ ! -d "/etc/smbcredentials" ]; then
 sudo mkdir /etc/smbcredentials
fi
Run the following command. Substitute
<Your Storage Account Key1>with the storage account key that you retrieved earlier.if [ ! -f "/etc/smbcredentials/orabackup1.cred" ]; then sudo bash -c 'echo "username=orabackup1" >> /etc/smbcredentials/orabackup1.cred' sudo bash -c 'echo "password=<Your Storage Account Key1>" >> /etc/smbcredentials/orabackup1.cred' fiChange permissions on the credentials file:
sudo chmod 600 /etc/smbcredentials/orabackup1.credAdd the mount to the /etc/fstab file:
sudo bash -c 'echo "//orabackup1.file.core.windows.net/orabackup /mnt/orabackup cifs nofail,vers=3.0,credentials=/etc/smbcredentials/orabackup1.cred,dir_mode=0777,file_mode=0777,serverino,cache=none,uid=oracle,gid=oinstall" >> /etc/fstab'Run the commands to mount the Azure file share by using the SMB protocol:
sudo mount -t cifs //orabackup1.file.core.windows.net/orabackup /mnt/orabackup -o vers=3.0,credentials=/etc/smbcredentials/orabackup1.cred,dir_mode=0777,file_mode=0777,serverino,cache=none,uid=oracle,gid=oinstallIf you get an error similar to the following example, the Common Internet File System (CIFS) package might not be installed on your Linux host:
mount: wrong fs type, bad option, bad superblock on //orabackup1.file.core.windows.net/orabackupTo check if the CIFS package is installed, run the following command:
sudo rpm -qa|grep cifs-utilsIf the command returns no output, install the CIFS package by using the following command. Then rerun the
mountcommand to mount the Azure file share.sudo yum install cifs-utilsCheck that the file share is mounted properly by using the following command:
df -hThe output should look similar to this example:
$ df -h
Filesystem                                    Size  Used Avail Use% Mounted on
devtmpfs                                      3.3G     0  3.3G   0% /dev
tmpfs                                         3.3G     0  3.3G   0% /dev/shm
tmpfs                                         3.3G   17M  3.3G   1% /run
tmpfs                                         3.3G     0  3.3G   0% /sys/fs/cgroup
/dev/sda2                                      30G  9.1G   19G  34% /
/dev/sdc1                                      59G  2.7G   53G   5% /u02
/dev/sda1                                     497M  199M  298M  41% /boot
/dev/sda15                                    495M  9.7M  486M   2% /boot/efi
tmpfs                                         671M     0  671M   0% /run/user/54321
/dev/sdb1                                      14G  2.1G   11G  16% /mnt/resource
tmpfs                                         671M     0  671M   0% /run/user/54322
//orabackup1.file.core.windows.net/orabackup   10T     0   10T   0% /mnt/orabackup
Back up the database
In this section, you use Oracle RMAN to take a full backup of the database and archive logs. You then write the backup as a backup set to the Azure file share that you mounted earlier.
Configure RMAN to back up to the Azure Files mount point:
rman target /
RMAN> configure snapshot controlfile name to '/mnt/orabkup/snapcf_ev.f';
RMAN> configure channel 1 device type disk format '/mnt/orabkup/%d/Full_%d_%U_%T_%s';
RMAN> configure channel 2 device type disk format '/mnt/orabkup/%d/Full_%d_%U_%T_%s';
In this example, you're limiting the size of RMAN backup pieces to 4 GiB. However, the RMAN backup
maxpiecesizevalue can go up to 4 TiB, which is the file size limit for Azure standard file shares and premium file shares. For more information, see Azure Files scalability and performance targets.RMAN> configure channel device type disk maxpiecesize 4000G;Confirm the configuration change details:
RMAN> show all;Run the backup. The following command takes a full database backup, including archive log files, as a backup set in compressed format:
RMAN> backup as compressed backupset database plus archivelog;
You backed up the database online by using Oracle RMAN, with the backup located in Azure Files. Because you're storing the backups in Azure Files, you can access them from other VMs if you need to clone the database.
Using RMAN and Azure Files for database backup has many advantages. The backup and restore time is linked to the size of the database. For large databases, these operations can take considerable time.
An alternative is to use application-consistent VM backups through Azure Backup. This mechanism uses snapshot technology to perform fast backups irrespective of database size. Integration with a Recovery Services vault provides cloud storage of your Oracle Database backups, so you can access them from other VMs and other Azure regions.
Restore and recover the database
Shut down the Oracle instance:
sqlplus / as sysdba
SQL> shutdown abort
ORACLE instance shut down.
Remove the database datafiles:
cd /u02/oradata/TEST
rm -f *.dbf
The following commands use RMAN to restore the missing datafiles and recover the database:
rman target /
RMAN> startup mount;
RMAN> restore database;
RMAN> recover database;
RMAN> alter database open;
Check that the database content is fully recovered:
RMAN> SELECT * FROM scott.scott_table;
The backup and recovery of the Oracle Database 19c database on an Azure Linux VM are now finished.
Delete the VM
When you no longer need the VM, you can use the following command to remove the resource group, the VM, and all related resources:
az group delete --name rg-oracle