Install HANA on SAP HANA on Azure (Large Instances)
In this article, we'll walk through installing HANA on SAP HANA on Azure Large Instances (otherwise known as BareMetal Infrastructure).
Prerequisites
To install HANA on SAP HANA on Azure (Large Instances), first:
- Provide Microsoft with all the data to deploy for you on an SAP HANA Large Instance.
- Receive the SAP HANA Large Instance from Microsoft.
- Create an Azure virtual network that is connected to your on-premises network.
- Connect the ExpressRoute circuit for HANA Large Instances to the same Azure virtual network.
- Install an Azure virtual machine that you use as a jump box for HANA Large Instances.
- Ensure that you can connect from the jump box to your HANA Large Instance and vice versa.
- Check whether all the necessary packages and patches are installed.
- Read the SAP notes and documentation about HANA installation on the operating system you're using. Make sure that the HANA release of choice is supported on the operating system release.
Download the SAP HANA installation bits
Now let's download the HANA installation packages to the jump box virtual machine. In this example, the operating system is Windows.
The HANA Large Instance units aren't directly connected to the internet. You can't directly download the installation packages from SAP to the HANA Large Instance virtual machine. Instead, you download the packages to the jump box virtual machine.
You need an SAP S-user or other user, which allows you to access the SAP Marketplace.
Sign in, and go to SAP Service Marketplace. Select Download Software > Installations and Upgrade > By Alphabetical Index. Then select Under H – SAP HANA Platform Edition > SAP HANA Platform Edition 2.0 > Installation. Download the files shown in the following screenshot.
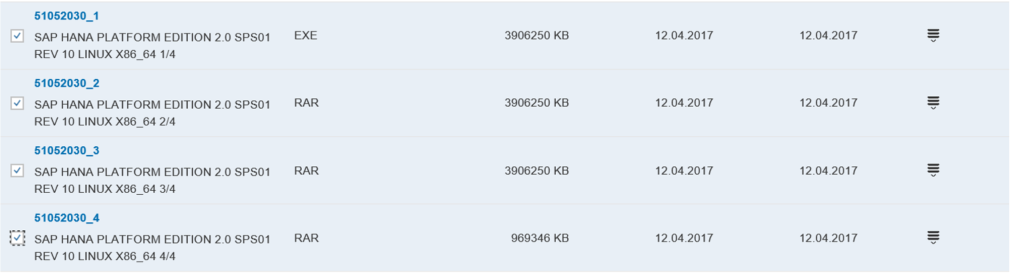
In this example, we downloaded SAP HANA 2.0 installation packages. On the Azure jump box virtual machine, expand the self-extracting archives into the directory as shown below.
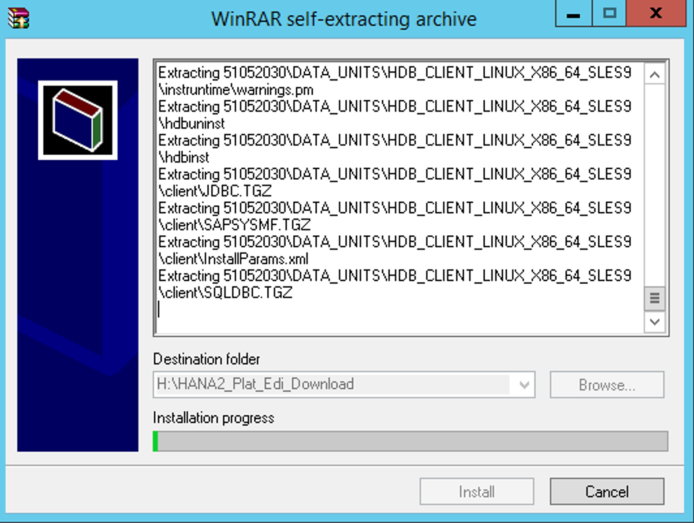
As the archives are extracted, copy the directory created by the extraction (in this case, 51052030). Copy the directory from the HANA Large Instance unit /hana/shared volume into a directory you created.
Important
Don't copy the installation packages into the root or boot LUN. Space is limited and needs to be used by other processes as well.
Install SAP HANA on the HANA Large Instance unit
To install SAP HANA, sign in as user root. Only root has enough permissions to install SAP HANA. Set permissions on the directory you copied over into /hana/shared.
chmod –R 744 <Installation bits folder>To install SAP HANA by using the graphical user interface setup, the gtk2 package needs to be installed on HANA Large Instances. To check whether it's installed, run the following command:
rpm –qa | grep gtk2(In later steps, we show the SAP HANA setup with the graphical user interface.)
Go into the installation directory, and navigate into the sub directory HDB_LCM_LINUX_X86_64.
Out of that directory, start:
./hdblcmguiNow you'll progress through a sequence of screens in which you provide the data for the installation. In this example, we're installing the SAP HANA database server and the SAP HANA client components. So our selection is SAP HANA Database.

Select Install New System.

Select among several other components that you can install.

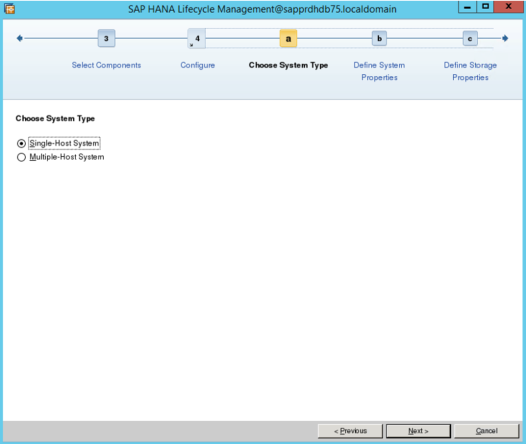
Choose the SAP HANA Client and the SAP HANA Studio. Also install a scale-up instance. Then select Single-Host System.
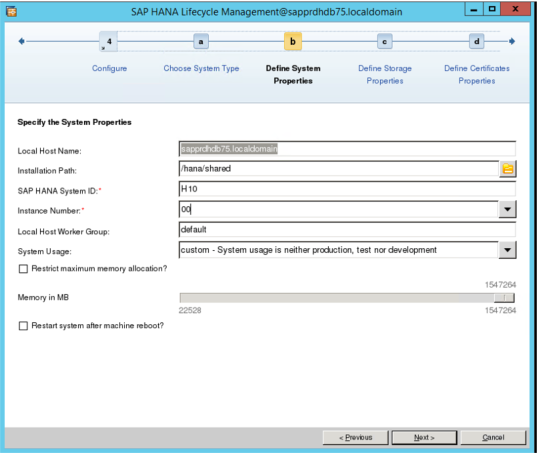
Next you'll provide some data. For the installation path, use the /hana/shared directory.
Important
As HANA System ID (SID), you must provide the same SID as you provided Microsoft when you ordered the HANA Large Instance deployment. Choosing a different SID causes the installation to fail, due to access permission problems on the different volumes.
Provide the locations for the HANA data files and the HANA log files.
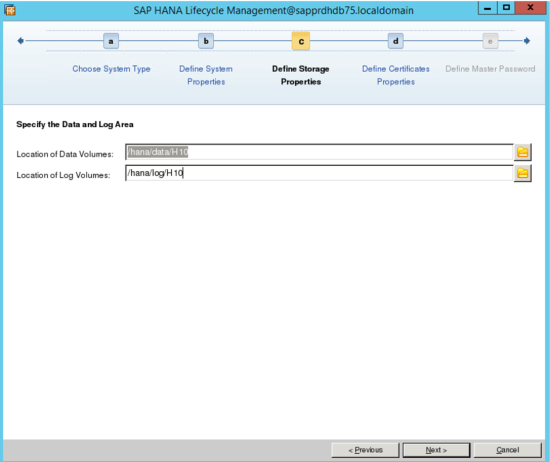
Note
The SID you specified when you defined system properties (two screens ago) should match the SID of the mount points. If there is a mismatch, go back and adjust the SID to the value you have on the mount points.
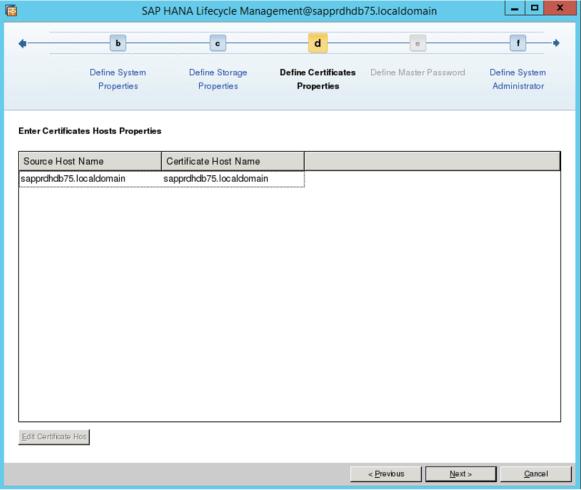
Review the host name and correct it as needed.
Retrieve the data you gave to Microsoft when you ordered the HANA Large Instance deployment.
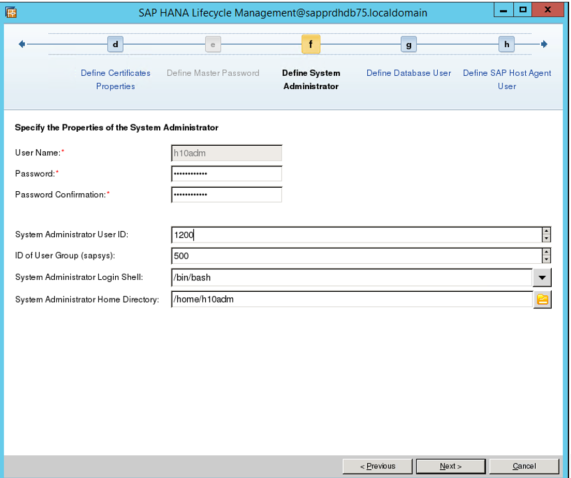
Important
Provide the System Administrator User ID and ID of User Group that you provided to Microsoft when you ordered the unit deployment. Otherwise, the installation of SAP HANA on the HANA Large Instance unit will fail.
The next two screens aren't shown here. They enable you to provide the password for the SYSTEM user of the SAP HANA database, and the password for the sapadm user. The latter is used for the SAP Host Agent that gets installed as part of the SAP HANA database instance.
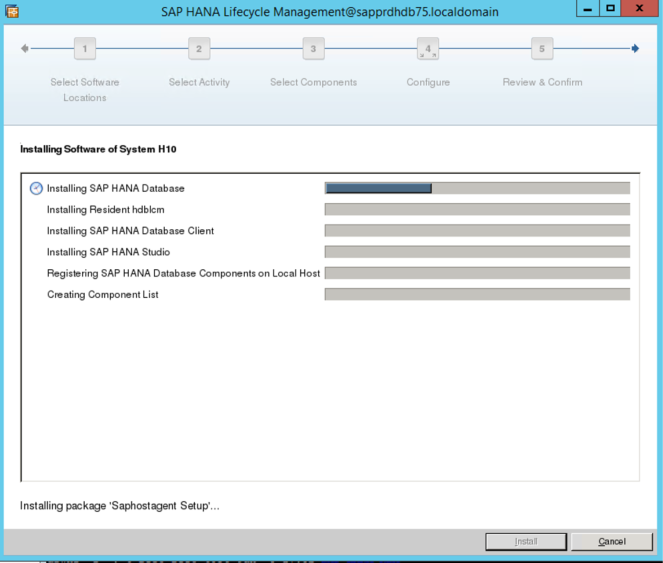
After defining the password, you see a confirmation screen. check all the data listed, and continue with the installation. You'll reach a progress screen that documents the installation progress, like this one:
As the installation finishes, you should see a screen like this one:
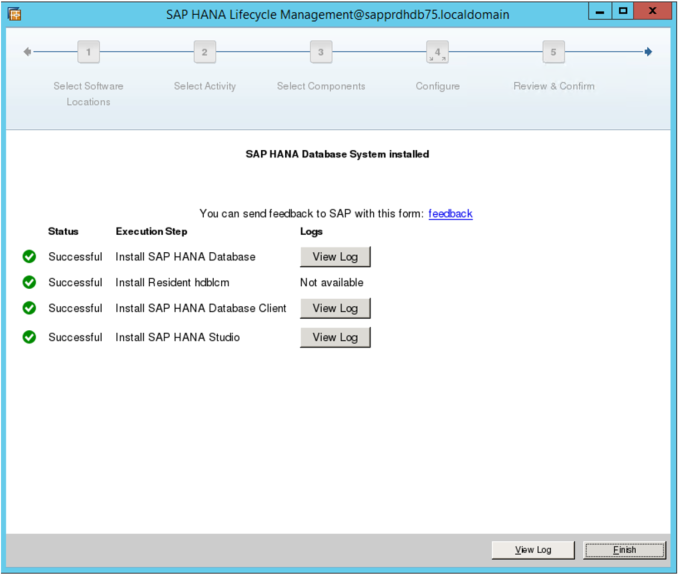
The SAP HANA instance should now be up and running, and ready for usage. You can connect to it from SAP HANA Studio. Make sure you check for and apply the latest updates.
Next steps
Learn about SAP HANA Large Instances high availability and disaster recovery on Azure.
Feedback
Coming soon: Throughout 2024 we will be phasing out GitHub Issues as the feedback mechanism for content and replacing it with a new feedback system. For more information see: https://aka.ms/ContentUserFeedback.
Submit and view feedback for