Note
Access to this page requires authorization. You can try signing in or changing directories.
Access to this page requires authorization. You can try changing directories.
Windows
This article describes the steps you take to prepare the Azure infrastructure for installing and configuring a high-availability SAP ASCS/SCS instance on a Windows failover cluster by using a cluster shared disk as an option for clustering an SAP ASCS instance. Two alternatives for cluster shared disk are presented in the documentation:
- Azure shared disks
- Using SIOS DataKeeper Cluster Edition to create mirrored storage, that simulates clustered shared disk
The documentation doesn't cover the database layer.
Prerequisites
Before you begin the installation review this article:
Create the ASCS VMs
For SAP ASCS / SCS cluster deploy two VMs in Azure availability set or Azure availability zones based on the type of your deployment. Once the VMs are deployed:
- Create Azure Internal Load Balancer for SAP ASCS /SCS instance.
- Add Windows VMs to the AD domain.
Based on your deployment type, the host names and the IP addresses of the scenario would be like:
SAP deployment in Azure availability set
| Host name role | Host name | Static IP address | Availability set | Disk SkuName |
|---|---|---|---|---|
| First cluster node ASCS/SCS cluster | pr1-ascs-10 | 10.0.0.4 | pr1-ascs-avset | Premium_LRS |
| Second cluster node ASCS/SCS cluster | pr1-ascs-11 | 10.0.0.5 | pr1-ascs-avset | |
| Cluster Network Name | pr1clust | 10.0.0.42(only for Win 2016 cluster) | n/a | |
| ASCS cluster network name | pr1-ascscl | 10.0.0.43 | n/a | |
| ERS cluster network name (only for ERS2) | pr1-erscl | 10.0.0.44 | n/a |
SAP deployment in Azure availability zones
| Host name role | Host name | Static IP address | Availability zone | Disk SkuName |
|---|---|---|---|---|
| First cluster node ASCS/SCS cluster | pr1-ascs-10 | 10.0.0.4 | AZ01 | Premium_ZRS |
| Second cluster node ASCS/SCS cluster | pr1-ascs-11 | 10.0.0.5 | AZ02 | |
| Cluster Network Name | pr1clust | 10.0.0.42(only for Win 2016 cluster) | n/a | |
| ASCS cluster network name | pr1-ascscl | 10.0.0.43 | n/a | |
| ERS cluster network name (only for ERS2) | pr1-erscl | 10.0.0.44 | n/a |
The steps mentioned in the document remain same for both deployment type. But if your cluster is running in availability set, you need to deploy LRS for Azure premium shared disk (Premium_LRS) and if the cluster is running in availability zone deploy ZRS for Azure premium shared disk (Premium_ZRS).
Note
Azure proximity placement group is not required for Azure shared disk. But for SAP deployment with PPG, follow below guidelines:
- If you are using PPG for SAP system deployed in a region then all virtual machines sharing a disk must be part of the same PPG.
- If you are using PPG for SAP system deployed across zones like described in the document Proximity placement groups with zonal deployments, you can attach Premium_ZRS storage to virtual machines sharing a disk.
Create Azure internal load balancer
During VM configuration, you can create or select exiting load balancer in networking section. For the ENSA1 architecture on Windows, you would need only one virtual IP address for SAP ASCS/SCS. On the other hand, the ENSA2 architecture necessitates two virtual IP addresses - one for SAP ASCS/SCS and another for ERS2. When configuring a standard internal load balancer for the HA setup of SAP ASCS/SCS on Windows, follow below guidelines.
- Frontend IP Configuration: Create frontend IP (example: 10.0.0.43). Select the same virtual network and subnet as your ASCS/ERS virtual machines.
- Backend Pool: Create backend pool and add ASCS and ERS VMs. In this example, VMs are pr1-ascs-10 and pr1-ascs-11.
- Inbound rules: Create load balancing rule.
- Frontend IP address: Select frontend IP
- Backend pool: Select backend pool
- Check "High availability ports"
- Protocol: TCP
- Health Probe: Create health probe with below details
- Protocol: TCP
- Port: [for example: 620<Instance-no.> for ASCS]
- Interval: 5
- Probe Threshold: 2
- Idle timeout (minutes): 30
- Check "Enable Floating IP"
- Applicable to only ENSA2 architecture: Create additional frontend IP (10.0.0.44), load balancing rule (use 621<Instance-no.> for ERS2 health probe port) as described in point 1 and 3.
Note
Health probe configuration property numberOfProbes, otherwise known as "Unhealthy threshold" in Portal, isn't respected. So to control the number of successful or failed consecutive probes, set the property "probeThreshold" to 2. It is currently not possible to set this property using Azure portal, so use either the Azure CLI or PowerShell command.
Note
When VMs without public IP addresses are placed in the back-end pool of an internal (no public IP address) Standard Azure load balancer, there will be no outbound internet connectivity unless you perform additional configuration to allow routing to public endpoints. For details on how to achieve outbound connectivity, see Public endpoint connectivity for virtual machines using Azure Standard Load Balancer in SAP high-availability scenarios.
Tip
With the Azure Resource Manager Template for WSFC for SAP ASCS/SCS instance with Azure Shared Disk, you can automate the infrastructure preparation, using Azure Shared Disk for one SAP SID with ERS1.
The Azure ARM template will create two Windows 2019 or 2016 VMs, create Azure shared disk and attach to the VMs. Azure Internal Load Balancer will be created and configured as well.
For details - see the ARM template.
Add registry entries on both cluster nodes of the ASCS/SCS instance
Azure Load Balancer may close connections, if the connections are idle for a period and exceed the idle timeout. The SAP work processes open connections to the SAP enqueue process as soon as the first enqueue/dequeue request needs to be sent. To avoid interrupting these connections, change the TCP/IP KeepAliveTime and KeepAliveInterval values on both cluster nodes. If using ERS1, it's also necessary to add SAP profile parameters, as described later in this article. The following registry entries must be changed on both cluster nodes:
- KeepAliveTime
- KeepAliveInterval
| Path | Variable name | Variable type | Value | Documentation |
|---|---|---|---|---|
| HKLM\SYSTEM\CurrentControlSet\Services\Tcpip\Parameters | KeepAliveTime | REG_DWORD (Decimal) | 120000 | KeepAliveTime |
| HKLM\SYSTEM\CurrentControlSet\Services\Tcpip\Parameters | KeepAliveInterval | REG_DWORD (Decimal) | 120000 | KeepAliveInterval |
To apply the changes, restart both cluster nodes.
Add the Windows VMs to the domain
After you assign static IP addresses to the virtual machines, add the virtual machines to the domain.
Install and configure Windows failover cluster
Install the Windows failover cluster feature
Run this command on one of the cluster nodes:
# Hostnames of the Win cluster for SAP ASCS/SCS
$SAPSID = "PR1"
$ClusterNodes = ("pr1-ascs-10","pr1-ascs-11")
$ClusterName = $SAPSID.ToLower() + "clust"

# Install Windows features.
# After the feature installs, manually reboot both nodes
Invoke-Command $ClusterNodes {Install-WindowsFeature Failover-Clustering, FS-FileServer -IncludeAllSubFeature -IncludeManagementTools }
Once the feature installation has completed, reboot both cluster nodes.
Test and configure Windows failover cluster
On Windows 2019, the cluster will automatically recognize that it's running in Azure, and as a default option for cluster management IP, it uses Distributed Network name. Therefore, it uses any of the cluster nodes local IP addresses. As a result, there's no need for a dedicated (virtual) network name for the cluster, and there's no need to configure this IP address on Azure Internal Load Balancer.
For more information, see, Windows Server 2019 Failover Clustering New features Run this command on one of the cluster nodes:
# Hostnames of the Win cluster for SAP ASCS/SCS
$SAPSID = "PR1"
$ClusterNodes = ("pr1-ascs-10","pr1-ascs-11")
$ClusterName = $SAPSID.ToLower() + "clust"

# IP address for cluster network name is needed ONLY on Windows Server 2016 cluster
$ClusterStaticIPAddress = "10.0.0.42"

# Test cluster
Test-Cluster –Node $ClusterNodes -Verbose

$ComputerInfo = Get-ComputerInfo

$WindowsVersion = $ComputerInfo.WindowsProductName

if($WindowsVersion -eq "Windows Server 2019 Datacenter"){
    write-host "Configuring Windows Failover Cluster on Windows Server 2019 Datacenter..."
    New-Cluster –Name $ClusterName –Node  $ClusterNodes -Verbose
}elseif($WindowsVersion -eq "Windows Server 2016 Datacenter"){
    write-host "Configuring Windows Failover Cluster on Windows Server 2016 Datacenter..."
    New-Cluster –Name $ClusterName –Node  $ClusterNodes –StaticAddress $ClusterStaticIPAddress -Verbose
}else{
    Write-Error "Not supported Windows version!"
}
Configure cluster cloud quorum
As you use Windows Server 2016 or 2019, we recommended configuring Azure Cloud Witness, as cluster quorum.
Run this command on one of the cluster nodes:
$AzureStorageAccountName = "cloudquorumwitness"
Set-ClusterQuorum –CloudWitness –AccountName $AzureStorageAccountName -AccessKey <YourAzureStorageAccessKey> -Verbose
Tuning the Windows failover cluster thresholds
After you successfully install the Windows failover cluster, you need to adjust some thresholds, to be suitable for clusters deployed in Azure. The parameters to be changed are documented in Tuning failover cluster network thresholds. Assuming that your two VMs that make up the Windows cluster configuration for ASCS/SCS are in the same subnet, change the following parameters to these values:
- SameSubNetDelay = 2000
- SameSubNetThreshold = 15
- RouteHistoryLength = 30
These settings were tested with customers and offer a good compromise. They're resilient enough, but they also provide failover that is fast enough for real error conditions in SAP workloads or VM failure.
Configure Azure shared disk
This section is only applicable, if you're using Azure shared disk.
Create and attach Azure shared disk with PowerShell
Run this command on one of the cluster nodes. You'll need to adjust the values for your resource group, Azure region, SAPSID, and so on.
#############################
# Create Azure Shared Disk
#############################

$ResourceGroupName = "MyResourceGroup"
$location = "MyAzureRegion"
$SAPSID = "PR1"

$DiskSizeInGB = 512
$DiskName = "$($SAPSID)ASCSSharedDisk"

# With parameter '-MaxSharesCount', we define the maximum number of cluster nodes to attach the shared disk
$NumberOfWindowsClusterNodes = 2

# For SAP deployment in availability set, use below storage SkuName
$SkuName = "Premium_LRS"
# For SAP deployment in availability zone, use below storage SkuName
$SkuName = "Premium_ZRS"

$diskConfig = New-AzDiskConfig -Location $location -SkuName $SkuName  -CreateOption Empty  -DiskSizeGB $DiskSizeInGB -MaxSharesCount $NumberOfWindowsClusterNodes
$dataDisk = New-AzDisk -ResourceGroupName $ResourceGroupName -DiskName $DiskName -Disk $diskConfig

##################################
## Attach the disk to cluster VMs
##################################
# ASCS Cluster VM1
$ASCSClusterVM1 = "$SAPSID-ascs-10"

# ASCS Cluster VM2
$ASCSClusterVM2 = "$SAPSID-ascs-11"

# Add the Azure Shared Disk to Cluster Node 1
$vm = Get-AzVM -ResourceGroupName $ResourceGroupName -Name $ASCSClusterVM1
$vm = Add-AzVMDataDisk -VM $vm -Name $DiskName -CreateOption Attach -ManagedDiskId $dataDisk.Id -Lun 0
Update-AzVm -VM $vm -ResourceGroupName $ResourceGroupName -Verbose

# Add the Azure Shared Disk to Cluster Node 2
$vm = Get-AzVM -ResourceGroupName $ResourceGroupName -Name $ASCSClusterVM2
$vm = Add-AzVMDataDisk -VM $vm -Name $DiskName -CreateOption Attach -ManagedDiskId $dataDisk.Id -Lun 0
Update-AzVm -VM $vm -ResourceGroupName $ResourceGroupName -Verbose
Format the shared disk with PowerShell
Get the disk number. Run these PowerShell commands on one of the cluster nodes:
Get-Disk | Where-Object PartitionStyle -Eq "RAW"  | Format-Table -AutoSize
# Example output
# Number Friendly Name     Serial Number HealthStatus OperationalStatus Total Size Partition Style
# ------ -------------     ------------- ------------ ----------------- ---------- ---------------
# 2      Msft Virtual Disk               Healthy      Online                512 GB RAW
Format the disk. In this example, it's disk number 2.
# Format SAP ASCS Disk number '2', with drive letter 'S'
$SAPSID = "PR1"
$DiskNumber = 2
$DriveLetter = "S"
$DiskLabel = "$SAPSID" + "SAP"

Get-Disk -Number $DiskNumber | Where-Object PartitionStyle -Eq "RAW" | Initialize-Disk -PartitionStyle GPT -PassThru |  New-Partition -DriveLetter $DriveLetter -UseMaximumSize | Format-Volume  -FileSystem ReFS -NewFileSystemLabel $DiskLabel -Force -Verbose
# Example output
# DriveLetter FileSystemLabel FileSystem DriveType HealthStatus OperationalStatus SizeRemaining      Size
# ----------- --------------- ---------- --------- ------------ ----------------- -------------      ----
# S           PR1SAP          ReFS       Fixed     Healthy      OK                    504.98 GB 511.81 GB
Verify that the disk is now visible as a cluster disk.
# List all disks
Get-ClusterAvailableDisk -All
# Example output
# Cluster    : pr1clust
# Id         : 88ff1d94-0cf1-4c70-89ae-cbbb2826a484
# Name       : Cluster Disk 1
# Number     : 2
# Size       : 549755813888
# Partitions : {\\?\GLOBALROOT\Device\Harddisk2\Partition2\}
Register the disk in the cluster.
# Add the disk to cluster
Get-ClusterAvailableDisk -All | Add-ClusterDisk
# Example output
# Name           State  OwnerGroup        ResourceType
# ----           -----  ----------        ------------
# Cluster Disk 1 Online Available Storage Physical Disk
SIOS DataKeeper Cluster Edition for the SAP ASCS/SCS cluster share disk
This section is only applicable, if you're using the third-party software SIOS DataKeeper Cluster Edition to create a mirrored storage that simulates cluster shared disk.
Now, you have a working Windows Server failover clustering configuration in Azure. To install an SAP ASCS/SCS instance, you need a shared disk resource. One of the options is to use SIOS DataKeeper Cluster Edition is a third-party solution that you can use to create shared disk resources.
Installing SIOS DataKeeper Cluster Edition for the SAP ASCS/SCS cluster share disk involves these tasks:
- Add Microsoft .NET Framework, if needed. See the SIOS documentation for the most up-to-date .NET framework requirements
- Install SIOS DataKeeper
- Configure SIOS DataKeeper
Install SIOS DataKeeper
Install SIOS DataKeeper Cluster Edition on each node in the cluster. To create virtual shared storage with SIOS DataKeeper, create a synced mirror and then simulate cluster shared storage.
Before you install the SIOS software, create the DataKeeperSvc domain user.
Note
Add the DataKeeperSvc domain user to the Local Administrator group on both cluster nodes.
Install the SIOS software on both cluster nodes.

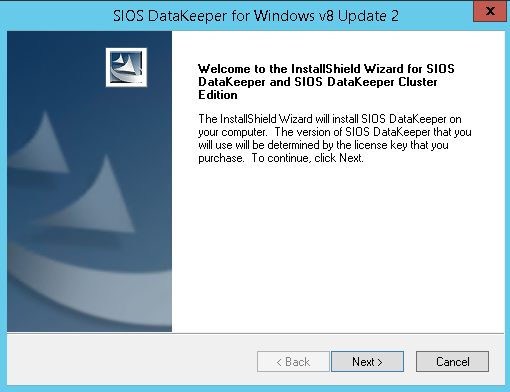
First page of the SIOS DataKeeper installation
In the dialog box, select Yes.
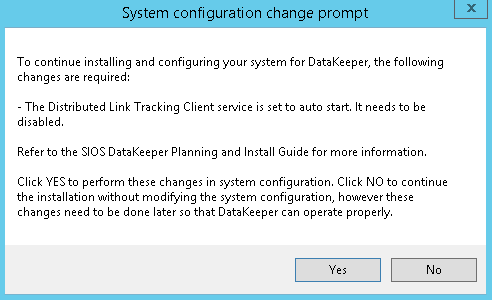
DataKeeper informs you that a service will be disabled
In the dialog box, we recommend that you select Domain or Server account.
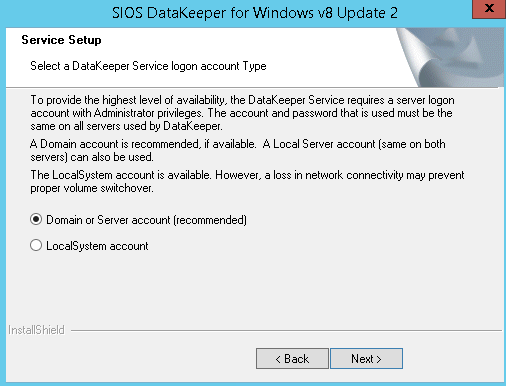
User selection for SIOS DataKeeper
Enter the domain account user name and password that you created for SIOS DataKeeper.
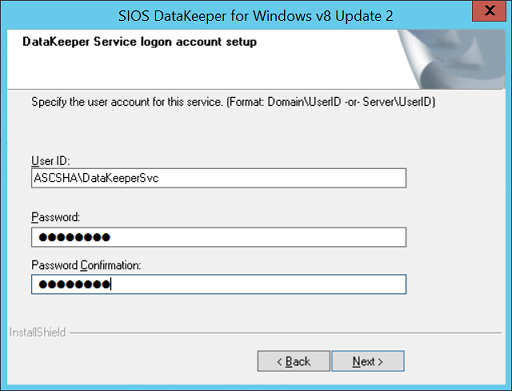
Enter the domain user name and password for the SIOS DataKeeper installation
Install the license key for your SIOS DataKeeper instance, as shown in Figure 35.
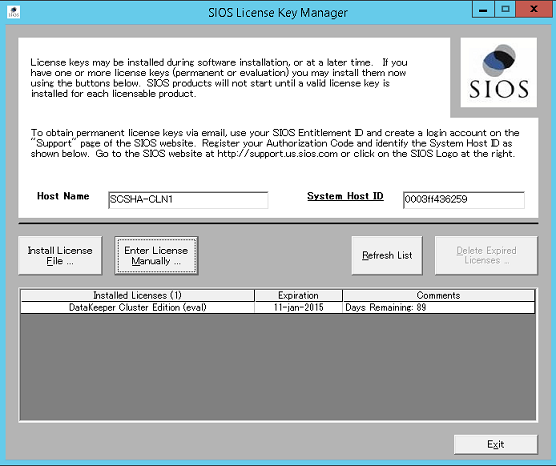
Enter your SIOS DataKeeper license key
When prompted, restart the virtual machine.
Configure SIOS DataKeeper
After you install SIOS DataKeeper on both nodes, start the configuration. The goal of the configuration is to have synchronous data replication between the additional disks that are attached to each of the virtual machines.
Start the DataKeeper Management and Configuration tool, and then select Connect Server.
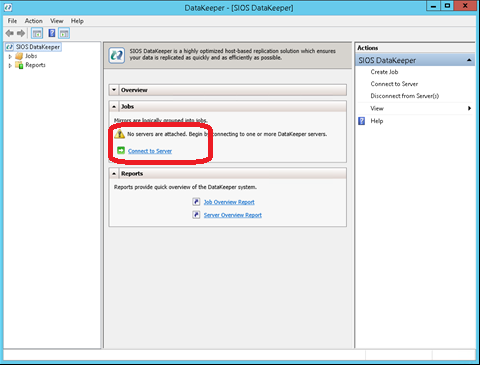
SIOS DataKeeper Management and Configuration tool
Enter the name or TCP/IP address of the first node the Management and Configuration tool should connect to, and, in a second step, the second node.
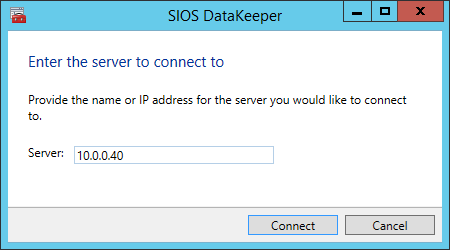
Insert the name or TCP/IP address of the first node the Management and Configuration tool should connect to, and in a second step, the second node
Create the replication job between the two nodes.
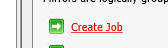
Create a replication job
A wizard guides you through the process of creating a replication job.
Define the name of the replication job.
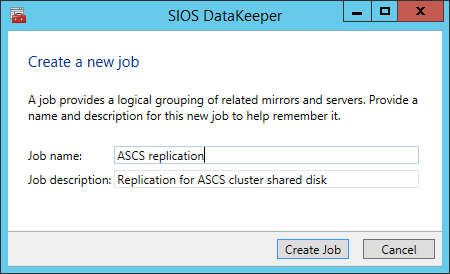
Define the name of the replication job
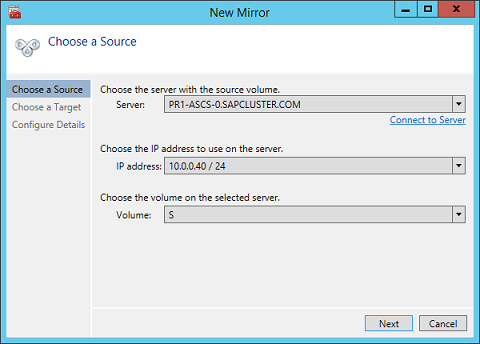
Define the base data for the node, which should be the current source node
Define the name, TCP/IP address, and disk volume of the target node.
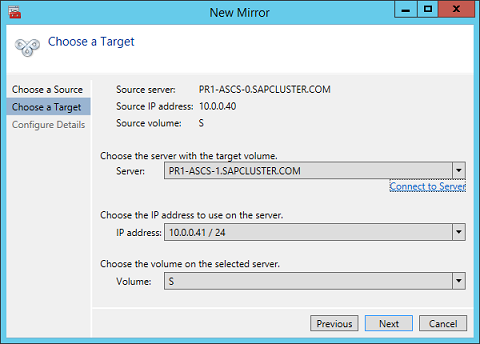
Define the name, TCP/IP address, and disk volume of the current target node
Define the compression algorithms. In our example, we recommend that you compress the replication stream. Especially in resynchronization situations, the compression of the replication stream dramatically reduces resynchronization time. Compression uses the CPU and RAM resources of a virtual machine. As the compression rate increases, so does the volume of CPU resources that are used. You can adjust this setting later.
Another setting you need to check is whether the replication occurs asynchronously or synchronously. When you protect SAP ASCS/SCS configurations, you must use synchronous replication.
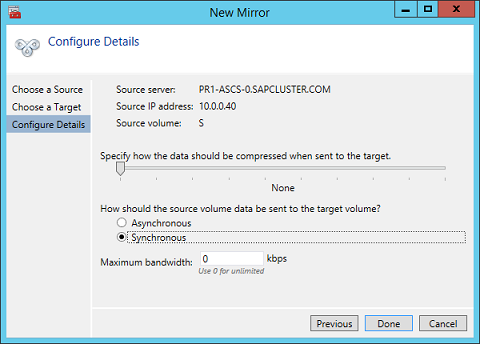
Define replication details
Define whether the volume that is replicated by the replication job should be represented to a Windows Server failover cluster configuration as a shared disk. For the SAP ASCS/SCS configuration, select Yes so that the Windows cluster sees the replicated volume as a shared disk that it can use as a cluster volume.
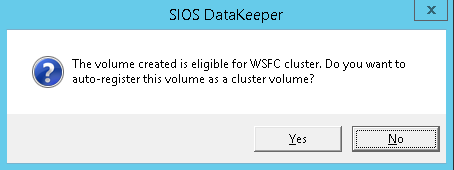
Select Yes to set the replicated volume as a cluster volume
After the volume is created, the DataKeeper Management and Configuration tool shows that the replication job is active.
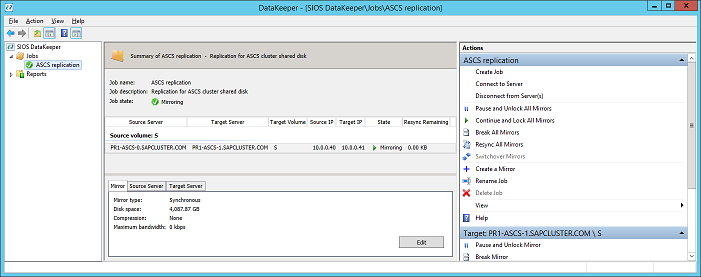
DataKeeper synchronous mirroring for the SAP ASCS/SCS share disk is active
Failover Cluster Manager now shows the disk as a DataKeeper disk, as shown in Figure 45:
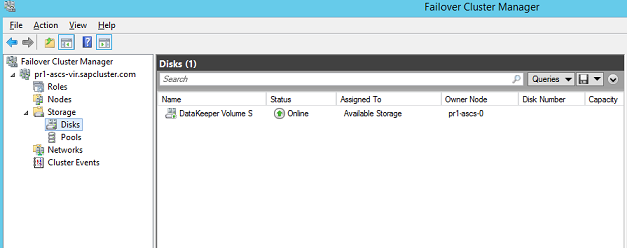
Failover Cluster Manager shows the disk that DataKeeper replicated