Note
Access to this page requires authorization. You can try signing in or changing directories.
Access to this page requires authorization. You can try changing directories.
This tutorial shows you how to configure routing preference for a virtual machine. Internet bound traffic from the virtual machine is routed via the ISP network when you choose Internet as your routing preference option. The default routing is via the Microsoft global network.
In this tutorial, you learn how to:
- Create a virtual machine with a public IP address configured for Internet routing preference.
- Verify the public IP address is set to Internet routing preference.
Prerequisites
- An Azure account with an active subscription. Create an account for free.

Create a resource group
Sign in to the Azure portal.
In the portal search box, enter Resource groups. In the search results, select Resource groups.
Select + Create.
In the Basics tab of Create a resource group, enter, or select the following information.
Setting Value Project details Subscription Select your subscription. Resource group Enter TutorVMRoutePref-rg. Resource details Region Select (US) West US 2. Select Review + create.
Select Create.
Create virtual machine with a public IP address
In this section, you create a virtual machine and public IP address in the Azure portal. During the public IP address configuration, you select Internet for routing preference.
In the portal search box, enter Virtual machine. In the search results, select Virtual machines.
In Virtual machines, select + Create, then + Virtual machine.
In the Basics tab of Create a virtual machine, enter, or select the following information.
Setting Value Project details Subscription Select your subscription. Resource group Select TutorVMRoutePref-rg. Instance details Virtual machine name Enter myVM. Region Select (US) West US 2. Availability options Select No infrastructure redundancy required. Zone options Select Self-selected zone. Availability zone Select Zone 1. Security type Select Standard. Image Select Windows Server 2022 Datacenter: Azure Edition - x64 Gen2. Azure Spot instance Leave the default of unchecked. Size Select a size. Administrator account Username Enter a username. Password Enter a password. Confirm password Reenter password. Inbound port rules Public inbound ports Select None. Note
All public inbound ports are closed for this virtual machine. To manage your virtual machines, deploy Azure Bastion. For more information, see Quickstart: Deploy Azure Bastion from the Azure portal.
Select Next: Disks then Next: Networking, or select the Networking tab.
In the networking tab, enter or select the following information.
Setting Value Network interface Virtual network Leave the default of (new) TutorVMRoutePref-rg-vnet. Subnet Leave the default of (new) default (10.1.0.0/24). Public IP Select Create new.
In Name, enter myPublicIP.
In Routing preference, select Internet.
In Availability zone, select Zone 1.
Select OK.Select Review + create.
Select Create.
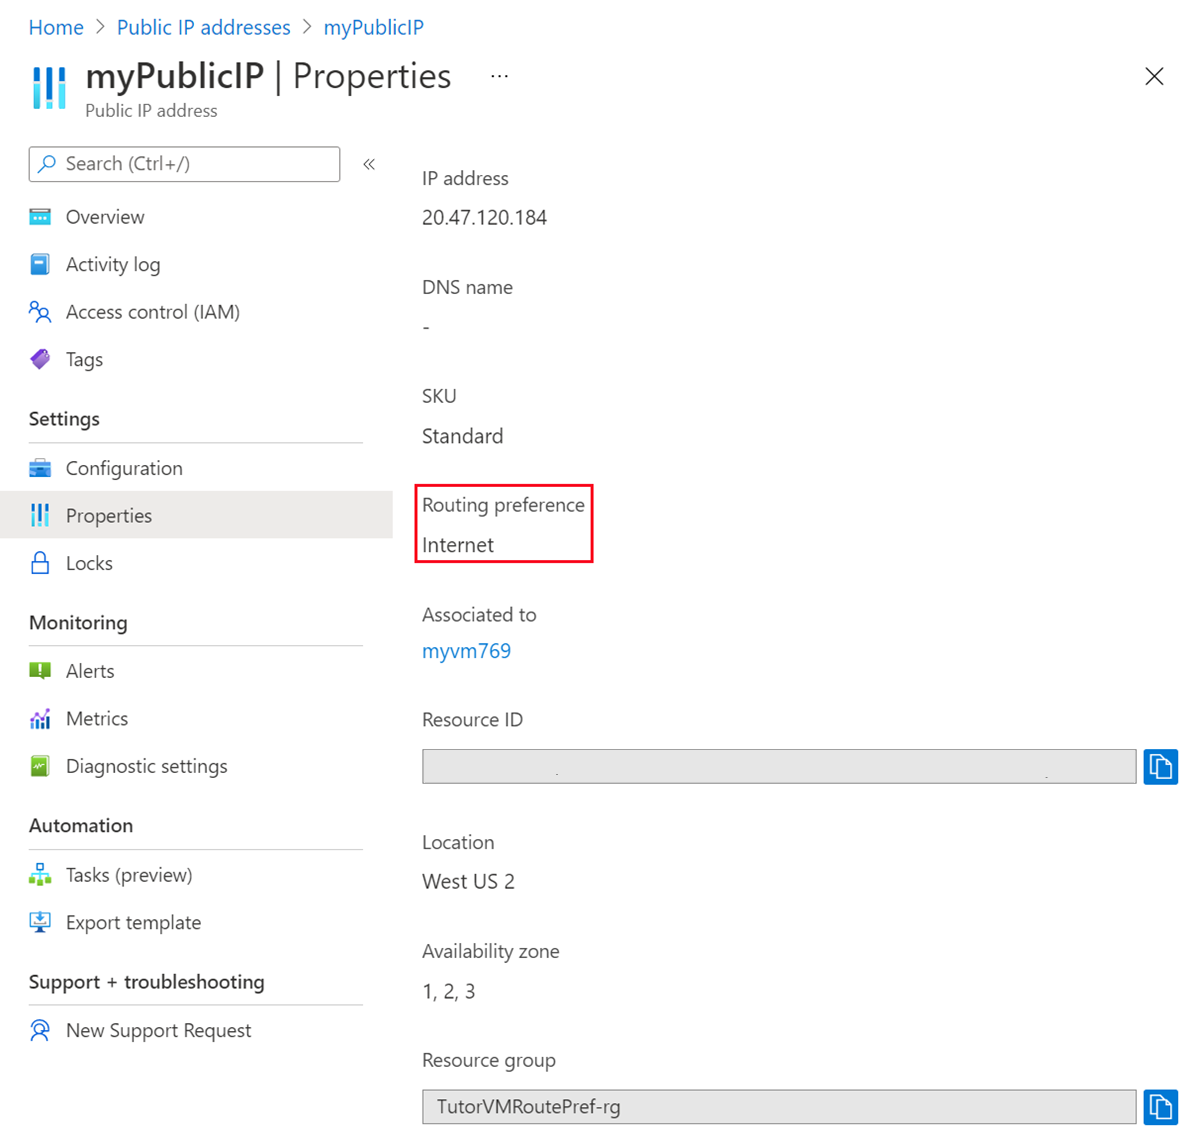
Verify internet routing preference
In this section, you search for the public IP address previously created and verify the internet routing preference using the Azure portal.
In the portal search box, enter Public IP address. In the search results, select Public IP addresses.
In Public IP addresses, select myPublicIP.
Select Properties in Settings.
Verify Internet is displayed in Routing preference.
Clean up resources
If you're not going to continue to use this application, delete the public IP address with the following steps:
In the search box at the top of the portal, enter Resource group.
In the search results, select Resource groups.
Select TutorVMRoutePref-rg
Select Delete resource group.
Enter myResourceGroup for TYPE THE RESOURCE GROUP NAME and select Delete.
Next steps
Advance to the next article to learn how to create a virtual machine with mixed routing preference: