Note
Access to this page requires authorization. You can try signing in or changing directories.
Access to this page requires authorization. You can try changing directories.
In this tutorial, you learn how to integrate a NAT gateway with an internal load balancer.
By default, an Azure Standard Load Balancer is secure. Outbound connectivity is explicitly defined by enabling outbound SNAT (Source Network Address Translation).
SNAT is enabled for an internal backend pool via another public load balancer, network routing, or a public IP defined on a virtual machine.
The NAT gateway integration replaces the need for the deployment of a public load balancer, network routing, or a public IP defined on a virtual machine in the backend pool.

In this tutorial, you learn how to:
- Create an Azure Load Balancer
- Create two virtual machines for the backend pool of the Azure Load Balancer
- Create a NAT gateway
- Validate outbound connectivity of the virtual machines in the load balancer backend pool
Prerequisites
An Azure account with an active subscription. Create an account for free.
Sign in to the Azure portal with your Azure account.
Create a NAT gateway
Before you deploy the NAT gateway resource and the other resources, a resource group is required to contain the resources deployed. In the following steps, you create a resource group, NAT gateway resource, and a public IP address. You can use one or more public IP address resources, public IP prefixes, or both.
For information about public IP prefixes and a NAT gateway, see Manage NAT gateway.
In the search box at the top of the portal, enter NAT gateway. Select NAT gateways in the search results.
Select + Create.
In Create network address translation (NAT) gateway, enter or select this information in the Basics tab:
Setting Value Project Details Subscription Select your Azure subscription. Resource Group Select Create new.
Enter test-rg.
Select OK.Instance details NAT gateway name Enter nat-gateway Region Select East US 2 Availability Zone Select No Zone. TCP idle timeout (minutes) Leave the default of 4. For information about availability zones and NAT gateway, see NAT gateway and availability zones.
Select the Outbound IP tab, or select the Next: Outbound IP button at the bottom of the page.
In the Outbound IP tab, enter or select the following information:
Setting Value Public IP addresses Select Create a new public IP address.
In Name, enter public-ip-nat.
Select OK.Select the Review + create tab, or select the blue Review + create button at the bottom of the page.
Select Create.
Create a virtual network and bastion host
The following procedure creates a virtual network with a resource subnet, an Azure Bastion subnet, and an Azure Bastion host.
In the portal, search for and select Virtual networks.
On the Virtual networks page, select + Create.
On the Basics tab of Create virtual network, enter or select the following information:
Setting Value Project details Subscription Select your subscription. Resource group Select test-rg. Instance details Name Enter vnet-1. Region Select (US) East US 2. 
Select Next to proceed to the Security tab.
Select Enable Azure Bastion in the Azure Bastion section of the Security tab.
Azure Bastion uses your browser to connect to VMs in your virtual network over secure shell (SSH) or remote desktop protocol (RDP) by using their private IP addresses. The VMs don't need public IP addresses, client software, or special configuration. For more information about Azure Bastion, see Azure Bastion
Enter or select the following information in Azure Bastion:
Setting Value Azure Bastion host name Enter bastion. Azure Bastion public IP address Select Create a public IP address.
Enter public-ip-bastion in Name.
Select OK.
Select Next to proceed to the IP Addresses tab.
In the address space box in Subnets, select the default subnet.
In Edit subnet, enter or select the following information:
Setting Value Subnet purpose Leave the default Default. Name Enter subnet-1. IPv4 IPv4 address range Leave the default of 10.0.0.0/16. Starting address Leave the default of 10.0.0.0. Size Leave the default of /24(256 addresses). Security NAT gateway Select nat-gateway. 
Select Save.
Select Review + create at the bottom of the screen, and when validation passes, select Create.
Create load balancer
In this section, you create an internal load balancer that load balances virtual machines. An internal load balancer is used to load balance traffic inside a virtual network with a private IP address.
During the creation of the load balancer, you configure:
- Frontend IP address
- Backend pool
- Inbound load-balancing rules
In the search box at the top of the portal, enter Load balancer. Select Load balancers in the search results.
In the Load balancer page, select Create.
In the Basics tab of the Create load balancer page, enter, or select the following information:
Setting Value Project details Subscription Select your subscription. Resource group Select test-rg. Instance details Name Enter load-balancer Region Select (US) East US 2. SKU Leave the default Standard. Type Select Internal. Tier Leave the default Regional. Select Next: Frontend IP configuration at the bottom of the page.
In Frontend IP configuration, select + Add a frontend IP configuration.
Enter frontend in Name.
Select subnet-1 (10.0.0.0/24) in Subnet.
Leave the rest of the options at the default values.
Select Add.
Select Next: Backend pools at the bottom of the page.
In the Backend pools tab, select + Add a backend pool.
Enter backend-pool for Name in Add backend pool.
Select NIC or IP Address for Backend Pool Configuration.
Select Save.
Select the Next: Inbound rules button at the bottom of the page.
In Load balancing rule in the Inbound rules tab, select + Add a load balancing rule.
In Add load balancing rule, enter or select the following information:
Setting Value Name Enter http-rule IP Version Select IPv4. Frontend IP address Select front-end. Backend pool Select backend-pool. Protocol Select TCP. Port Enter 80. Backend port Enter 80. Health probe Select Create new.
In Name, enter health-probe.
Select TCP in Protocol.
Leave the rest of the defaults, and select OK.Session persistence Select None. Idle timeout (minutes) Enter or select 15. TCP reset Select Enabled. Floating IP Select Disabled. Select Save.
Select the blue Review + create button at the bottom of the page.
Select Create.
Create virtual machines
In this section, you create two VMs (vm-1 and vm-2) in two different zones (Zone 1 and Zone 2).
These VMs are added to the backend pool of the load balancer that was created earlier.
In the search box at the top of the portal, enter Virtual machine. Select Virtual machines in the search results.
Select + Create then Azure virtual machine.
In Create a virtual machine, type or select the values in the Basics tab:
Setting Value Project details Subscription Select your subscription. Resource group Select test-rg. Instance details Virtual machine name Enter vm-1. Region Select East US 2. Availability options Select Zone 1. Security type Select Standard. Image Select Ubuntu Server 22.04 LTS - x64 Gen2. VM architecture Leave the default of x64. Size Select a size. Administrator account Authentication type Select Password. Username Enter azureuser. Password Enter a password. Confirm password Reenter the password. Inbound port rules Public inbound ports Select None. Select the Networking tab, or select Next: Disks, then Next: Networking.
In the Networking tab, enter or select the following information:
Setting Value Network interface Virtual network Select vnet-1. Subnet Select subnet-1 (10.0.0.0/24) Public IP Select None. NIC network security group Select Advanced Configure network security group Select Create new.
In the Create network security group, enter nsg-1 in Name.
Under Inbound rules, select +Add an inbound rule.
In Service, select HTTP.
Select Add
Select OKLoad balancing Place this virtual machine behind an existing load-balancing solution? Select the check box. Load balancing settings Load-balancing options Select Azure load balancer Select a load balancer Select load-balancer Select a backend pool Select backend-pool Select Review + create.
Review the settings, and then select Create.
Follow the previous steps to create a VM with the following values and all the other settings the same as vm-1:
Setting VM 2 Name vm-2 Availability zone 2 Network security group Select the existing nsg-1 Load-balancing options Select Azure load balancer Select a load balancer Select load-balancer Select a backend pool Select backend-pool
Test NAT gateway
In this section, you test the NAT gateway. You first discover the public IP of the NAT gateway. You then connect to the test virtual machine and verify the outbound connection through the NAT gateway.
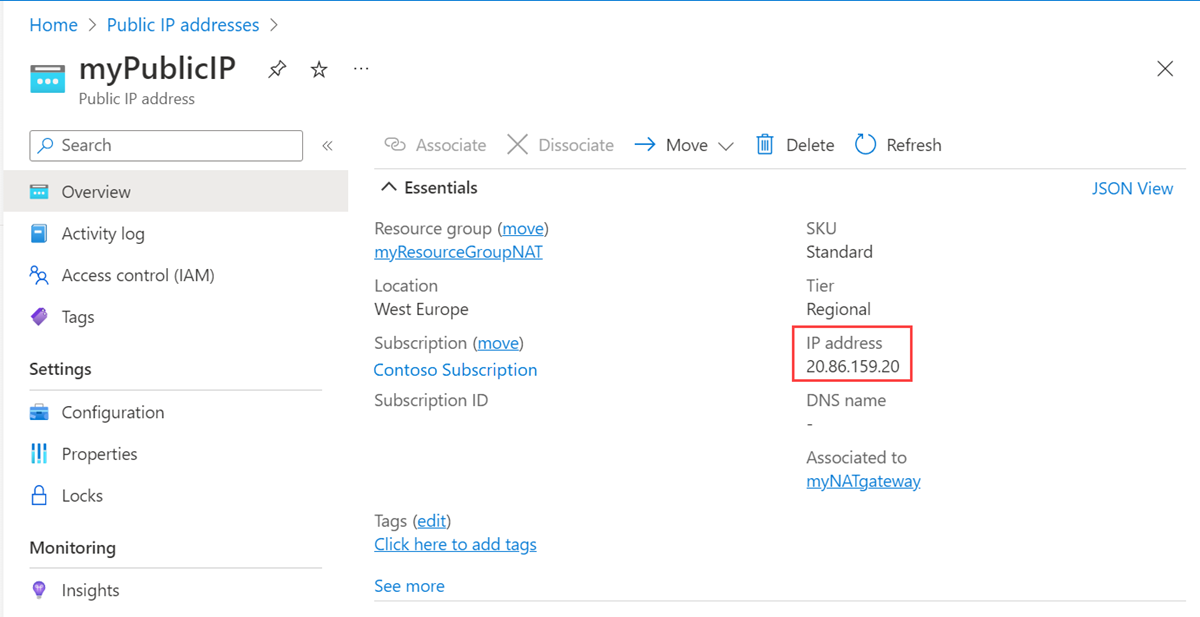
In the search box at the top of the portal, enter Public IP. Select Public IP addresses in the search results.
Select public-ip-nat.
Make note of the public IP address.
In the search box at the top of the portal, enter Virtual machine. Select Virtual machines in the search results.
Select vm-1.
On the Overview page, select Connect, then select the Bastion tab.
Select Use Bastion.
Enter the username and password entered during virtual machine creation. Select Connect.
In the bash prompt, enter the following command.
curl ifconfig.meVerify the IP address returned by the command matches the public IP address of the NAT gateway.
azureuser@vm-1:~$ curl ifconfig.me
203.0.113.0.25
Close the bastion connection to vm-1.
When you finish using the resources that you created, you can delete the resource group and all its resources.
In the Azure portal, search for and select Resource groups.
On the Resource groups page, select the test-rg resource group.
On the test-rg page, select Delete resource group.
Enter test-rg in Enter resource group name to confirm deletion, and then select Delete.
Next steps
For more information on Azure NAT Gateway, see: