Note
Access to this page requires authorization. You can try signing in or changing directories.
Access to this page requires authorization. You can try changing directories.
Learn how to add an existing network interface when you create an Azure virtual machine (VM). Also learn how to add or remove network interfaces from an existing VM in the stopped (deallocated) state. A network interface enables an Azure VM to communicate with internet, Azure, and on-premises resources. A VM has one or more network interfaces.
If you need to add, change, or remove IP addresses for a network interface, see Configure IP addresses for an Azure network interface. To manage network interfaces, see Create, change, or delete a network interface.
Prerequisites
If you don't have one, set up an Azure account with an active subscription. Create an account for free. Complete one of these tasks before starting the remainder of this article:
Portal users: Sign in to the Azure portal with your Azure account.
PowerShell users: Either run the commands in the Azure Cloud Shell, or run PowerShell locally from your computer. The Azure Cloud Shell is a free interactive shell that you can use to run the steps in this article. It has common Azure tools preinstalled and configured to use with your account. In the Azure Cloud Shell browser tab, find the Select environment dropdown list, then pick PowerShell if it isn't already selected.
If you're running PowerShell locally, use Azure PowerShell module version 1.0.0 or later. Run
Get-Module -ListAvailable Az.Networkto find the installed version. If you need to upgrade, see Install Azure PowerShell module. RunConnect-AzAccountto sign in to Azure.Azure CLI users: Either run the commands in the Azure Cloud Shell, or run Azure CLI locally from your computer. The Azure Cloud Shell is a free interactive shell that you can use to run the steps in this article. In the Azure Cloud Shell browser tab, find the Select environment dropdown list, then pick Bash if it isn't already selected.
If you're running Azure CLI locally, use Azure CLI version 2.0.26 or later. Run
az --versionto find the installed version. If you need to install or upgrade, see Install Azure CLI. Runaz loginto create a connection with Azure.
Add existing network interfaces to a new virtual machine
When you create a virtual machine through the portal, the portal creates a network interface with default settings and attaches the network interface to the VM for you. You can't use the portal to add existing network interfaces to a new VM, or to create a VM with multiple network interfaces. You can do both by using the CLI or PowerShell. Be sure to familiarize yourself with the constraints. If you create a VM with multiple network interfaces, you must also configure the operating system to use them properly after you create the VM. Learn how to configure Linux or Windows for multiple network interfaces.
Create a network interface before you create the VM.
Create a VM. You can use CLI or PowerShell.
- For CLI use: az vm create. See example
- For PowerShell use: New-AzNetworkInterface and New-AzVM. See example
Add a network interface to an existing VM
To add a network interface to your virtual machine:
Go to the Azure portal to find an existing virtual machine. Search for and select Virtual machines.
Select the name of your VM. The VM must support the number of network interfaces you want to add. To find out how many network interfaces each VM size supports, see the sizes in Azure for Sizes for virtual machines in Azure.
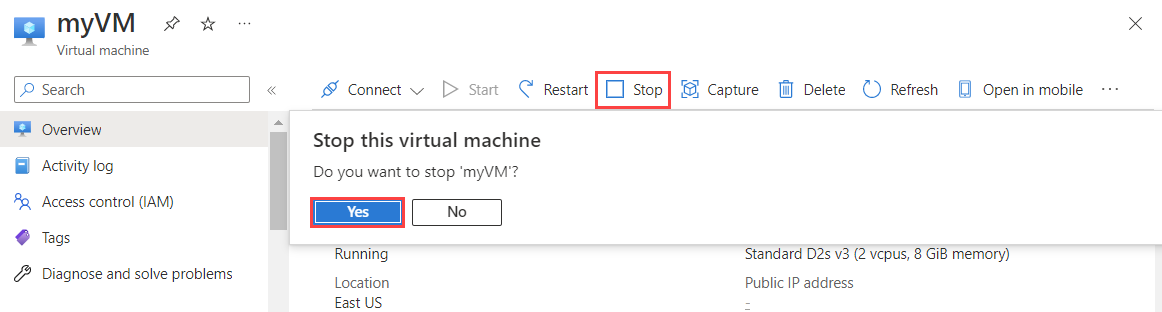
In the VM Overview page, select Stop, and then Yes. Then wait until the Status of the VM changes to Stopped (deallocated).
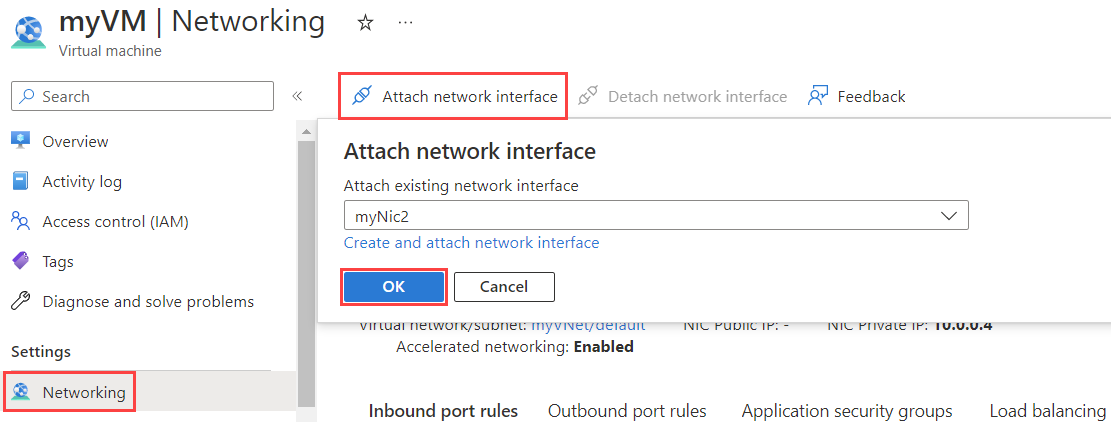
Select Networking > Attach network interface. Then in Attach existing network interface, select the network interface you'd like to attach, and select OK.
Note
The network interface you select must exist in the same virtual network with the network interface currently attached to the VM.
If you don't have an existing network interface, you must first create one. To do so, select Create network interface. To learn more about how to create a network interface, see Create a network interface. To learn more about additional constraints when adding network interfaces to virtual machines, see Constraints.
Select Overview > Start to start the virtual machine.
Now you can configure the VM operating system to use multiple network interfaces properly. Learn how to configure Linux or Windows for multiple network interfaces.
Commands
Tool Command CLI az vm nic add. See example PowerShell Add-AzVMNetworkInterface. See example
View network interfaces for a VM
You can view the network interfaces currently attached to a VM to learn about each network interface's configuration, and the IP addresses assigned to each network interface.
Go to the Azure portal to find an existing virtual machine. Search for and select Virtual machines.
Note
Sign in using an account that is assigned the Owner, Contributor, or Network Contributor role for your subscription. To learn more about how to assign roles to accounts, see Built-in roles for Azure role-based access control.
Select the name of the VM for which you want to view attached network interfaces.
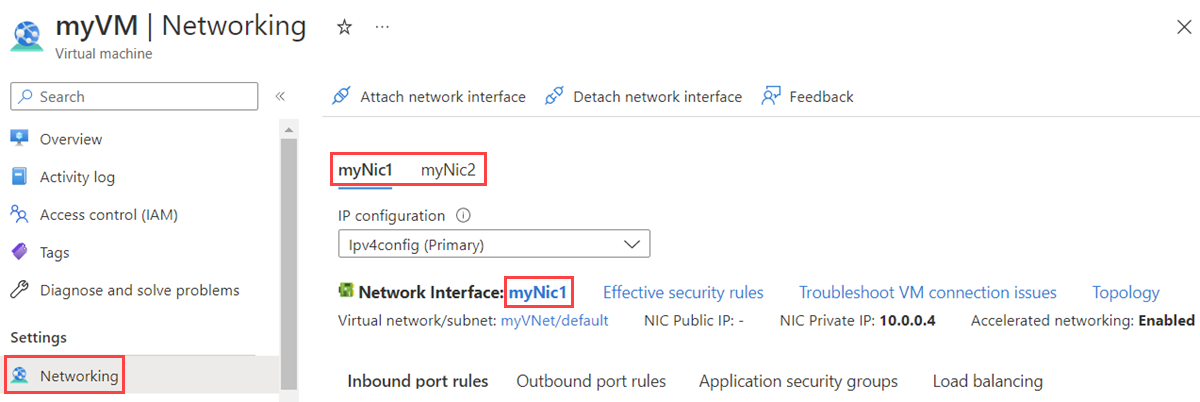
Select Networking to see the network interfaces currently attached to the VM. Select a network interface to see its configuration
To learn about network interface settings and how to change them, see Manage network interfaces. To learn about how to add, change, or remove IP addresses assigned to a network interface, see Manage network interface IP addresses.
Commands
Tool Command CLI az vm nic list PowerShell Get-AzVM
Remove a network interface from a VM
Use the following steps:
Go to the Azure portal to find an existing virtual machine. Search for and select Virtual machines.
Select the name of the VM for which you want to delete attached network interfaces.
Select Stop.
Wait until the Status of the VM changes to Stopped (deallocated).
Select Networking > Detach network interface.
In the Detach network interface, select the network interface you'd like to detach. Then select OK.
Note
If only one network interface is listed, you can't detach it, because a virtual machine must always have at least one network interface attached to it.
Commands
Tool Command CLI az vm nic remove. See example PowerShell Remove-AzVMNetworkInterface. See example
Constraints
Check the following items:
A VM must have at least one network interface attached to it.
A VM can only have as many network interfaces attached to it as the VM size supports. To learn more about how many network interfaces each VM size supports, see Sizes for virtual machines in Azure. All sizes support at least two network interfaces.
The network interfaces you add to a VM can't currently be attached to another VM. To learn more about how to create network interfaces, see Create a network interface.
In the past, you could add network interfaces only to VMs that supported multiple network interfaces and were created with at least two network interfaces. You couldn't add a network interface to a VM that was created with one network interface, even if the VM size supported more than one network interface. Conversely, you could only remove network interfaces from a VM with at least three network interfaces, because VMs created with at least two network interfaces always had to have at least two network interfaces. These constraints no longer apply. You can now create a VM with any number of network interfaces (up to the number supported by the VM size).
By default, the first network interface attached to a VM is the primary network interface. All other network interfaces in the VM are secondary network interfaces.
You can control which network interface you send outbound traffic to. However, a VM by default sends all outbound traffic to the IP address that's assigned to the primary IP configuration of the primary network interface.
In the past, all VMs within the same availability set were required to have a single, or multiple, network interfaces. VMs with any number of network interfaces can now exist in the same availability set, up to the number supported by the VM size. You can only add a VM to an availability set when it's created. To learn more about availability sets, see Availability options for Azure Virtual Machines.
You can connect network interfaces in the same VM to different subnets within a virtual network. However, the network interfaces must all be connected to the same virtual network.
You can add any IP address for any IP configuration of any primary or secondary network interface to an Azure Load Balancer back-end pool. In the past, only the primary IP address for the primary network interface could be added to a back-end pool. To learn more about IP addresses and configurations, see Configure IP addresses for an Azure network interface.
Deleting a VM doesn't delete the network interfaces that are attached to it. When you delete a VM, the network interfaces are detached from the VM. You can add those network interfaces to different VMs or delete them.
Achieving the optimal performance documented requires Accelerated Networking. In some cases, you must explicitly enable Accelerated Networking for Windows or Linux virtual machines.
Note
Azure provides a default outbound access IP for VMs that either aren't assigned a public IP address or are in the backend pool of an internal basic Azure load balancer. The default outbound access IP mechanism provides an outbound IP address that isn't configurable.
The default outbound access IP is disabled when one of the following events happens:
- A public IP address is assigned to the VM.
- The VM is placed in the backend pool of a standard load balancer, with or without outbound rules.
- An Azure NAT Gateway resource is assigned to the subnet of the VM.
VMs that you create by using virtual machine scale sets in flexible orchestration mode don't have default outbound access.
For more information about outbound connections in Azure, see Default outbound access in Azure and Use Source Network Address Translation (SNAT) for outbound connections.