Note
Access to this page requires authorization. You can try signing in or changing directories.
Access to this page requires authorization. You can try changing directories.
This quickstart describes how to use an Azure Resource Manager template (ARM template) to create an any-to-any scenario where any spoke can reach another spoke.
An Azure Resource Manager template is a JavaScript Object Notation (JSON) file that defines the infrastructure and configuration for your project. The template uses declarative syntax. You describe your intended deployment without writing the sequence of programming commands to create the deployment.
If your environment meets the prerequisites and you're familiar with using ARM templates, select the Deploy to Azure button. The template will open in the Azure portal.

Prerequisites
- If you don't have an Azure subscription, create a free account before you begin.
- Public key certificate data is required for this configuration. See Generate and export certificates for steps to generate and export the required certificates. Sample certificate data is provided in the article only to satisfy the template requirements in order to create a P2S gateway.
Review the template
The template used in this quickstart is from Azure Quickstart Templates. The template for this article is too long to show here. To view the template, see azuredeploy.json.
In this quickstart, you'll create an Azure Virtual WAN multi-hub deployment, including all gateways and VNet connections. The list of input parameters has been purposely kept at a minimum. The IP addressing scheme can be changed by modifying the variables inside of the template. The scenario is explained further in the Any-to-any scenario article.

This template creates a fully functional Azure Virtual WAN environment with the following resources:
- Two distinct hubs in different regions
- Four Azure virtual networks (VNet)
- Two VNet connections for each VWAN hub
- One Point-to-Site (P2S) VPN gateway in each hub
- One Site-to-Site (S2S) VPN gateway in each hub
- One ExpressRoute gateway in each hub
Multiple Azure resources are defined in the template:
- Microsoft.Network/virtualwans
- Microsoft.Network/virtualhubs
- Microsoft.Network/virtualnetworks
- Microsoft.Network/hubvirtualnetworkconnections
- Microsoft.Network/p2svpngateways
- Microsoft.Network/vpngateways
- Microsoft.Network/expressroutegateways
- Microsoft.Network/vpnserverconfigurations
Note
This ARM template doesn't create the customer-side resources required for hybrid connectivity. After you deploy the template, you still need to create and configure the P2S VPN clients, the VPN branches (Local Sites), and connect the ExpressRoute circuits.
To find more templates, see Azure Quickstart Templates.
Deploy the template
To deploy this template properly, you must use Deploy to Azure button in the Azure portal, rather than other methods, for the following reasons:
- In order to create the P2S configuration, you need to upload the root certificate data. The data field doesn't accept the certificate data when using PowerShell or CLI.
- This template doesn't work properly using Cloud Shell due to the certificate data upload.
- Additionally, you can easily modify the template and parameters in the portal to accommodate IP address ranges and other values.
Click Deploy to Azure.
To view the template, click Edit template. On this page, you can adjust some of the values such as address space or the name of certain resources. Save to save your changes, or Discard.
On the template page, enter the values. For the Hub_Public Certificate Data for P2S fields, you need to input the public key certificate data from the root certificate that you want to use (as mentioned in the prerequisites). For more information, see Generate and export certificates.
When you have finished entering values, select Review + create.
On the Review + create page, after validation passes, select Create.
It takes about 75 minutes for the deployment to complete. You can view the progress on the template Overview page. If you close the portal, deployment continues.
Validate the deployment
Sign in to the Azure portal.
Select Resource groups from the left pane.
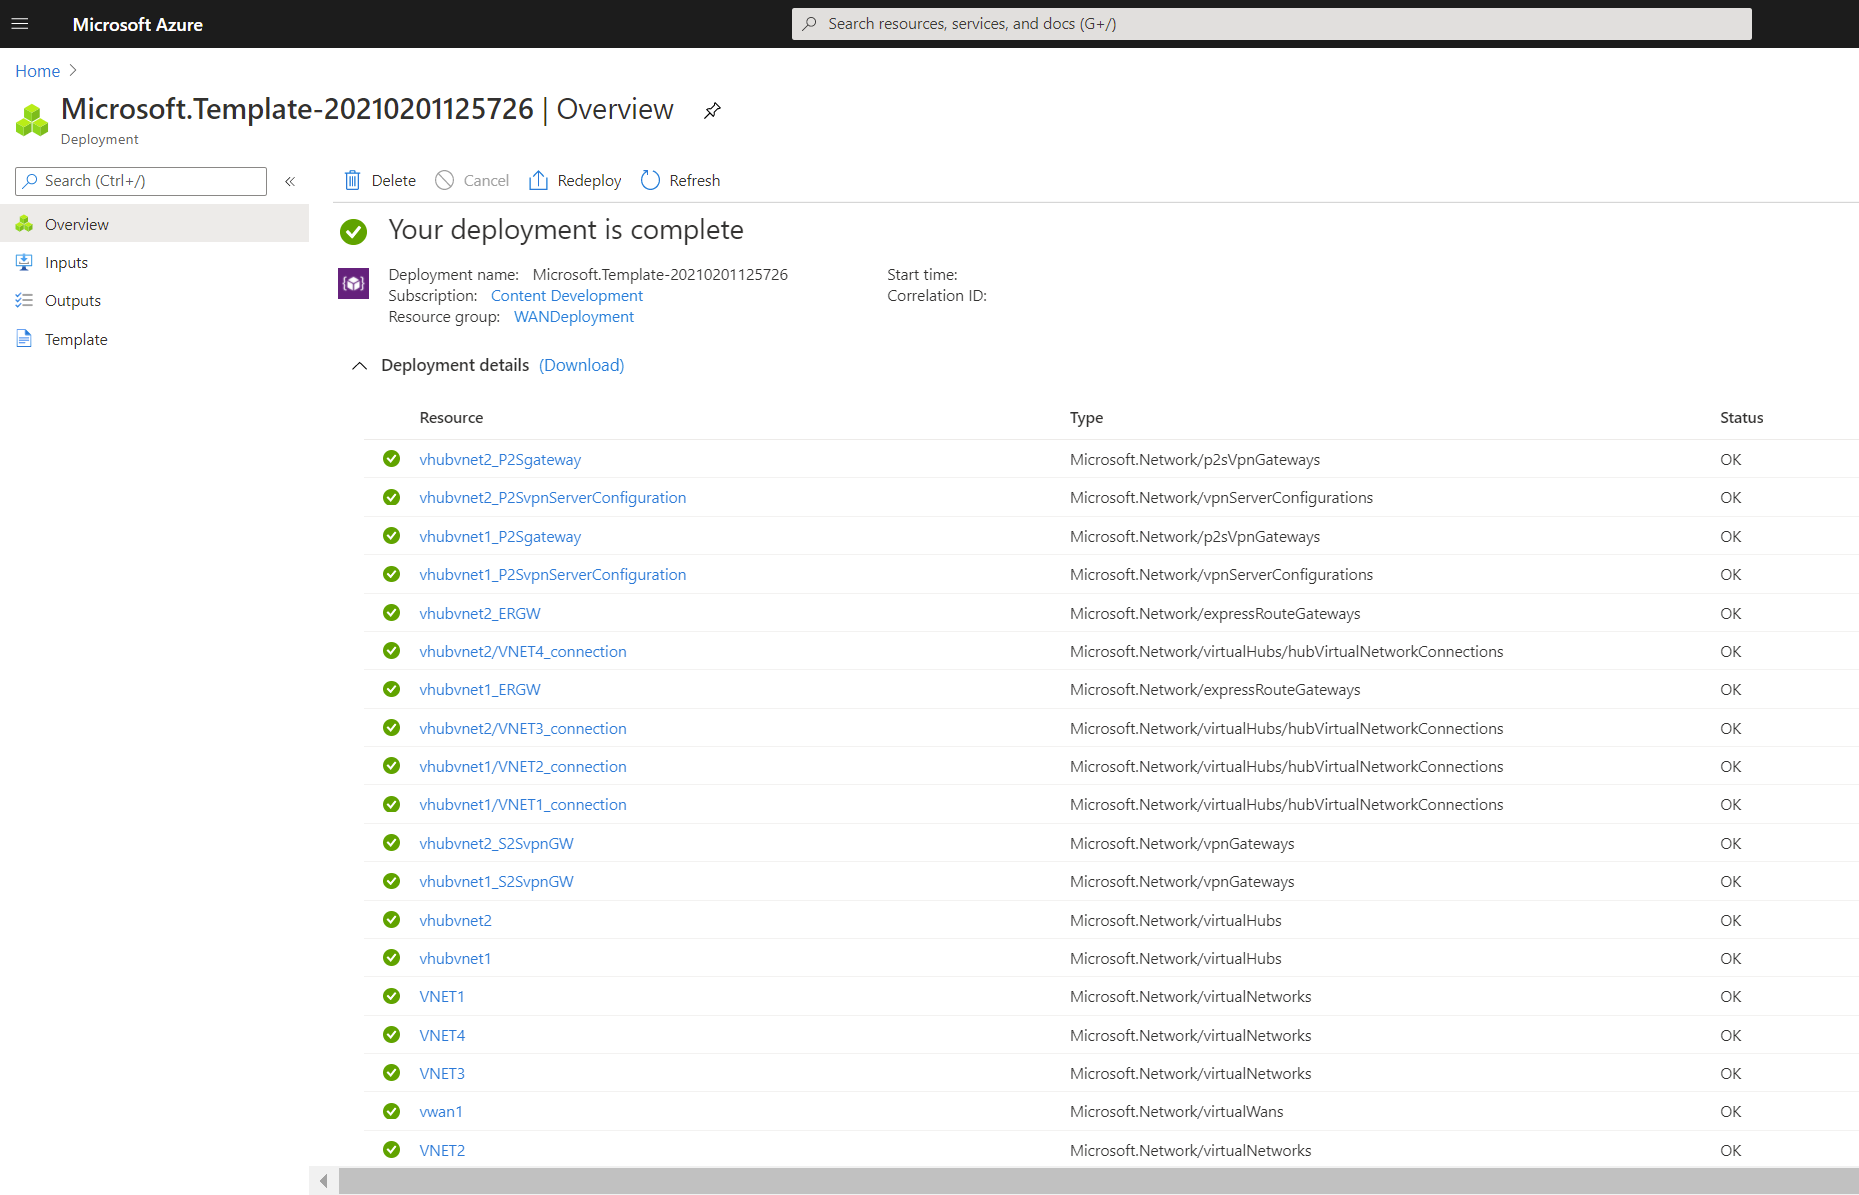
Select the resource group that you created in the previous section. On the Overview page, you'll see something similar to this example:

Click the virtual WAN to view the hubs. On the virtual WAN page, click each hub to view connections and other hub information.

Complete the hybrid configuration
The template doesn't configure all of the settings necessary for a hybrid network. Complete the following configurations and settings, depending on your requirements:
- Configure the VPN branches - local sites
- Complete the P2S VPN configuration
- Connect the ExpressRoute circuits
Clean up resources
When you no longer need the resources that you created, delete them. Some of the Virtual WAN resources must be deleted in a certain order due to dependencies. Deleting can take about 30 minutes to complete.
Open the virtual WAN that you created.
Select a virtual hub associated to the virtual WAN to open the hub page.
Delete all gateway entities following the below order for each gateway type. This can take 30 minutes to complete.
VPN:
- Disconnect VPN sites
- Delete VPN connections
- Delete VPN gateways
ExpressRoute:
- Delete ExpressRoute connections
- Delete ExpressRoute gateways
Repeat for all hubs associated to the virtual WAN.
You can either delete the hubs at this point, or delete the hubs later when you delete the resource group.
Navigate to the resource group in the Azure portal.
Select Delete resource group. This deletes the other resources in the resource group, including the hubs and the virtual WAN.