Note
Access to this page requires authorization. You can try signing in or changing directories.
Access to this page requires authorization. You can try changing directories.
This article helps you use the Route-maps feature to tag routes using the Azure portal. For more information about Virtual WAN Route-maps, see About Route-maps.
Prerequisites
Verify that you have met the following criteria before beginning your configuration:
You have virtual WAN (VWAN) with a connection (S2S, P2S, or ExpressRoute) already configured.
- For steps to create a VWAN with a S2S connection, see Tutorial - Create a S2S connection with Virtual WAN.
- For steps to create a virtual WAN with a P2S User VPN connection, see Tutorial - Create a User VPN P2S connection with Virtual WAN.
Be sure to view About Route-maps for considerations and limitations before proceeding with configuration steps.
Design
In this situation, we have two hubs. Hub 1 has 2 VNets and a VPN branch office. One of the VNets has an (network virtual appliance) peered with the hub. Hub 2 also has 2 VNets and a VPN branch office.

Here's the addressing for this environment:
| Resource | Address Space |
|---|---|
| Hub 1 | 192.168.1.0/24 |
| Hub 2 | 192.168.2.0/24 |
| Virtual network 1 | 10.1.0.0/24 |
| Virtual network 2 | 10.2.0.0/24 |
| Virtual network 3 | 10.3.0.0/24 |
| Virtual network 4 | 10.4.0.0/24 |
| VPN Branch 1 | 10.122.1.0/24, 10.122.2.0/24, 10.122.3.0/24, 10.100.0.0/16 |
| VPN Branch 2 | 10.200.0.0/16 |
| NVA 1 | 10.150.1.0/24, 10.150.2.0/24, 10.150.3.0/24, 10.150.4.0/24 |
Scenario: Using BGP communities to Tag routes
In this scenario, the goal is to tag route 10.5.0.192/26 form virtual network 3 on Hub 2 with BGP community 3356:70

Workflow
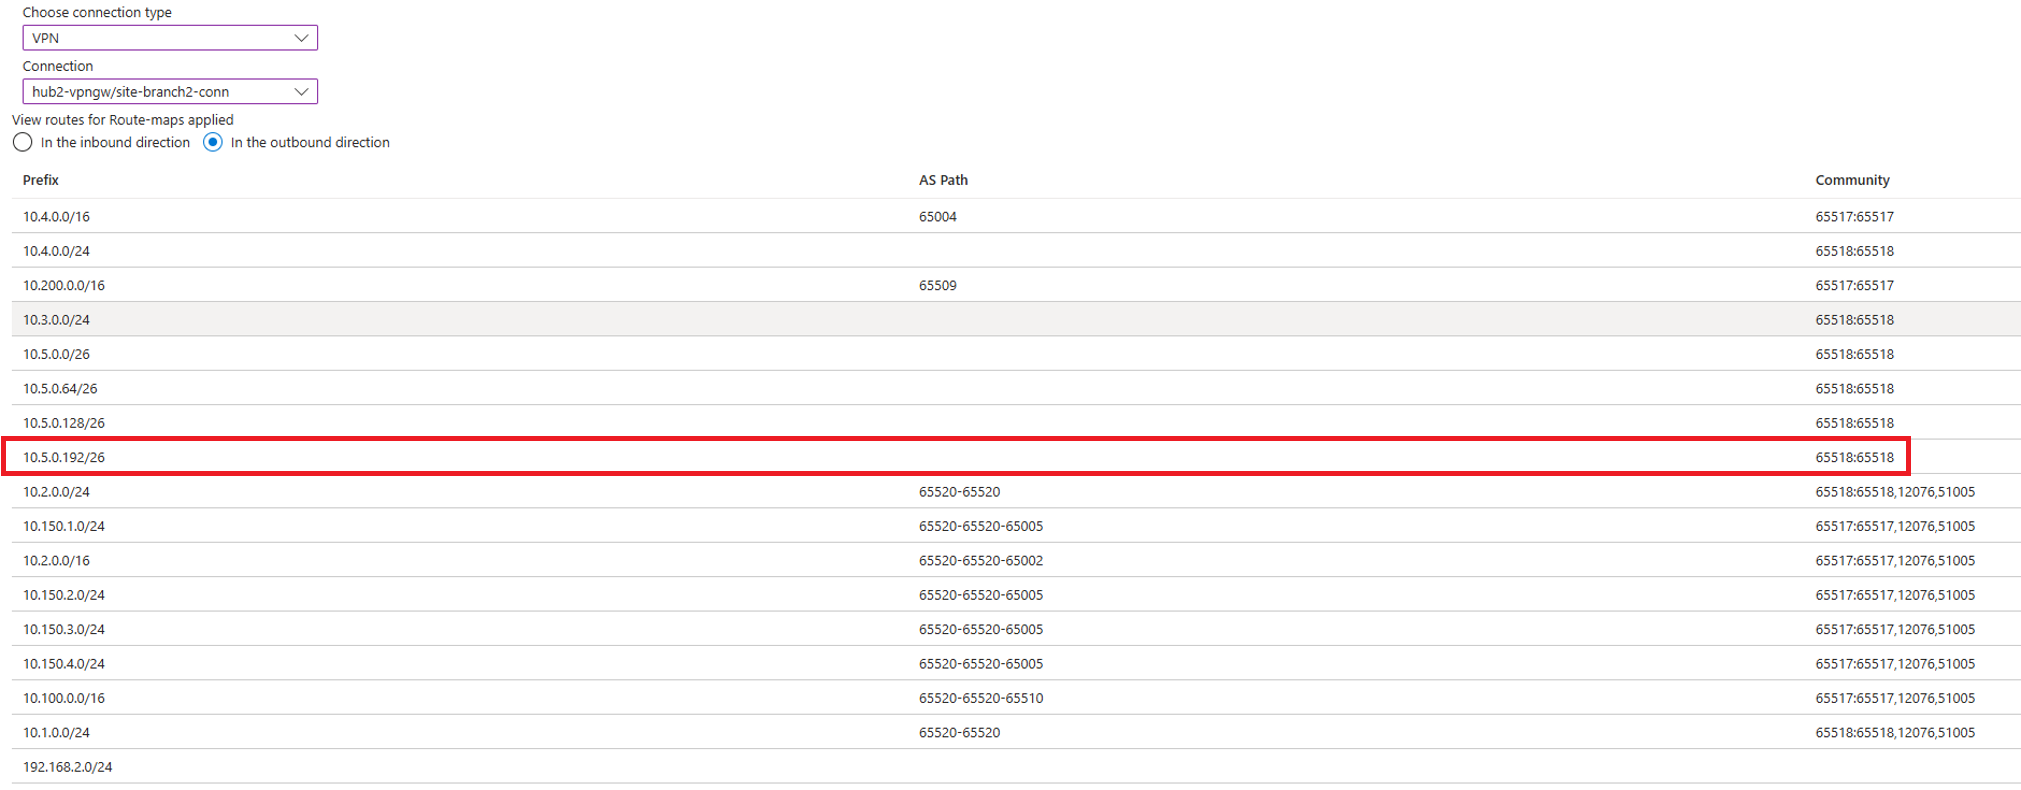
Use the Route-Map dashboard in hub 2 to verify the BGP community on the route 10.5.0.192/26 being advertised from the virtual network connection.

Look at the Route-Map dashboard for the VPN Branch to verify the BGP community on the route for 10.5.0.192/26. The goal is to vary what routes are being sent on-premises.
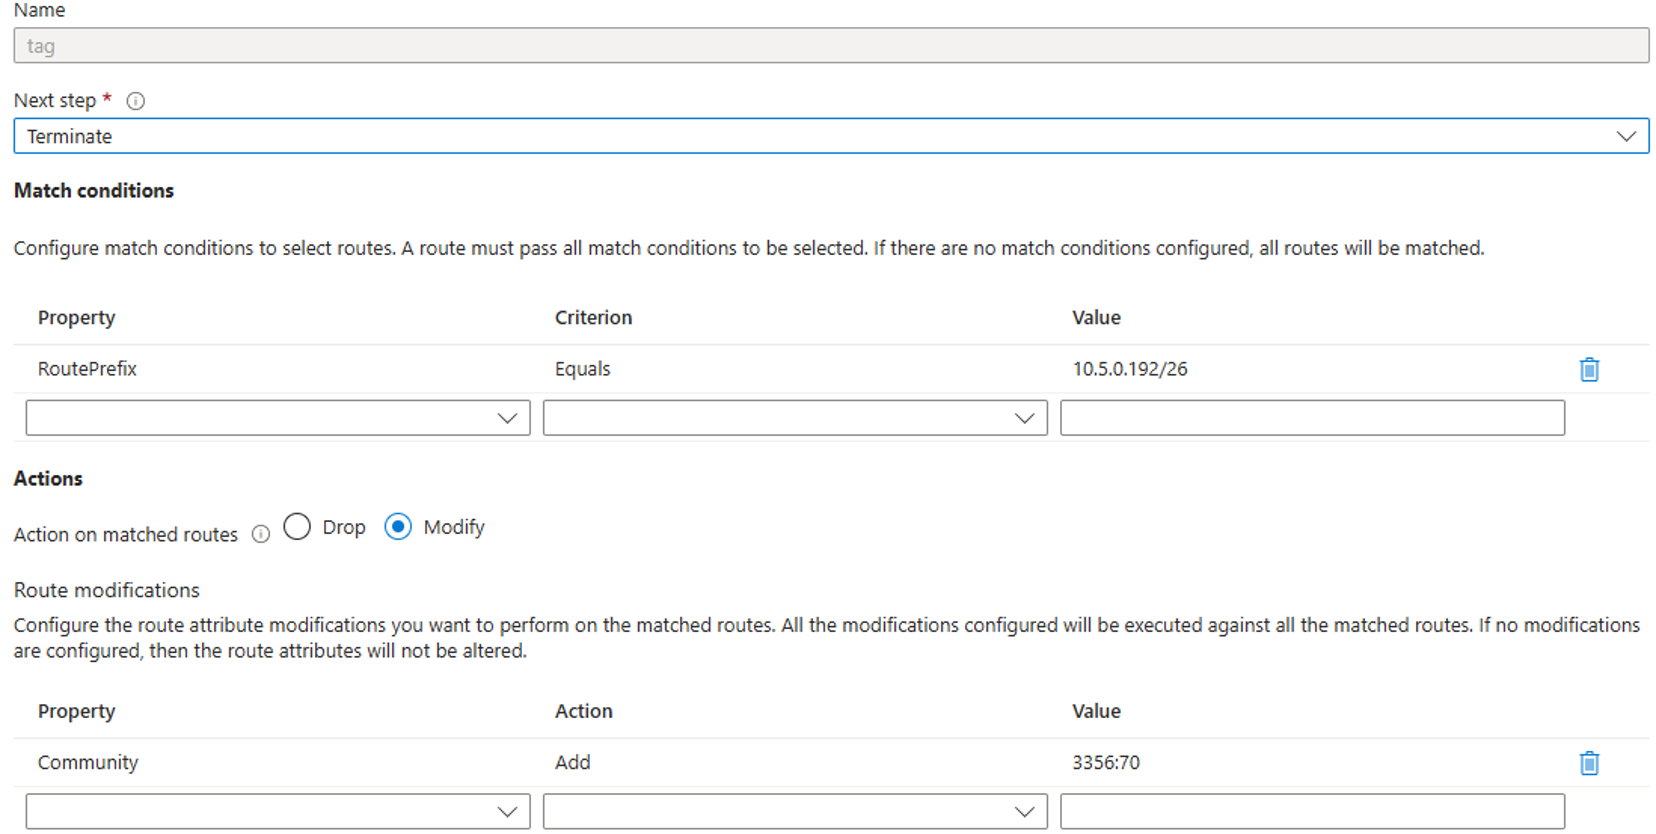
Create a Route-Map to tag the route. If this is your first time creating a Route-Map, see How to configure Route-maps for more information.
The Route-Map will have a match rule for route 10.5.0.192/26. The action modify will be selected. Route Modification has an add for community 3356:70.
Apply the Route-Map on the virtual network 3 connection. The Route-Map will be applied in the inbound direction.

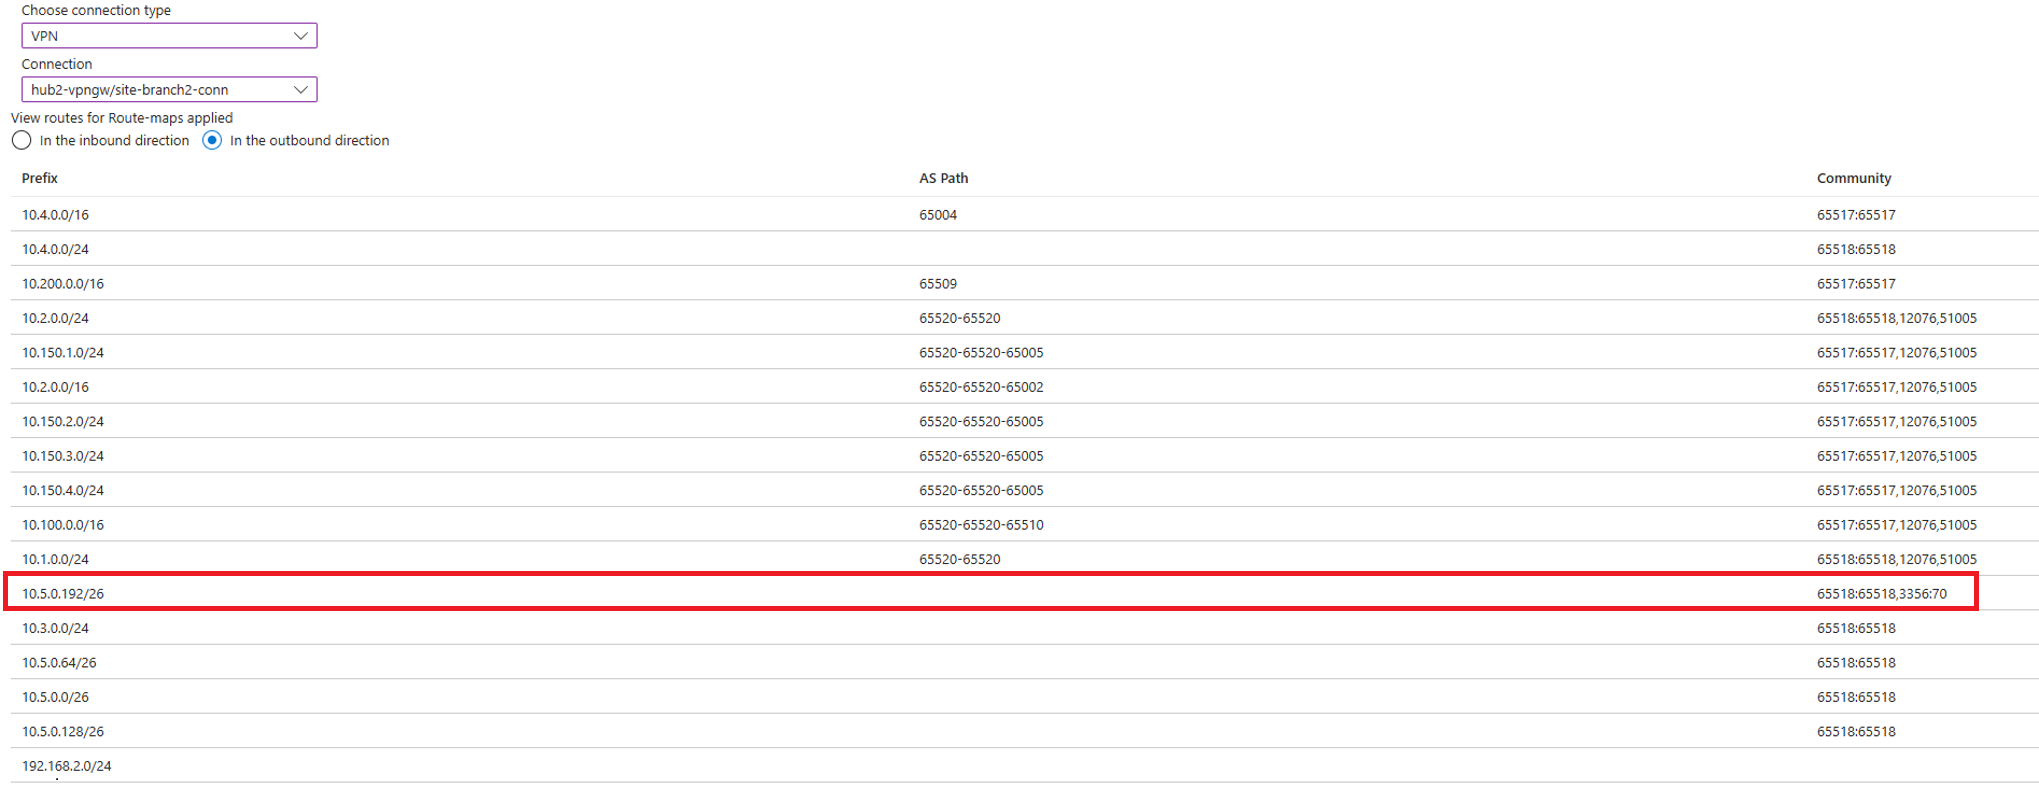
Using the Route-Map dashboard in Hub 2, Verify that route 10.5.0.192/26 has the BGP community of 3356:70 added on the virtual network 3 connection.

look at the Route-Map dashboard for the VPN branch connection to verify route 10.5.0.192/26 has the BGP community 3356:70 being advertised to the VPN branch office 2.


Next steps
- Use the Route-maps dashboard to monitor routes, AS Path, and BGP communities.
- To learn more about Route-maps, see About Route-maps.