Configure point-to-site VPN clients: certificate authentication - Windows

This article helps you connect to your Azure virtual network (VNet) using VPN Gateway point-to-site (P2S) and Certificate authentication. There are multiple sets of steps in this article, depending on the tunnel type you selected for your P2S configuration, the operating system, and the VPN client that is used to connect.

When you connect to an Azure VNet using a P2S IKEv2/SSTP tunnel and certificate authentication, you can use the VPN client that is natively installed on the Windows operating system from which you’re connecting. If you use the tunnel type OpenVPN, you also have the option of using the Azure VPN Client or the OpenVPN client software. This article walks you through configuring the VPN clients.

Before you begin

Before beginning, verify that you are on the correct article. The following table shows the configuration articles available for Azure VPN Gateway P2S VPN clients. Steps differ, depending on the authentication type, tunnel type, and the client OS.

Authentication Tunnel type HowTo article
Azure certificate IKEv2, OpenVPN, SSTP Windows
Azure certificate IKEv2, OpenVPN macOS-iOS
Azure certificate IKEv2, OpenVPN Linux
Microsoft Entra ID OpenVPN (SSL) Windows
Microsoft Entra ID OpenVPN (SSL) macOS
RADIUS - certificate - Article
RADIUS - password - Article
RADIUS - other methods - Article

Important

Starting July 1, 2018, support is being removed for TLS 1.0 and 1.1 from Azure VPN Gateway. VPN Gateway will support only TLS 1.2. Only point-to-site connections are impacted; site-to-site connections won't be affected. If you’re using TLS for point-to-site VPNs on Windows 10 or later clients, you don’t need to take any action. If you're using TLS for point-to-site connections on Windows 7 and Windows 8 clients, see the VPN Gateway FAQ for update instructions.

1. Generate VPN client configuration files

All of the necessary configuration settings for the VPN clients are contained in a VPN client profile configuration zip file. You can generate client profile configuration files using PowerShell, or by using the Azure portal. Either method returns the same zip file.

The VPN client profile configuration files that you generate are specific to the P2S VPN gateway configuration for the VNet. If there are any changes to the P2S VPN configuration after you generate the files, such as changes to the VPN protocol type or authentication type, you need to generate new VPN client profile configuration files and apply the new configuration to all of the VPN clients that you want to connect. For more information about P2S connections, see About point-to-site VPN.

PowerShell

When you generate VPN client configuration files, the value for '-AuthenticationMethod' is 'EapTls'. Generate the VPN client configuration files using the following command:

$profile=New-AzVpnClientConfiguration -ResourceGroupName "TestRG" -Name "VNet1GW" -AuthenticationMethod "EapTls"

$profile.VPNProfileSASUrl

Azure portal

  1. In the Azure portal, go to the virtual network gateway for the virtual network to which you want to connect.

  2. On the virtual network gateway page, select Point-to-site configuration to open the Point-to-site configuration page.

  3. At the top of the Point-to-site configuration page, select Download VPN client. This doesn't download VPN client software, it generates the configuration package used to configure VPN clients. It takes a few minutes for the client configuration package to generate. During this time, you may not see any indications until the packet has generated.

    Screenshot of Point-to-site configuration page.

  4. Once the configuration package has been generated, your browser indicates that a client configuration zip file is available. It's named the same name as your gateway. Unzip the file to view the folders.

2. Generate client certificates

For certificate authentication, a client certificate must be installed on each client computer. The client certificate you want to use must be exported with the private key, and must contain all certificates in the certification path. Additionally, for some configurations, you'll also need to install root certificate information.

In many cases, you can install the client certificate directly on the client computer by double-clicking. However, for certain OpenVPN client configurations, you may need to extract information from the client certificate in order to complete the configuration.

  • For information about working with certificates, see Point-to site: Generate certificates.
  • To view an installed client certificate, open Manage User Certificates. The client certificate is installed in Current User\Personal\Certificates.

3. Configure the VPN client

Next, configure the VPN client. Select from the following instructions:

IKEv2 and SSTP: native VPN client steps

This section helps you configure the native VPN client that's part of your Windows operating system to connect to your VNet. This configuration doesn't require additional client software.

View configuration files

Unzip the VPN client profile configuration file to view the following folders:

  • WindowsAmd64 and WindowsX86, which contain the Windows 64-bit and 32-bit installer packages, respectively. The WindowsAmd64 installer package is for all supported 64-bit Windows clients, not just Amd.
  • Generic, which contains general information used to create your own VPN client configuration. The Generic folder is provided if IKEv2 or SSTP+IKEv2 was configured on the gateway. If only SSTP is configured, then the Generic folder isn’t present.

Configure VPN client profile

You can use the same VPN client configuration package on each Windows client computer, as long as the version matches the architecture for the client. For the list of client operating systems that are supported, see the point-to-site section of the VPN Gateway FAQ.

Note

You must have Administrator rights on the Windows client computer from which you want to connect.

  1. Select the VPN client configuration files that correspond to the architecture of the Windows computer. For a 64-bit processor architecture, choose the 'VpnClientSetupAmd64' installer package. For a 32-bit processor architecture, choose the 'VpnClientSetupX86' installer package.

  2. Double-click the package to install it. If you see a SmartScreen popup, click More info, then Run anyway.

  3. Install the client certificate. Typically, you can do this by double-clicking the certificate file and providing a password if required. For more information, see Install client certificates.

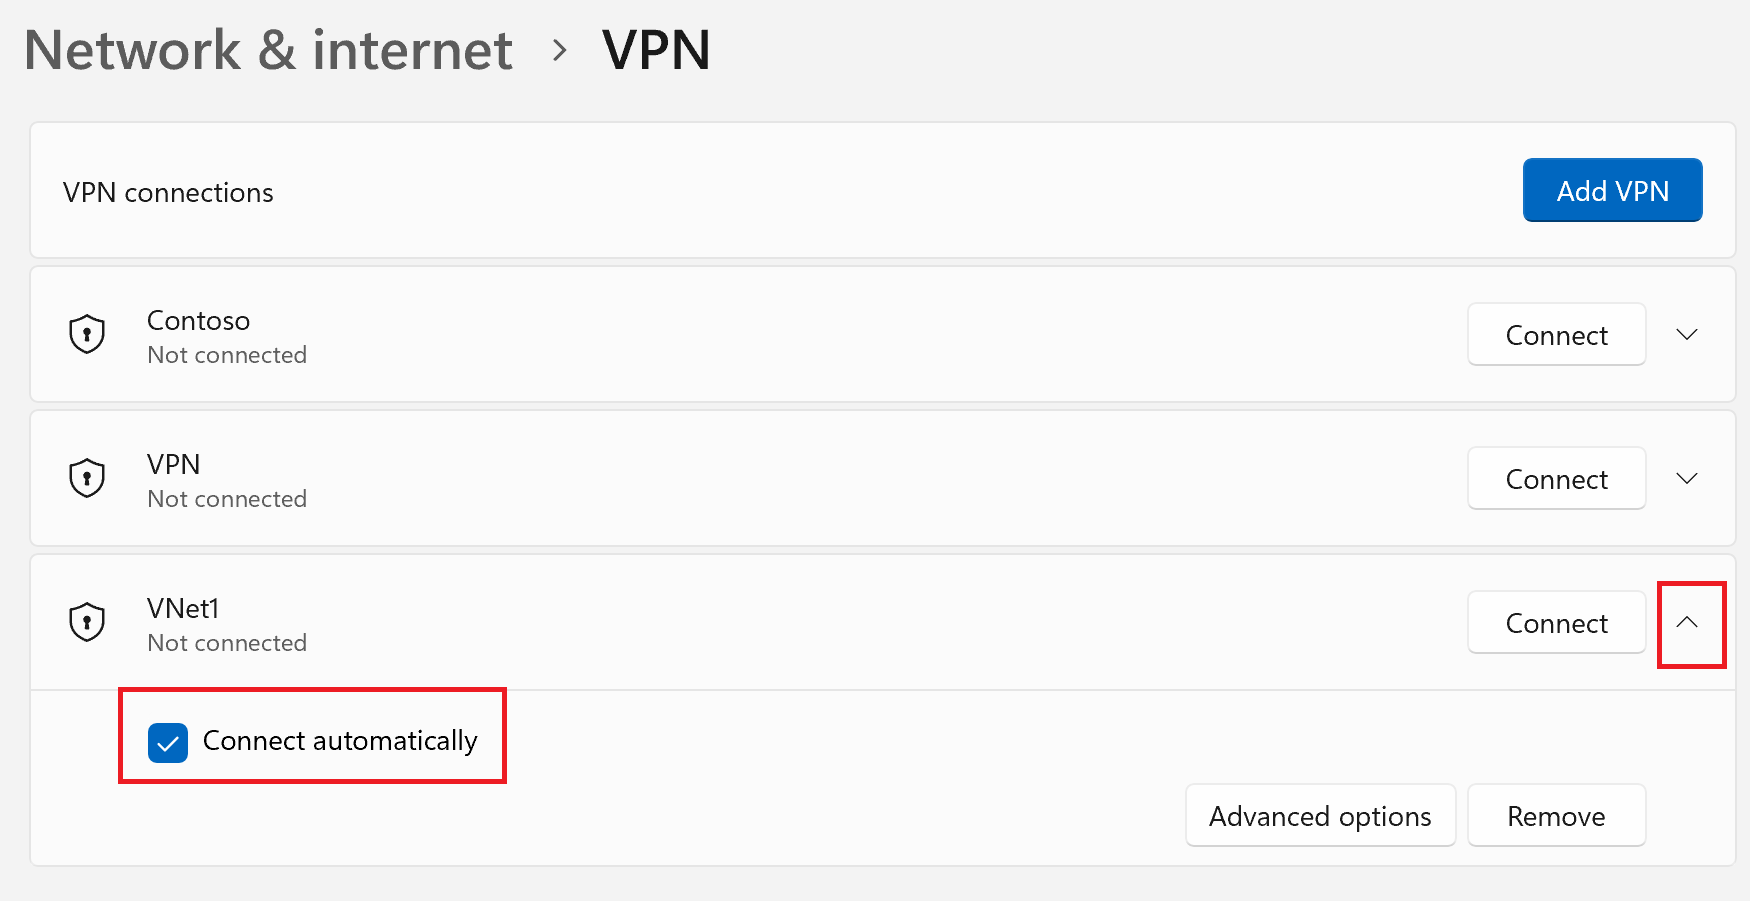
  4. Connect to your VPN. Go to the VPN settings and locate the VPN connection that you created. It's the same name as your virtual network. Select Connect. A pop-up message may appear. Select Continue to use elevated privileges.

  5. On the Connection status page, select Connect to start the connection. If you see a Select Certificate screen, verify that the client certificate showing is the one that you want to use to connect. If it isn't, use the drop-down arrow to select the correct certificate, and then select OK.

OpenVPN: Azure VPN Client steps

This section applies to certificate authentication configurations that use the OpenVPN tunnel type. The following steps help you download, install, and configure the Azure VPN Client to connect to your VNet. Note that these steps apply to certificate authentication. If you're using OpenVPN with Microsoft Entra authentication, see the Microsoft Entra ID configuration article instead.

To connect, each client computer requires the following items:

  • The Azure VPN Client software must be installed on each client computer that you want to connect.
  • The Azure VPN Client profile must be configured using the downloaded azurevpnconfig.xml configuration file.
  • The client computer must have a client certificate that's installed locally.

View configuration files

When you open the zip file, you'll see the AzureVPN folder. Locate the azurevpnconfig.xml file. This file contains the settings you use to configure the VPN client profile.

If you don't see the file, verify the following items:

  • Verify that your VPN gateway is configured to use the OpenVPN tunnel type.
  • If you're using Microsoft Entra authentication, you may not have an AzureVPN folder. See the Microsoft Entra ID configuration article instead.

Download the Azure VPN Client

  1. Download the latest version of the Azure VPN Client install files using one of the following links:

  2. Install the Azure VPN Client to each computer.

  3. Verify that the Azure VPN Client has permission to run in the background. For steps, see Windows background apps.

  4. To verify the installed client version, open the Azure VPN Client. Go to the bottom of the client and click ... -> ? Help. In the right pane, you can see the client version number.

Configure the VPN client profile

  1. Open the Azure VPN Client.

  2. Click + on the bottom left of the page, then select Import.

  3. In the window, navigate to the azurevpnconfig.xml file, select it, then click Open.

  4. From the Certificate Information dropdown, select the name of the child certificate (the client certificate). For example, P2SChildCert. You can also (optionally) select a Secondary Profile.

    Screenshot showing Azure VPN client profile configuration page.

    If you don't see a client certificate in the Certificate Information dropdown, you'll need to cancel and fix the issue before proceeding. It's possible that one of the following things is true:

    • The client certificate isn't installed locally on the client computer.
    • There are multiple certificates with exactly the same name installed on your local computer (common in test environments).
    • The child certificate is corrupt.
  5. After the import validates (imports with no errors), click Save.

  6. In the left pane, locate the VPN connection, then click Connect.

Optional settings for the Azure VPN Client

The following sections discuss additional optional configuration settings that are available for the Azure VPN Client.

Secondary Profile

The Azure VPN Client provides high availability for client profiles. Adding a secondary client profile gives the client a more resilient way to access the VPN. If there's a region outage or failure to connect to the primary VPN client profile, the Azure VPN Client will auto-connect to the secondary client profile without causing any disruptions.

This feature requires the Azure VPN Client version 2.2124.51.0, which is currently in the process of being rolled out. For this example, we'll add a secondary profile to an already existing profile.

Using the settings in this example, if the client can't connect to VNet1, it will automatically connect to VNet2 without causing disruptions.

  1. Add another VPN client profile to the Azure VPN Client. For this example, we added a profile to connect to VNet2.

  2. Next, go to the VNet1 profile and click "...", then Configure.

  3. From the Secondary Profile dropdown, select the profile for VNet2. Then, Save your settings.

    Screenshot showing Azure VPN client profile configuration page with secondary profile.

Custom settings: DNS and routing

You can configure the Azure VPN Client with optional configuration settings such as additional DNS servers, custom DNS, forced tunneling, custom routes, and other additional settings. For a description of the available settings and configuration steps, see Azure VPN Client optional settings.

OpenVPN: OpenVPN Client steps

This section applies to certificate authentication configurations that are configured to use the OpenVPN tunnel type. The following steps help you configure the OpenVPN ® Protocol client and connect to your VNet.

View configuration files

When you open the VPN client configuration package zip file, you should see an OpenVPN folder. If you don't see the folder, verify the following items:

  • Verify that your VPN gateway is configured to use the OpenVPN tunnel type.
  • If you're using Microsoft Entra authentication, you may not have an OpenVPN folder. See the Microsoft Entra ID configuration article instead.

Note

OpenVPN Client version 2.6 is not yet supported.

  1. Download and install the OpenVPN client (version 2.4 or higher) from the official OpenVPN website. Version 2.6 is not yet supported.

  2. Locate the VPN client profile configuration package that you generated and downloaded to your computer. Extract the package. Go to the OpenVPN folder and open the vpnconfig.ovpn configuration file using Notepad.

  3. Next, locate the child certificate you created. If you don't have the certificate, use one of the following links for steps to export the certificate. You'll use the certificate information in the next step.

  4. From the child certificate, extract the private key and the base64 thumbprint from the .pfx. There are multiple ways to do this. Using OpenSSL on your computer is one way. The profileinfo.txt file contains the private key and the thumbprint for the CA and the Client certificate. Be sure to use the thumbprint of the client certificate.

    openssl pkcs12 -in "filename.pfx" -nodes -out "profileinfo.txt"
    
  5. Switch to the vpnconfig.ovpn file you opened in Notepad. Fill in the section between <cert> and </cert>, getting the values for $CLIENT_CERTIFICATE, $INTERMEDIATE_CERTIFICATE, and $ROOT_CERTIFICATE as shown below.

       # P2S client certificate
       # please fill this field with a PEM formatted cert
       <cert>
       $CLIENT_CERTIFICATE
       $INTERMEDIATE_CERTIFICATE (optional)
       $ROOT_CERTIFICATE
       </cert>
    
    • Open profileinfo.txt from the previous step in Notepad. You can identify each certificate by looking at the subject= line. For example, if your child certificate is called P2SChildCert, your client certificate will be after the subject=CN = P2SChildCert attribute.
    • For each certificate in the chain, copy the text (including and between) "-----BEGIN CERTIFICATE-----" and "-----END CERTIFICATE-----".
    • Only include an $INTERMEDIATE_CERTIFICATE value if you have an intermediate certificate in your profileinfo.txt file.
  6. Open the profileinfo.txt in Notepad. To get the private key, select the text (including and between) "-----BEGIN PRIVATE KEY-----" and "-----END PRIVATE KEY-----" and copy it.

  7. Go back to the vpnconfig.ovpn file in Notepad and find this section. Paste the private key replacing everything between and <key> and </key>.

    # P2S client root certificate private key
    # please fill this field with a PEM formatted key
    <key>
    $PRIVATEKEY
    </key>
    
  8. Don't change any other fields. Use the filled in configuration in client input to connect to the VPN.

  9. Copy the vpnconfig.ovpn file to C:\Program Files\OpenVPN\config folder.

  10. Right-click the OpenVPN icon in the system tray and click Connect.

Next steps

For additional steps, return to the P2S article that you were working from.