Note
Access to this page requires authorization. You can try signing in or changing directories.
Access to this page requires authorization. You can try changing directories.
This article shows you how to create a self-signed root certificate and generate client certificates using MakeCert. The steps in this article help you create .pfx and .cer files. For .pem files, see Generate .pem certificate files.
Note
We recommend using the PowerShell steps instead to create your certificates. We provide these MakeCert instructions as an optional method.
MakeCert is deprecated. This means that this tool could be removed at any point. Certificates that you already generated using MakeCert aren't affected if MakeCert is no longer available. MakeCert is only used to generate the certificates, not as a validating mechanism.
Create a self-signed root certificate
The following steps show you how to create a self-signed certificate using MakeCert. These steps aren't deployment-model specific.
Download and install MakeCert.
After installation, you can typically find the makecert.exe utility under this path: 'C:\Program Files (x86)\Windows Kits\10\bin<arch>'. However, it's possible that it was installed to another location. Open a command prompt as administrator and navigate to the location of the MakeCert utility. You can use the following example, adjusting for the proper location:
cd C:\Program Files (x86)\Windows Kits\10\bin\x64Create and install a certificate in the Personal certificate store on your computer. The following example creates a corresponding .cer file that you upload to Azure when configuring P2S. Replace 'P2SRootCert' and 'P2SRootCert.cer' with the name that you want to use for the certificate. The certificate is located in your 'Certificates - Current User\Personal\Certificates'.
makecert -sky exchange -r -n "CN=P2SRootCert" -pe -a sha256 -len 2048 -ss My
Export the public key (.cer)
After you create a self-signed root certificate, export the root certificate .cer file (not the private key). You'll later upload the necessary certificate data contained in the file to Azure. The following steps help you export the .cer file for your self-signed root certificate and retrieve the necessary certificate data.
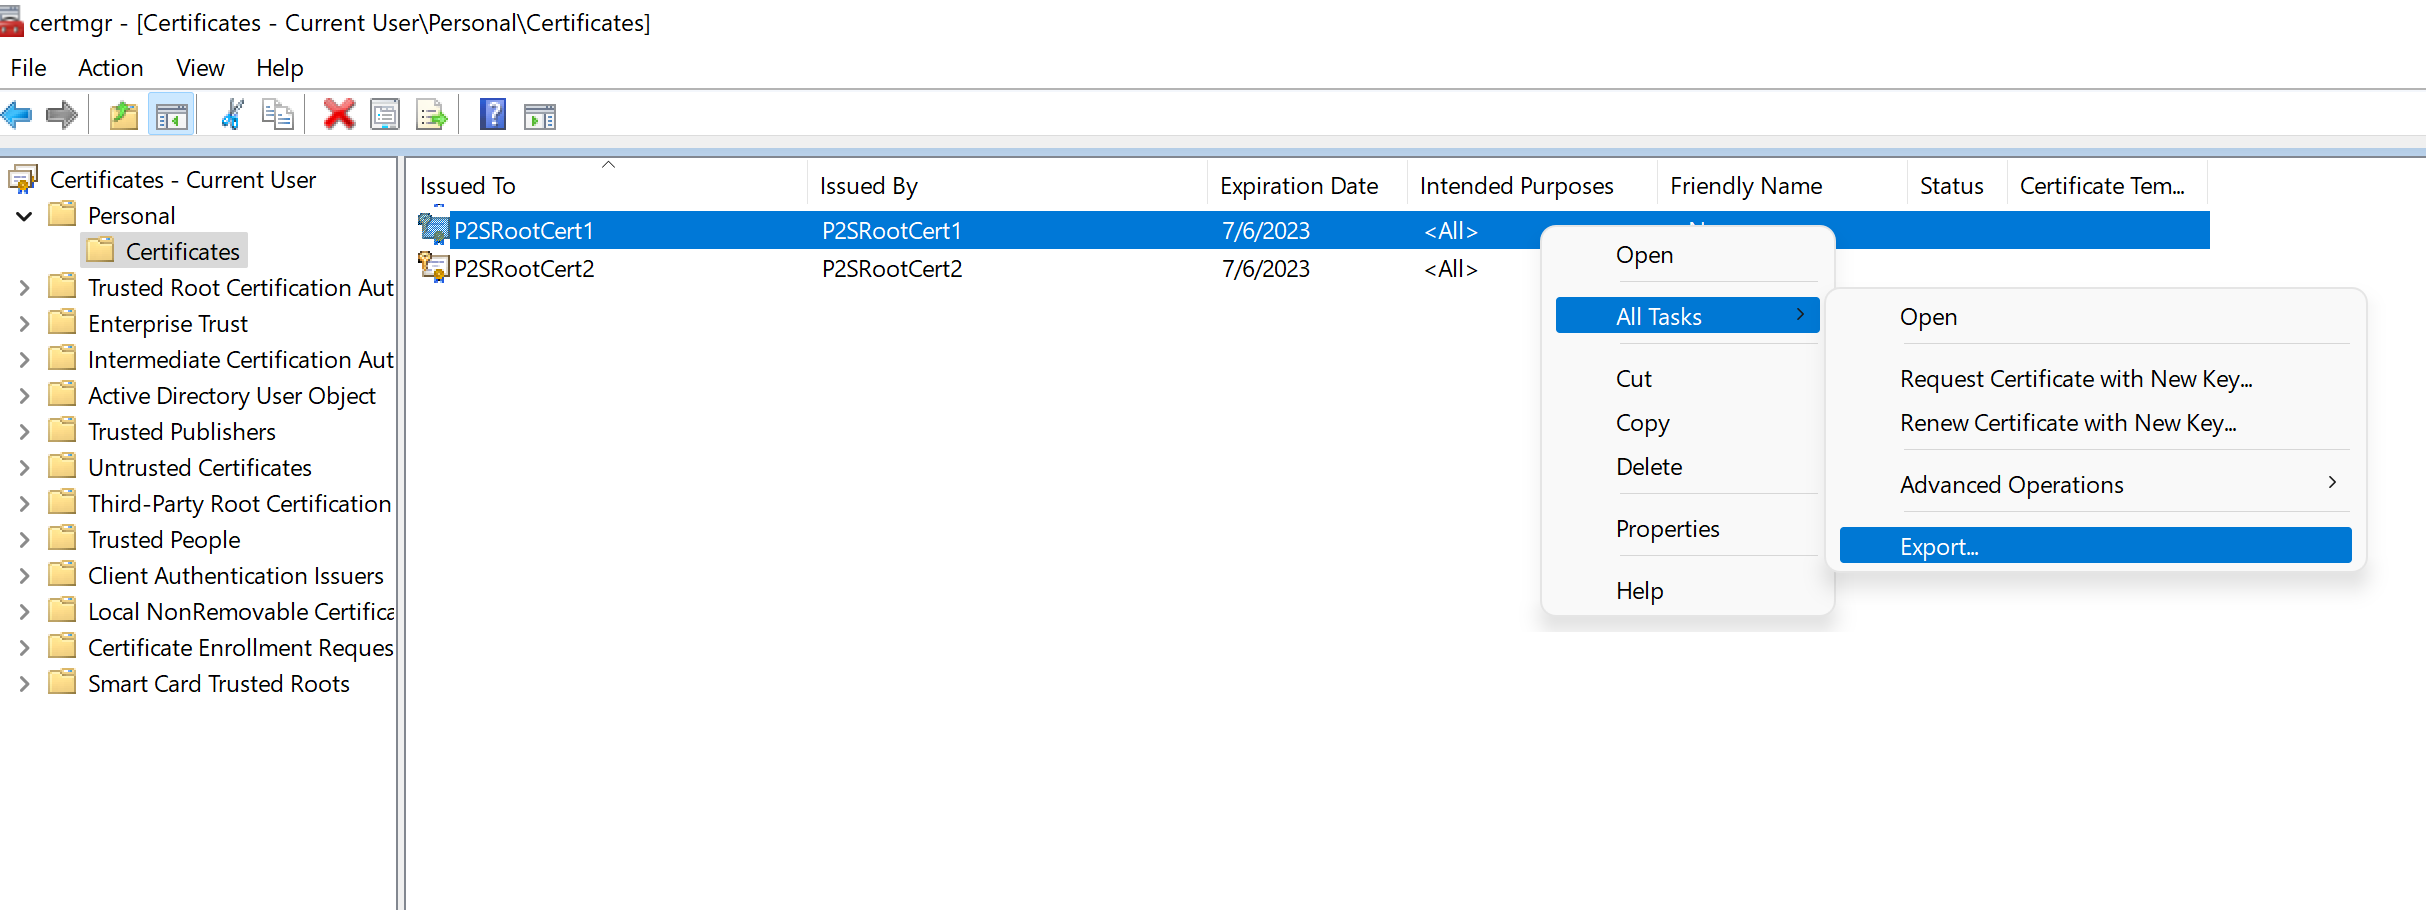
To get the certificate .cer file, open Manage user certificates.
Locate the self-signed root certificate, typically in Certificates - Current User\Personal\Certificates, and right-click. Select All Tasks -> Export. This opens the Certificate Export Wizard.
If you can't find the certificate under "Current User\Personal\Certificates", you might have accidentally opened Certificates - Local Computer, rather than Certificates - Current User.
In the wizard, select Next.
Select No, do not export the private key, and then select Next.
On the Export File Format page, select Base-64 encoded X.509 (.CER)., and then select Next.
For File to Export, Browse to the location to which you want to export the certificate. For File name, name the certificate file. Then, select Next.
Select Finish to export the certificate.
You see a confirmation saying The export was successful.
Go to the location where you exported the certificate and open it using a text editor, such as Notepad. If you exported the certificate in the required Base-64 encoded X.509 (.CER) format, you see text similar to the following example. The section highlighted in blue contains the information that you copy and upload to Azure.
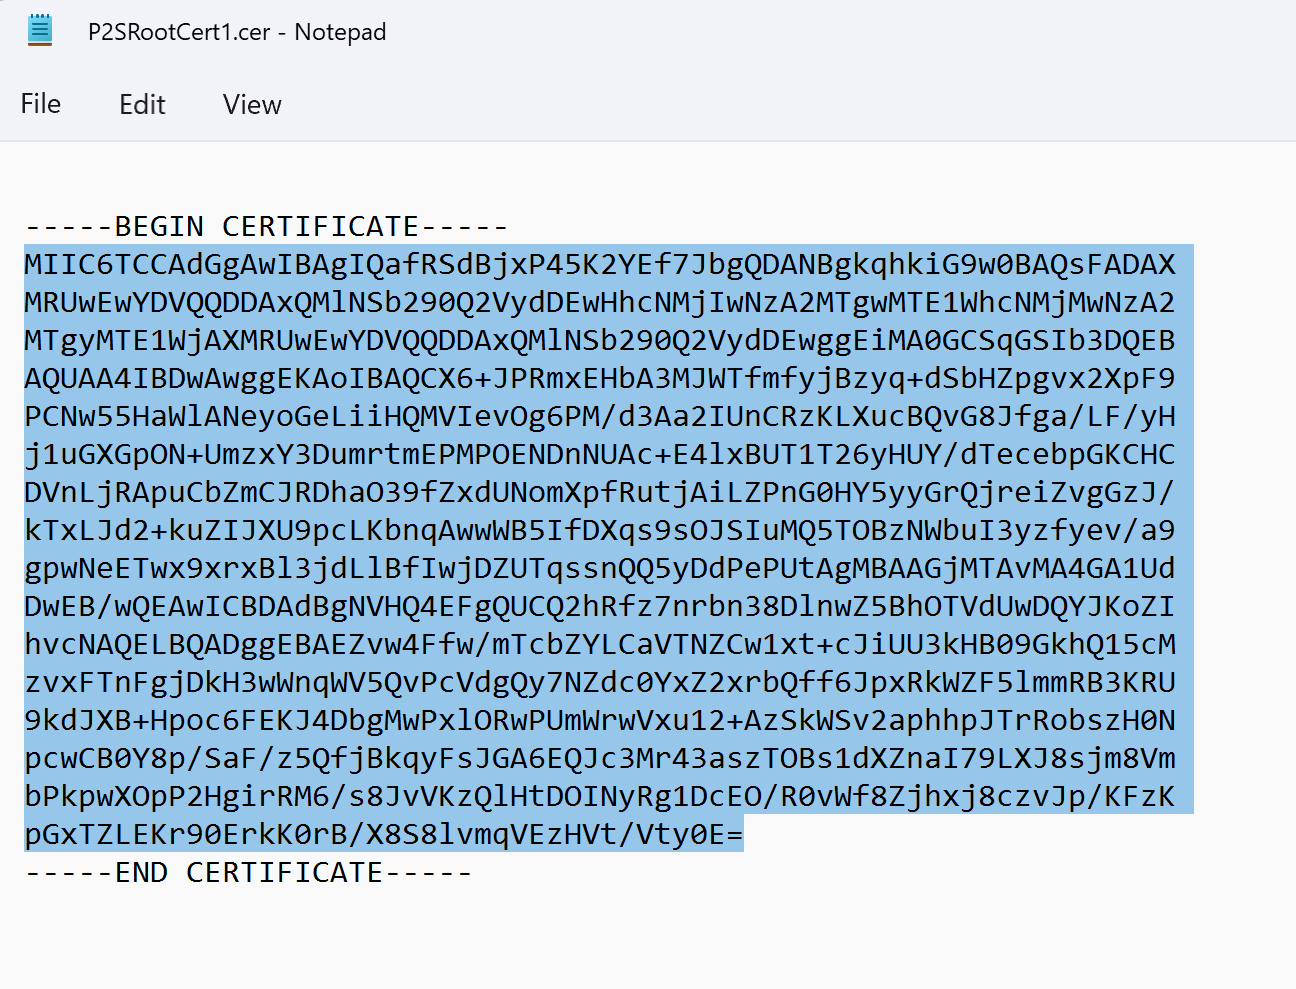
If your file doesn't look similar to the example, typically that means you didn't export it using the Base-64 encoded X.509(.CER) format. Additionally, if you use a text editor other than Notepad, understand that some editors can introduce unintended formatting in the background. This can create problems when uploaded the text from this certificate to Azure.


The exported.cer file is uploaded to Azure when you configure your P2S gateway.
Export the self-signed certificate and private key to store it (optional)
You might want to export the self-signed root certificate and store it safely. You can later install it on another computer and generate more client certificates, or export another .cer file. To export the self-signed root certificate as a .pfx, select the root certificate and use the same steps as described in Export a client certificate.
Create and install client certificates
You don't install the self-signed certificate directly on the client computer. You need to generate a client certificate from the self-signed certificate. You then export and install the client certificate to the client computer. The following steps aren't deployment-model specific.
Generate a client certificate
Each client computer that connects to a virtual network using Point-to-Site must have a client certificate installed. You generate a client certificate from the self-signed root certificate, and then export and install the client certificate. If the client certificate isn't installed, authentication fails.
The following steps walk you through generating a client certificate from a self-signed root certificate. You can generate multiple client certificates from the same root certificate. When you generate client certificates using the following steps, the client certificate is automatically installed on the computer that you used to generate the certificate. If you want to install a client certificate on another client computer, you can export the certificate.
On the same computer that you used to create the self-signed certificate, open a command prompt as administrator.
Modify and run the sample to generate a client certificate.
- Change "P2SRootCert" to the name of the self-signed root that you're generating the client certificate from. Make sure you're using the name of the root certificate, which is whatever the 'CN=' value was that you specified when you created the self-signed root.
- Change P2SChildCert to the name you want to generate a client certificate to be.
If you run the following example without modifying it, the result is a client certificate named P2SChildcert in your Personal certificate store that was generated from root certificate P2SRootCert.
makecert.exe -n "CN=P2SChildCert" -pe -sky exchange -m 96 -ss My -in "P2SRootCert" -is my -a sha256
Export a client certificate
When you generate a client certificate, it's automatically installed on the computer that you used to generate it. If you want to install the client certificate on another client computer, you need to first export the client certificate.
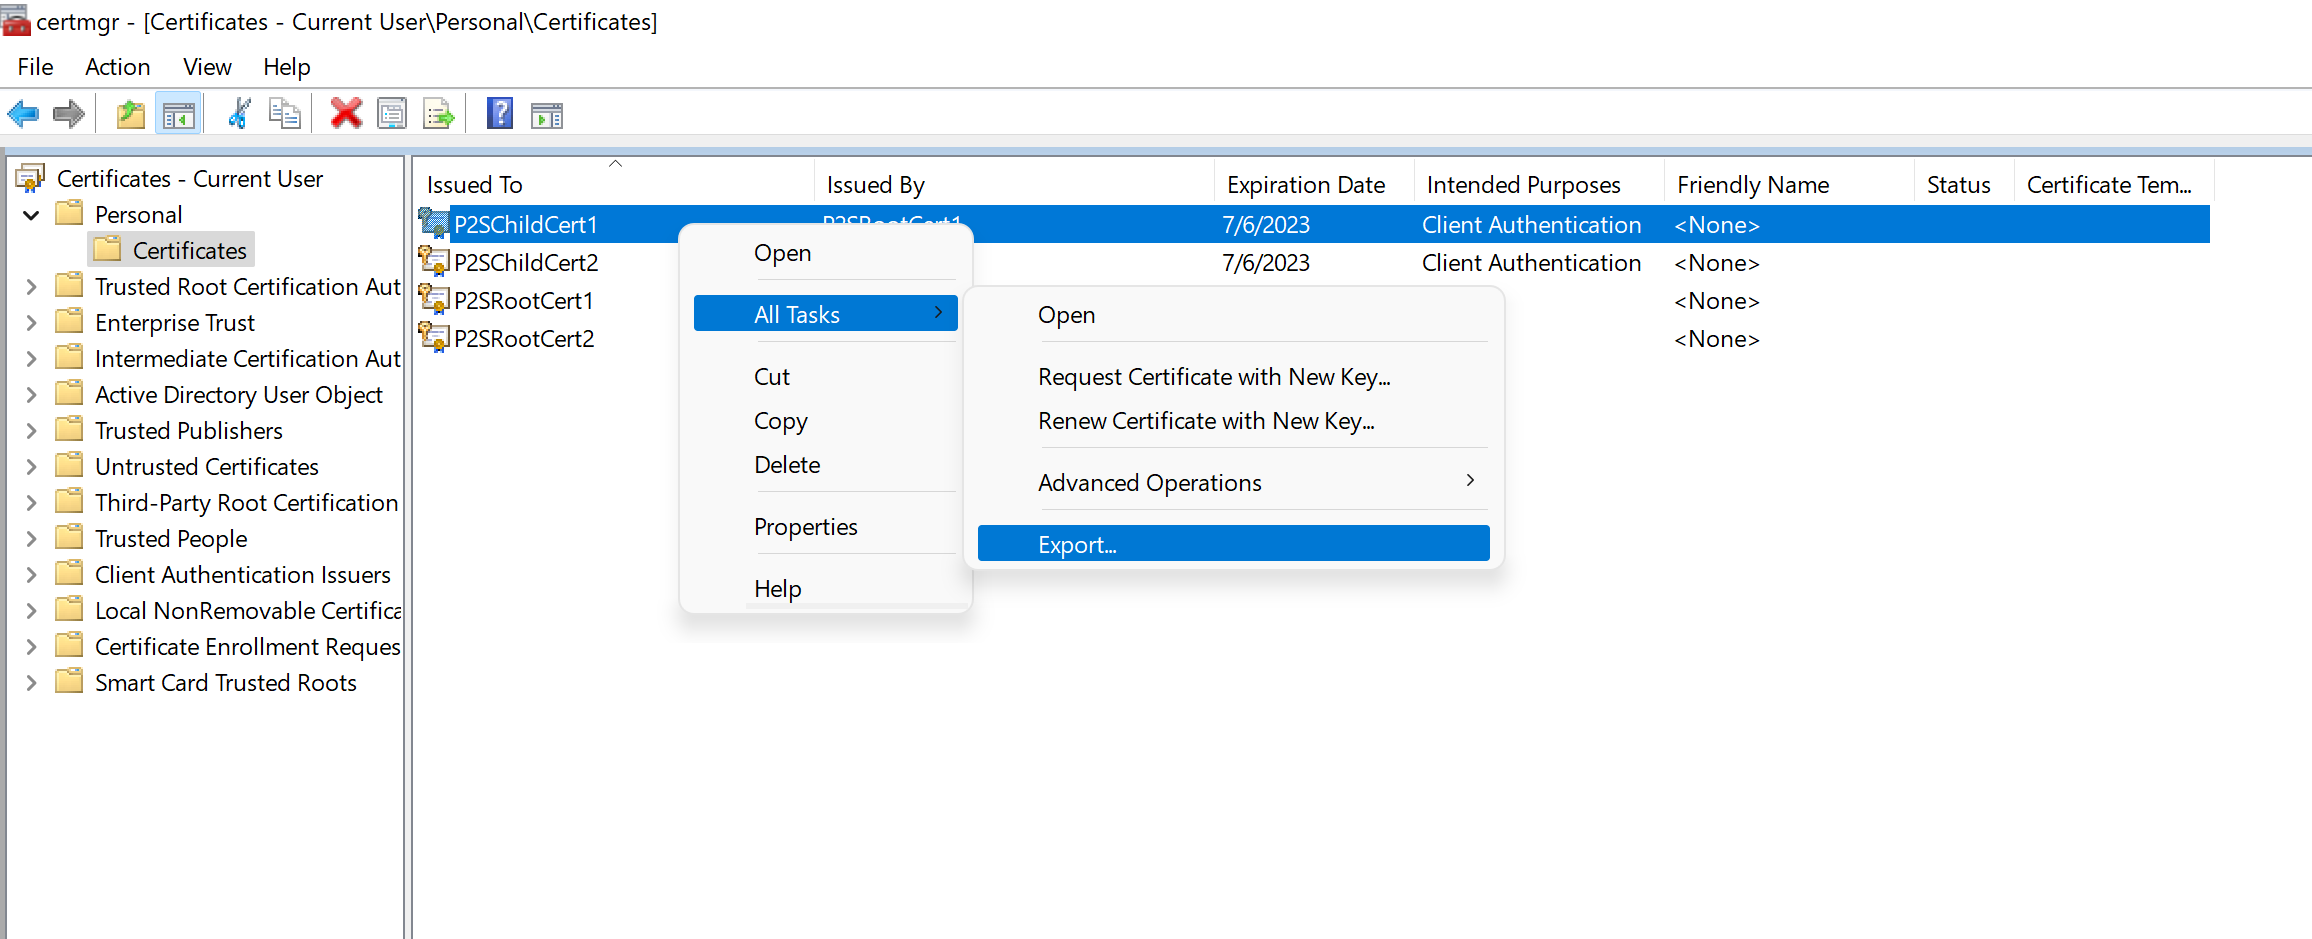
To export a client certificate, open Manage user certificates. The client certificates that you generated are, by default, located in 'Certificates - Current User\Personal\Certificates'. Right-click the client certificate that you want to export, click all tasks, and then click Export to open the Certificate Export Wizard.
In the Certificate Export Wizard, click Next to continue.
Select Yes, export the private key, and then click Next.
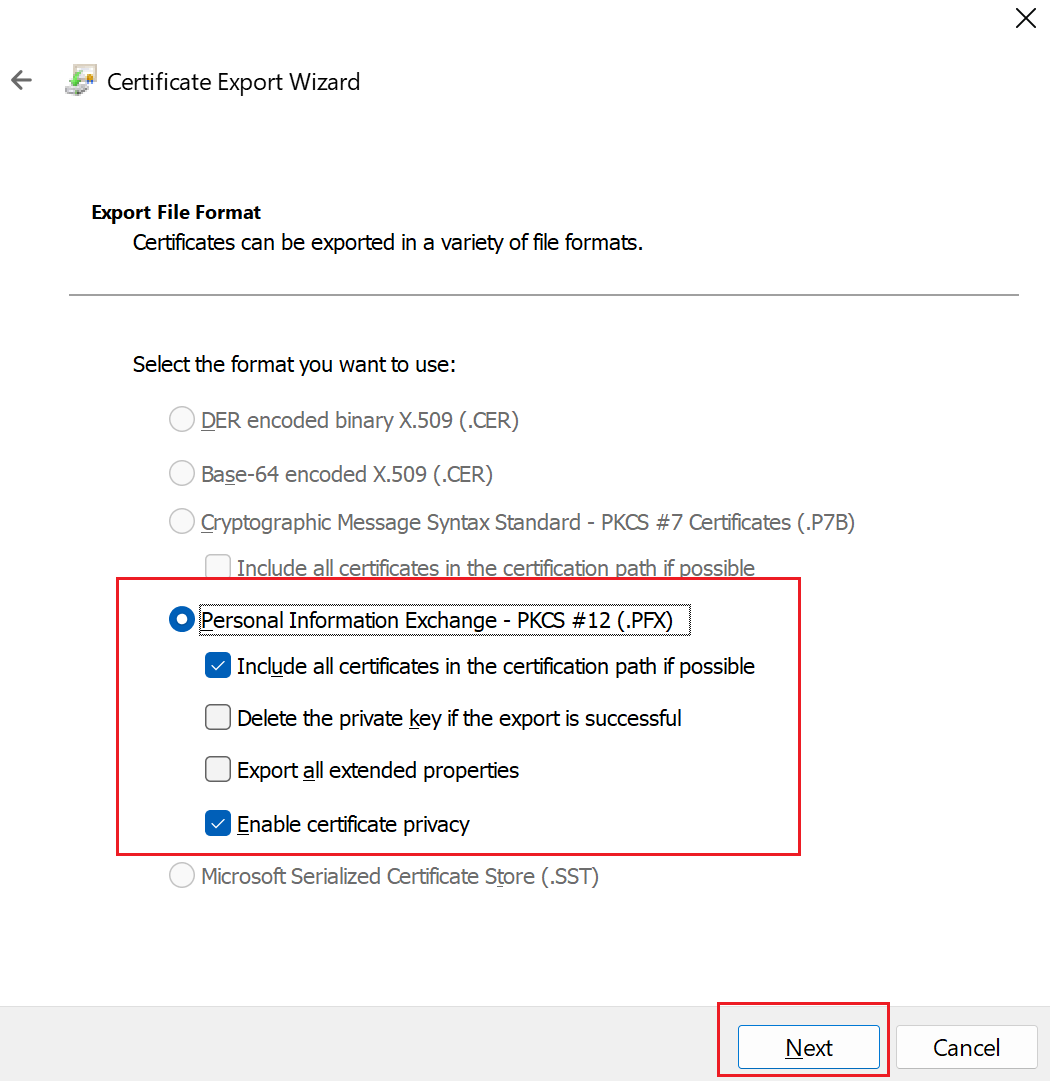
On the Export File Format page, leave the defaults selected. Make sure that Include all certificates in the certification path if possible is selected. This setting additionally exports the root certificate information that is required for successful client authentication. Without it, client authentication fails because the client doesn't have the trusted root certificate. Then, click Next.
On the Security page, you must protect the private key. If you select to use a password, make sure to record or remember the password that you set for this certificate. Then, click Next.
On the File to Export, Browse to the location to which you want to export the certificate. For File name, name the certificate file. Then, click Next.
Click Finish to export the certificate.


Install an exported client certificate
To install a client certificate, see Install a client certificate.
Next steps
To continue with your Point-to-Site configuration, see Configure server settings for P2S VPN Gateway certificate authentication.
For P2S troubleshooting information, see Troubleshooting Azure point-to-site connections.