Note
Access to this page requires authorization. You can try signing in or changing directories.
Access to this page requires authorization. You can try changing directories.
You can deploy profiles for Azure VPN clients (Windows 10 or later) by using Microsoft Intune. This article helps you create an Intune profile using custom settings.
Note
- This article applies to deploying profiles that use Microsoft Entra ID for authentication only.
Prerequisites
- Devices are already enrolled with Intune MDM.
- The Azure VPN Client for Windows 10 or later is already deployed on the client machine.
- Only Windows version 19H2 or higher is supported.
Modify XML
In the following steps, we use a sample XML for a custom OMA-URI profile for Intune with the following settings:
- Always On VPN is configured.
- Trusted Network detection enabled.
For other supported options, see the VPNv2 CSP article.
Download the VPN profile from the Azure portal and extract the azurevpnconfig.xml file from the package.
Copy and paste the text below into a new text editor file.
 <VPNProfile>
   <RememberCredentials>true</RememberCredentials>
   <AlwaysOn>true</AlwaysOn>
   <TrustedNetworkDetection>contoso.com,test.corp.contoso.com</TrustedNetworkDetection>
   <PluginProfile>
     <ServerUrlList>azuregateway-7cee0077-d553-4323-87df-069c331f58cb-053dd0f6af02.vpn.azure.com;FriendlyName</ServerUrlList>
     <CustomConfiguration>

     </CustomConfiguration>
     <PluginPackageFamilyName>Microsoft.AzureVpn_8wekyb3d8bbwe</PluginPackageFamilyName>
   </PluginProfile>
   <RegisterDNS>false</RegisterDNS>
 </VPNProfile>
Modify the entry between
<ServerUrlList>and;with the entry from your downloaded profile (azurevpnconfig.xml) and choose a "FriendlyName" of your choice (like myVpn) to insert after the semicolon. Change the "TrustedNetworkDetection" FQDN to fit your environment.Open the Azure downloaded profile (azurevpnconfig.xml) and copy the entire contents to the clipboard by highlighting the text and pressing (ctrl) + C.
Paste the copied text from the previous step into the file you created in step 2 between the
<CustomConfiguration> </CustomConfiguration>tags. Save the file with an xml extension.Write down the value in the
<name> </name>tags. This is the name of the profile. You can also modify this value to something more meaningful, as it will be visible to the end users. You will need this name when you create the profile in Intune. Close the file and remember the location where it is saved.
Create Intune profile
In this section, you create a Microsoft Intune profile with custom settings.
Sign in to Intune and navigate to Devices -> Configuration profiles. Select + Create profile.
For Platform, select Windows 10 and later. For Profile Type, select Templates and Custom. Then, select Create.
Give the profile a name and description, then select Next.
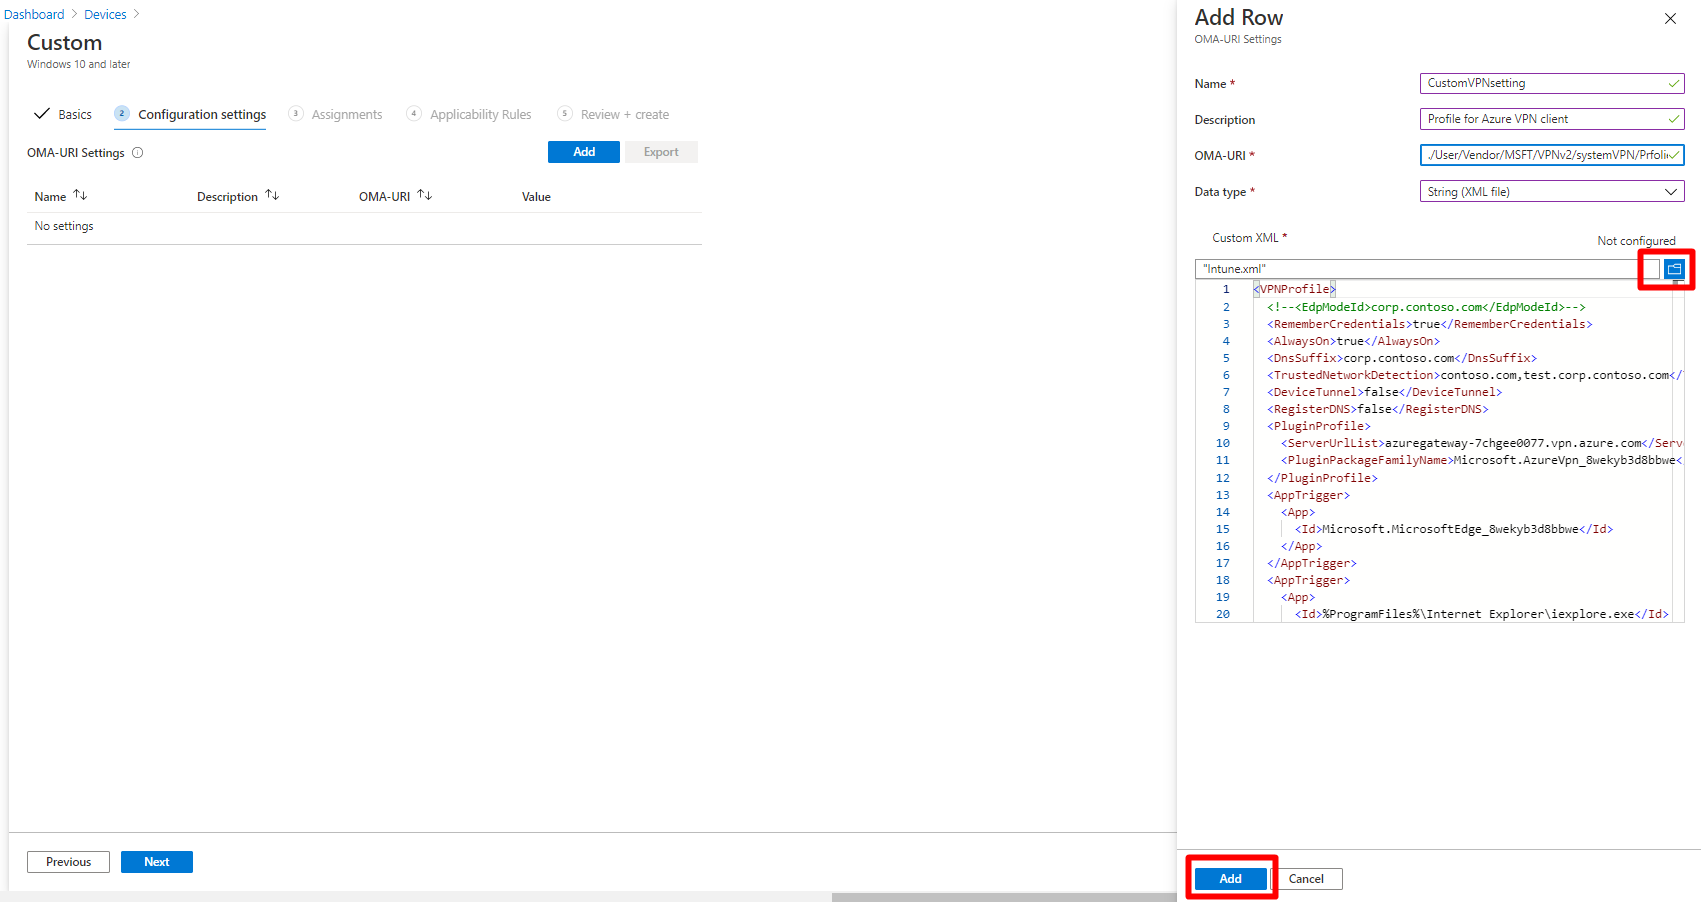
On the Configuration settings tab, select Add.
- Name: Enter a name for the configuration.
- Description: Optional description.
- OMA-URI:
./User/Vendor/MSFT/VPNv2/<name of your connection>/ProfileXML(this information can be found in the azurevpnconfig.xml file in the <name> </name> tag). You can also use a different value for the name of your connection if desired. - Data type: String (XML file).
Select the folder icon and pick the file you saved in step 6 in the XML steps. Select Add.
Select Next.
Under Assignments, select the group to which you want to push the configuration. Then, select Next.
Applicability rules are optional. Define any rules if needed, and then select Next.
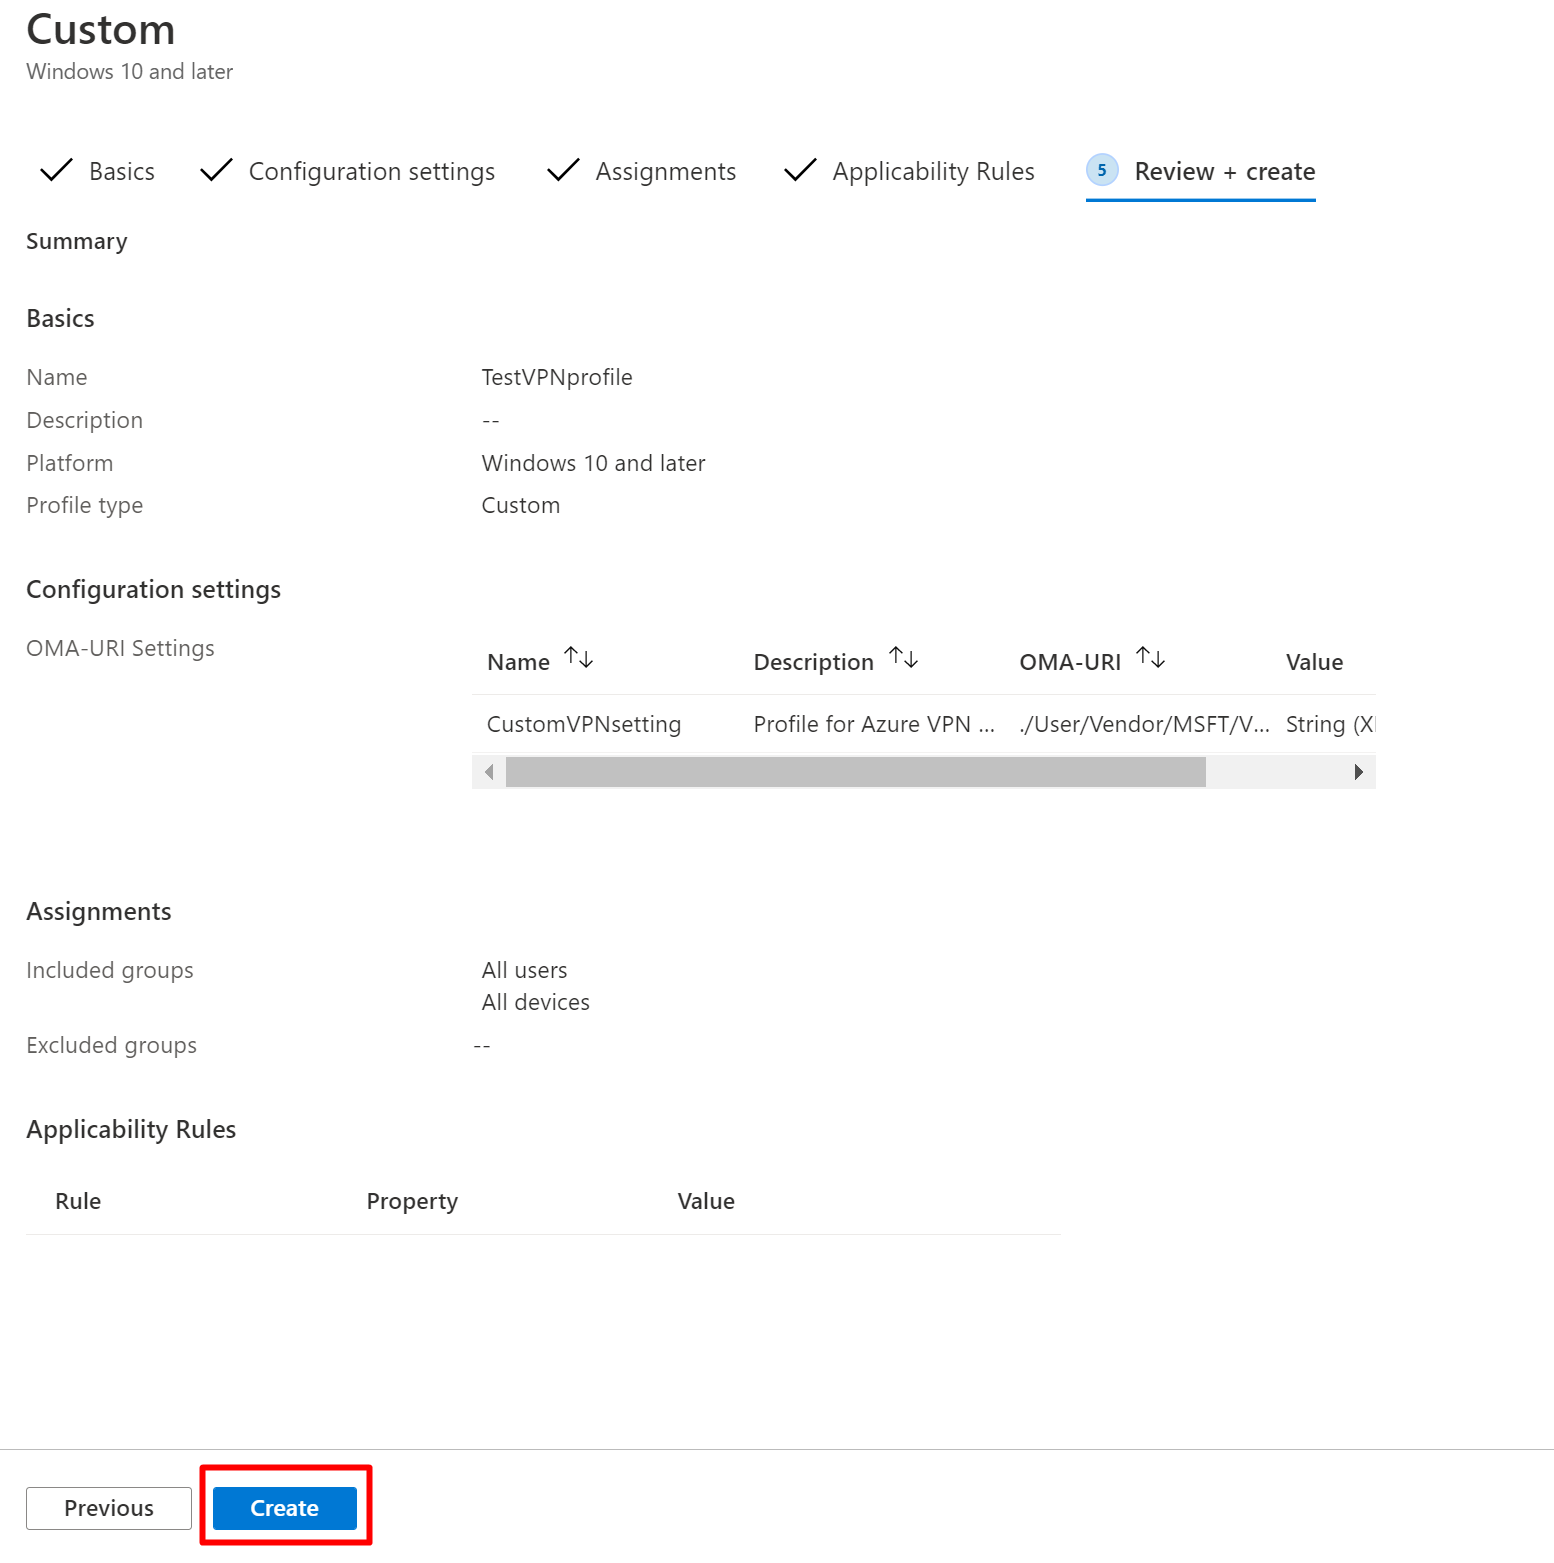
On the Review + create page, select Create.

Your custom profile is now created. For the Microsoft Intune steps to deploy this profile, see Assign user and device profiles.
Next steps
For more information about point-to-site, see About point-to-site.
