Note
Access to this page requires authorization. You can try signing in or changing directories.
Access to this page requires authorization. You can try changing directories.

Time to complete: 15 minutes
Objective: The Business Data Catalog feature in Microsoft SharePoint Server exposes and incorporates data from line-of-business (LOB) applications into portals. To incorporate this data into your portal site, you must build an application definition file that Microsoft Office SharePoint Server can consume.
The Business Data Catalog Definition Editor tool, available with Microsoft Office SharePoint Server 2007 SDK, enables you to create an application definition file for the Business Data Catalog. This tool automatically generates an XML file for the definition file, so you do not need to manually create the file in an XML editor.
The purpose of the Microsoft Office SharePoint Server application that you are creating is to:
Query for an employee in the MS_SAMPLE_EMPLOYEE interface table using a Business Data List Web Part based on an employee name.
Perform a full-text search from Microsoft Office SharePoint Server on the MS_SAMPLE_EMPLOYEE interface table.
For each of these requirements, you must complete a set of tasks in the Business Data Catalog Definition Editor tool. This topic provides instructions on how to perform these tasks.
Prerequisites
You must have the Business Data Catalog Definition Editor installed as part of the Microsoft Office SharePoint Server 2007 SDK.
Publish the WCF service as described in Step 1: Use the Oracle E-Business Adapter to Create and Publish a WCF Service.
Connect to the WCF LOB Service and Create Entity
You must connect to the WCF service to extract the Web Services Description Language (WSDL) for the service. From the WSDL, the Business Data Catalog Definition Editor extracts the methods. These methods can be used to create entities. For this tutorial, an entity is created.
To connect to the WCF service and create entities
Start the Business Data Catalog Definition Editor. On the Start menu, click Microsoft Business Data Catalog Definition Editor.
On the toolbar, click Add LOB System.
In the Add LOB System window, click Connect to Webservice.
In the URL box, type the URL for the WCF service. For this tutorial, the URL will be:
https://<COMPUTER_NAME>:<PORT_NUMBER>/MS_SAMPLE_EMPLOYEE/InterfaceTables_FND_APPS_MS_SAMPLE_EMPLOYEE.svcThe URL is available when you test whether the WCF service is published successfully, as described in Step 1: Use the Oracle E-Business Adapter to Create and Publish a WCF Service.
Click Connect.
To see the operations you selected in the WCF Adapter Service Development Wizard, click the Add Web Method tab. You will see the following method: Select.
Drag the Select methods to the Design Surface. As you drag the method to the Design Surface, an entity is created, and the method becomes part of that entity.
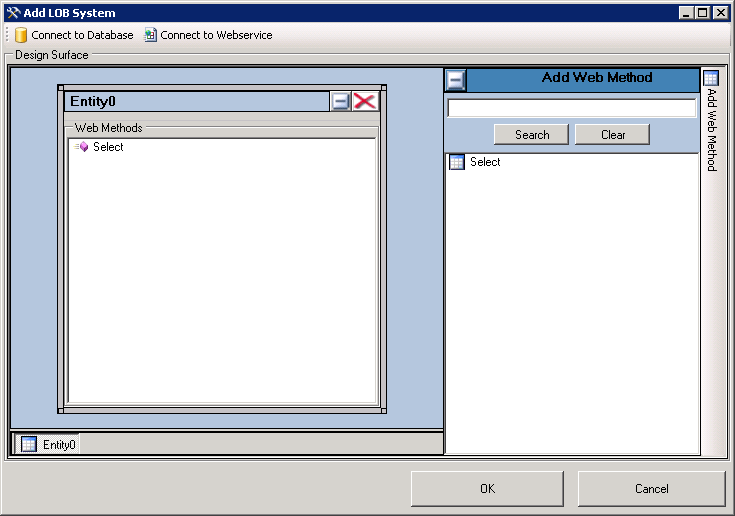
Click OK.
In the Enter the name for the LOB System dialog box, type a name in the LOB System Name box. For this example, call it MS_SAMPLE_EMPLOYEE, and then click OK.
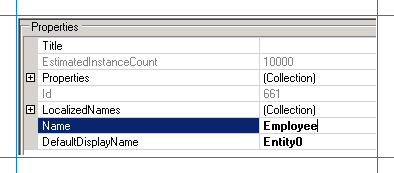
In the Business Data Catalog Definition Editor, the newly created entity is listed as Entity0. Rename the entity to Employee. Perform the following steps to rename the entity:
Expand the MS_SAMPLE_EMPLOYEE node, and then expand the Entities node.
Select the Entity0 node.
In the Properties pane, type Employee in the Name box.
Specify User Name and Password Headers for the Methods
When creating a WCF service for the Select operation on the MS_SAMPLE_EMPLOYEE interface table in Oracle E-Business Suite, you specified user name and password headers as part of the endpoint behavior configuration in Step 1: Use the Oracle E-Business Adapter to Create and Publish a WCF Service. You must specify the same values for the Select method property.
To specify user name and password headers for the Select method
In the Metadata Objects pane, expand the Employee node, and then expand the Methods node.
Click the Select node, and in the Properties pane click the ellipsis (…) button against the Properties box.
In the PropertyView Collection Editor window, click Add, and in the Property pane, type HttpHeaderUserName for the Name box. Type MyUserHeader for the PropertyValue box. Select System.String for the Type box.
In the PropertyView Collection Editor window, click Add, and in the Property pane, type HttpHeaderPassword for the Name box. Similarly, type MyPasswordHeader for the PropertyValue box. Select System.String for the Type box.
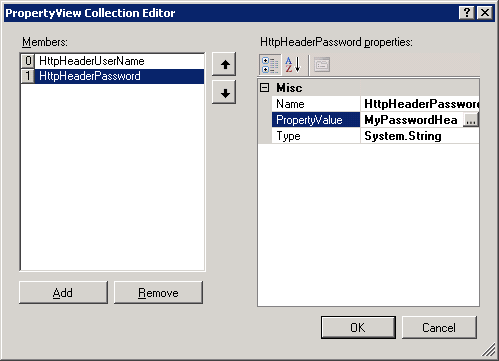
Click OK.
Scenario 1: Query for Employees using a Business Data List Web Part
To create an application definition file that can be used to search for employees from a Business Data List Web Part and based on employee name, you must perform the following set of tasks.
In the Select method, create a filter and map it to the FILTER parameter.
Create a Finder method instance for the Select method. A Finder method retrieves a list of records based on a filter.
To create a filter, and map it to the FILTER parameter
Create a filter.
In the Metadata Objects pane, expand the Employee node, and then expand the Methods node.
Expand the Select method, right-click Filters, and then click Add Filter.
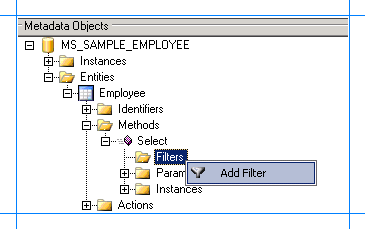
In the Properties pane, for the FilterType property, select Equals.
In the Properties pane, type EmployeeName in the Name box.
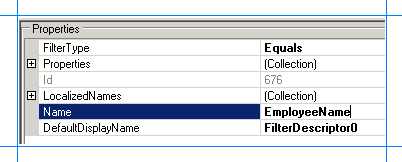
Map the filter to the FILTER parameter in the Select method.
In the Metadata Objects pane, expand the Employee node, and then expand the Methods node.
Expand the Select method, and then expand the Parameters node.
Expand the FILTER node, and click the second FILTER node.
In the Properties pane, select EmployeeName from the FilterDescriptor list.
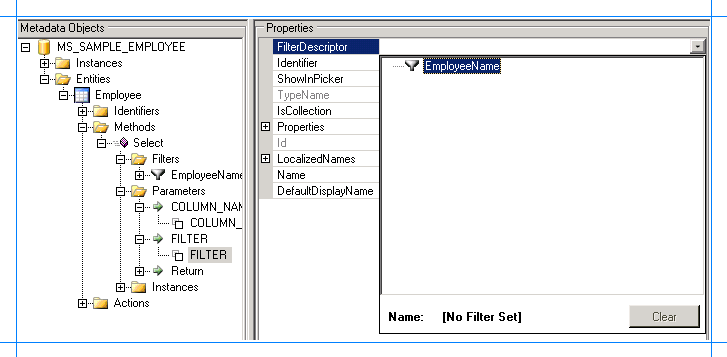
To create a Finder method instance for the Select method
In the Metadata Objects pane, expand the Employee node, and then expand the Methods node.
Expand the Select node, right-click Instances, and then click Add Method Instance.
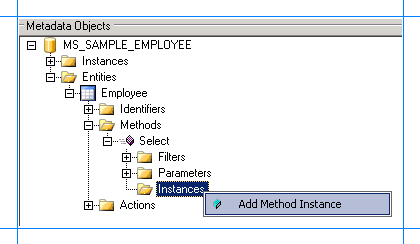
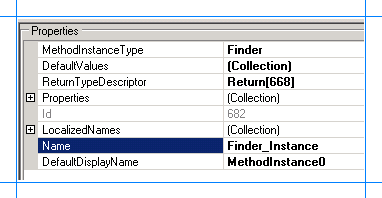
In the Create Method Instance window, click Finder for Method Instance Type. Select Return for Return TypeDescriptor.
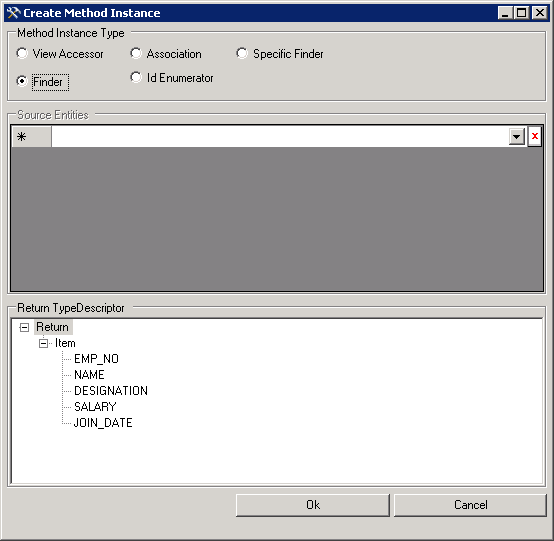
Click OK.
In the Properties pane, type Finder_Instance in the Name box.
Scenario 2: Full-Text Search on MS_SAMPLE_EMPLOYEE Interface Table from Microsoft Office SharePoint Server
To create an application definition file that can be used to perform a full-text search on MS_SAMPLE_EMPLOYEE interface table from Microsoft Office SharePoint Server, you must perform the following set of tasks.
In the Select method, create an identifier, and map it to the FILTER parameter and the return value that stores the employee name.
Create a Specific Finder method instance for the Select. The Specific Finder method will find a specific record based on the identifier, that is, an employee name.
Create an ID Enumerator method instance.
To create an identifier, and map it to the FILTER parameter and employee name return value
Create an identifier for the Employee entity.
In the Metadata Objects pane, expand the Employee node.
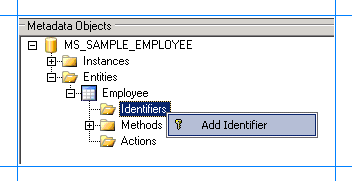
Right-click the Identifiers node, and then select Add Identifier.
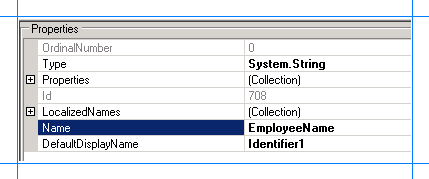
In the Properties pane, type EmployeeName in the Name box.
Select System.String for the Type box.
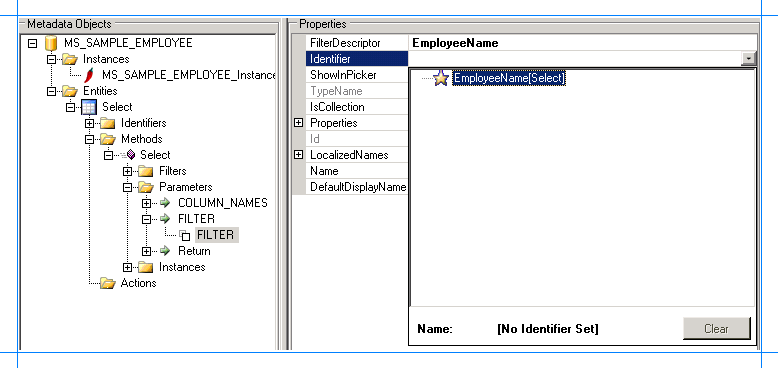
Map the identifier to the FILTER parameter for the Select method.
In the Metadata Objects pane, expand the Employee node, and then expand the Methods node.
Expand the Select method, and then expand the Parameters node.
Expand the FILTER parameter, and then click the second FILTER node.
In the Properties pane, select EmployeeName[Employee] from the Identifier list.
Map the identifier to the employee name return value.
In the Metadata Objects pane, expand the Employee node, and then expand the Methods node.
Expand the Select method, and then expand the Parameters node.
Expand the Return node, then the second Return node, then the Item node, and then click the Name node.
In the Properties pane, select EmployeeName[Employee] from the Identifier list.
To create a Specific Finder method instance for the Select method
In the Metadata Objects pane, expand the Employee node, and then the Methods node.
Expand the Select node, right-click Instances, and then select Add Method Instance to open the Create Method Instance window.

In the Create Method Instance window, select Specific Finder for Method Instance Type. Select Return for Return TypeDescriptor.
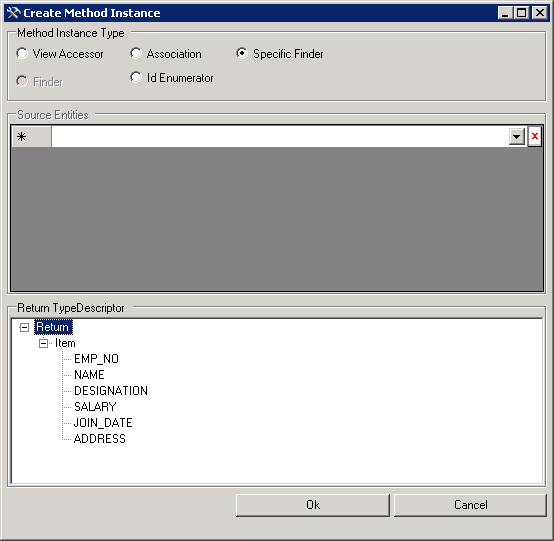
Click OK.
In the Properties pane, type SpeciFinder_Instance for the Name box.
To create an Id Enumerator method instance for the Select method
In the Metadata Objects pane, expand the Employee node, and then the Methods node.
Expand the Select node, right-click Instances, and then select Add Method Instance to open the Create Method Instance window.

In the Create Method Instance window, select Id Enumerator for Method Instance Type. Select Return for Return TypeDescriptor.
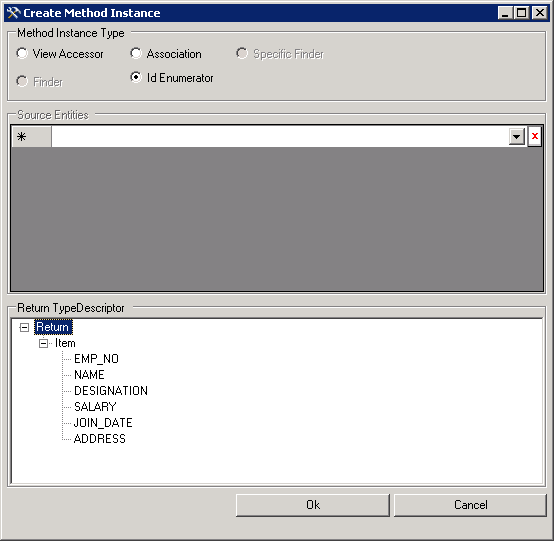
Click OK.
In the Properties pane, type IDEnumerator_Instance for the Name box.
Set Default Parameters for the Method Instances
The Select method requires you to specify the column names. Therefore, you need to specify a default value for the COLUMN_NAMES parameter for the Finder, Specific Finder, and Id Enumerator method instances created earlier. Additionally, you should also specify a default value for the FILTER parameter for the Id Enumerator method instance.
To set the default parameters for the method instances
In the Metadata Objects pane, expand the Employee node, and then expand the Methods node.
Expand the Select node, and then expand the Parameters node.
Expand the COLUMN_NAMES node, and then select the COLUMN_NAMES parameter.
In the Properties pane, click the ellipsis button (…) against the DefaultValues box.
In the DefaultValueView Collection Editor dialog box, click Add, and in the property pane, click Finder_Instance in the SelectMethodInstance list.
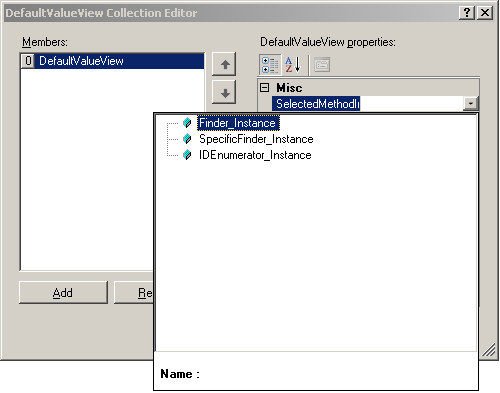
Type
*in the Value box.Similarly, repeat steps 5 and 6 to add default values for the SpecificFinder_Instance and IDEnumerator_Instance method instances.
In the DefaultValueView Collection Editor dialog box, click OK.
Next, add a default value for the FILTER parameter for the IDEnumerator_Instance method instance. Expand the FILTER node, and then select the FILTER parameter.
In the Properties pane, click the ellipsis button (…) against the DefaultValues box.
In the DefaultValueView Collection Editor dialog box, click Add, and in the property pane, click IDEnumerator_Instance in the SelectMethodInstance list.
Type
%in the Value box.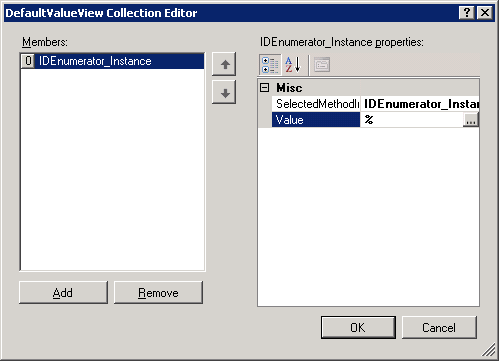
In the DefaultValueView Collection Editor dialog box, click OK.
Set up Single Sign-On for Connecting to Oracle E-Business Suite
After you have finished performing all the procedures in this topic, you will have created an application definition file that can be imported into a SharePoint application. From the application, you invoke the methods to retrieve relevant data from Oracle E-Business Suite. To enable this, you must create a mapping between a user in the Oracle E-Business Suite and the user in the SharePoint application. You create this mapping in SharePoint Central Administration console after you have imported the application definition file.
However, to create the mapping you must set a property SecondarySsoApplicationId in the Business Data Catalog Definition Editor.
To set the SecondarySsoApplicationId property
In the Metadata Objects pane, expand the MS_SAMPLE_EMPLOYEE node, and then expand the Instances node.
Click MS_SAMPLE_EMPLOYEE_Instance, and in the Properties pane, click the ellipsis (…) button against the Properties box.
In the PropertyView Collection Editor dialog box, click Add, and in the Property pane, type SecondarySsoApplicationId for the Name box. Similarly, type OracleSSO for the PropertyValue box. Select System.String for the Type box.
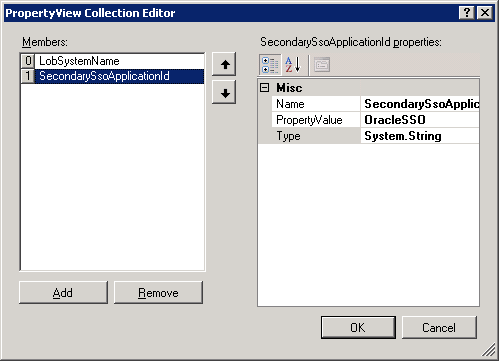
Click OK.
Export the Application Definition to a File
You have now created an application definition that contains Oracle E-Business Suite instance metadata. You must export this definition to an XML file, which can be imported into Microsoft Office SharePoint Server.
To export the application definition to a file
In the Metadata Objects pane, right-click the MS_SAMPLE_EMPLOYEE node, and then click Export.
Save the file as Employee.xml.
Next Steps
You must now create a SharePoint application to retrieve data from Oracle E-Business Suite. For instructions, see Step 3: Create a SharePoint Application to Retrieve Data from Oracle E-Business Suite.
See Also
Tutorial: Present Data from Oracle E-Business Suite on a SharePoint Site