Overview and Prerequisites
In this tutorial, you learn how to create a virtual network (VNet) and deploy a virtual machine (VM) to the VNet with the Azure CLI. This tutorial also covers Azure CLI specific concepts such as shell variables and output queries.
This tutorial can be completed with the interactive experience offered through Azure Cloud Shell, or you may install the CLI locally.
Use ctrl-shift-v (cmd-shift-v on macOS) to paste tutorial text into Azure Cloud Shell.
Prerequisites
Use the Bash environment in Azure Cloud Shell. For more information, see Quickstart for Bash in Azure Cloud Shell.

If you prefer to run CLI reference commands locally, install the Azure CLI. If you're running on Windows or macOS, consider running Azure CLI in a Docker container. For more information, see How to run the Azure CLI in a Docker container.
If you're using a local installation, sign in to the Azure CLI by using the az login command. To finish the authentication process, follow the steps displayed in your terminal. For other sign-in options, see Sign in with the Azure CLI.
When you're prompted, install the Azure CLI extension on first use. For more information about extensions, see Use extensions with the Azure CLI.
Run az version to find the version and dependent libraries that are installed. To upgrade to the latest version, run az upgrade.
Shell variables
Shell variables store values for future use and can be used to pass values to command parameters. Shell variables allow for the reuse of commands, both on their own and in scripts. This tutorial uses shell variables for easier customization of command parameters. To use your own parameter values instead of using the provided values, change the values assigned to the shell variables. For more information about shell variables, see Use shell variables.
Create a resource group
In Azure, all resources are allocated in a resource management group. Resource groups provide logical groupings of resources
that make them easier to work with as a collection. Use the az group create command to create a resource group named VMTutorialResources.
# create Bash shell variables
resourceGroup=VMTutorialResources
location=eastus

az group create --name $resourceGroup --location $location
Create a resource group in interactive mode
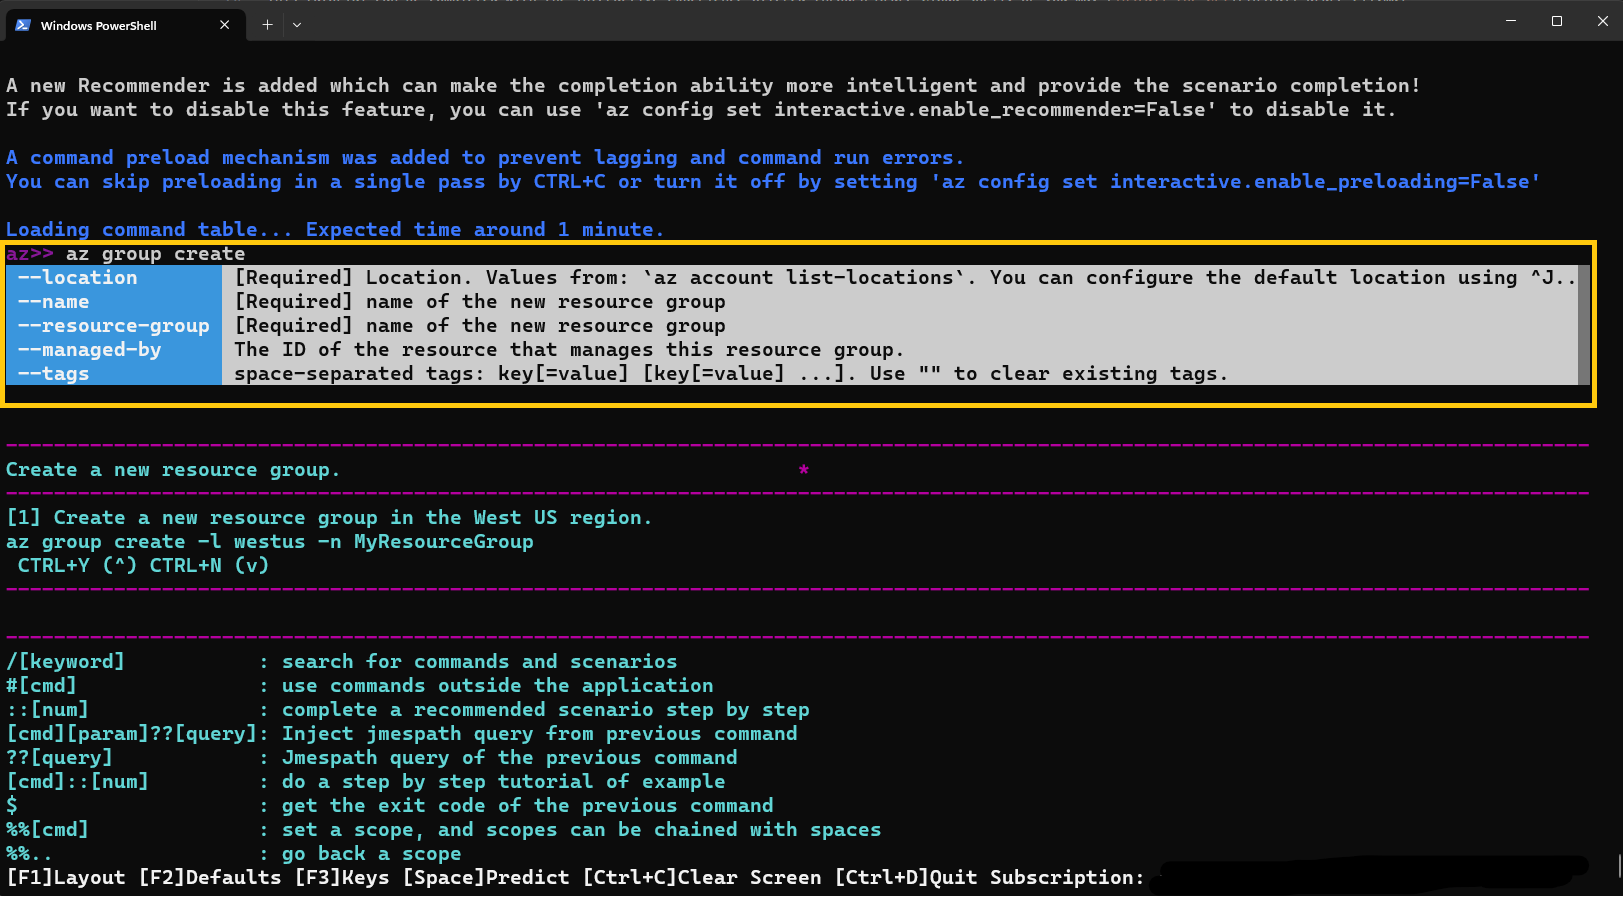
Interactive mode offers new AI functionalities that allow the user to run and search for commands more efficiently. To get a better understanding of required parameters and steps related to az group create, try out Azure CLI in interactive mode by running the az interactive command. Please note that all commands throughout this tutorial can be run in interactive mode.
# install interactive mode
az interactive
In the following example, the command recommendation feature in interactive mode lists and defines all of the required parameters needed for az group create:
# get options for az group create
az>> az group create