How Defender for Cloud Apps helps protect your Google Cloud Platform (GCP) environment
Google Cloud Platform is an IaaS provider that enables your organization to host and manage their entire workloads in the cloud. Along with the benefits of leveraging infrastructure in the cloud, your organization's most critical assets may be exposed to threats. Exposed assets include storage instances with potentially sensitive information, compute resources that operate some of your most critical applications, ports, and virtual private networks that enable access to your organization.
Connecting GCP to Defender for Cloud Apps helps you secure your assets and detect potential threats by monitoring administrative and sign-in activities, notifying on possible brute force attacks, malicious use of a privileged user account, and unusual deletions of VMs.
Main threats
- Abuse of cloud resources
- Compromised accounts and insider threats
- Data leakage
- Resource misconfiguration and insufficient access control
How Defender for Cloud Apps helps to protect your environment
- Detect cloud threats, compromised accounts, and malicious insiders
- Use the audit trail of activities for forensic investigations
Control GCP with built-in policies and policy templates
You can use the following built-in policy templates to detect and notify you about potential threats:
| Type | Name |
|---|---|
| Built-in anomaly detection policy | Activity from anonymous IP addresses Activity from infrequent country Activity from suspicious IP addresses Impossible travel Activity performed by terminated user (requires Microsoft Entra ID as IdP) Multiple failed login attempts Unusual administrative activities Multiple delete VM activities Unusual multiple VM creation activities (preview) |
| Activity policy template | Changes to compute engine resources Changes to StackDriver configuration Changes to storage resources Changes to Virtual Private Network Logon from a risky IP address |
For more information about creating policies, see Create a policy.
Automate governance controls
In addition to monitoring for potential threats, you can apply and automate the following GCP governance actions to remediate detected threats:
| Type | Action |
|---|---|
| User governance | - Require user to reset password to Google (requires connected linked Google Workspace instance) - Suspend user (requires connected linked Google Workspace instance) - Notify user on alert (via Microsoft Entra ID) - Require user to sign in again (via Microsoft Entra ID) - Suspend user (via Microsoft Entra ID) |
For more information about remediating threats from apps, see Governing connected apps.
Protect GCP in real time
Review our best practices for securing and collaborating with external users and blocking and protecting the download of sensitive data to unmanaged or risky devices.
Connect Google Cloud Platform to Microsoft Defender for Cloud Apps
This section provides instructions for connecting Microsoft Defender for Cloud Apps to your existing Google Cloud Platform (GCP) account using the connector APIs. This connection gives you visibility into and control over GCP use. For information about how Defender for Cloud Apps protects GCP, see Protect GCP.
We recommend that you use a dedicated project for the integration and restrict access to the project to maintain stable integration and prevent deletions/modifications of the setup process.
Note
The instructions for connecting your GCP environment for auditing follow Google's recommendations for consuming aggregated logs. The integration leverages Google StackDriver and will consume additional resources that might impact your billing. The consumed resources are:
- Aggregated export sink – Organization level
- Pub/Sub topic – GCP project level
- Pub/Sub subscription – GCP project level
The Defender for Cloud Apps auditing connection only imports Admin Activity audit logs; Data Access and System Event audit logs are not imported. For more information about GCP logs, see Cloud Audit Logs.
Prerequisites
The integrating GCP user must have the following permissions:
- IAM and Admin edit – Organization level
- Project creation and edit
You can connect GCP Security auditing to your Defender for Cloud Apps connections to gain visibility into and control over GCP app use.
Configure Google Cloud Platform
Create a dedicated project
Create a dedicated project in GCP under your organization to enable integration isolation and stability
Sign in to your GCP portal using your integrating GCP user account.
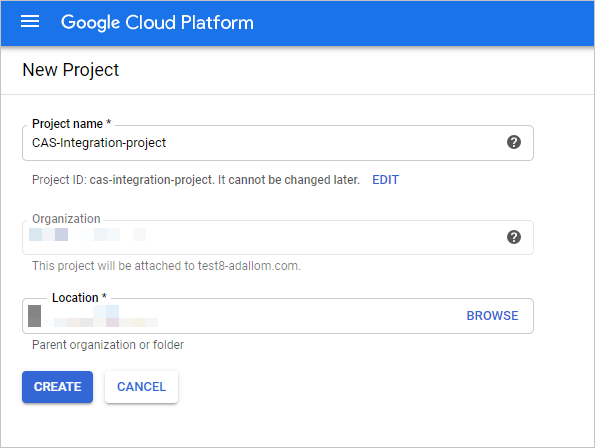
Select Create Project to start a new project.
In the New project screen, name your project and select Create.
Enable required APIs
Switch to the dedicated project.
Go to the Library tab.
Search for and select Cloud Logging API, and then on the API page, select ENABLE.
Search for and select Cloud Pub/Sub API, and then on the API page, select ENABLE.
Note
Make sure that you do not select Pub/Sub Lite API.
Create a dedicated service account for the security auditing integration
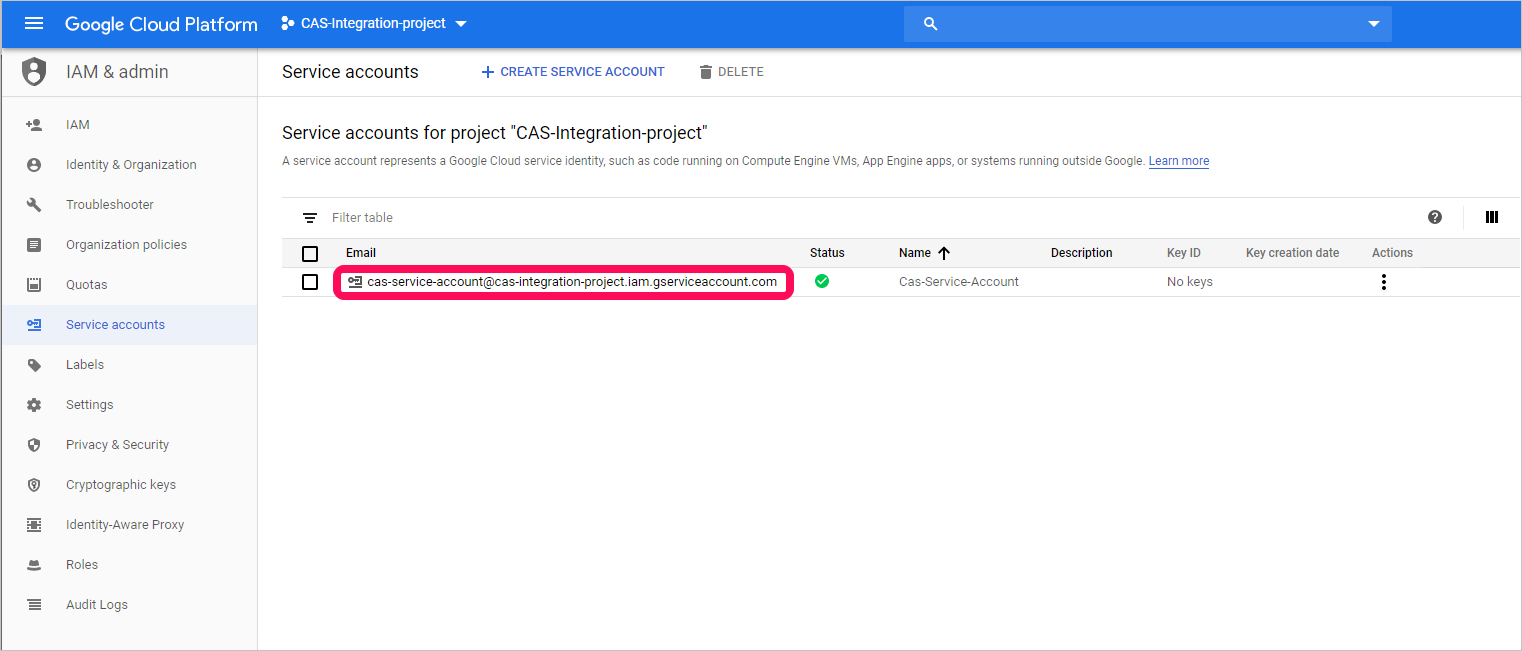
Under IAM & admin, select Service accounts.
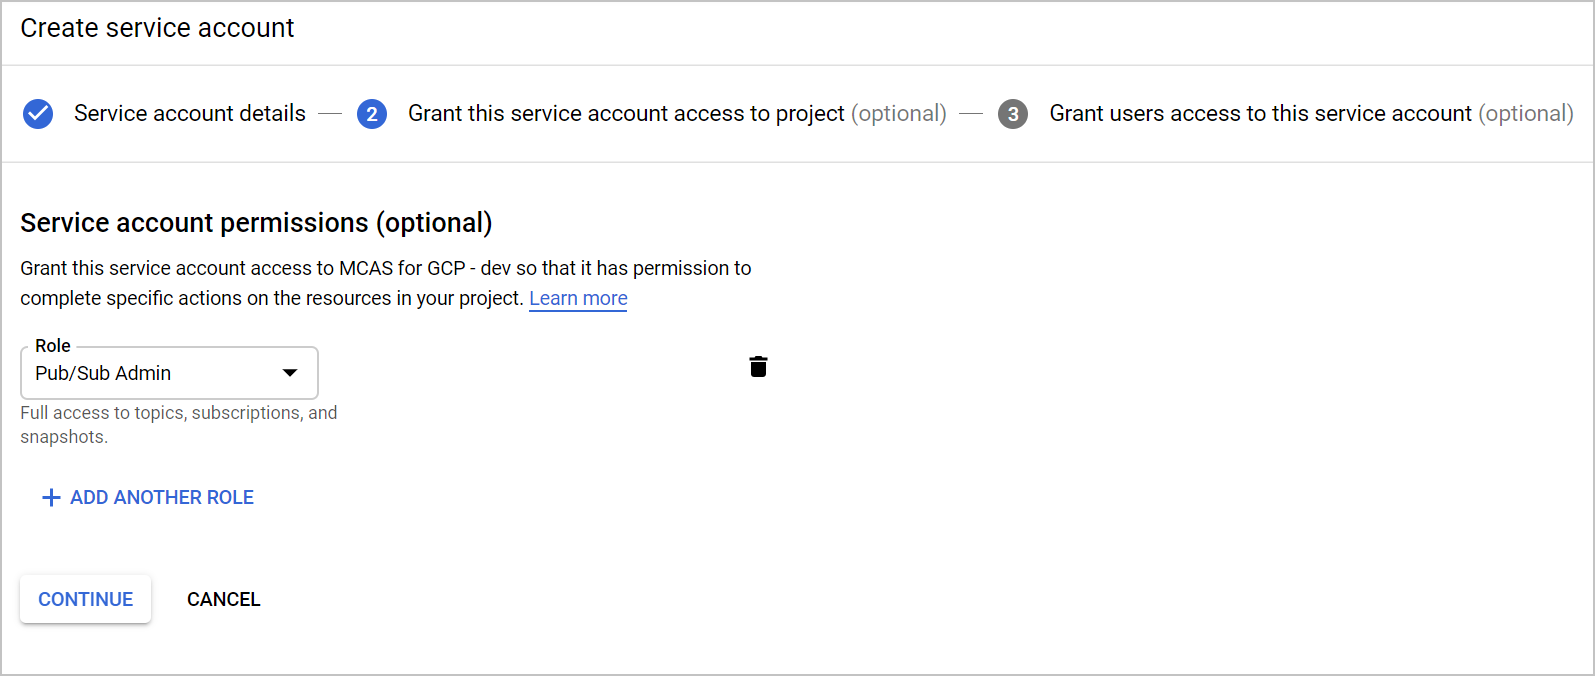
Select CREATE SERVICE ACCOUNT to create a dedicated service account.
Enter an account name, and then select Create.
Specify the Role as Pub/Sub Admin and then select Save.
Copy the Email value, you'll need this later.
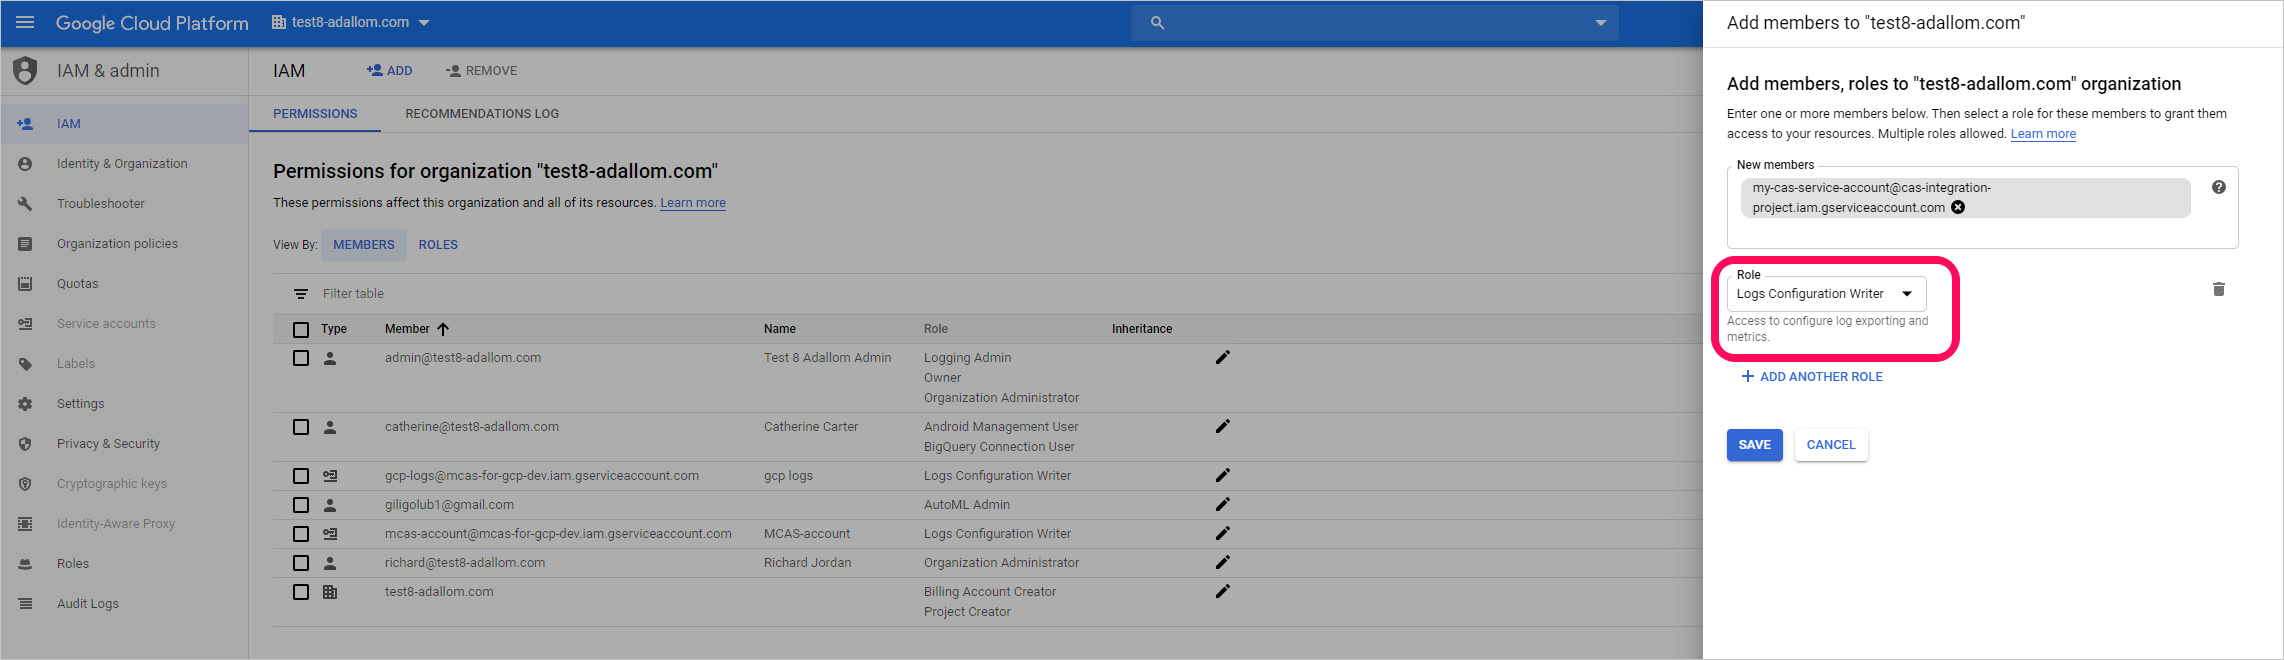
Under IAM & admin, select IAM.
Switch to organization level.
Select ADD.
In the New members box, paste the Email value you copied earlier.
Specify the Role as Logs Configuration Writer and then select Save.
Create a private key for the dedicated service account
Switch to project level.
Under IAM & admin, select Service accounts.
Open the dedicated service account and select Edit.
Select CREATE KEY.
In the Create private key screen, select JSON, and then select CREATE.
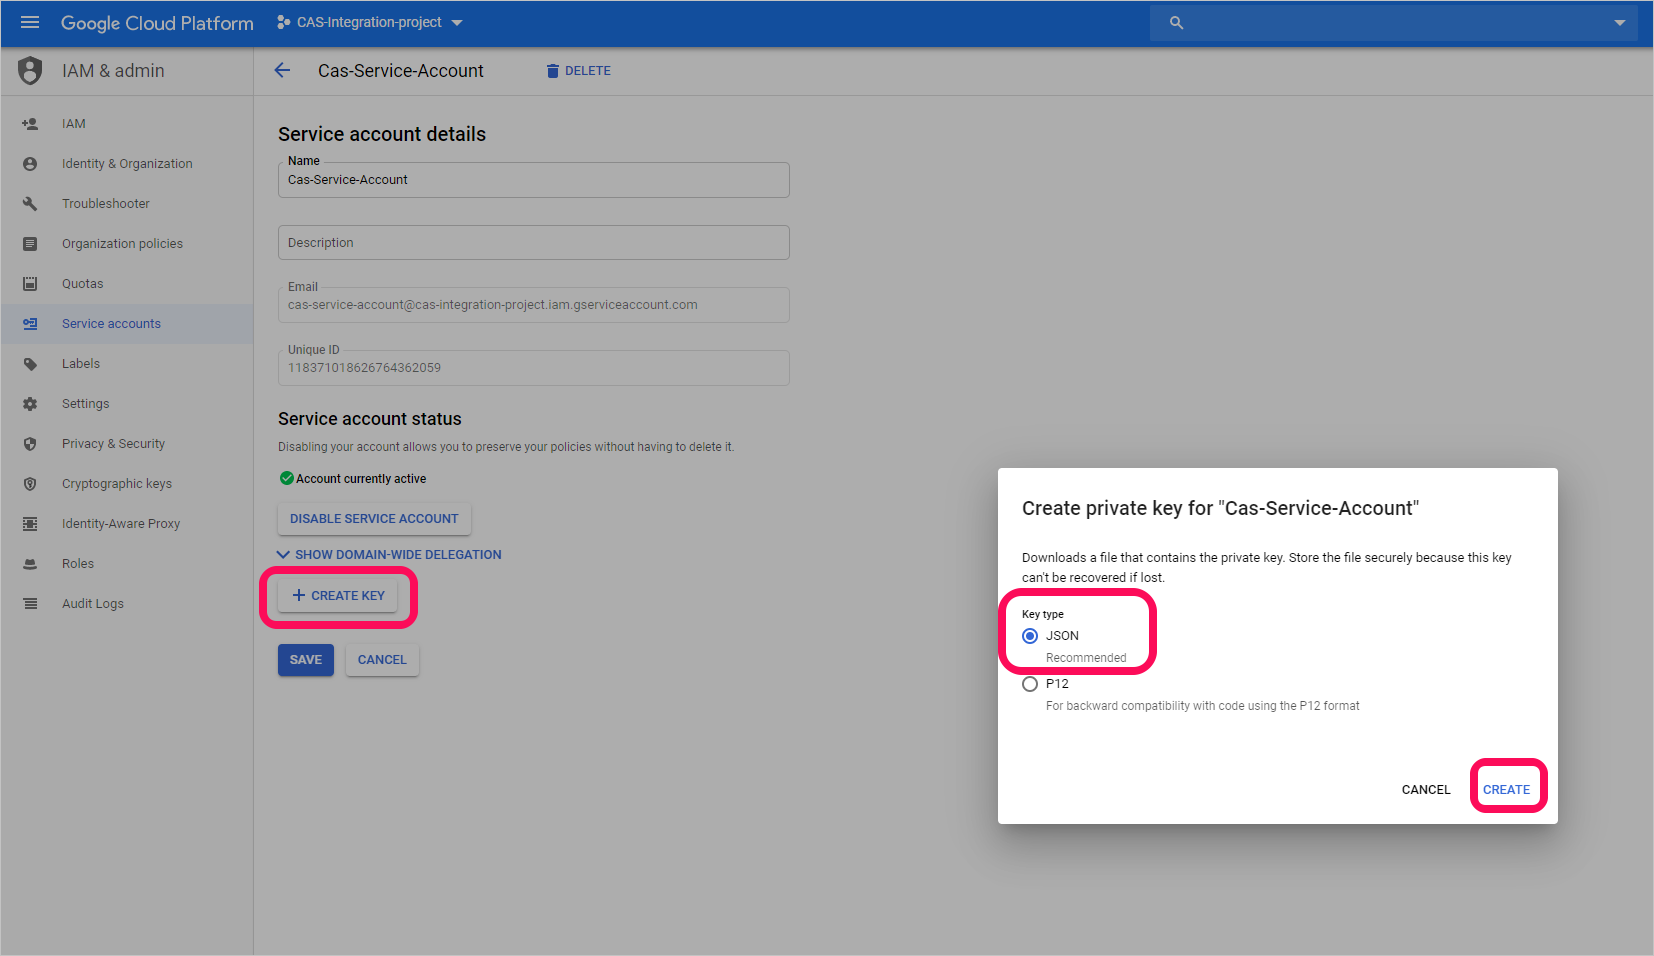
Note
You'll need the JSON file that is downloaded to your device later.
Retrieve your Organization ID
Make a note of your Organization ID, you'll need this later. For more information, see Getting your organization ID.

Connect Google Cloud Platform auditing to Defender for Cloud Apps
This procedure describes how to add the GCP connection details to connect Google Cloud Platform auditing to Defender for Cloud Apps.
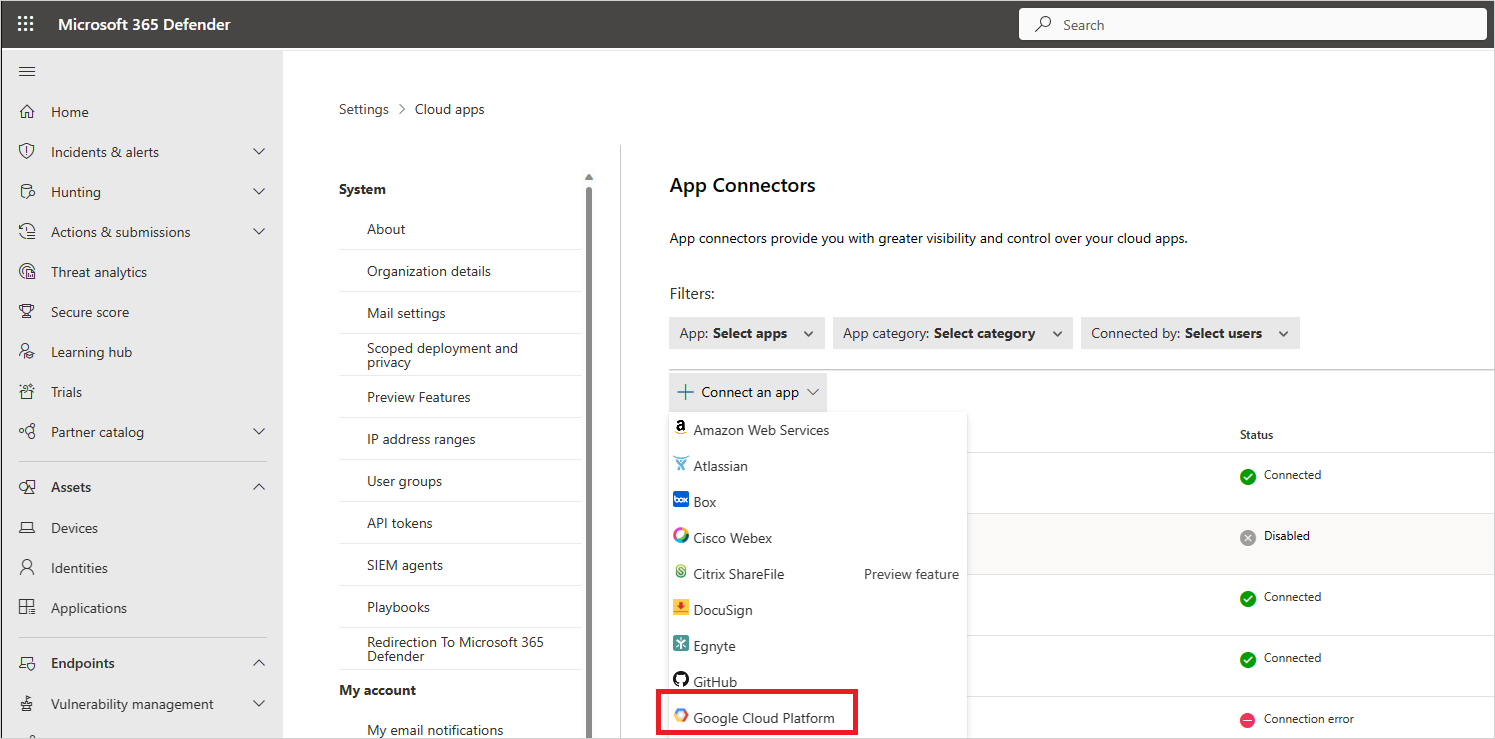
In the Microsoft Defender Portal, select Settings. Then choose Cloud Apps. Under Connected apps, select App Connectors.
In the App connectors page, to provide the GCP connector credentials, do one of the following:
Note
We recommended that you connect your Google Workspace instance to get unified user management and governance. This is the recommended even if you do not use any Google Workspace products and the GCP users are managed via the Google Workspace user management system.
For a new connector
Select +Connect an app, followed by Google Cloud Platform.
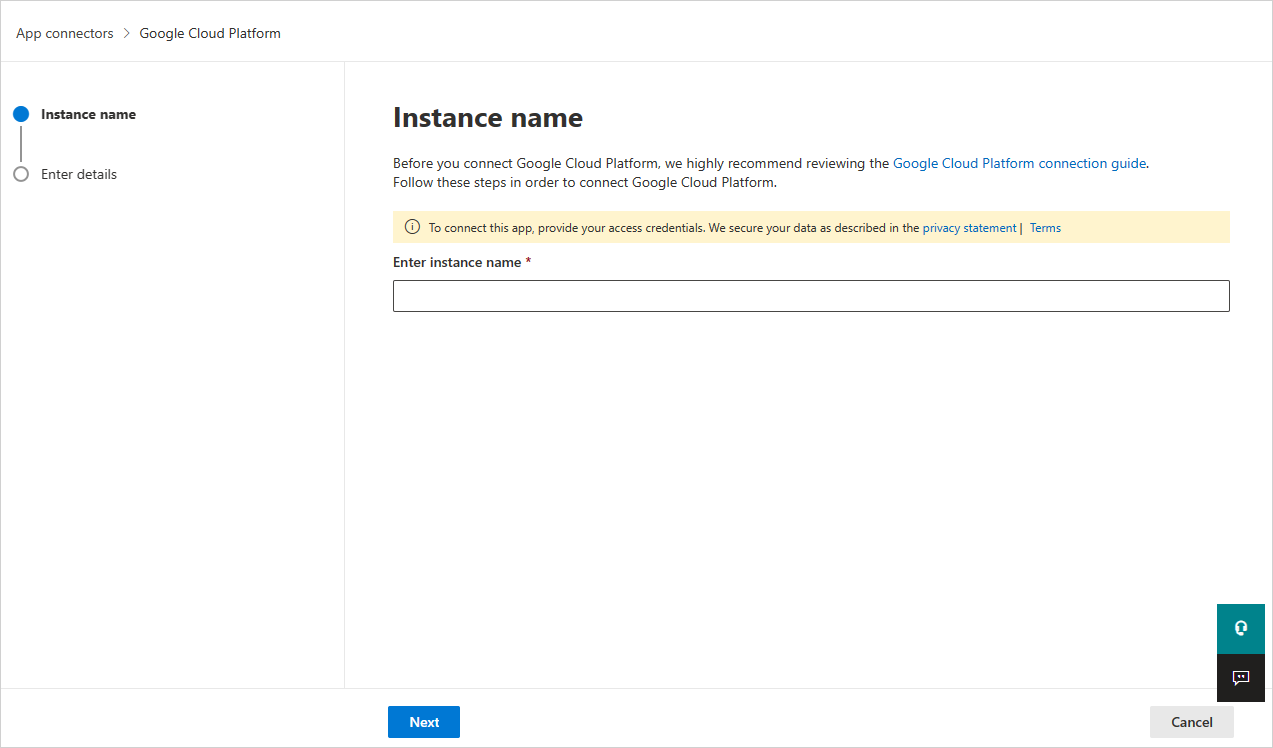
In the next window, provide a name for the connector, and then select Next.
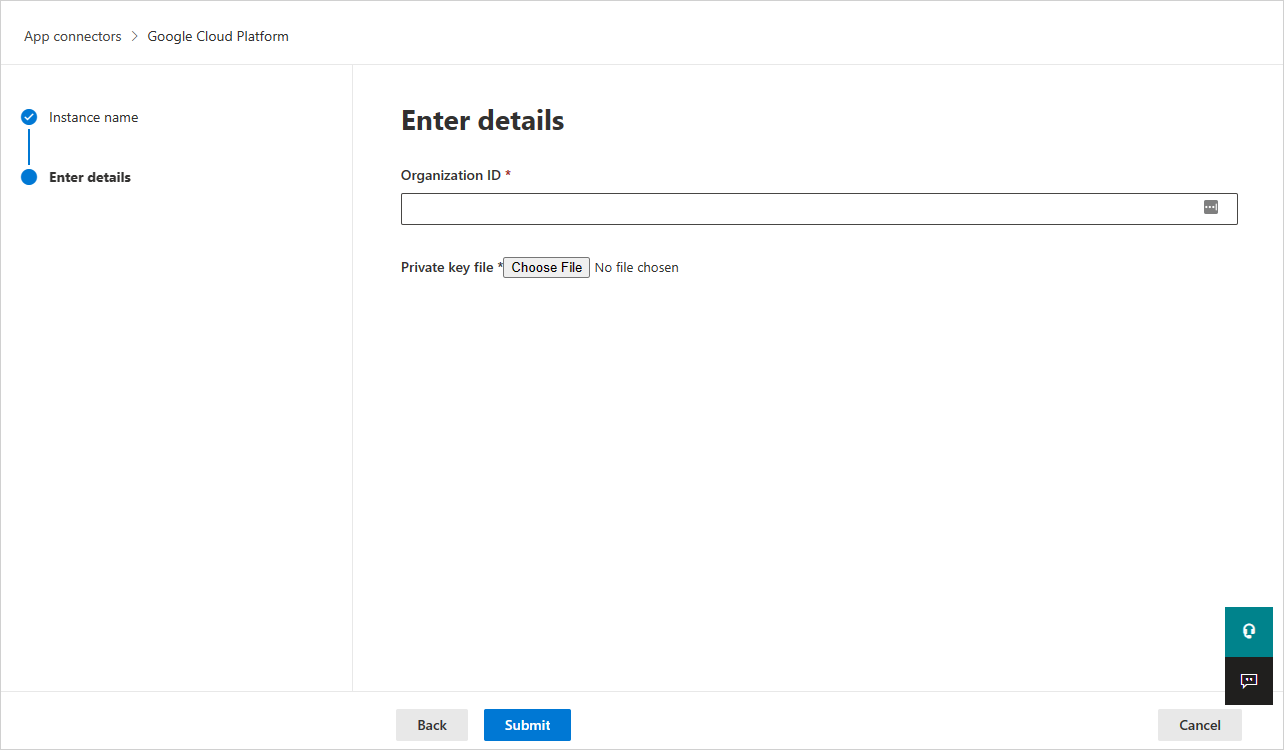
In the Enter details page, do the following, and then select Submit.
- In the Organization ID box, enter the organization you made a note of earlier.
- In the Private key file box, browse to the JSON file you downloaded earlier.
For an existing connector
In the list of connectors, on the row in which the GCP connector appears, select Edit settings.

In the Enter details page, do the following, and then select Submit.
- In the Organization ID box, enter the organization you made a note of earlier.
- In the Private key file box, browse to the JSON file you downloaded earlier.
In the Microsoft Defender Portal, select Settings. Then choose Cloud Apps. Under Connected apps, select App Connectors. Make sure the status of the connected App Connector is Connected.
Note
Defender for Cloud Apps will create an aggregated export sink (organization level), a Pub/Sub topic and Pub/Sub subscription using the integration service account in the integration project.
Aggregated export sink is used to aggregate logs across the GCP organization and the Pub/Sub topic created is used as the destination. Defender for Cloud Apps subscribes to this topic through the Pub/Sub subscription created to retrieve the admin activity logs across the GCP organization.
If you have any problems connecting the app, see Troubleshooting App Connectors.
Next steps
If you run into any problems, we're here to help. To get assistance or support for your product issue, please open a support ticket.
Feedback
Coming soon: Throughout 2024 we will be phasing out GitHub Issues as the feedback mechanism for content and replacing it with a new feedback system. For more information see: https://aka.ms/ContentUserFeedback.
Submit and view feedback for