Note
Access to this page requires authorization. You can try signing in or changing directories.
Access to this page requires authorization. You can try changing directories.
As a cloud file storage and collaboration tool, Google Workspace enables your users to share their documents across your organization and partners in a streamlined and efficient way. Using Google Workspace might expose your sensitive data not only internally, but also to external collaborators, or even worse make it publicly available via a shared link. Such incidents can be caused by malicious actors, or by unaware employees. Google Workspace also provides a large third-party app eco-system to help boost productivity. Using these apps can expose your organization to the risk of malicious apps or use of apps with excessive permissions.
Connecting Google Workspace to Defender for Cloud Apps gives you improved insights into your users' activities, provides threat detection using machine learning based anomaly detections, information protection detections (such as detecting external information sharing), enables automated remediation controls, and detects threats from enabled third-party apps in your organization.
Main threats
- Compromised accounts and insider threats
- Data leakage
- Insufficient security awareness
- Malicious third-party apps and Google add-ons
- Malware
- Ransomware
- Unmanaged bring your own device (BYOD)
How Defender for Cloud Apps helps to protect your environment
- Detect cloud threats, compromised accounts, and malicious insiders
- Discover, classify, label, and protect regulated and sensitive data stored in the cloud
- Discover and manage OAuth apps that have access to your environment
- Enforce DLP and compliance policies for data stored in the cloud
- Limit exposure of shared data and enforce collaboration policies
- Use the audit trail of activities for forensic investigations
SaaS security posture management
Connect Google Workspace to automatically get security recommendations in Microsoft Secure Score. In Secure Score, select Recommended actions and filter by Product = Google Workspace.
Google Workspace supports security recommendations to Enable MFA enforcement.
For more information, see:
Control Google Workspace with built-in policies and policy templates
You can use the following built-in policy templates to detect and notify you about potential threats:
| Type | Name |
|---|---|
| Built-in anomaly detection policy | Activity from anonymous IP addresses Activity from infrequent country Activity from suspicious IP addresses Impossible travel Activity performed by terminated user (requires Microsoft Entra ID as IdP) Malware detection Multiple failed login attempts Unusual administrative activities |
| Activity policy template | Logon from a risky IP address |
| File policy template | Detect a file shared with an unauthorized domain Detect a file shared with personal email addresses Detect files with PII/PCI/PHI |
For more information about creating policies, see Create a policy.
Automate governance controls
In addition to monitoring for potential threats, you can apply and automate the following Google Workspace governance actions to remediate detected threats:
| Type | Action |
|---|---|
| Data governance | - Apply Microsoft Purview Information Protection sensitivity label - Grant read permission to domain - Make a file/folder in Google Drive private - Reduce public access to file/folder - Remove a collaborator from a file - Remove Microsoft Purview Information Protection sensitivity label - Remove external collaborators on file/folder - Remove file editor's ability to share - Remove public access to file/folder - Require user to reset password to Google - Send DLP violation digest to file owners - Send DLP violation to last file editor - Transfer file ownership - Trash file |
| User governance | - Suspend user - Notify user on alert (via Microsoft Entra ID) - Require user to sign in again (via Microsoft Entra ID) - Suspend user (via Microsoft Entra ID) |
| OAuth app governance | - Revoke OAuth app permission |
For more information about remediating threats from apps, see Governing connected apps.
Protect Google Workspace in real time
Review our best practices for securing and collaborating with external users and blocking and protecting the download of sensitive data to unmanaged or risky devices.
Connect Google Workspace to Microsoft Defender for Cloud Apps
This section provides instructions for connecting Microsoft Defender for Cloud Apps to your existing Google Workspace account using the connector APIs. This connection gives you visibility into and control over Google Workspace use.
The steps in this section must be completed by a Google Workspace admin. For detailed information about the configuration steps in Google Workspace, see the Google Workspace documentation. Develop on Google Workspace |Google for Developers
Note
Defender for Cloud Apps doesn’t display file download activities for Google Workspace.
Configure Google Workspace
As a Google Workspace Super Admin, perform these steps to prepare your environment.
Sign in to the Google Workspace as a Super Admin.
Create a new project named Defender for Cloud Apps.
Copy the Project number. You'll need it later.
Enable the following APIs:
- Admin SDK API
- Google Drive API
Create Credentials for a service account with the following details:
Name: Defender for Cloud Apps
Description: API connector from Defender for Cloud Apps to a Google workspace account.
Grant this service account access to the project.
Copy the following information of the service account. You'll need it later
- Client ID
Create a new key. Download and save the file and the password required to use the file.
In the API controls, add a new Client ID in the Domain Wide Delegation, using the Client ID you copied above.
Add the following authorizations. Enter the following list of required scopes (copy the text and paste it in the OAuth Scopes box):
https://www.googleapis.com/auth/admin.reports.audit.readonly,https://www.googleapis.com/auth/admin.reports.usage.readonly,https://www.googleapis.com/auth/drive,https://www.googleapis.com/auth/drive.appdata,https://www.googleapis.com/auth/drive.apps.readonly,https://www.googleapis.com/auth/drive.file,https://www.googleapis.com/auth/drive.metadata.readonly,https://www.googleapis.com/auth/drive.readonly,https://www.googleapis.com/auth/drive.scripts,https://www.googleapis.com/auth/admin.directory.user.readonly,https://www.googleapis.com/auth/admin.directory.user.security,https://www.googleapis.com/auth/admin.directory.user.alias,https://www.googleapis.com/auth/admin.directory.orgunit,https://www.googleapis.com/auth/admin.directory.notifications,https://www.googleapis.com/auth/admin.directory.group.member,https://www.googleapis.com/auth/admin.directory.group,https://www.googleapis.com/auth/admin.directory.device.mobile.action,https://www.googleapis.com/auth/admin.directory.device.mobile,https://www.googleapis.com/auth/admin.directory.user ```
In the Google admin console, enable the service status for Google Drive for the Super Admin user that will be used for the connector. We recommend that you enable the service status for all users.
Configure Defender for Cloud Apps
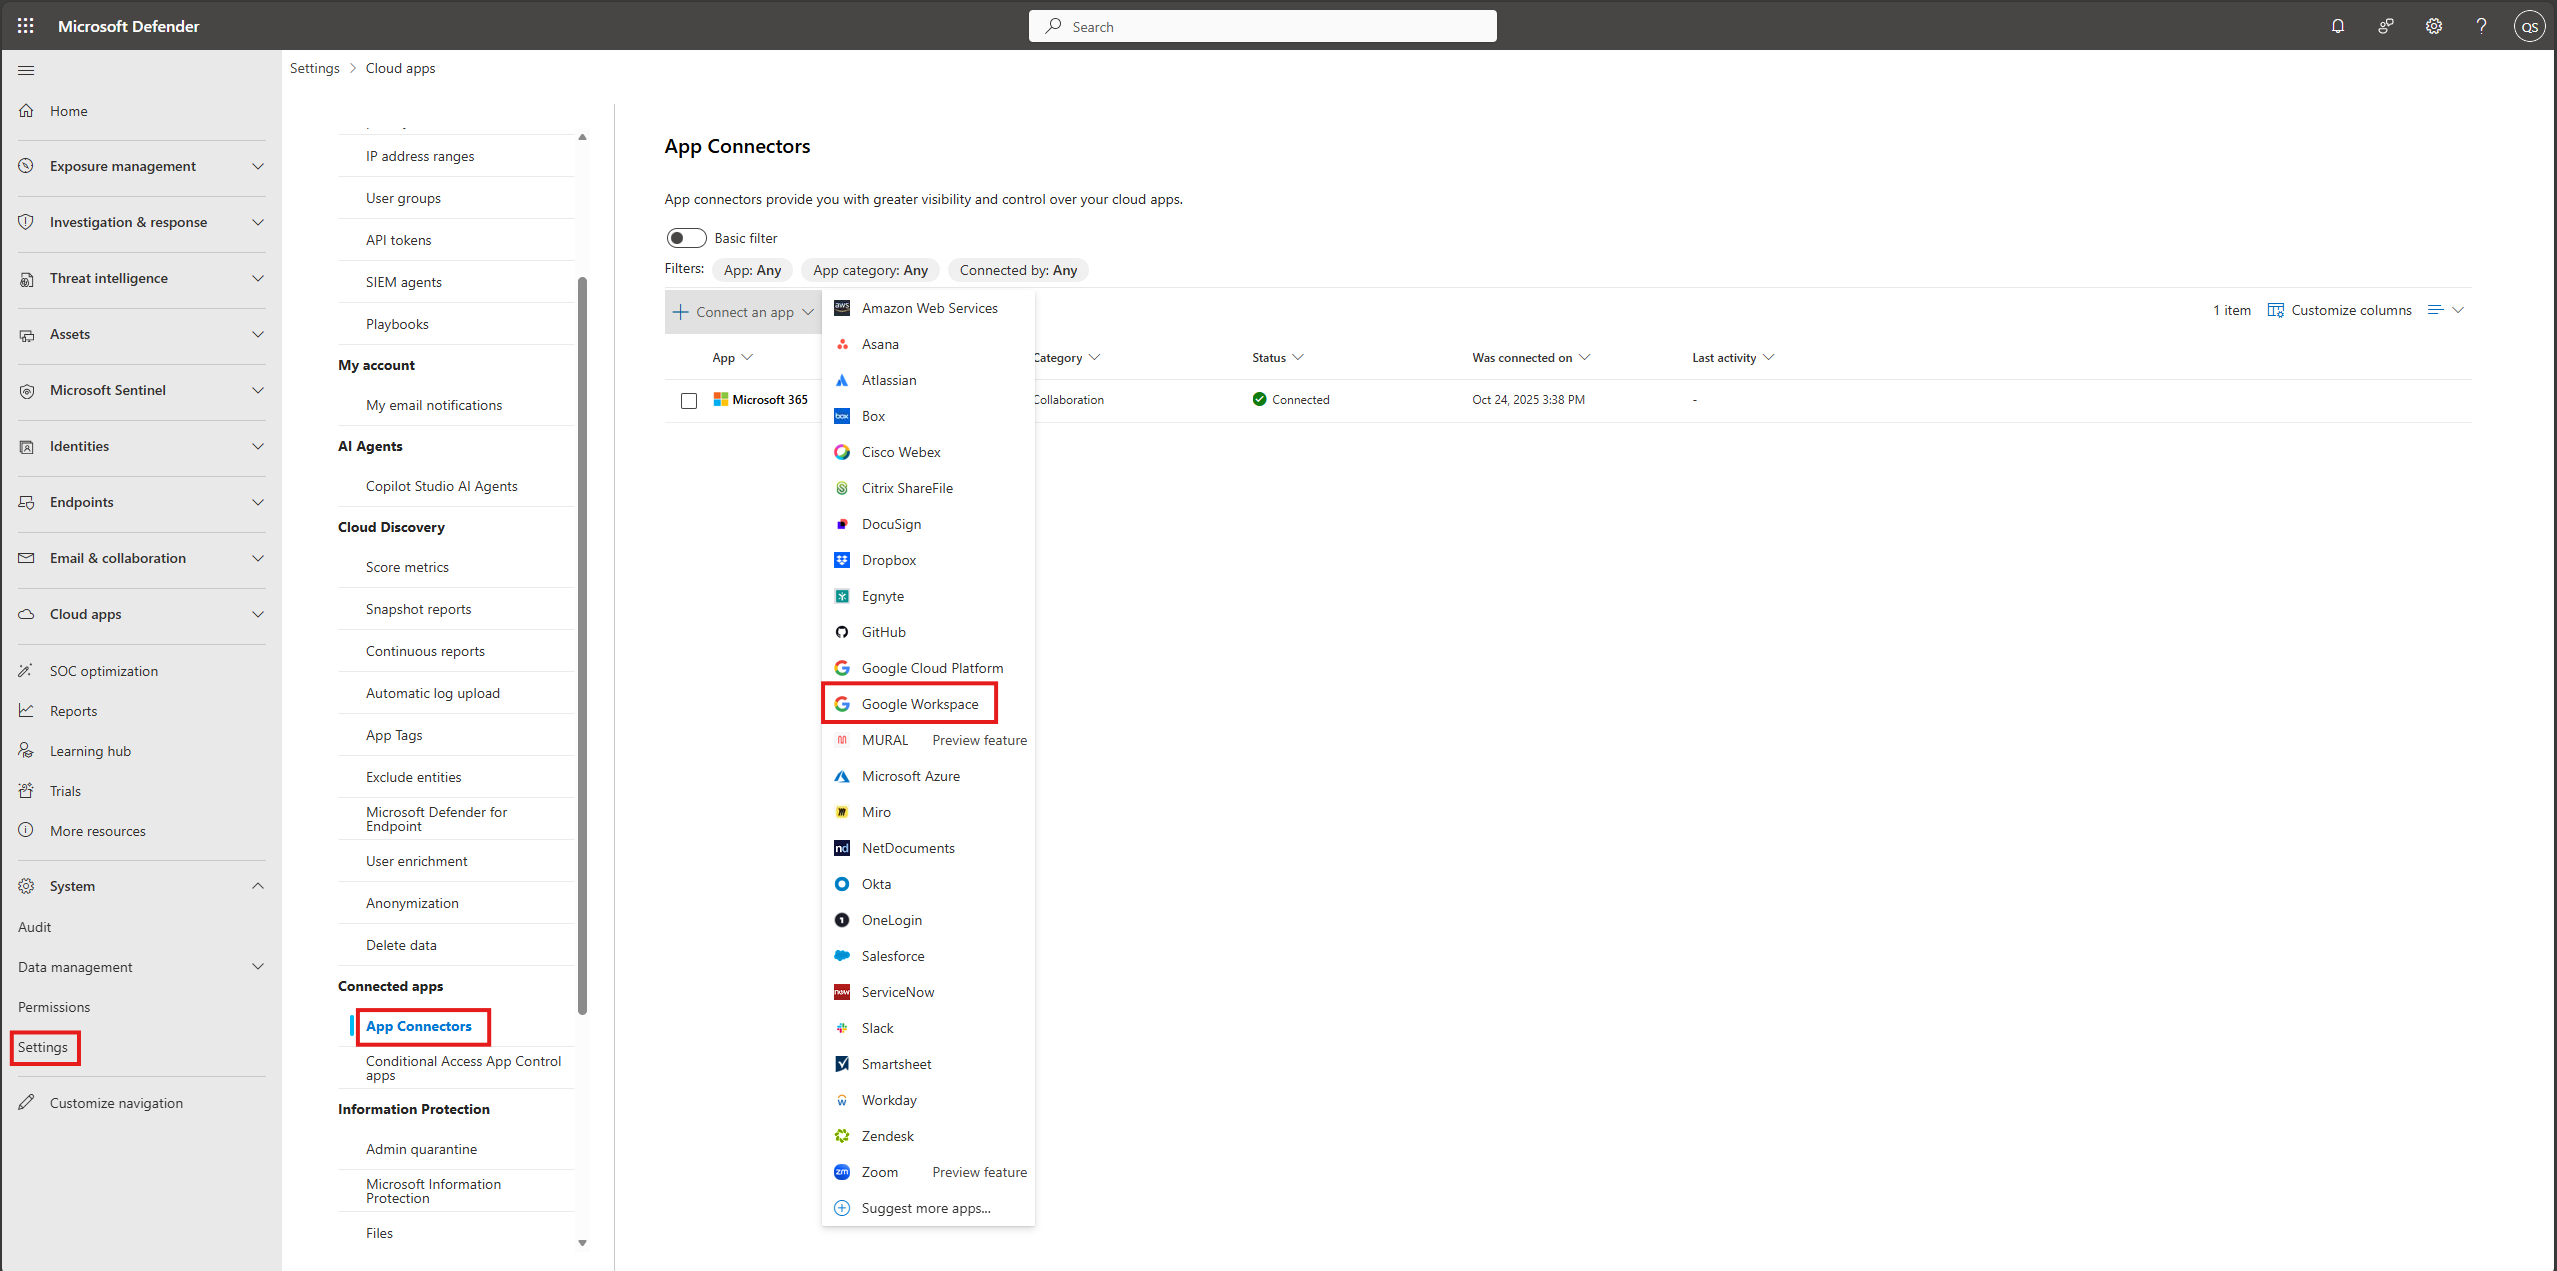
In the Microsoft Defender Portal, select Settings. Then choose Cloud Apps. Under Connected apps, select App Connectors.
Select +Connect an app and then select Google Workspace from the list of apps.
To provide the Google Workspace connection details, under App connectors, do one of the following:
For a Google Workspace organization that already has a connected GCP instance
- In the list of connectors, at the end of row in which the GCP instance appears, select the three dots and then select Connect Google Workspace instance.
For a Google Workspace organization that does not already have a connected GCP instance
- In the Connected apps page, select +Connect an app, and then select Google Workspace.
In the Instance name window, give your connector a name. Then select Next.
In the Add Google key, fill in the following information:
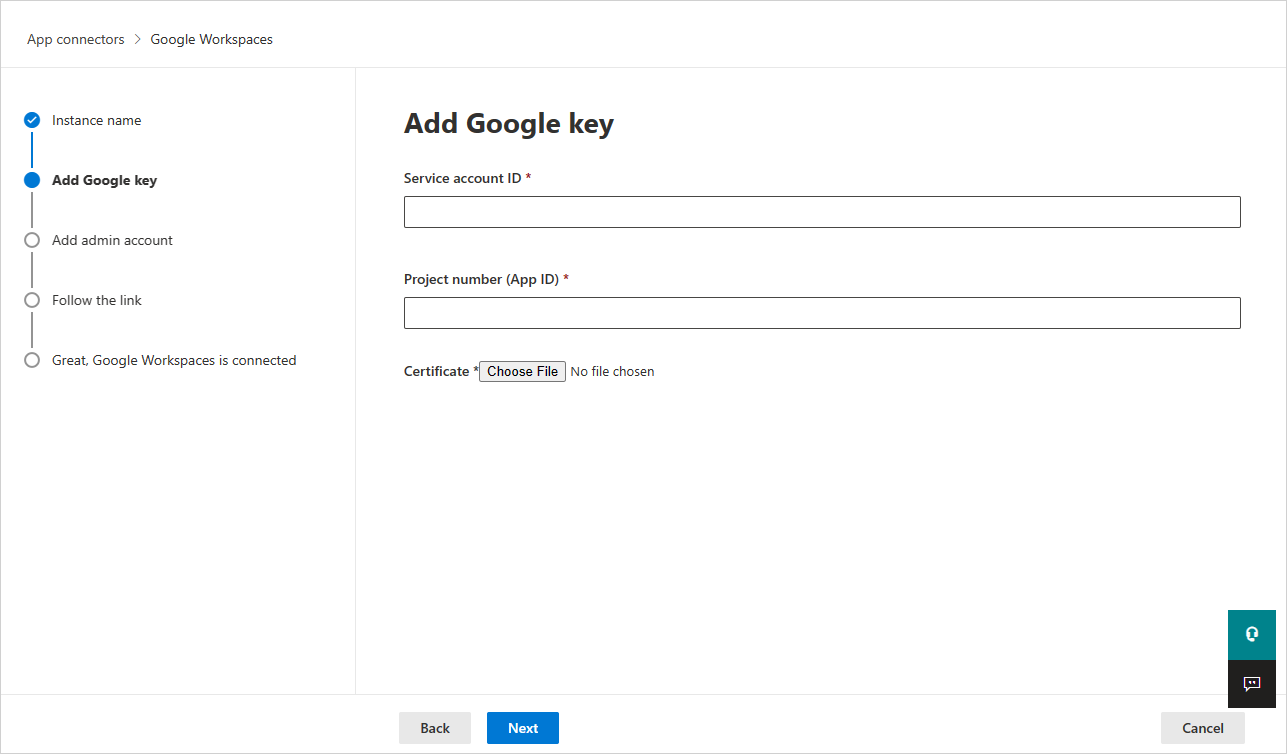
Enter the Service account ID, the Email that you copied earlier.
Enter the Project number (App ID) that you copied earlier.
Upload the P12 Certificate file that you saved earlier.
Enter the email address of your Google Workspace Super Admin.
Deploying with an account that isn't a Google Workspace Super Admin will lead to failure in the API test and doesn't allow Defender for Cloud Apps to correctly function. We request specific scopes so even as Super Admin, Defender for Cloud Apps is still limited.
If you have a Google Workspace Business or Enterprise account, select the check box. For information about which features are available in Defender for Cloud Apps for Google Workspace Business or Enterprise, see Enable instant visibility, protection, and governance actions for your apps.
Select Connect Google Workspaces.
In the Microsoft Defender Portal, select Settings. Then choose Cloud Apps. Under Connected apps, select App Connectors. Make sure the status of the connected App Connector is Connected.


After connecting Google Workspace, you'll receive events for seven days prior to connection.
After connecting Google Workspace, Defender for Cloud Apps performs a full scan. Depending on how many files and users you have, completing the full scan can take a while. To enable near real-time scanning, files on which activity is detected are moved to the beginning of the scan queue. For example, a file that is edited, updated, or shared is scanned right away. This doesn't apply to files that aren't inherently modified. For example, files that are viewed, previewed, printed, or exported are scanned during the regular scan.
SaaS Security Posture Management (SSPM) data (Preview) is shown in the Microsoft Defender Portal on the Secure Score page. For more information, see Security posture management for SaaS apps.
If you have any problems connecting the app, see Troubleshooting App Connectors.