Note
Access to this page requires authorization. You can try signing in or changing directories.
Access to this page requires authorization. You can try changing directories.
As a major CRM cloud provider, Salesforce incorporates large amounts of sensitive information about customers, pricing playbooks, and major deals inside your organization. Being a business-critical app, Salesforce is accessed and used by people inside your organization and by others outside of it (such as partners and contractors) for various purposes. In many cases, a large proportion of your users accessing Salesforce have low awareness of security and might put your sensitive information at risk by unintentionally sharing it. In other instances, malicious actors might gain access to your most sensitive customer-related assets.
Connecting Salesforce to Defender for Cloud Apps gives you improved insights into your users' activities, provides threat detection using machine learning based anomaly detections and information protection detections (such as detecting external information sharing). It also enables automated remediation controls, and detects threats from enabled third-party apps in your organization.
Use this app connector to access SaaS Security Posture Management (SSPM) features, via security controls reflected in Microsoft Secure Score. Learn more.
Main threats
- Compromised accounts and insider threats
- Data leakage
- Elevated privileges
- Insufficient security awareness
- Malicious third-party apps and Google add-ons
- Ransomware
- Unmanaged bring your own device (BYOD)
Prerequisites
Install and authorize the Salesforce Connected App in the target Salesforce org before you start the connection process. Salesforce enforces usage restrictions on Connected Apps. For more information, see:Prepare for Connected App Usage Restrictions Change
Assign the Approve Uninstalled Connected Apps permission to the Salesforce service account used to connect Microsoft Defender for Cloud Apps. Salesforce requires this permission to connect third-party apps via OAuth.
How Defender for Cloud Apps helps to protect your environment
- Detect cloud threats, compromised accounts, and malicious insiders
- Discover, classify, label, and protect regulated and sensitive data stored in the cloud
- Discover and manage OAuth apps that have access to your environment
- Enforce DLP and compliance policies for data stored in the cloud
- Limit exposure of shared data and enforce collaboration policies
- Use the audit trail of activities for forensic investigations
SaaS security posture management
Connect Salesforce to automatically get security recommendations for Salesforce in Microsoft Secure Score.
In Secure Score, select Recommended actions and filter by Product = Salesforce. For example, recommendations for Salesforce include:
- Require identity verification during multi-factor authentication (MFA) registration
- Enforce login IP ranges on every request
- Maximum invalid login attempts
- Password complexity requirement
For more information, see:
Control Salesforce with built-in policies and policy templates
You can use the following built-in policy templates to detect and notify you about potential threats:
| Type | Name |
|---|---|
| Built-in anomaly detection policy | Activity from anonymous IP addresses Activity from infrequent country Activity from suspicious IP addresses Impossible travel Activity performed by terminated user (requires Microsoft Entra ID as IdP) Multiple failed login attempts Unusual administrative activities Unusual file deletion activities (Temporarily not supported due to limitation in Salesforce API) Unusual file share activities Unusual impersonated activities Unusual multiple file download activities |
| Activity policy template | Logon from a risky IP address Mass download by a single user |
| File policy template | Detect a file shared with an unauthorized domain Detect a file shared with personal email addresses |
For more information about creating policies, see Create a policy.
Automate governance controls
In addition to monitoring for potential threats, you can apply and automate the following Salesforce governance actions to remediate detected threats:
| Type | Action |
|---|---|
| User governance | - Notify users of pending alerts - Send DLP violation digest to file owners - Suspend user - Notify user on alert (via Microsoft Entra ID) - Require user to sign in again (via Microsoft Entra ID) - Suspend user (via Microsoft Entra ID) |
| OAuth app governance | - Revoke OAuth app for users |
For more information about remediating threats from apps, see Governing connected apps.
Protect Salesforce in real time
Review our best practices for securing and collaborating with external users and blocking and protecting the download of sensitive data to unmanaged or risky devices.
Connect Salesforce to Microsoft Defender for Cloud Apps
Prerequisites
- For all integrations other than SSPM, make sure that Salesforce Shield is available for your Salesforce instance.
This section provides instructions for connecting Microsoft Defender for Cloud Apps to your existing Salesforce account using the app connector API. This connection gives you visibility into and control over Salesforce use.
Use this app connector to access SaaS Security Posture Management (SSPM) features, via security controls reflected in Microsoft Secure Score. Learn more.
In your Salesforce account, create a dedicated service admin account for Defender for Cloud Apps.
Make sure that the Salesforce account is assigned to one of the following editions, which support REST API access:
- Performance
- Enterprise
- Unlimited
- Developer
- Professional. REST API must be added to the Professional edition separately.
Create a new profile for the Defender for Cloud Apps service account. This profile will be used to configure the App connector.
Make sure that the service account profile includes the following permissions:
- API Enabled
- View All Data
- Manage Salesforce CRM Content
- Manage Users
- Query All Files
- Modify Metadata Through Metadata API Functions
- View Setup And Configuration
If Salesforce CRM Content is active in your organization:
- Grant Salesforce CRM Content access to the Defender for Cloud Apps service admin account.
- Turn off Lock sessions to the IP address from which they originated for the service account profile.
- Turn on Content Deliveries and Public Links.
Note
The Content Deliveries feature needs to be enabled for Defender for Cloud Apps to query file sharing data. For more information, see ContentDistribution.
How to connect Defender for Cloud Apps to Salesforce
In the Defender for Cloud Apps console, select Investigate and then Connected apps.
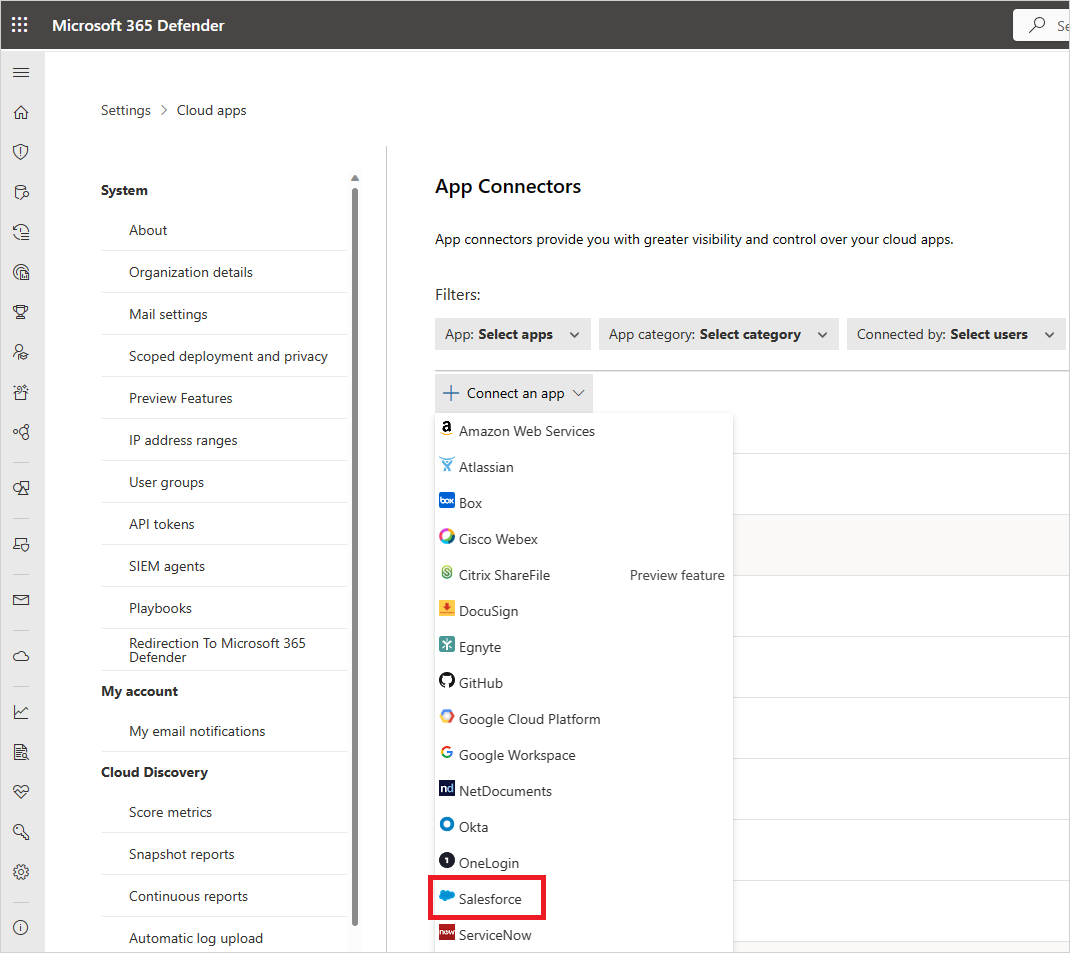
In the App connectors page, select +Connect an app followed by Salesforce.
In the next window, give the connection a name and select Next.
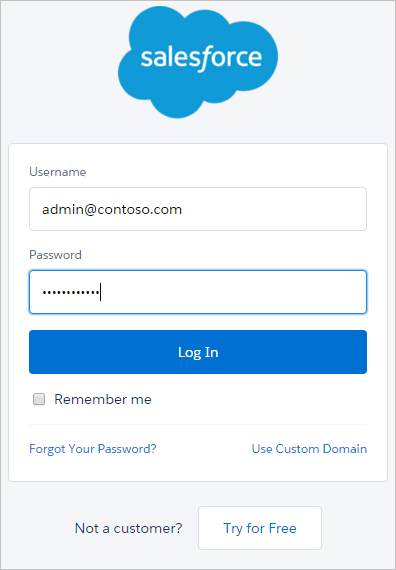
In the Follow the link page, select Connect Salesforce.
This opens the Salesforce sign in page. Enter your credentials to allow Defender for Cloud Apps access to your team's Salesforce app.
Salesforce will ask you if you want to allow Defender for Cloud Apps access to your team information and activity log and perform any activity as any team member. To continue, select Allow.
At this point, you'll receive a success or failure notice for the deployment. Defender for Cloud Apps is now authorized in Salesforce.com.
Back in the Defender for Cloud Apps console, you should see the Salesforce was successfully connected message.
In the Microsoft Defender Portal, select Settings. Then choose Cloud Apps. Under Connected apps, select App Connectors. Make sure the status of the connected App Connector is Connected.


After connecting Salesforce, you'll receive Events as follows: Log in events and Setup Audit Trail for seven days prior to connection, EventMonitoring 30 days, or one day back - depending on your Salesforce EventMonitoring license. The Defender for Cloud Apps API communicates directly with the APIs available from Salesforce. Because Salesforce limits the number of API calls it can receive, Defender for Cloud Apps takes this into account and respects the limitation. Salesforce APIs send each response with a field for the API counters, including total available and remaining. Defender for Cloud Apps calculates this into a percentage and makes sure to always leave 10% of available API calls remaining.
Note
Defender for Cloud Apps throttling is calculated solely on its own API calls with Salesforce, not with those of any other applications making API calls with Salesforce. Limiting API calls due to throttling may temporarily slow data ingestion in Defender for Cloud Apps, but the process typically catches up overnight
Note
If your Salesforce instance isn't in English, select the appropriate language attribute value for the integration service admin account.
To change the language attribute, navigate to Administration -> Users -> User and open the integration system admin account. Now navigate to Locale Settings -> Language and select the desired language.
Defender for Cloud Apps processeS Salesforce events as follows:
- Sign-in events every 15 minutes
- Setup audit trails every 15 minutes
- Event logs every 1 hour. For more information about Salesforce events, see Using event monitoring.
Next steps
If you have any problems connecting the app, see Troubleshooting App Connectors.