Note
Access to this page requires authorization. You can try signing in or changing directories.
Access to this page requires authorization. You can try changing directories.
Note
If you're a US Government customer, use the URIs listed in Microsoft Defender for Endpoint for US Government customers.
Tip
For better performance, instead of using api.security.microsoft.com, use a server closer to your geolocation:
- us.api.security.microsoft.com
- eu.api.security.microsoft.com
- uk.api.security.microsoft.com
- au.api.security.microsoft.com
- swa.api.security.microsoft.com
- ina.api.security.microsoft.com
- aea.api.security.microsoft.com
Get Alerts using a simple PowerShell script
How long it takes to go through this example?
It only takes 5 minutes done in two steps:
- Application registration
- Use examples: only requires copy/paste of a short PowerShell script
Do I need a permission to connect?
For the Application registration stage, you must have an appropriate role assigned in your Microsoft Entra tenant. For more details about roles, see Permission options.
Step 1 - Create an App in Microsoft Entra ID
Sign in to the Azure portal.
Navigate to Microsoft Entra ID > App registrations > New registration.
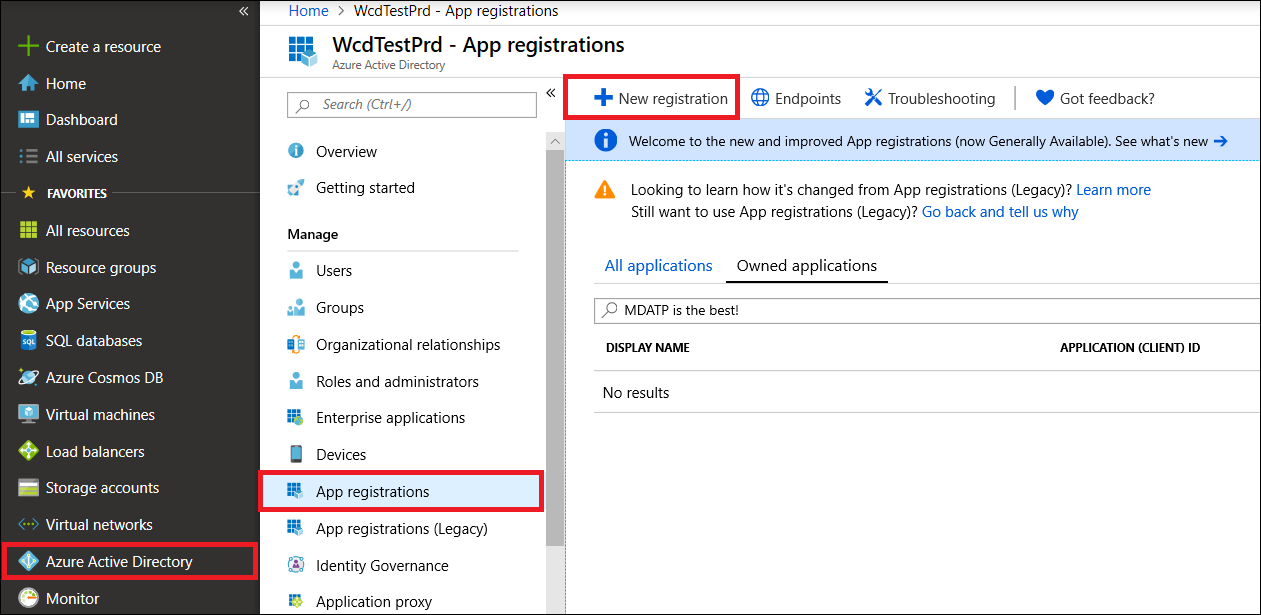
In the registration form, choose a name for your application and then select Register.
Allow your Application to access Defender for Endpoint and assign it 'Read all alerts' permission:
On your application page, select API Permissions > Add permission > APIs my organization uses > type WindowsDefenderATP and select WindowsDefenderATP.
Note
WindowsDefenderATP does not appear in the original list. You need to start writing its name in the text box to see it appear.

Choose Application permissions > Alert.Read.All, and then select Add permissions.
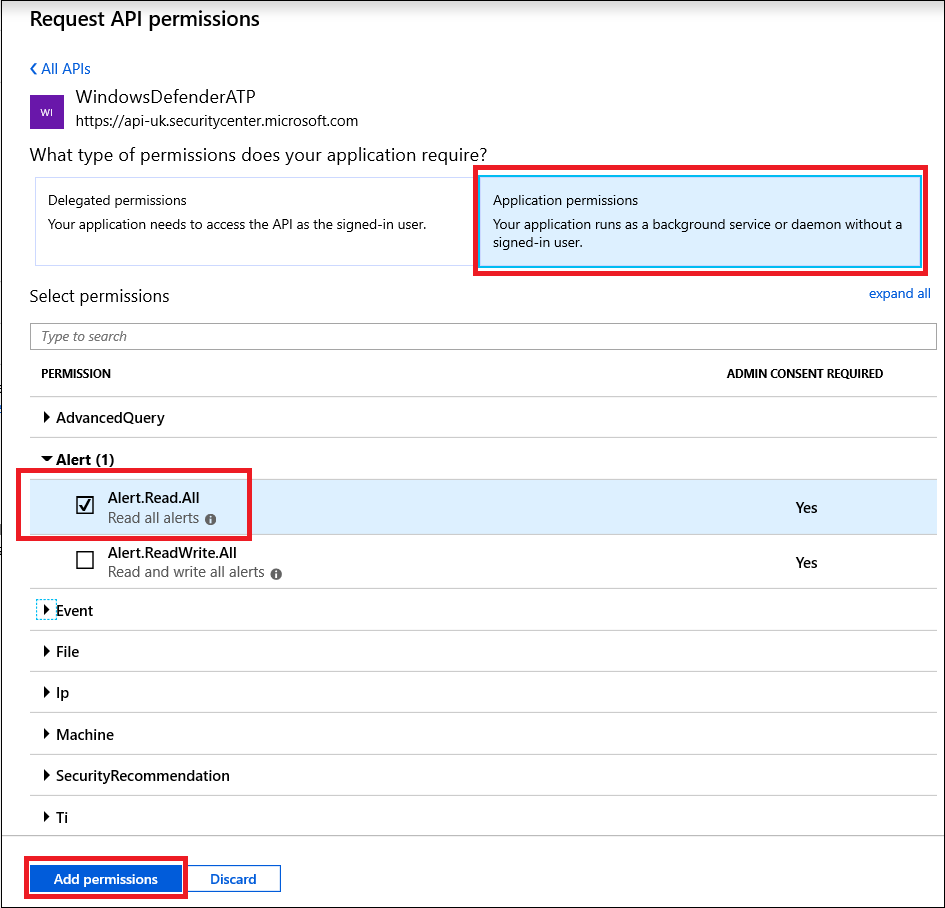
Important
You need to select the relevant permissions. Read All Alerts is only an example.
For example:
- To run advanced queries, select 'Run advanced queries' permission.
- To isolate a machine, select 'Isolate machine' permission.
- To determine which permission you need, see the Permissions section in the API you're interested to call.
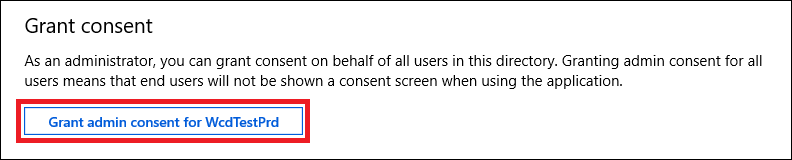
Select Grant consent.
Note
Every time you add permission, you must click on Grant consent for the new permission to take effect.
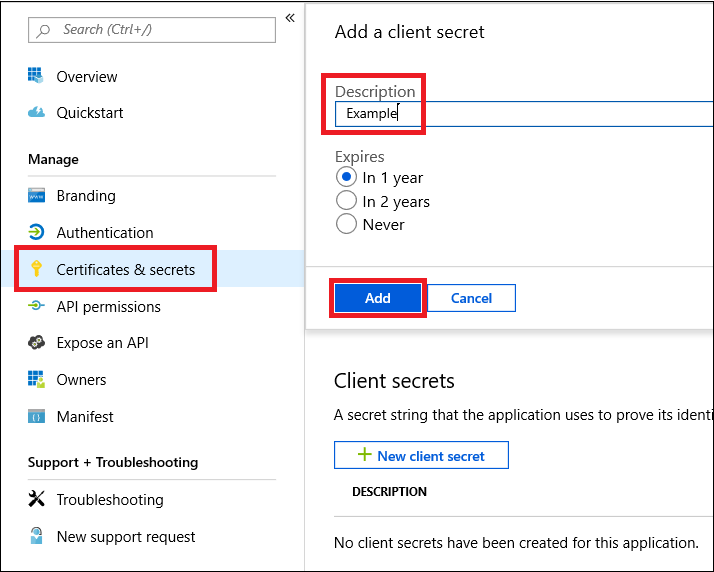
Add a secret to the application.
Select Certificates & secrets, add description to the secret and select Add.
Important
After click Add, copy the generated secret value. You won't be able to retrieve after you leave!
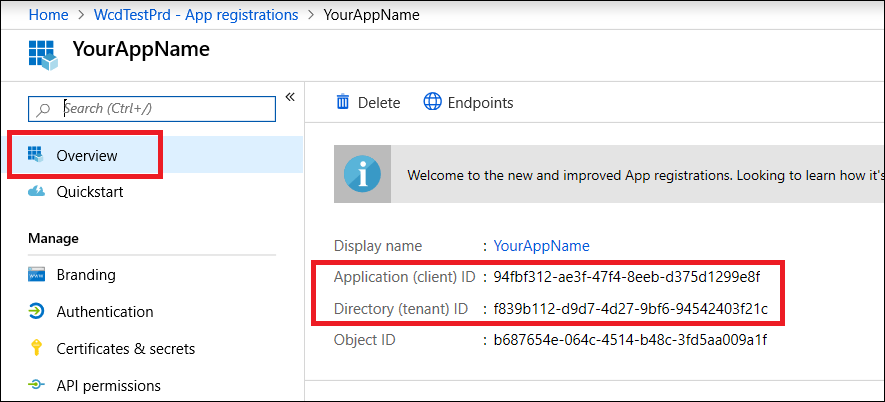
Write down your application ID and your tenant ID.
On your application page, go to Overview and copy the following:


Done! You've successfully registered an application!
Step 2 - Get a token using the App and use this token to access the API
Tip
Some Microsoft Defender for Endpoint APIs continue to require access tokens issued for the legacy resource https://api.securitycenter.microsoft.com. If the token audience doesn't match the resource expected by the API, requests fail with 403 Forbidden, even if the API endpoint uses https://api.security.microsoft.com. Use https://api.securitycenter.microsoft.com as the resource or scope when acquiring tokens.
Copy the following script to PowerShell ISE or to a text editor, and save it as Get-Token.ps1. Running this script generates a token and saves it in the working folder under the name Latest-token.txt.
# This code gets the application context token and saves it to a file named "Latest-token.txt" in the current directory.

$tenantId = '' ### Paste your tenant ID here
$appId = '' ### Paste your Application (client) ID here
$appSecret = '' ### Paste your Application secret (App key) here to test, and then store it in a safe place!

$resourceAppIdUri = 'https://api.securitycenter.microsoft.com/'
$oAuthUri = "https://login.microsoftonline.com/$TenantId/oauth2/token"
$authBody = [Ordered] @{
  resource = "$resourceAppIdUri"
  client_id = "$appId"
  client_secret = "$appSecret"
  grant_type = 'client_credentials'
}
$authResponse = Invoke-RestMethod -Method Post -Uri $oAuthUri -Body $authBody -ErrorAction Stop
$token = $authResponse.access_token
Out-File -FilePath "./Latest-token.txt" -InputObject $token
return $token
Validate the token
- Run the script to generate the
Latest-token.txtfile. - In a web browser, open https://jwt.ms/, and then copy the token (the contents of the
Latest-token.txt) in the Enter token below box. - On the Decoded token tab, find the roles section, and verify it contains Alert.Read.All permissions as shown in the following image:

Let's get the Alerts!
- The following script uses
Get-Token.ps1to access the API and gets alerts for the past 48 hours. - Save this script in the same folder you saved the previous script
Get-Token.ps1. - The script creates two files (json and csv) with the data in the same folder as the scripts.
# Returns Alerts created in the past 48 hours.

$token = ./Get-Token.ps1       #run the script Get-Token.ps1  - make sure you are running this script from the same folder of Get-Token.ps1

# Get Alert from the last 48 hours. Make sure you have alerts in that time frame.
$dateTime = (Get-Date).ToUniversalTime().AddHours(-48).ToString("o")

# The URL contains the type of query and the time filter we created previously.
# Learn more about other query options and filters: https://learn.microsoft.com/defender-endpoint/api/get-alerts.
$url = "https://api.security.microsoft.com/api/alerts?`$filter=alertCreationTime ge $dateTime"

# Set the WebRequest headers
$headers = @{
  'Content-Type' = 'application/json'
  Accept = 'application/json'
  Authorization = "Bearer $token"
}

# Send the web request and get the results.
$response = Invoke-WebRequest -Method Get -Uri $url -Headers $headers -ErrorAction Stop

# Extract the alerts from the results.
$alerts =  ($response | ConvertFrom-Json).value | ConvertTo-Json

# Get string with the execution time. We concatenate that string to the output file to avoid overwrite the file.
$dateTimeForFileName = Get-Date -Format o | foreach {$_ -replace ":", "."}

# Save the result as json and as csv.
$outputJsonPath = "./Latest Alerts $dateTimeForFileName.json"
$outputCsvPath = "./Latest Alerts $dateTimeForFileName.csv"

Out-File -FilePath $outputJsonPath -InputObject $alerts
($alerts | ConvertFrom-Json) | Export-CSV $outputCsvPath -NoTypeInformation
You're all done! You successfully:
- Created and registered and application.
- Granted permission for that application to read alerts.
- Connected the API.
- Used a PowerShell script to return alerts created in the past 48 hours.
Related articles
- Microsoft Defender for Endpoint APIs
- Access Microsoft Defender for Endpoint with application context
- Access Microsoft Defender for Endpoint with user context
Tip
Do you want to learn more? Engage with the Microsoft Security community in our Tech Community: Microsoft Defender for Endpoint Tech Community.