Note
Access to this page requires authorization. You can try signing in or changing directories.
Access to this page requires authorization. You can try changing directories.
The alerts queue shows a list of alerts that were flagged from identities in your network. By default, the queue displays alerts seen in the last seven days in a grouped view. The most recent alerts are shown at the top of the list helping you see the most recent alerts first.
View the alerts queue
In the Microsoft Defender portal, go to Incidents & alerts and then to Alerts.
Alerts from the last seven days are displayed with the following information:
- Alert name
- Tags
- Severity
- Investigation state
- Status
- Category
- Detection source
- Impacted assets
- First activity
- Last activity

Customize the view of the alerts queue
You can customize the view of the alerts queue in a few ways. Using the tools at the top of the page, you can:
- Customize the view to add or remove columns.
- Apply filters.
- Customize the duration. Display the alerts for a particular duration, such as 1 Day, 3 Days, 1 Week, 30 Days, and 6 Months.
- Export a detailed Excel report for analysis.
Filter the alerts view
You can apply the following filters to get a more focused view of the alerts.
| Alert | Description |
|---|---|
| Severity | Alert severity is based on several factors, including how much access the attacker might have, the potential impact if the attack succeeds, and the likelihood that the alert is a true positive. For a full list of alert types and their assigned severity levels, see Security alert name mapping and unique external IDs |
| Status | You can choose to filter the list of alerts based on their Status. For example, you can filter to show only alerts that are New, In Progress, or Resolved. |
| Detection sources | You can filter the alerts based on the following Detection sources: Microsoft Defender for Identity or Microsoft Defender XDR |
| Tags | You can filter the alerts based on Tags assigned to alerts. |
View an alert
You can access individual alerts from multiple locations, by selecting the alert name from any of the following:
- The Alerts page
- The Incidents page
- The Identities page
- The pages of individual Devices
- The Advanced hunting page
The alerts page
The alerts page provides context into the alert, by combining attack signals and alerts related to the selected alert to construct a detailed alert story. The alerts page helps you quickly triage, investigate, and take effective action on alerts.
Note
Microsoft Defender for Identity alerts currently appear in two different layouts in the Microsoft Defender portal. While the alert views show different information, all alerts are based on Defender for Identity collected data. The differences in layout and information shown are part of an ongoing transition to a unified alerting experience across Microsoft Defender products.
To view alerts from both Defender for Identity and Defender XDR, select Filter, then under Service sources choose Microsoft Defender for Identity and Defender XDR, and select Apply:

Microsoft Defender for Identity alerts
At the top of the page, there are sections for the Accounts, Destination Host, and Source Host of the alert. Depending on the alert, you might see details about additional hosts, accounts, IP addresses, domains, and security groups. Select any of them to get more details about the entities involved.
- The Alert story section gives information to provide a complete story with the details of the alert. The alert story is divided into two sections:
- What happened includes the alert's timeline and the entities involved in the alert.
- Alert graph provides a visual representation of the alert, including the entities involved in the alert and their relationships. The graph helps you understand how the entities are connected and how they relate to the alert.
- Important information provides technical context that supports alert investigation. You can use this information to validate whether the activity was expected or suspicious and decide what actions to take to contain or escalate the incident.
- Activity details provides detailed information, including the timestamp, the base object, the search scope, and other details about the alert.
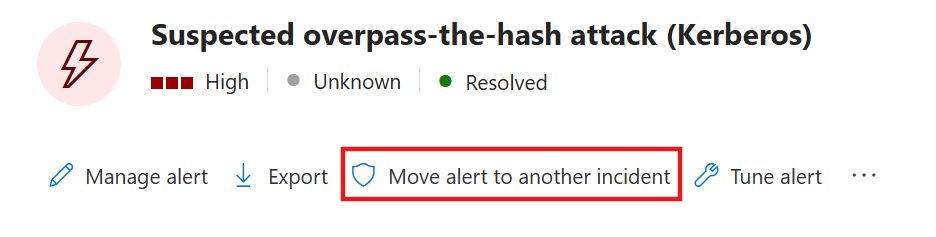
- The details pane on the right side of the page provides additional information about the alert, including the Alert details, Comments & history. The details pane also provides additional options, such as:
- Manage alert
- Export alert
- Move alert to another incident
- Classify an alert

Microsoft Defender XDR alerts
At the top of the page, there are sections for the Accounts, Destination Host, and Source Host of the alert. Depending on the alert, you might see buttons for details about additional hosts, accounts, IP addresses, domains, and security groups. Select any of them to get more details about the entities involved.
- The Alert story section gives information to provide a complete story with the details of the alert. The alert story is divided into two sections:
- What happened includes the alert's timeline and the entities involved in the alert.
- The details pane on the right side of the page provides additional information about the alert, including the Alert details, Comments & history. The details pane also provides additional options, such as:
- Manage alert
- Move alert to another incident
- Classify an alert

Manage security alerts
Selecting an alert opens the Alert management pane, where you can perform the following actions:
Change the status of an alert
You can categorize alerts as New, In Progress, or Resolved by changing their status as your investigation progresses. This helps you organize and manage how your team can respond to alerts. For example, a team leader can review all New alerts, and decide to assign them to the In Progress queue for further analysis. The team leader might assign the alert to the Resolved queue if they know the alert is benign, or coming from a device that is irrelevant (such as one belonging to a security administrator), or is being dealt with through an earlier alert.
Move an alert to another incident
You can create a new incident from the alert or link to an existing incident.
Assign alerts
If an alert isn't yet assigned, you can select Assign to me to assign the alert to yourself.

Add comments to an alert
You can add comments to an alert to provide additional context or information. This is useful for sharing insights with your team or documenting your investigation process. Whenever a change or comment is made to an alert, it's recorded in the Comments and history section.

Classify security alerts
For each alert, ask the following questions to determine the alert classification and help decide what to do next:
- Is the security alert a TP, B-TP, or FP?
- How common is this specific security alert in your environment?
- Was the alert triggered by the same types of computers or users? For example, servers with the same role or users from the same group/department? If the computers or users were similar, you might decide to exclude it to avoid extra future FP alerts.
Following proper investigation, all Defender for Identity security alerts can be classified as one of the following activity types:
True positive (TP): A malicious action detected by Defender for Identity.
Benign true positive (B-TP): An action detected by Defender for Identity that is real, but not malicious, such as a penetration test or known activity generated by an approved application.
False positive (FP): A false alarm, meaning the activity didn't happen.

Note
An increase of alerts of the exact same type typically reduces the suspicious/importance level of the alert. For repeated alerts, verify configurations, and use security alert details and definitions to understand exactly what is happening that trigger the repeats.
Tuning alerts
Tune your alerts to adjust and optimize them, reducing false positives. Alert tuning allows your SOC teams to focus on high-priority alerts and improve threat detection coverage across your system. In Microsoft Defender XDR, create rule conditions based on evidence types, and then apply your rule on any rule type that matches your conditions.
For more information, see Tune an alert.