Note
Access to this page requires authorization. You can try signing in or changing directories.
Access to this page requires authorization. You can try changing directories.
This article shows you how to deploy and run the Chat with your own data sample for .NET. This sample implements a chat app using C#, Azure OpenAI Service, and Retrieval Augmented Generation (RAG) in Azure AI Search to get answers about employee benefits at a fictitious company. The employee benefits chat app is seeded with PDF files including an employee handbook, a benefits document and a list of company roles and expectations.
In this article, you:
- Deploy a chat app to Azure.
- Get answers about employee benefits.
- Change settings to change behavior of responses.
Once you complete this procedure, start modifying the new project with your custom code.
This article is part of a collection of articles that show you how to build a chat app using Azure OpenAI service and Azure AI Search.
Other articles in the collection include:
Architectural overview
In this sample application, a fictitious company called Contoso Electronics provides the chat app experience to its employees to ask questions about the benefits, internal policies, and job descriptions and roles.
The architecture of the chat app is shown in the following diagram:

- User interface - The application's chat interface is a Blazor WebAssembly application. This interface is what accepts user queries, routes requests to the application backend, and displays generated responses.
- Backend - The application backend is an ASP.NET Core Minimal API. The backend hosts the Blazor static web application and is what orchestrates the interactions among the different services. Services used in this application include:
- Azure AI Search – Indexes documents from the data stored in an Azure Storage Account. This makes the documents searchable using vector search capabilities.
- Azure OpenAI Service – Provides the Large Language Models (LLM) to generate responses. Microsoft Agent Framework is used in conjunction with the Azure OpenAI Service to orchestrate the more complex AI workflows.
Cost
Most resources in this architecture use a basic or consumption pricing tier. Consumption pricing is based on usage, which means you only pay for what you use. To complete this article, there's a charge, but it's minimal. When you're done with the article, delete the resources to stop incurring charges.
For more information, see Azure Samples: Cost in the sample repo.
Prerequisites
A development container environment is available with all dependencies required to complete this article. You can run the development container in GitHub Codespaces (in a browser) or locally using Visual Studio Code.
To follow along with this article, you need the following prerequisites:
- An Azure subscription - Create one for free
- Azure account permissions - Your Azure account must have Microsoft.Authorization/roleAssignments/write permissions, such as User Access Administrator or Owner.
- GitHub account
Open development environment
Begin now with a development environment that has all the dependencies installed to complete this article.
GitHub Codespaces runs a development container managed by GitHub with Visual Studio Code for the Web as the user interface. For the most straightforward development environment, use GitHub Codespaces so that you have the correct developer tools and dependencies preinstalled to complete this article.
Important
All GitHub accounts can use Codespaces for up to 60 hours free each month with 2 core instances. For more information, see GitHub Codespaces monthly included storage and core hours.
Start the process to create a new GitHub codespace on the
mainbranch of theAzure-Samples/azure-search-openai-demo-csharpGitHub repository.To have both the development environment and the documentation available at the same time, right-click on the following Open in GitHub Codespaces button, and select Open link in new windows.

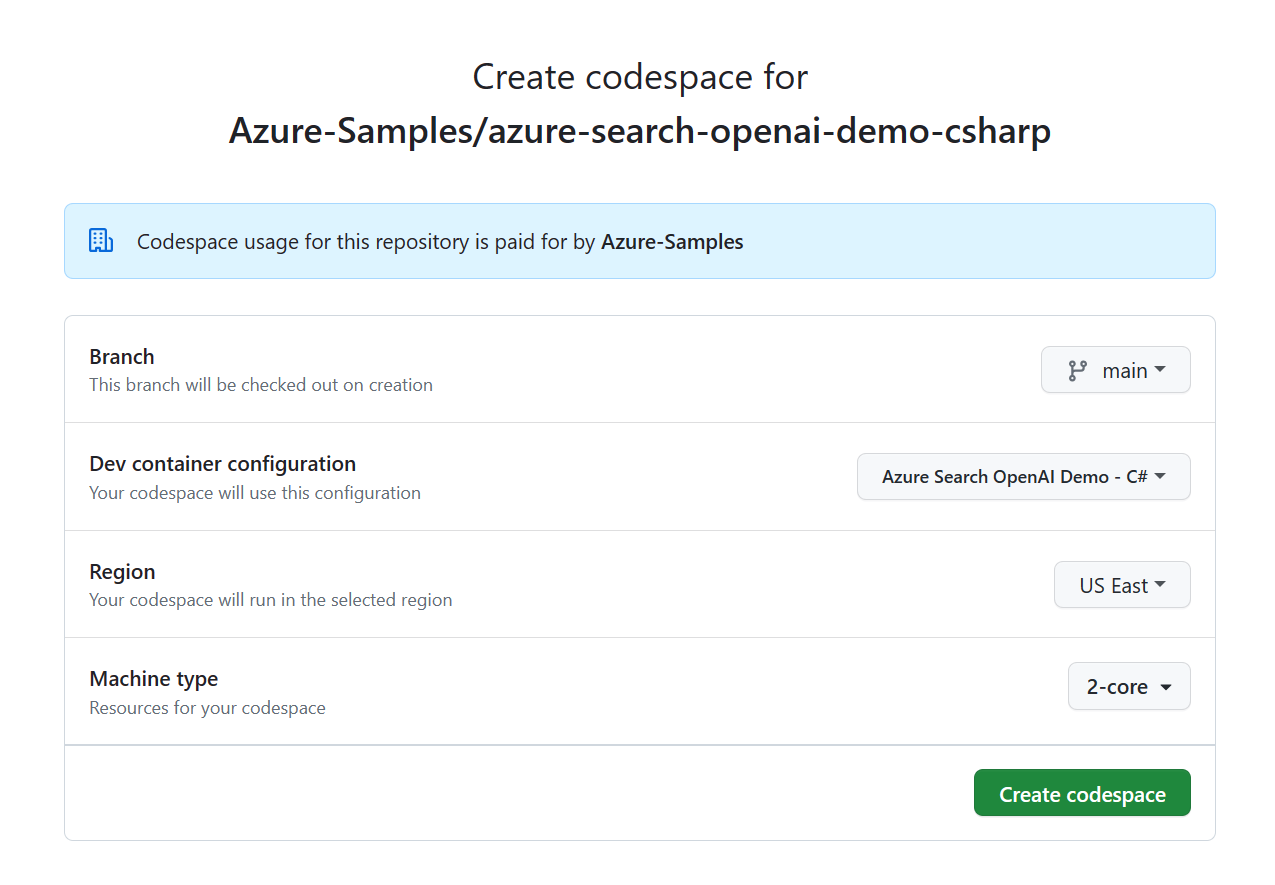
On the Create codespace page, review the codespace configuration settings and then select Create new codespace:
Wait for the codespace to start. This startup process can take a few minutes.
In the terminal at the bottom of the screen, sign in to Azure with the Azure Developer CLI.
azd auth loginCopy the code from the terminal and then paste it into a browser. Follow the instructions to authenticate with your Azure account.
The remaining tasks in this article take place in the context of this development container.
Deploy and run
The sample repository contains all the code and configuration files you need to deploy a chat app to Azure. The following steps walk you through the process of deploying the sample to Azure.
Deploy chat app to Azure
Important
Azure resources created in this section incur immediate costs, primarily from the Azure AI Search resource. These resources may accrue costs even if you interrupt the command before it's fully executed.
Run the following Azure Developer CLI command to provision the Azure resources and deploy the source code:
azd upWhen you're prompted to enter an environment name, keep it short and lowercase. For example,
myenv. It's used as part of the resource group name.When prompted, select a subscription to create the resources in.
When you're prompted to select a location the first time, select a location near you. This location is used for most the resources including hosting.
If you're prompted for a location for the OpenAI model, select a location that is near you. If the same location is available as your first location, select that.
Wait until the app is deployed. The deployment might take up to 20 minutes to complete.
After the application deploys successfully, a URL appears in the terminal.
Select that URL labeled
Deploying service webto open the chat application in a browser.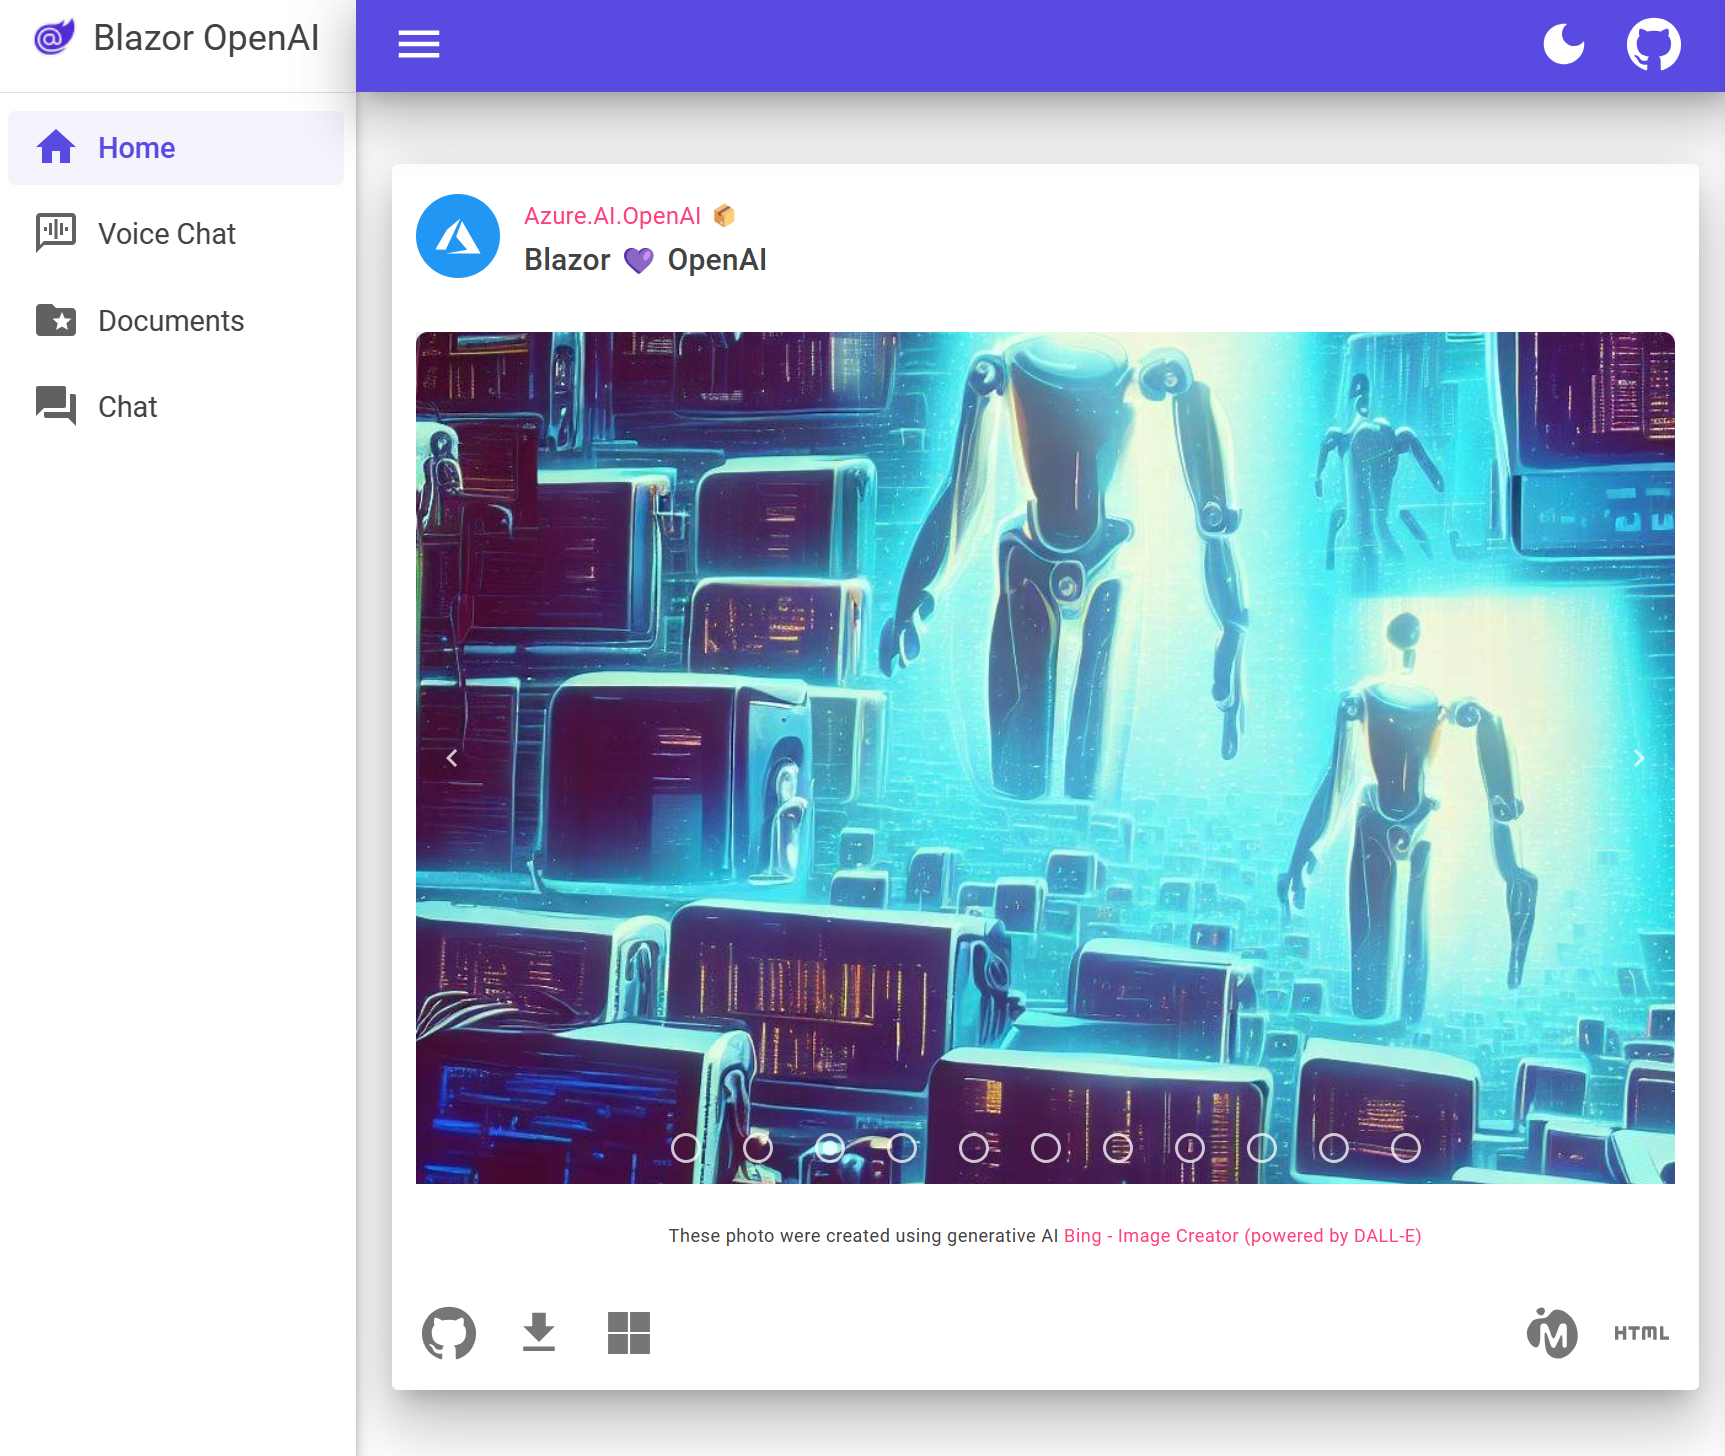
Use chat app to get answers from PDF files
The chat app is preloaded with employee benefits information from PDF files. You can use the chat app to ask questions about the benefits. The following steps walk you through the process of using the chat app.
In the browser, navigate to the Chat page using the left navigation.
Select or enter "What is included in my Northwind Health Plus plan that is not in standard?" in the chat text box. Your response is similar to the following image.
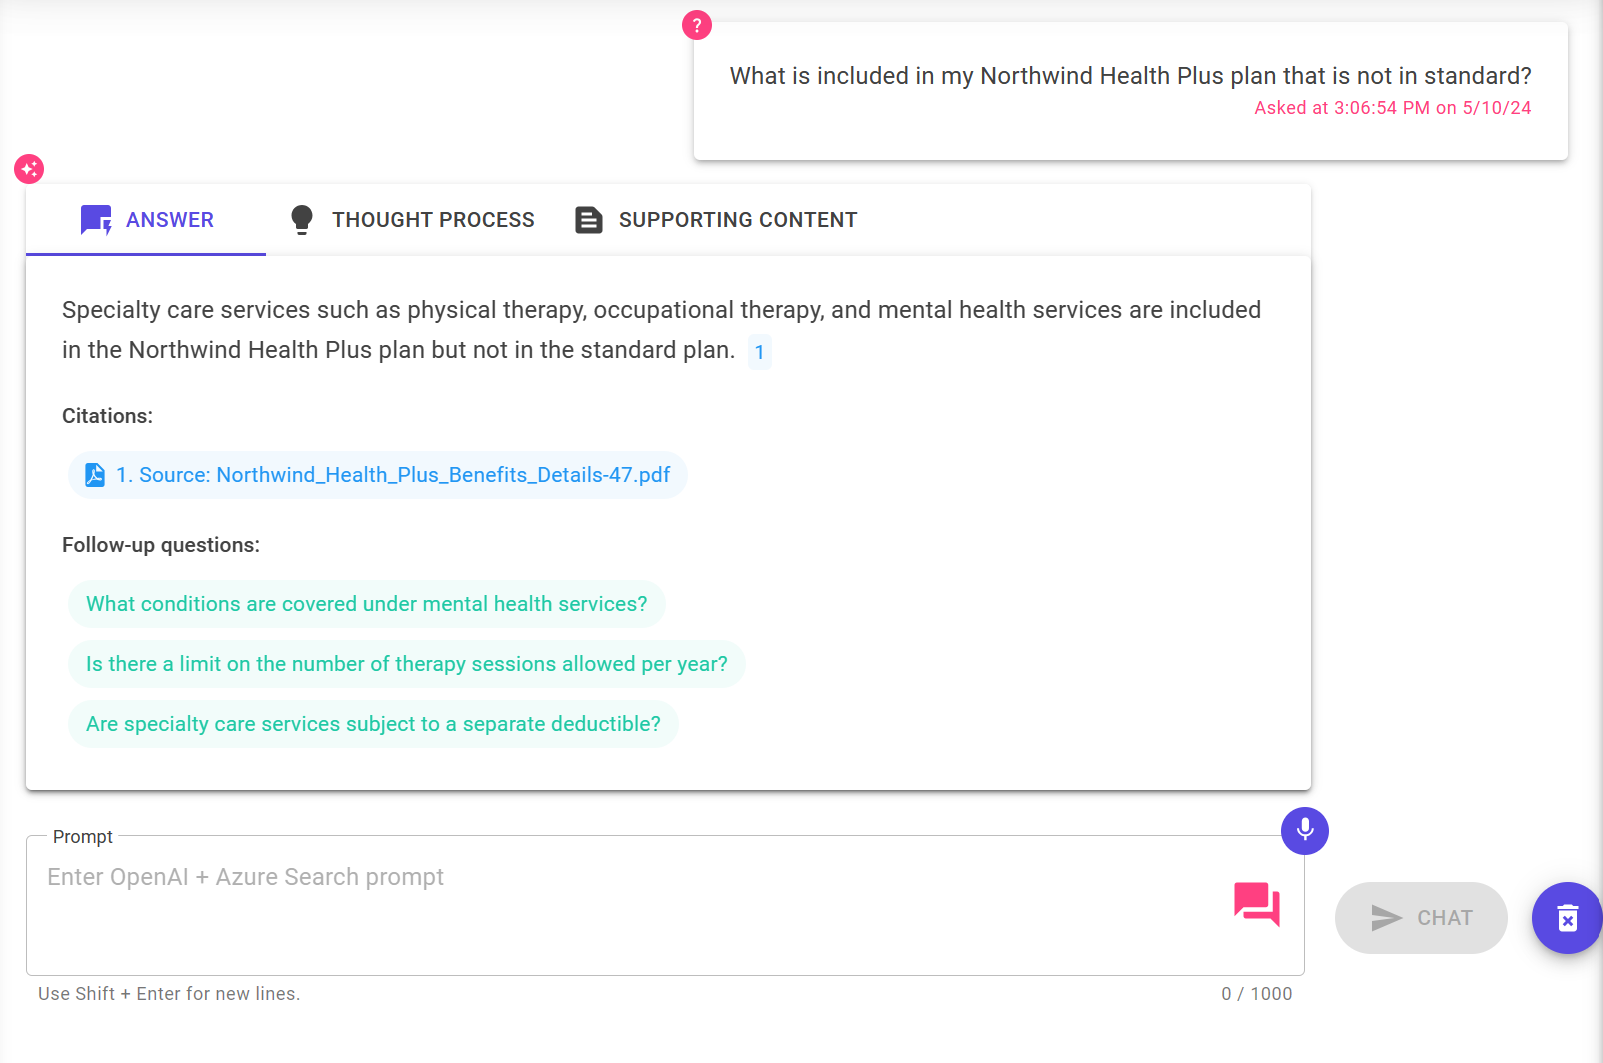
From the answer, select a citation. A pop-up window opens displaying the source of the information.

Navigate between the tabs at the top of the answer box to understand how the answer was generated.
Tab Description Thought process This is a script of the interactions in chat. You can view the system prompt ( content) and your user question (content).Supporting content This includes the information to answer your question and the source material. The number of source material citations is noted in the Developer settings. The default value is 3. Citation This displays the source page that contains the citation. When you're done, navigate back to the answer tab.


Use chat app settings to change behavior of responses
The intelligence of the chat is determined by the OpenAI model and the settings that are used to interact with the model.
| Setting | Description |
|---|---|
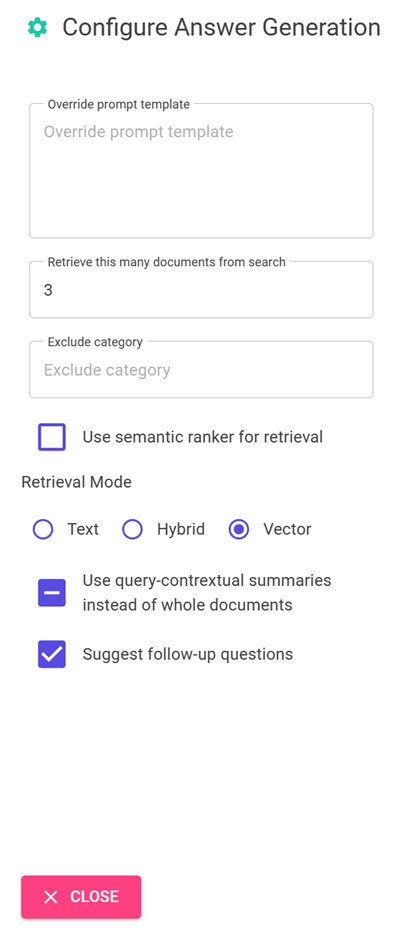
| Override prompt template | This is the prompt that is used to generate the answer. |
| Retrieve this many search results | This is the number of search results that are used to generate the answer. You can see these sources returned in the Thought process and Supporting content tabs of the citation. |
| Exclude category | This is the category of documents that are excluded from the search results. |
| Use semantic ranker for retrieval | This is a feature of Azure AI Search that uses machine learning to improve the relevance of search results. |
| Retrieval mode | Vectors + Text means that the search results are based on the text of the documents and the embeddings of the documents. Vectors means that the search results are based on the embeddings of the documents. Text means that the search results are based on the text of the documents. |
| Use query-contextual summaries instead of whole documents | When both Use semantic ranker and Use query-contextual summaries are checked, the LLM uses captions extracted from key passages, instead of all the passages, in the highest ranked documents. |
| Suggest follow-up questions | Have the chat app suggest follow-up questions based on the answer. |
The following steps walk you through the process of changing the settings.
In the browser, select the gear icon in the upper right of the page.
If not selected, select the Suggest follow-up questions checkbox and ask the same question again.
What is included in my Northwind Health Plus plan that is not in standard?The chat might return with follow-up question suggestions.
In the Settings tab, deselect Use semantic ranker for retrieval.
Ask the same question again.
What is my deductible?What is the difference in the answers?
The response that used the Semantic ranker provided a single answer. The response without semantic ranking returned a less direct answer.
Clean up resources
To finish, clean up the Azure and GitHub CodeSpaces resources you used.
Clean up Azure resources
The Azure resources created in this article are billed to your Azure subscription. If you don't expect to need these resources in the future, delete them to avoid incurring more charges.
Run the following Azure Developer CLI command to delete the Azure resources and remove the source code:
azd down --purge
Clean up GitHub Codespaces
Deleting the GitHub Codespaces environment ensures that you can maximize the amount of free per-core hours entitlement you get for your account.
Important
For more information about your GitHub account's entitlements, see GitHub Codespaces monthly included storage and core hours.
Sign into the GitHub Codespaces dashboard (https://github.com/codespaces).
Locate your currently running codespaces sourced from the
Azure-Samples/azure-search-openai-demo-csharpGitHub repository.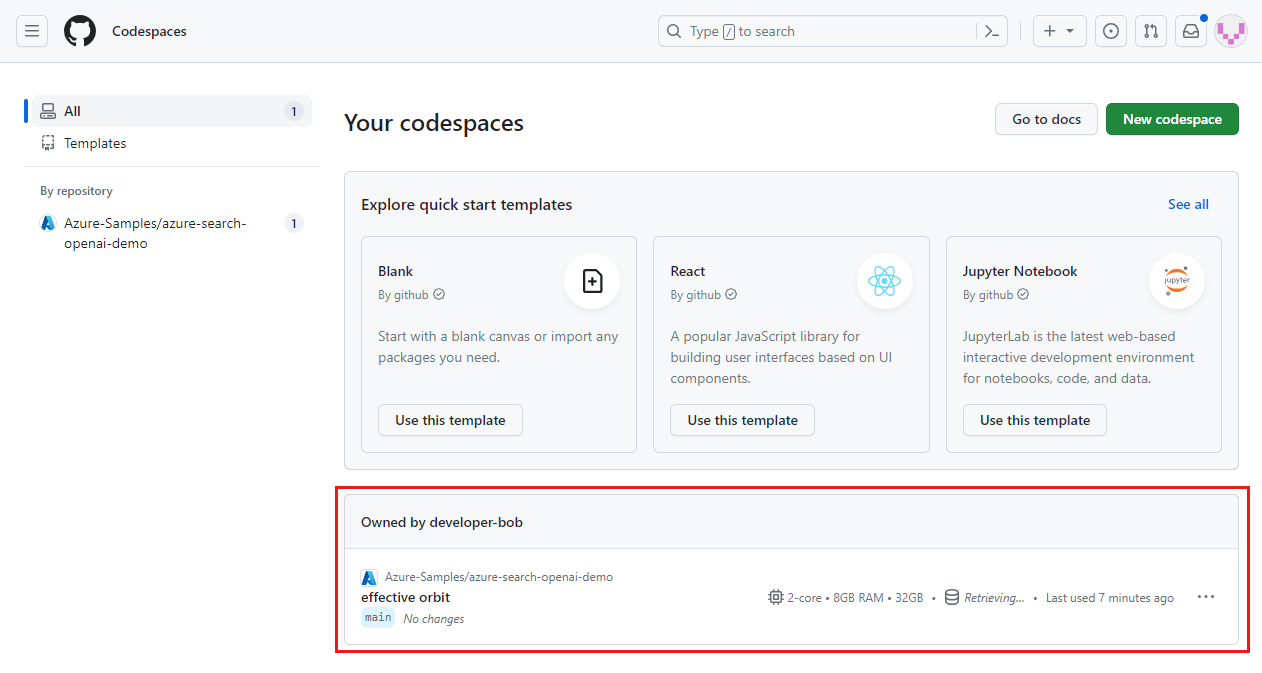
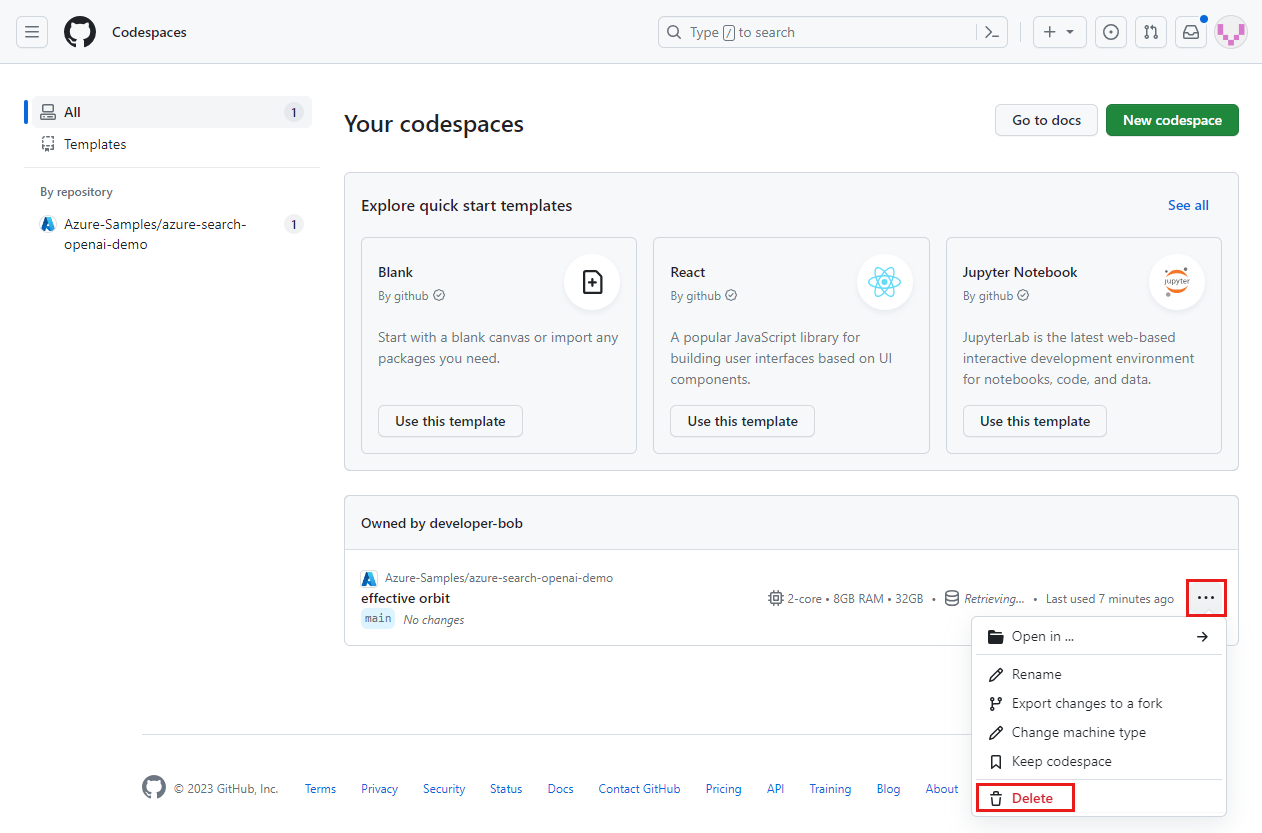
Open the context menu for the codespace and then select Delete.
Get help
This sample repository offers troubleshooting information.
If your issue isn't addressed, log your issue to the repository's Issues.
Next steps
- Get the source code for the sample used in this article
- Build a chat app with Azure OpenAI best practice solution architecture
- Access control in Generative AI Apps with Azure AI Search
- Build an Enterprise ready OpenAI solution with Azure API Management
- Outperforming vector search with hybrid retrieval and ranking capabilities
Collaborate with us on GitHub
The source for this content can be found on GitHub, where you can also create and review issues and pull requests. For more information, see our contributor guide.