Note
Access to this page requires authorization. You can try signing in or changing directories.
Access to this page requires authorization. You can try changing directories.
Azure Migrate application and code assessment for .NET helps you to identify any issues your application might have when it is ported to Azure and improve the performance, scalability and security by suggesting modern, cloud-native solutions.
The tool is available as a Visual Studio extension and a CLI tool.
This guide describes how to use the CLI tool to scan your application for possible incompatibilities with Azure.
If you have not installed the .NET CLI tool, please follow these instructions first.
Scan your application
The application and code assessment for .NET CLI tool lets you decide which projects in your solution to scan to identify migration opportunities to Azure. Follow these steps to scan your application.
In CLI type
appcat analyzeand press Enter.Note
If this is your first time running application and code assessment for .NET, you will see an informational message about telemetry and how to opt-out if you should want to.
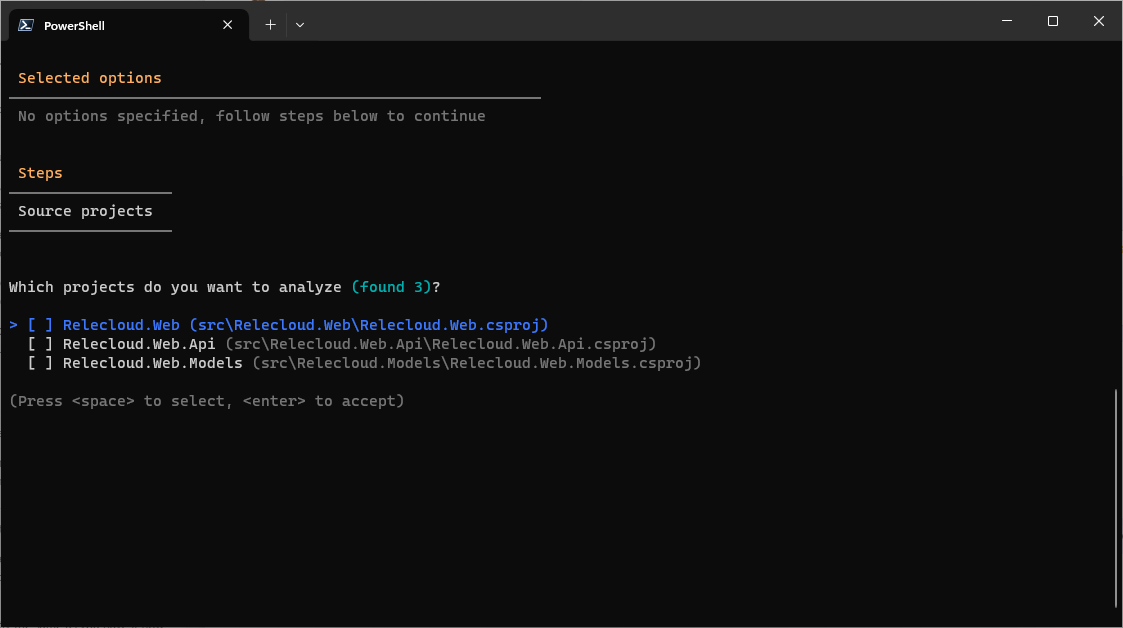
A screen is presented that allows you to pick the projects in your solution to analyze. Use the arrow keys to highlight individual projects and press Space to select them. Press Enter when you're ready.
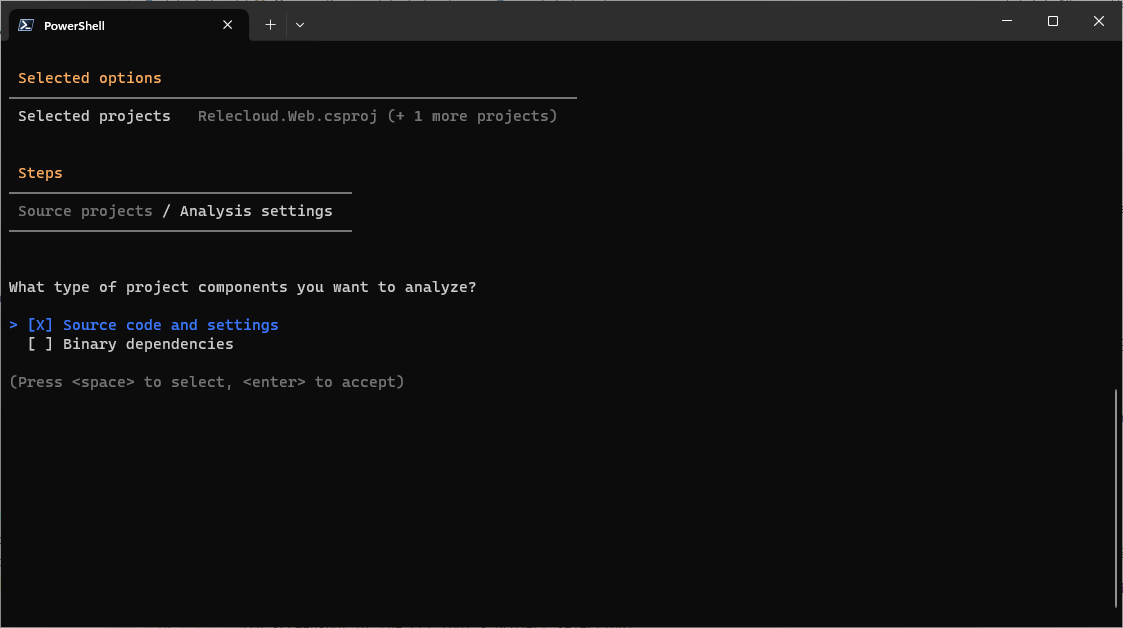
Next you'll be presented with the option to analyze Source code and settings, Binary dependencies, or both. Make your choice and press Enter.
Note
The source code and settings option will only scan the source code in the projects you selected on the previous screen. The Binary dependencies option will scan any dependencies (such as NuGet packages) your projects rely on. You can expect to see many more issues identified when binary dependencies is selected. This option can create some "noise" since it will also identify potential compatibility issues of the binaries that are not necessarily apply to your application.
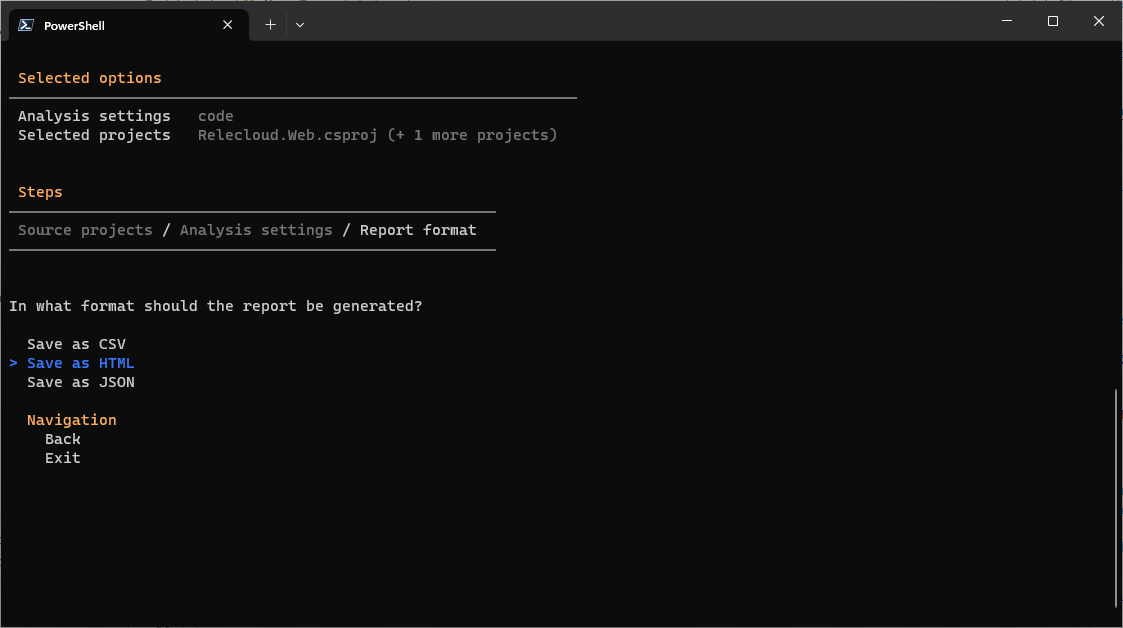
You'll then be prompted to generate a report with the results of the analysis. The output can be formatted as CSV, HTML, or JSON. Press Enter.
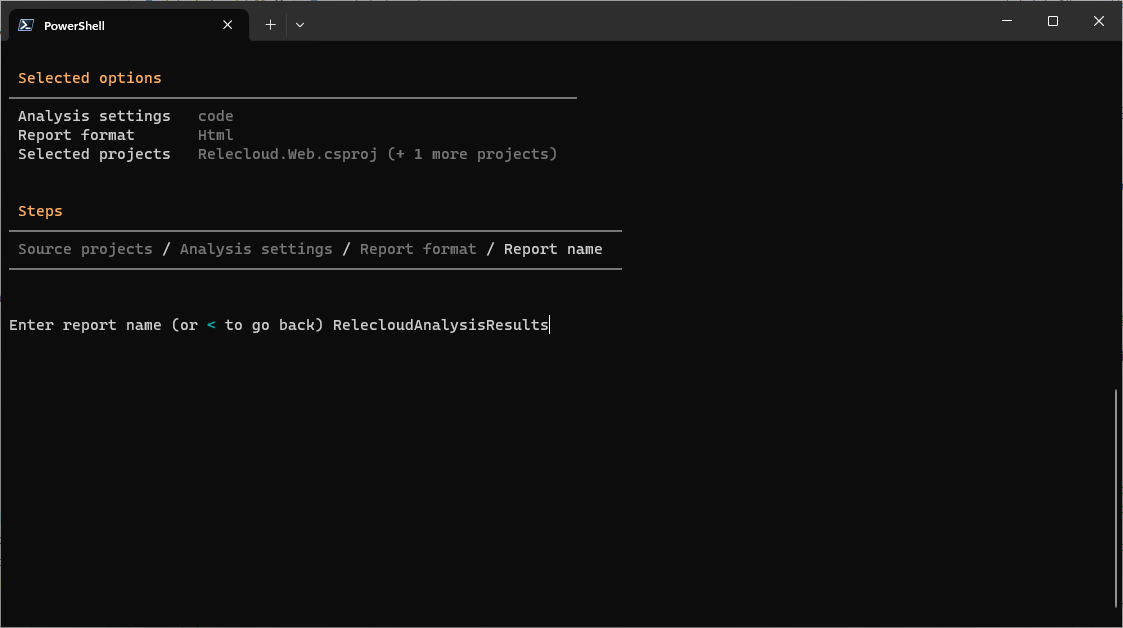
You'll be prompted for a report name. Input the name and press Enter.
Finally, you'll be asked whether you want to perform the scan. Press y to continue, or n to go back and change options.
Once the analysis completes, the report is saved, and a summary of the results are displayed.

Next Steps
Interpret the results
For information on how to interpret results, see Interpret the analysis results from the Azure Migrate application and code assessment for .NET.
Collaborate with us on GitHub
The source for this content can be found on GitHub, where you can also create and review issues and pull requests. For more information, see our contributor guide.