Note
Access to this page requires authorization. You can try signing in or changing directories.
Access to this page requires authorization. You can try changing directories.
This article describes the most common warning messages and issues that occur while configuring and running the Android Emulator. Also, it describes solutions for resolving these errors and various troubleshooting tips to help you diagnose emulator problems. For more information, see Troubleshoot known issues with Android Emulator on developer.android.com.
Deployment issues on Windows
Some error messages may be displayed by the emulator when you deploy your app. The most common errors and solutions are explained here.
Deployment errors
If you see an error about a failure to install the APK on the emulator or a failure to run the Android Debug Bridge (adb), verify that the Android SDK can connect to your emulator. To verify emulator connectivity, use the following steps:
Launch the emulator from the Android Device Manager (select your virtual device and select Start).
Open a command prompt and go to the folder where adb is installed. If the Android SDK is installed at its default location, adb is located at C:\Program Files (x86)\Android\android-sdk\platform-tools\adb.exe; if not, modify this path for the location of the Android SDK on your computer.
Type the following command:
adb devicesIf the emulator is accessible from the Android SDK, the emulator should appear in the list of attached devices. For example:
List of devices attached
emulator-5554   device
If the emulator doesn't appear in this list, start the Android SDK Manager, apply all updates, then try launching the emulator again.
MMIO access error
If the message An MMIO access error has occurred is displayed, restart the emulator.
Missing Google Play Services
If the emulated Android device doesn't have Google Play Services or Google Play Store installed, you probably created a virtual device that excluded these packages. When you create a virtual device, be sure to select one or both of the following options:
- Google APIs—includes Google Play Services in the virtual device.
- Google Play Store–includes Google Play Store in the virtual device.
For example, this virtual device will include Google Play Services and Google Play Store:

Note
Google Play Store images are available only for some base device types such as Pixel, Pixel 2, Nexus 5, and Nexus 5X.
Performance issues
Performance issues are typically caused by one of the following problems:
- The emulator is running without hardware acceleration.
- The virtual device running in the emulator using an Arm-based image.
The following sections cover these scenarios in more detail.
Hardware acceleration isn't enabled
When you start a virtual device, and you don't have hardware acceleration enabled, the Device Manager displays an error dialog similar to the following image:
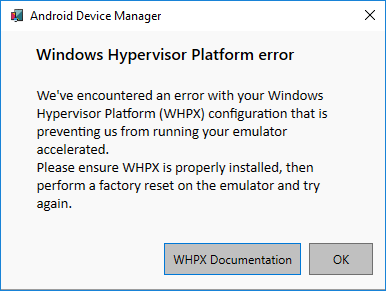
To fix this error, follow the troubleshooting steps in the Hardware acceleration issues section.
Hardware acceleration issues
When using hardware acceleration, you may run into configuration problems or conflicts with other software on your computer. The first step in troubleshooting is verifying that hardware acceleration is enabled. You can use the Android's SDK to check this setting. Open a command prompt and entering the following command:
"C:\Program Files (x86)\Android\android-sdk\emulator\emulator-check.exe" accel
This command assumes that the Android SDK is installed at the default location of C:\Program Files (x86)\Android\android-sdk. If the Android SDK is installed elsewhere, modify the preceding command to the correct location.
Tip
Make sure the Android Emulator is up to date. From Visual Studio, press Tools > Android > Android SDK Manager. Select the Tools tab and see if the Android Emulator entry has an update available.
Incorrect BIOS settings
If the BIOS hasn't been configured properly to support hardware acceleration, a message similar to the following example will be displayed when you run the emulator-check.exe accel command:
VT feature disabled in BIOS/UEFI
To correct this problem, reboot into your computer's BIOS and enable the following options:
- Virtualization Technology (may have a different label depending on motherboard manufacturer).
- Hardware Enforced Data Execution Prevention.
If problems still occur because of issues related to Hyper-V, see the following section.
Hyper-V issues
In some cases, enabling both Hyper-V and Windows Hypervisor Platform in the Turn Windows features on or off dialog may not properly enable Hyper-V. To verify that Hyper-V is enabled, use the following steps:
Enter PowerShell in the Windows search box.
Right-click Windows PowerShell in the search results and select Run as administrator.
In the PowerShell console, enter the following command:
Get-WindowsOptionalFeature -FeatureName Microsoft-Hyper-V-All -OnlineIf Hyper-V isn't enabled, a message similar to the following example will be displayed to indicate that the state of Hyper-V is Disabled:
FeatureName      : Microsoft-Hyper-V-All
DisplayName      : Hyper-V
Description      : Provides services and management tools for creating and running virtual machines and their resources.
RestartRequired  : Possible
State            : Disabled
CustomProperties :
In the PowerShell console, enter the following command:
Get-WindowsOptionalFeature -FeatureName HypervisorPlatform -OnlineIf the Hypervisor isn't enabled, a message similar to the following example will be displayed to indicate that the state of HypervisorPlatform is Disabled:
FeatureName      : HypervisorPlatform
DisplayName      : Windows Hypervisor Platform
Description      : Enables virtualization software to run on the Windows hypervisor
RestartRequired  : Possible
State            : Disabled
CustomProperties :
If Hyper-V or HypervisorPlatform aren't enabled, use the following PowerShell commands to enable them:
Enable-WindowsOptionalFeature -Online -FeatureName Microsoft-Hyper-V -All
Enable-WindowsOptionalFeature -Online -FeatureName HypervisorPlatform -All
After these commands complete, reboot.
For more information about enabling Hyper-V (including techniques for enabling Hyper-V using the Deployment Image Servicing and Management tool), see Install Hyper-V.
More troubleshooting tips
The following suggestions are often helpful in diagnosing Android emulator issues.
Starting the emulator from the command line
If the emulator isn't already running, you can start it from the command line (rather than from within Visual Studio) to view its output. Typically, Android emulator AVD images are stored at the following location: %userprofile%\.android\avd.
You can launch the emulator with an AVD image from this location by passing in the folder name of the AVD. For example, this command launches an AVD named Pixel_API_27:
"C:\Program Files (x86)\Android\android-sdk\emulator\emulator.exe" -partition-size 2000 -no-boot-anim -verbose -feature WindowsHypervisorPlatform -avd pixel_5_-_api_30 -prop monodroid.avdname=pixel_5_-_api_30
This command assumes that the Android SDK is installed at the default location of C:\Program Files (x86)\Android\android-sdk. If the Android SDK is installed elsewhere, modify the preceding command to the correct location.
Viewing Device Manager logs
Often you can diagnose emulator problems by viewing the Device Manager logs. These logs are written to the following location: %userprofile%\AppData\Local\Xamarin\Logs\16.0.
You can view each DeviceManager.log file by using a text editor.
Collaborate with us on GitHub
The source for this content can be found on GitHub, where you can also create and review issues and pull requests. For more information, see our contributor guide.