Note
Access to this page requires authorization. You can try signing in or changing directories.
Access to this page requires authorization. You can try changing directories.
 Browse the sample
Push notifications deliver information from a backend system to a client app. Apple, Google, and other platforms each have their own Push Notification Service (PNS). Azure Notification Hubs enable you to centralize notifications across platforms so that your backend app can communicate with a single hub, which takes care of distributing notifications to each PNS.
Azure Notification Hubs require apps to register with the hub and optionally define templates and/or subscribe to tags:
- Performing a device installation links a PNS handle to an identifier in the Azure Notification Hub. For more information about registrations, see Registration management.
- Templates allow devices to specify parameterized message templates. Incoming messages can be customized per device. For more information, see Notification hubs templates.
- Tags can be used to subscribe to message categories such as news, sports, and weather. For more information, see Routing and tag expressions.
In this tutorial you'll use Azure Notification Hubs to send push notifications to a .NET Multi-platform App UI (.NET MAUI) app targeting Android and iOS. An ASP.NET Core Web API backend is used to handle device registration for the client, and to initiate a push notification. These operations are handled using the Microsoft.Azure.NotificationHubs NuGet package. For more information on the overall approach, see Registration management from a backend.
In this tutorial, you:
- Setup push notification services and Azure Notification Hub.
- Create an ASP.NET Core WebAPI backend app.
- Create a .NET MAUI app.
- Configure the Android app for push notifications.
- Configure the iOS app for push notifications.
- Test the app.
- Troubleshoot any setup and configuration issues.
Prerequisites
To complete this tutorial you'll require:
- An Azure account with an active subscription.
- A PC or Mac running the latest version of Visual Studio/Visual Studio Code with the .NET Multi-platform App UI development workload and the ASP.NET and web development workloads installed.
For Android, you must have:
- A developer unlocked physical device, or an emulator, running API 26+ with Google Play Services installed.
For iOS, you must have:
- An active Apple developer Account.
- A Mac running Xcode, along with a valid developer certificate installed into your Keychain.
Then, on iOS you should either have:
An iOS 16+ simulator that runs in macOS 13+ on Mac computers with Apple silicon or T2 processors.
OR
A physical iOS device that's registered to your developer account (running iOS 13.0+).
Your physical device registered in your Apple developer account, and associated with your certificate.
Important
The iOS simulator supports remote notifications in iOS 16+ when running in macOS 13+ on Mac computers with Apple silicon or T2 processors. If you don't meet these hardware requirements you'll require an active Apple developer account and a physical device.
To follow this tutorial you should have familiarity with:
While this tutorial targets Visual Studio, it's possible to follow it using Visual Studio Code on a PC or Mac. However, there will be some differences that need reconciling. For example, descriptions of user interface and workflows, template names, and environment configuration.
Setup push notification services and Azure Notification Hub
In this section, you'll setup Firebase Cloud Messaging and Apple Push Notification Services (APNS). You'll then create and configure an Azure Notification Hub to work with these services.
Create a Firebase project
To create a Firebase project:
In a web browser, sign in to the Firebase console.
In the Firebase console, select the Add project button and create a new Firebase project, entering PushDemo as the Project name.
Note
A unique name will be generated for you. By default this comprises a lowercase variant of the name you provided plus a generated number separated by a dash. You can change this if you want, provided that your edits are still globally unique.
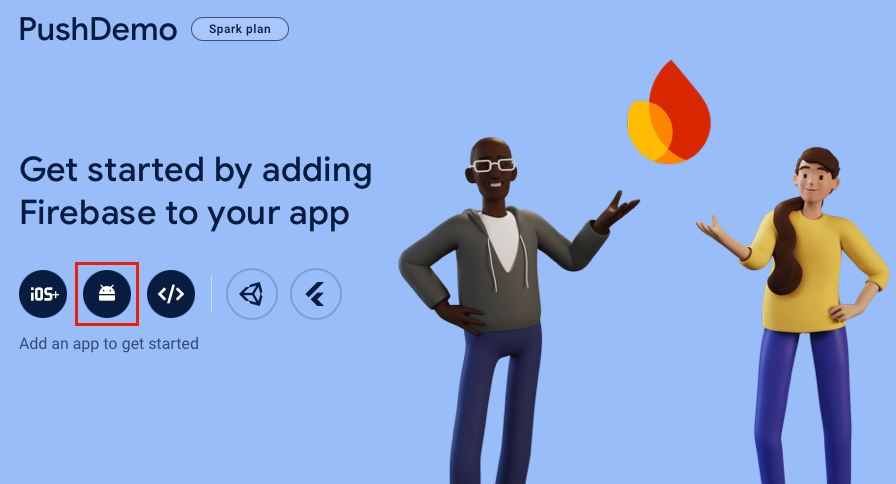
After your project is created, select the Android logo to add Firebase to an Android app:
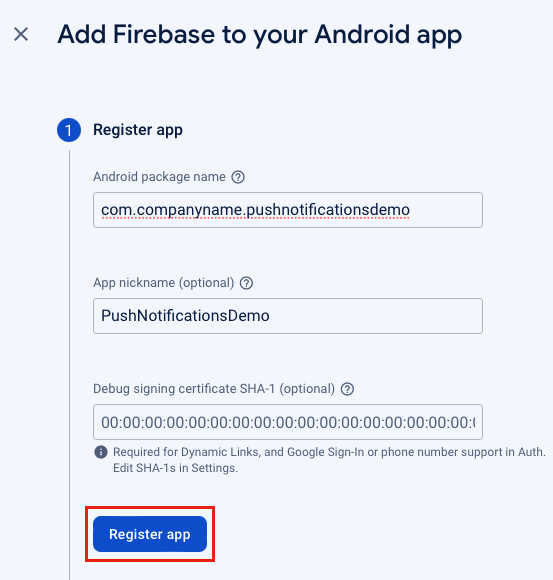
In the Add Firebase to your Android app page, enter a name for your package, optionally an app nickname, and select the Register app button:
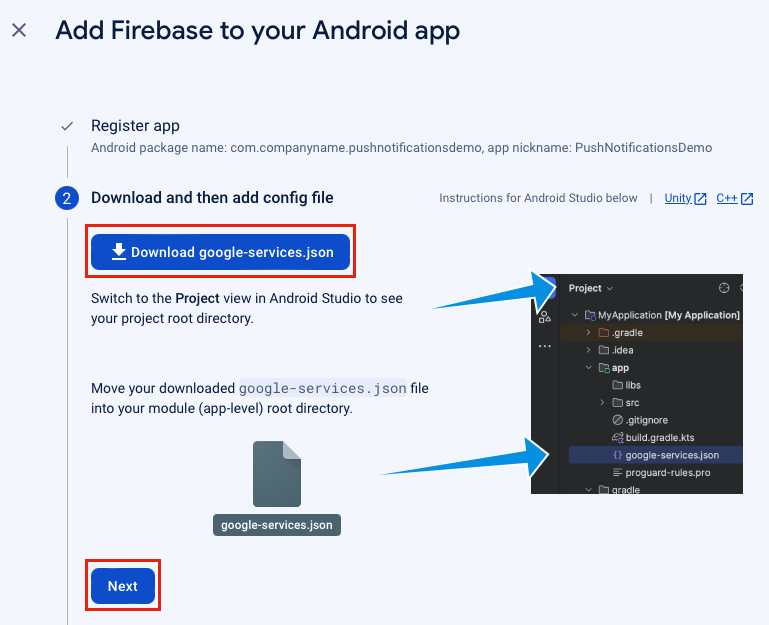
In the Add Firebase to your Android app page, select the Download google-services.json button and save the file to a local folder before selecting the Next button:
In the Add Firebase to your Android app page, select the Next button.
In the Add Firebase to your Android app page, select the Continue to the console button.
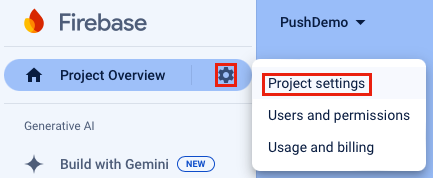
In the Firebase console, select the Project Overview icon and then select Project settings:
In the Project settings, select the Cloud Messaging tab. You'll see that Firebase Cloud Messaging API (V1) is enabled:

In the Project settings, select the Service accounts tab and then select the Generate new private key button.
In the Generate new private key dialog, select the Generate key button:
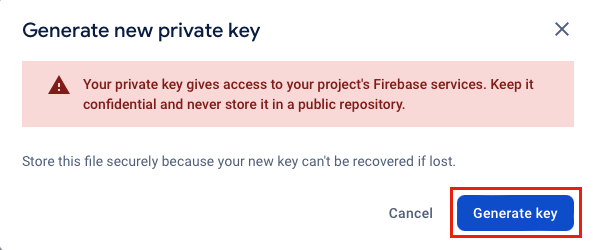
A JSON file will be downloaded, which will contain values you'll enter into your Azure Notification Hub.
Register your iOS app for push notifications
To send push notifications to an iOS app you'll need to register your app with Apple and register for push notifications. This can be accomplished by performing the steps in the following Azure Notification Hub documentation:
- Generate the certificate signing request file
- Register your app for push notifications
- Create a certificate for your notification hub
If you want to receive push notifications on a physical device, you'll also need to create a provisioning profile.
Important
To receive background notifications on iOS you must add the remote notifications background mode to your app. For more information, see Enable the remote notifications capability on developer.apple.com.
Create an Azure Notification Hub
To create a notification hub in the Azure portal:
- In a web browser, sign into the Azure portal.
- In the Azure portal, click the Create a resource button and then search for and choose Notification Hub before selecting the Create button.
- In the Notification Hub page, perform the following steps:
In the Subscription field, select the name of the Azure subscription you want to use, and then select an existing resource group, or create a new one.
In the Namespace Details field, enter a unique name for the new namespace.
In the Notification Hub Details field, type a name for the notification hub. This is required because a namespace contains one or more notification hubs.
In the Location drop-down, select a value that specifies the location in which you want to create the notification hub.
Review the Availability Zones option. If you chose a region that has availability zones, the checkbox is selected by default.
Note
Availability zones is a paid feature, so an additional fee is added to your tier.
Choose a Disaster recovery option: none, paired recovery region, or flexible recovery region. If you choose Paired recovery region, the failover region is displayed. If you select Flexible recovery region, use the drop-down to choose from a list of recovery regions.
Select the Create button. The notification hub will be created.
- In the Azure portal, browse to your newly created notification hub and then to the Manage > Access Policies blade.
- In the Access Policies blade, make a note of the connection string for the
DefaultFullSharedAccessSignaturepolicy. You'll require this later when building a backend service that communicates with your notification hub.
For more information about creating a notification hub, see Create an Azure notification hub in the Azure portal.
Configure Firebase Cloud Messaging in the notification hub
To configure your notification hub to communicate with Firebase Cloud Messaging:
In the Azure portal, browse to your notification hub and select the Settings > Google (FCM v1) blade.
In the Google (FCM v1) blade, enter values for the Private Key, Client Email, and Project ID fields. These values can be found in the private key JSON file you downloaded from Firebase Cloud Messaging:
Azure field JSON key JSON value example Private Key private_keyThis value should begin with -----BEGIN PRIVATE KEY-----\nand end with-----END PRIVATE KEY-----\n.Client Email client_emailfirebase-adminsdk-55sfg@pushdemo-d6ab2.iam.gserviceaccount.comProject ID project_idpushdemo-d6ab2In the Google (FCM v1) blade, select the Save button.
Configure Apple Push Notification Service in the notification hub
In the Azure portal, browse to your notification hub and select the Settings > Apple (APNS) blade. Then follow the appropriate steps based on the approach you chose previously when creating a certificate for the notification hub.
Important
When setting the Application Mode, only choose Production if you want to send push notifications to users who've purchased your app from the store.
Option 1 - Use a .p12 push certificate
- In the Apple (APNS) blade, select the Certificate authentication mode.
- In the Apple (APNS) blade, select the file icon next to the Upload Certificate field. Then select the .p12 file that you exported earlier and upload it.
- In the Apple (APNS) blade, enter the certificate password into the Password field if required.
- In the Apple (APNS) blade, select the Sandbox application mode.
- In the Apple (APNS) blade, select the Save button.
Option 2 - Use token-based authentication
- In the Apple (APNS) blade, select the Token authentication mode.
- In the Apple (APNS) blade, enter the values you previously acquired for the Key Id, Bundle Id, Team Id, and Token fields.
- In the Apple (APNS) blade, select the Sandbox application mode.
- In the Apple (APNS) blade, select the Save button.
Create an ASP.NET Core Web API backend app
In this section you'll create an ASP.NET Core Web API backend to handle device installation and sending notifications to the .NET MAUI app.
Create a web API project
To create a web API project:
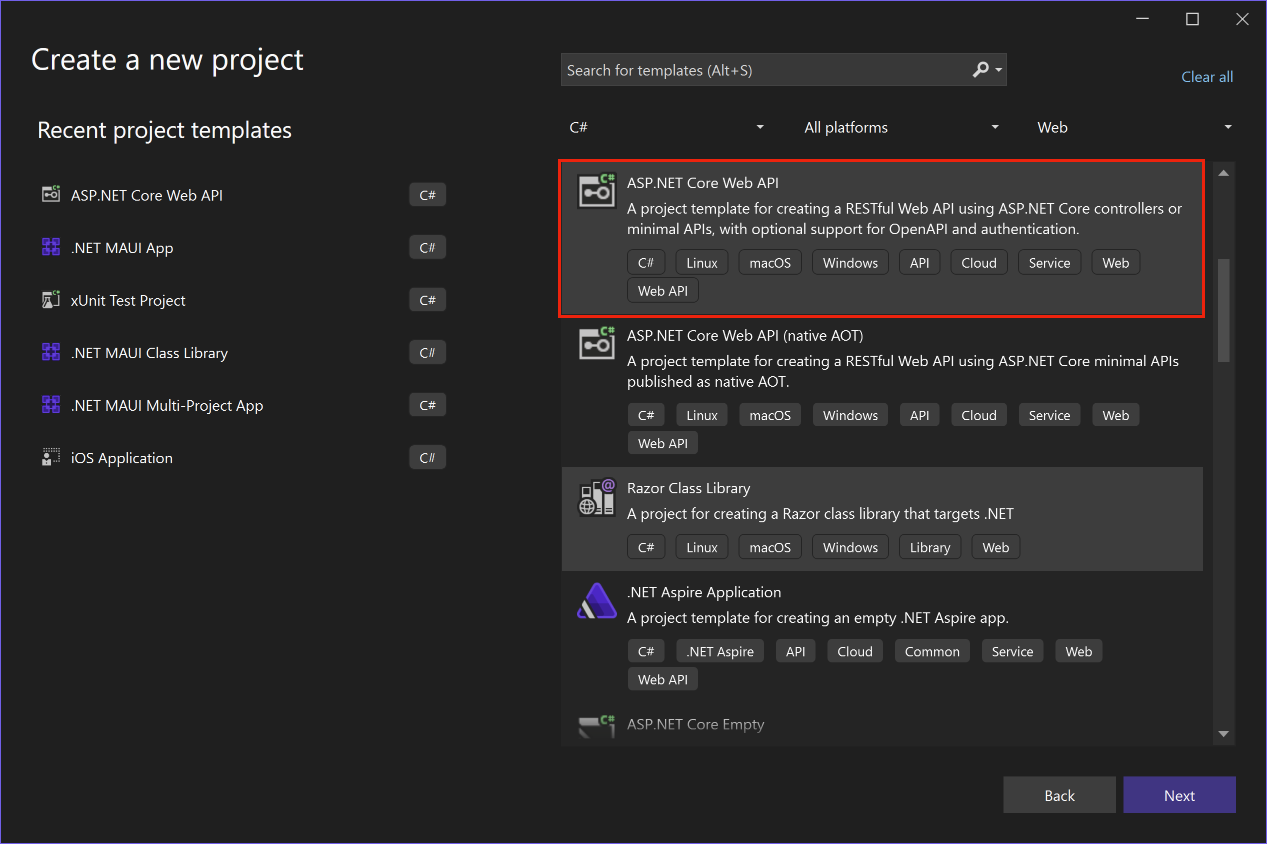
In Visual Studio, create a ASP.NET Core Web API project:
In the Configure your new project dialog, name the project PushNotificationsAPI.
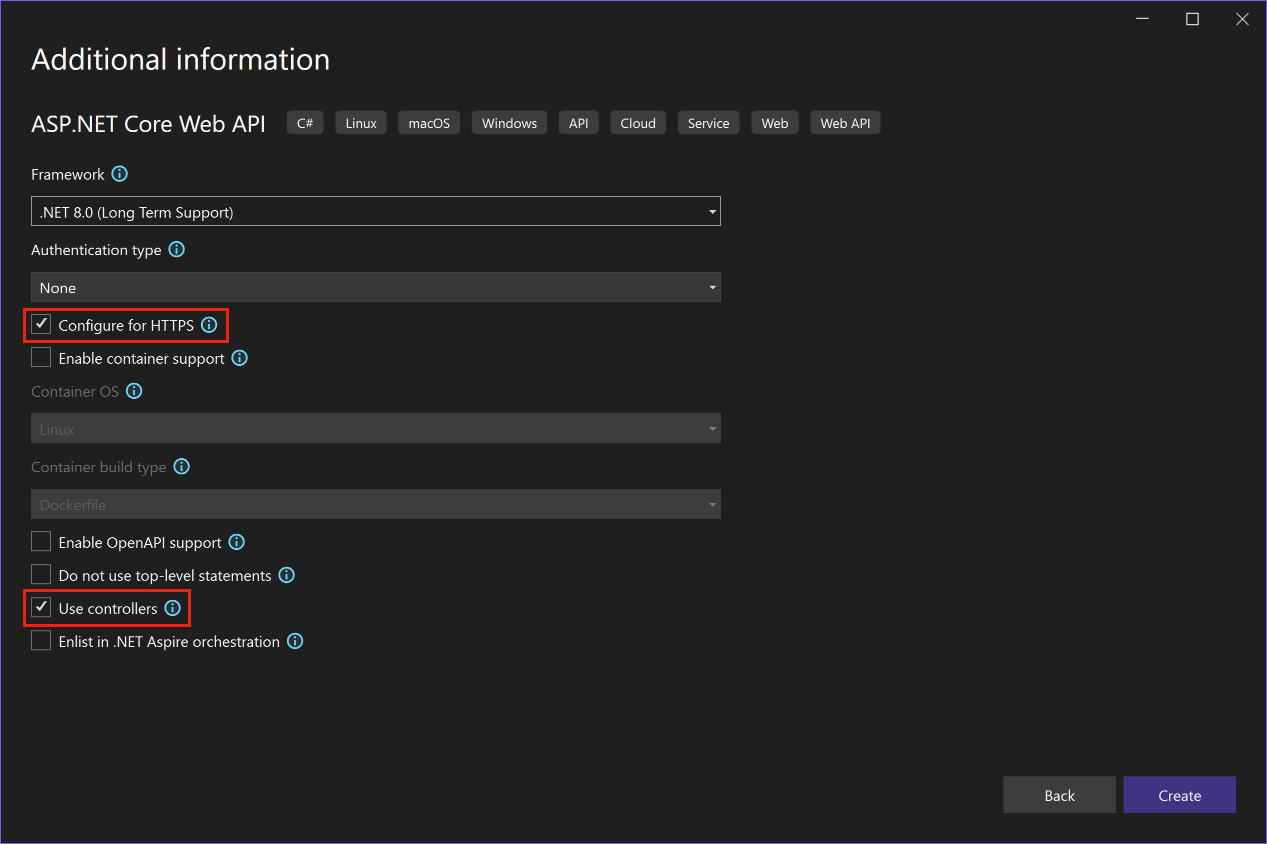
In the Additional information dialog ensure that the Configure for HTTPS and Use controllers checkboxes are enabled:
Once the project has been created, press F5 to run the project.
The app is currently configured to use the
WeatherForecastControlleras thelaunchUrl, which is set in the Properties\launchSettings.json file. The app will launch in a web browser, and will display some JSON data.Important
When you run an ASP.NET Core project that uses HTTPS, Visual Studio will detect if the ASP.NET Core HTTPS development certificate is installed to your local user certificate store, and will offer to install it and trust it if it's missing.
Close the web browser.
In Solution Explorer, expand the Controllers folder and delete WeatherForecastController.cs.
In Solution Explorer, in the root of the project, delete WeatherForecast.cs.
Open a command window, and navigate to the directory that contains the project file. Then, run the following commands:
dotnet user-secrets init
dotnet user-secrets set "NotificationHub:Name" <value>
dotnet user-secrets set "NotificationHub:ConnectionString" "<value>"
Replace the placeholder values with your own Azure Notification Hub name and connection string values. These can be found at the following locations in your Azure Notification Hub:
Configuration value Location NotificationHub:NameSee Name in the Essentials summary at the top of the Overview page. NotificationHub:ConnectionStringSee DefaultFullSharedAccessSignature* in the Access Policies page. This sets up local configuration values using the Secret Manager tool. This decouples your Azure Notification Hub secrets from the Visual Studio solution, to ensure that they don't end up in source control.
Tip
For production scenarios, consider a service such as Azure KeyVault to securely store the connection string.
Authenticate clients with an API key
To authenticate clients with an API key:
Open a command window, and navigate to the directory that contains the project file. Then, run the following commands:
dotnet user-secrets set "Authentication:ApiKey" <value>Replace the placeholder value with your API key, which can be any value.
In Visual Studio, add a new folder named Authentication to your project, and then add a new class named
ApiKeyAuthOptionsto the Authentication folder and replace its code with the following code:using Microsoft.AspNetCore.Authentication; namespace PushNotificationsAPI.Authentication; public class ApiKeyAuthOptions : AuthenticationSchemeOptions { public const string DefaultScheme = "ApiKey"; public string Scheme => DefaultScheme; public string ApiKey { get; set; } }In Visual Studio, add a new class named
ApiKeyAuthHandlerto the Authentication folder and replace its code with the following code:using Microsoft.AspNetCore.Authentication; using Microsoft.Extensions.Options; using System.Security.Claims; using System.Text.Encodings.Web; namespace PushNotificationsAPI.Authentication; public class ApiKeyAuthHandler : AuthenticationHandler<ApiKeyAuthOptions> { const string ApiKeyIdentifier = "apikey"; public ApiKeyAuthHandler( IOptionsMonitor<ApiKeyAuthOptions> options, ILoggerFactory logger, UrlEncoder encoder) : base(options, logger, encoder) { } protected override Task<AuthenticateResult> HandleAuthenticateAsync() { string key = string.Empty; if (Request.Headers[ApiKeyIdentifier].Any()) { key = Request.Headers[ApiKeyIdentifier].FirstOrDefault(); } else if (Request.Query.ContainsKey(ApiKeyIdentifier)) { if (Request.Query.TryGetValue(ApiKeyIdentifier, out var queryKey)) key = queryKey; } if (string.IsNullOrWhiteSpace(key)) return Task.FromResult(AuthenticateResult.Fail("No api key provided")); if (!string.Equals(key, Options.ApiKey, StringComparison.Ordinal)) return Task.FromResult(AuthenticateResult.Fail("Invalid api key.")); var identities = new List<ClaimsIdentity> { new ClaimsIdentity("ApiKeyIdentity") }; var ticket = new AuthenticationTicket(new ClaimsPrincipal(identities), Options.Scheme); return Task.FromResult(AuthenticateResult.Success(ticket)); } }An authentication handler is a type that implements the behavior of a scheme, which in this case is a custom API key scheme.
In Visual Studio, add a new class named
AuthenticationBuilderExtensionsto the Authentication folder and replace its code with the following code:using Microsoft.AspNetCore.Authentication; namespace PushNotificationsAPI.Authentication; public static class AuthenticationBuilderExtensions { public static AuthenticationBuilder AddApiKeyAuth( this AuthenticationBuilder builder, Action<ApiKeyAuthOptions> configureOptions) { return builder .AddScheme<ApiKeyAuthOptions, ApiKeyAuthHandler>( ApiKeyAuthOptions.DefaultScheme, configureOptions); } }This extension method will be used to simplify the middleware configuration code in Program.cs.
In Visual Studio, open Program.cs and update the code to configure the API key authentication below the call to the
builder.Services.AddControllersmethod:using PushNotificationsAPI.Authentication; builder.Services.AddControllers(); builder.Services.AddAuthentication(options => { options.DefaultAuthenticateScheme = ApiKeyAuthOptions.DefaultScheme; options.DefaultChallengeScheme = ApiKeyAuthOptions.DefaultScheme; }).AddApiKeyAuth(builder.Configuration.GetSection("Authentication").Bind);In Program.cs, update the code below the
// Configure the HTTP request pipelinecomment to call theUseRouting,UseAuthentication, andMapControllersextension methods:// Configure the HTTP request pipeline. app.UseHttpsRedirection(); app.UseRouting(); app.UseAuthentication(); app.UseAuthorization(); app.MapControllers(); app.Run();The
UseAuthenticationextension method registers the middleware that uses the previously registered authentication scheme.UseAuthenticationmust be called before any middleware that depends on users being authenticated.Note
While an API key isn't as secure as a token, it will suffice for this tutorial, and be easily configured via the ASP.NET Middleware.
Add and configure services
To add and configure services in your web API backend app:
In Visual Studio, add the Microsoft.Azure.NotificationHubs NuGet package to your project. This NuGet package is used to access your notification hub, encapsulated within a service.
In Visual Studio, add a new folder named Models to your project, and then add a new class named
PushTemplatesto the Models folder and replace its code with the following code:namespace PushNotificationsAPI.Models; public class PushTemplates { public class Generic { public const string Android = "{ \"message\" : { \"notification\" : { \"title\" : \"PushDemo\", \"body\" : \"$(alertMessage)\"}, \"data\" : { \"action\" : \"$(alertAction)\" } } }"; public const string iOS = "{ \"aps\" : {\"alert\" : \"$(alertMessage)\"}, \"action\" : \"$(alertAction)\" }"; } public class Silent { public const string Android = "{ \"message\" : { \"data\" : {\"message\" : \"$(alertMessage)\", \"action\" : \"$(alertAction)\"} } }"; public const string iOS = "{ \"aps\" : {\"content-available\" : 1, \"apns-priority\": 5, \"sound\" : \"\", \"badge\" : 0}, \"message\" : \"$(alertMessage)\", \"action\" : \"$(alertAction)\" }"; } }The
PushTemplatesclass contains tokenized notification payloads for generic and silent push notifications. These payloads are defined outside of the installation to allow experimentation without having to update existing installations via the service. Handling changes to installations in this way is out of scope for this article. In product scenarios, consider using custom templates.In Visual Studio, add a new class named
DeviceInstallationto the Models folder and replace its code with the following code:using System.ComponentModel.DataAnnotations; namespace PushNotificationsAPI.Models; public class DeviceInstallation { [Required] public string InstallationId { get; set; } [Required] public string Platform { get; set; } [Required] public string PushChannel { get; set; } public IList<string> Tags { get; set; } = Array.Empty<string>(); }In Visual Studio, add a new class named
NotificationRequestto the Models folder and replace its code with the following code:namespace PushNotificationsAPI.Models; public class NotificationRequest { public string Text { get; set; } public string Action { get; set; } public string[] Tags { get; set; } = Array.Empty<string>(); public bool Silent { get; set; } }In Visual Studio, add a new class named
NotificationHubOptionsto the Models folder and replace its code with the following code:using System.ComponentModel.DataAnnotations; namespace PushNotificationsAPI.Models; public class NotificationHubOptions { [Required] public string Name { get; set; } [Required] public string ConnectionString { get; set; } }In Visual Studio, add a new folder named Services to your project, and then add a new interface named
INotificationServiceto the Services folder and replace its code with the following code:using PushNotificationsAPI.Models; namespace PushNotificationsAPI.Services; public interface INotificationService { Task<bool> CreateOrUpdateInstallationAsync(DeviceInstallation deviceInstallation, CancellationToken token); Task<bool> DeleteInstallationByIdAsync(string installationId, CancellationToken token); Task<bool> RequestNotificationAsync(NotificationRequest notificationRequest, CancellationToken token); }In Visual Studio, add a new class named
NotificationHubServiceto the Services folder and replace its code with the following code:using Microsoft.Extensions.Options; using Microsoft.Azure.NotificationHubs; using PushNotificationsAPI.Models; namespace PushNotificationsAPI.Services; public class NotificationHubService : INotificationService { readonly NotificationHubClient _hub; readonly Dictionary<string, NotificationPlatform> _installationPlatform; readonly ILogger<NotificationHubService> _logger; public NotificationHubService(IOptions<NotificationHubOptions> options, ILogger<NotificationHubService> logger) { _logger = logger; _hub = NotificationHubClient.CreateClientFromConnectionString(options.Value.ConnectionString, options.Value.Name); _installationPlatform = new Dictionary<string, NotificationPlatform> { { nameof(NotificationPlatform.Apns).ToLower(), NotificationPlatform.Apns }, { nameof(NotificationPlatform.FcmV1).ToLower(), NotificationPlatform.FcmV1 } }; } public async Task<bool> CreateOrUpdateInstallationAsync(DeviceInstallation deviceInstallation, CancellationToken token) { if (string.IsNullOrWhiteSpace(deviceInstallation?.InstallationId) || string.IsNullOrWhiteSpace(deviceInstallation?.Platform) || string.IsNullOrWhiteSpace(deviceInstallation?.PushChannel)) return false; var installation = new Installation() { InstallationId = deviceInstallation.InstallationId, PushChannel = deviceInstallation.PushChannel, Tags = deviceInstallation.Tags }; if (_installationPlatform.TryGetValue(deviceInstallation.Platform, out var platform)) installation.Platform = platform; else return false; try { await _hub.CreateOrUpdateInstallationAsync(installation, token); } catch { return false; } return true; } public async Task<bool> DeleteInstallationByIdAsync(string installationId, CancellationToken token) { if (string.IsNullOrWhiteSpace(installationId)) return false; try { await _hub.DeleteInstallationAsync(installationId, token); } catch { return false; } return true; } public async Task<bool> RequestNotificationAsync(NotificationRequest notificationRequest, CancellationToken token) { if ((notificationRequest.Silent && string.IsNullOrWhiteSpace(notificationRequest?.Action)) || (!notificationRequest.Silent && (string.IsNullOrWhiteSpace(notificationRequest?.Text)) || string.IsNullOrWhiteSpace(notificationRequest?.Action))) return false; var androidPushTemplate = notificationRequest.Silent ? PushTemplates.Silent.Android : PushTemplates.Generic.Android; var iOSPushTemplate = notificationRequest.Silent ? PushTemplates.Silent.iOS : PushTemplates.Generic.iOS; var androidPayload = PrepareNotificationPayload( androidPushTemplate, notificationRequest.Text, notificationRequest.Action); var iOSPayload = PrepareNotificationPayload( iOSPushTemplate, notificationRequest.Text, notificationRequest.Action); try { if (notificationRequest.Tags.Length == 0) { // This will broadcast to all users registered in the notification hub await SendPlatformNotificationsAsync(androidPayload, iOSPayload, token); } else if (notificationRequest.Tags.Length <= 20) { await SendPlatformNotificationsAsync(androidPayload, iOSPayload, notificationRequest.Tags, token); } else { var notificationTasks = notificationRequest.Tags .Select((value, index) => (value, index)) .GroupBy(g => g.index / 20, i => i.value) .Select(tags => SendPlatformNotificationsAsync(androidPayload, iOSPayload, tags, token)); await Task.WhenAll(notificationTasks); } return true; } catch (Exception e) { _logger.LogError(e, "Unexpected error sending notification"); return false; } } string PrepareNotificationPayload(string template, string text, string action) => template .Replace("$(alertMessage)", text, StringComparison.InvariantCulture) .Replace("$(alertAction)", action, StringComparison.InvariantCulture); Task SendPlatformNotificationsAsync(string androidPayload, string iOSPayload, CancellationToken token) { var sendTasks = new Task[] { _hub.SendFcmV1NativeNotificationAsync(androidPayload, token), _hub.SendAppleNativeNotificationAsync(iOSPayload, token) }; return Task.WhenAll(sendTasks); } Task SendPlatformNotificationsAsync(string androidPayload, string iOSPayload, IEnumerable<string> tags, CancellationToken token) { var sendTasks = new Task[] { _hub.SendFcmV1NativeNotificationAsync(androidPayload, tags, token), _hub.SendAppleNativeNotificationAsync(iOSPayload, tags, token) }; return Task.WhenAll(sendTasks); } }The tag expression provided to the
SendTemplateNotificationsAsyncmethod is limited to 20 tags if they only contain ORs. Otherwise they are limited to 6 tags. For more information, see Routing and Tag Expressions.In Visual Studio, open Program.cs and update the code to add the
NotificationHubServiceas a singleton implementation ofINotificationServicebelow the call to thebuilder.Services.AddAuthenticationmethod:using PushNotificationsAPI.Authentication; using PushNotificationsAPI.Services; using PushNotificationsAPI.Models; var builder = WebApplication.CreateBuilder(args); // Add services to the container. builder.Services.AddControllers(); builder.Services.AddAuthentication(options => { options.DefaultAuthenticateScheme = ApiKeyAuthOptions.DefaultScheme; options.DefaultChallengeScheme = ApiKeyAuthOptions.DefaultScheme; }).AddApiKeyAuth(builder.Configuration.GetSection("Authentication").Bind); builder.Services.AddSingleton<INotificationService, NotificationHubService>(); builder.Services.AddOptions<NotificationHubOptions>() .Configure(builder.Configuration.GetSection("NotificationHub").Bind) .ValidateDataAnnotations(); var app = builder.Build();
Create the notifications REST API
To create the notifications REST API:
In Visual Studio, add a new Controller named
NotificationsControllerto the Controllers folder.Tip
Choose the API Controller with read/write actions template.
In the NotificationsController.cs file, add the following
usingstatements at the top of the file:using System.ComponentModel.DataAnnotations; using System.Net; using Microsoft.AspNetCore.Authorization; using Microsoft.AspNetCore.Mvc; using PushNotificationsAPI.Models; using PushNotificationsAPI.Services;In the NotificationsController.cs file, add the
Authorizeattribute to theNotificationsControllerclass:[Authorize] [ApiController] [Route("api/[controller]")] public class NotificationsController : ControllerBaseIn the NotificationsController.cs file, update the
NotificationsContollerconstructor to accept the registered instance ofINotificationServiceas an argument, and assign it to a readonly member:readonly INotificationService _notificationService; public NotificationsController(INotificationService notificationService) { _notificationService = notificationService; }In the NotificationsContoller.cs file, replace all the methods with the following code:
[HttpPut]
[Route("installations")]
[ProducesResponseType((int)HttpStatusCode.OK)]
[ProducesResponseType((int)HttpStatusCode.BadRequest)]
[ProducesResponseType((int)HttpStatusCode.UnprocessableEntity)]
public async Task<IActionResult> UpdateInstallation(
    [Required] DeviceInstallation deviceInstallation)
{
    var success = await _notificationService
        .CreateOrUpdateInstallationAsync(deviceInstallation, HttpContext.RequestAborted);

    if (!success)
        return new UnprocessableEntityResult();

    return new OkResult();
}

[HttpDelete()]
[Route("installations/{installationId}")]
[ProducesResponseType((int)HttpStatusCode.OK)]
[ProducesResponseType((int)HttpStatusCode.BadRequest)]
[ProducesResponseType((int)HttpStatusCode.UnprocessableEntity)]
public async Task<ActionResult> DeleteInstallation(
    [Required][FromRoute] string installationId)
{
    // Probably want to ensure deletion even if the connection is broken
    var success = await _notificationService
        .DeleteInstallationByIdAsync(installationId, CancellationToken.None);

    if (!success)
        return new UnprocessableEntityResult();

    return new OkResult();
}

[HttpPost]
[Route("requests")]
[ProducesResponseType((int)HttpStatusCode.OK)]
[ProducesResponseType((int)HttpStatusCode.BadRequest)]
[ProducesResponseType((int)HttpStatusCode.UnprocessableEntity)]
public async Task<IActionResult> RequestPush(
    [Required] NotificationRequest notificationRequest)
{
    if ((notificationRequest.Silent &&
        string.IsNullOrWhiteSpace(notificationRequest?.Action)) ||
        (!notificationRequest.Silent &&
        string.IsNullOrWhiteSpace(notificationRequest?.Text)))
        return new BadRequestResult();

    var success = await _notificationService
        .RequestNotificationAsync(notificationRequest, HttpContext.RequestAborted);

    if (!success)
        return new UnprocessableEntityResult();

    return new OkResult();
}
In the Properties/launchSettings.json file, change the
launchUrlproperty for each profile fromweatherforecasttoapi/notifications.
Create an API app
You'll now create an API app in Azure App Service to host your backend service. This can be accomplished directly from Visual Studio or Visual Studio Code, with Azure CLI, Azure PowerShell, Azure Developer CLI, and through the Azure Portal. For more information, see Publish your web app.
To create an API app in the Azure portal:
In a web browser, sign into the Azure portal.
In the Azure portal, click the Create a resource button and then search for and choose API App before selecting the Create button.
In the Create API App page, update the following fields before selecting the Create button:
Field Action Subscription Choose the same target subscription you created the notification hub in. Resource Group Choose the same resource group you created the notification hub in. Name Enter a globally unique name. Runtime stack Ensure that the latest version of .NET is selected. Once the API App has been provisioned, navigate to the resource.
On the Overview page, make a note of the default domain value. This URL is your backend endpoint that will be consumed from your .NET MAUI app. The URL will use the API app name that you specified, with the format
https://<app_name>.azurewebsites.net.In the Azure portal, browse to the Settings > Environment variables blade and then ensure that the App settings tab is selected. Then use the Add button to add the following settings:
Name Value Authentication:ApiKey <api_key_value> NotificationHub:Name <hub_name_value> NotificationHub:ConnectionString <hub_connection_string_value> Important
The
Authentication:ApiKeyapplication setting has been added for simplicity. For production scenarios, consider a service such as Azure KeyVault to securely store the connection string.Once all of these settings have been entered, select the Apply button and then the Confirm button.
Publish the backend service
To publish your backend service to Azure App Service:
- In Visual Studio, right-click your project and select Publish.
- In the Publish wizard, select Azure and then the Next button.
- In the Publish wizard, select Azure App Service (Windows) and then the Next button.
- In the Publish wizard, follow the authentication flow to connect Visual Studio to your Azure subscription and publish the app.
Visual Studio builds, packages, and publishes the app to Azure, and then launches the app in your default browser. For more information, see Publish an ASP.NET web app.
Tip
You can download a publish profile for your app from the Overview blade of your API app in the Azure portal and then use the profile in Visual Studio to publish your app.
Validate the published API
To check that the API app has been published correctly you should use the REST tooling of your choice to send a POST request to the following address:
https://<app_name>.azurewebsites.net/api/notifications/requests
Note
The base address is https://<app_name>.azurewebsites.net.
Ensure that you configure the request headers to include the key apikey and its value, set the body to raw, and use the following placeholder JSON content:
{}
You should receive a 400 Bad Request response from the service.
Note
It's not yet possible to test the API using valid request data since this will require platform-specific information from the .NET MAUI app.
For more information about calling REST APIs, see Use .http files in Visual Studio and Test web APIs with the Http Repl. In Visual Studio Code, REST Client can be used to test REST APIs.
Create a .NET MAUI app
In this section, you'll build a .NET Multi-platform App UI (.NET MAUI) app that enables you to register to receive push notifications from a notification hub via the backend service, and de-register.
To create your .NET MAUI app:
In Visual Studio, create a new .NET MAUI app named PushNotificationsDemo, using the .NET MAUI App project template.
In Visual Studio, add a new folder named Models to the .NET MAUI project, and then add a new class named
DeviceInstallationto the Models folder and replace its code with the following code:using System.Text.Json.Serialization; namespace PushNotificationsDemo.Models; public class DeviceInstallation { [JsonPropertyName("installationId")] public string InstallationId { get; set; } [JsonPropertyName("platform")] public string Platform { get; set; } [JsonPropertyName("pushChannel")] public string PushChannel { get; set; } [JsonPropertyName("tags")] public List<string> Tags { get; set; } = new List<string>(); }In Visual Studio, add an enumeration named
PushDemoActionto the Models folder and replace its code with the following code:namespace PushNotificationsDemo.Models; public enum PushDemoAction { ActionA, ActionB }In Visual Studio, add a new folder named Services to the .NET MAUI project, and then add a new interface named
IDeviceInstallationServiceto the Services folder and replace its code with the following code:using PushNotificationsDemo.Models; namespace PushNotificationsDemo.Services; public interface IDeviceInstallationService { string Token { get; set; } bool NotificationsSupported { get; } string GetDeviceId(); DeviceInstallation GetDeviceInstallation(params string[] tags); }This interface will be implemented on each platform later, to provide the
DeviceInstallationinformation required by the backend service.In Visual Studio, add an interface named
INotificationRegistrationServiceto the Services folder and replace its code with the following code:namespace PushNotificationsDemo.Services; public interface INotificationRegistrationService { Task DeregisterDeviceAsync(); Task RegisterDeviceAsync(params string[] tags); Task RefreshRegistrationAsync(); }This interface will handle the interaction between the client and the backend service.
In Visual Studio, add an interface named
INotificationActionServiceto the Services folder and replace its code with the following code:namespace PushNotificationsDemo.Services; public interface INotificationActionService { void TriggerAction(string action); }This interface will be used as a simple mechanism to centralize the handling of notification actions.
In Visual Studio, add an interface named
IPushDemoNotificationActionServiceto the Services folder and replace its code with the following code:using PushNotificationsDemo.Models; namespace PushNotificationsDemo.Services; public interface IPushDemoNotificationActionService : INotificationActionService { event EventHandler<PushDemoAction> ActionTriggered; }The
IPushDemoNotificationActionServicetype is specific to this app, and uses thePushDemoActionenumeration to identify the action that's being triggered using a strongly-typed approach.In Visual Studio, add a class named
NotificationRegistrationServiceto the Services folder and replace its code with the following code:using System.Text; using System.Text.Json; using PushNotificationsDemo.Models; namespace PushNotificationsDemo.Services; public class NotificationRegistrationService : INotificationRegistrationService { const string RequestUrl = "api/notifications/installations"; const string CachedDeviceTokenKey = "cached_device_token"; const string CachedTagsKey = "cached_tags"; string _baseApiUrl; HttpClient _client; IDeviceInstallationService _deviceInstallationService; IDeviceInstallationService DeviceInstallationService => _deviceInstallationService ?? (_deviceInstallationService = Application.Current.Windows[0].Page.Handler.MauiContext.Services.GetService<IDeviceInstallationService>()); public NotificationRegistrationService(string baseApiUri, string apiKey) { _client = new HttpClient(); _client.DefaultRequestHeaders.Add("Accept", "application/json"); _client.DefaultRequestHeaders.Add("apikey", apiKey); _baseApiUrl = baseApiUri; } public async Task DeregisterDeviceAsync() { var cachedToken = await SecureStorage.GetAsync(CachedDeviceTokenKey) .ConfigureAwait(false); if (cachedToken == null) return; var deviceId = DeviceInstallationService?.GetDeviceId(); if (string.IsNullOrWhiteSpace(deviceId)) throw new Exception("Unable to resolve an ID for the device."); await SendAsync(HttpMethod.Delete, $"{RequestUrl}/{deviceId}") .ConfigureAwait(false); SecureStorage.Remove(CachedDeviceTokenKey); SecureStorage.Remove(CachedTagsKey); } public async Task RegisterDeviceAsync(params string[] tags) { var deviceInstallation = DeviceInstallationService?.GetDeviceInstallation(tags); await SendAsync<DeviceInstallation>(HttpMethod.Put, RequestUrl, deviceInstallation) .ConfigureAwait(false); await SecureStorage.SetAsync(CachedDeviceTokenKey, deviceInstallation.PushChannel) .ConfigureAwait(false); await SecureStorage.SetAsync(CachedTagsKey, JsonSerializer.Serialize(tags)); } public async Task RefreshRegistrationAsync() { var cachedToken = await SecureStorage.GetAsync(CachedDeviceTokenKey) .ConfigureAwait(false); var serializedTags = await SecureStorage.GetAsync(CachedTagsKey) .ConfigureAwait(false); if (string.IsNullOrWhiteSpace(cachedToken) || string.IsNullOrWhiteSpace(serializedTags) || string.IsNullOrWhiteSpace(DeviceInstallationService?.Token) || cachedToken == DeviceInstallationService?.Token) return; var tags = JsonSerializer.Deserialize<string[]>(serializedTags); await RegisterDeviceAsync(tags); } async Task SendAsync<T>(HttpMethod requestType, string requestUri, T obj) { string serializedContent = null; await Task.Run(() => serializedContent = JsonSerializer.Serialize(obj)) .ConfigureAwait(false); await SendAsync(requestType, requestUri, serializedContent); } async Task SendAsync(HttpMethod requestType, string requestUri, string jsonRequest = null) { var request = new HttpRequestMessage(requestType, new Uri($"{_baseApiUrl}{requestUri}")); if (jsonRequest != null) request.Content = new StringContent(jsonRequest, Encoding.UTF8, "application/json"); var response = await _client.SendAsync(request).ConfigureAwait(false); response.EnsureSuccessStatusCode(); } }In Visual Studio, add a class named
PushDemoNotificationActionServiceto the Services folder and replace its code with the following code:using PushNotificationsDemo.Models; namespace PushNotificationsDemo.Services; public class PushDemoNotificationActionService : IPushDemoNotificationActionService { readonly Dictionary<string, PushDemoAction> _actionMappings = new Dictionary<string, PushDemoAction> { { "action_a", PushDemoAction.ActionA }, { "action_b", PushDemoAction.ActionB } }; public event EventHandler<PushDemoAction> ActionTriggered = delegate { }; public void TriggerAction(string action) { if (!_actionMappings.TryGetValue(action, out var pushDemoAction)) return; List<Exception> exceptions = new List<Exception>(); foreach (var handler in ActionTriggered?.GetInvocationList()) { try { handler.DynamicInvoke(this, pushDemoAction); } catch (Exception ex) { exceptions.Add(ex); } } if (exceptions.Any()) throw new AggregateException(exceptions); } }In Visual Studio, add a class named
Configto the root of the project and replace its code with the following code:namespace PushNotificationsDemo; public static partial class Config { public static string ApiKey = "API_KEY"; public static string BackendServiceEndpoint = "BACKEND_SERVICE_ENDPOINT"; }The
Configclass is used as simple way to keep your secrets out of source control. You can replace these values as part of an automated build or override them using a local partial class.Important
When specifying the base address in the .NET MAUI app, ensure it ends with a
/.In Visual Studio, add a class named
Config.local_secretsto the root of the project. Then replace the code in the Config.local_secrets.cs file with the following code:namespace PushNotificationsDemo; public static partial class Config { static Config() { ApiKey = "<your_api_key>"; BackendServiceEndpoint = "<your_api_app_url>"; } }Replace the placeholder values with the values you chose when creating the backend service. The
BackendServiceEndpointURL should use the formathttps://<api_app_name>.azurewebsites.net/.Tip
Remember to add
*.local_secrets.*to your.gitignorefile to avoid committing this file to source control.
Create the UI
To create the app's UI:
In Visual Studio, open MainPage.xaml and replace the
VerticalStackLayoutand its children with the following XAML:<VerticalStackLayout Margin="20" Spacing="6"> <Button x:Name="registerButton" Text="Register" Clicked="OnRegisterButtonClicked" /> <Button x:Name="deregisterButton" Text="Deregister" Clicked="OnDeregisterButtonClicked" /> </VerticalStackLayout>In Visual Studio, open MainPage.xaml.cs and add a
usingstatement for thePushNotificationsDemo.Servicesnamespace:using PushNotificationsDemo.Services;In MainPage.xaml.cs, add a
readonlybacking field to store a reference to theINotificationRegistrationServiceimplementation:readonly INotificationRegistrationService _notificationRegistrationService;In the
MainPageconstructor, resolve theINotificationRegistrationServiceimplementation and assign it to the_notificationRegistrationServicebacking field:public MainPage(INotificationRegistrationService service) { InitializeComponent(); _notificationRegistrationService = service; }In the
MainPageclass, implement theOnRegisterButtonClickedandOnDeregisterButtonClickedevent handlers, calling the corresponding register and deregister methods on theINotificationRegistrationServiceobject:void OnRegisterButtonClicked(object sender, EventArgs e) { _notificationRegistrationService.RegisterDeviceAsync() .ContinueWith((task) => { ShowAlert(task.IsFaulted ? task.Exception.Message : $"Device registered"); }); } void OnDeregisterButtonClicked(object sender, EventArgs e) { _notificationRegistrationService.DeregisterDeviceAsync() .ContinueWith((task) => { ShowAlert(task.IsFaulted ? task.Exception.Message : $"Device deregistered"); }); } void ShowAlert(string message) { MainThread.BeginInvokeOnMainThread(() => { DisplayAlert("Push notifications demo", message, "OK") .ContinueWith((task) => { if (task.IsFaulted) throw task.Exception; }); }); }void OnRegisterButtonClicked(object sender, EventArgs e) { _notificationRegistrationService.RegisterDeviceAsync() .ContinueWith((task) => { ShowAlert(task.IsFaulted ? task.Exception.Message : $"Device registered"); }); } void OnDeregisterButtonClicked(object sender, EventArgs e) { _notificationRegistrationService.DeregisterDeviceAsync() .ContinueWith((task) => { ShowAlert(task.IsFaulted ? task.Exception.Message : $"Device deregistered"); }); } void ShowAlert(string message) { MainThread.BeginInvokeOnMainThread(() => { DisplayAlertAsync("Push notifications demo", message, "OK") .ContinueWith((task) => { if (task.IsFaulted) throw task.Exception; }); }); }Important
In the app, registration and de-registration is performed in response to user input, to allow this functionality to be explored and tested more easily. In a production app you would typically perform the registration and de-registration actions during the appropriate point in the app lifecycle, without requiring explicit user input.
In Visual Studio, open App.xaml.cs and add the following
usingstatements:using PushNotificationsDemo.Models; using PushNotificationsDemo.Services;In App.xaml.cs, add a
readonlybacking field to store a reference to theIPushDemoNotificationActionServiceimplementation:readonly IPushDemoNotificationActionService _actionService;
In the
Appconstructor, resolve theIPushDemoNotificationActionServiceimplementation and assign it to the_actionServicebacking field, and subscribe to theIPushDemoNotificationActionService.ActionTriggeredevent:public App(IPushDemoNotificationActionService service) { InitializeComponent(); _actionService = service; _actionService.ActionTriggered += NotificationActionTriggered; MainPage = new AppShell(); }
In the
Appconstructor, resolve theIPushDemoNotificationActionServiceimplementation and assign it to the_actionServicebacking field, and subscribe to theIPushDemoNotificationActionService.ActionTriggeredevent:public App(IPushDemoNotificationActionService service) { InitializeComponent(); _actionService = service; _actionService.ActionTriggered += NotificationActionTriggered; }
In the
Appclass, implement the event handler for theIPushDemoNotificationActionService.ActionTriggeredevent:void NotificationActionTriggered(object sender, PushDemoAction e) { ShowActionAlert(e); } void ShowActionAlert(PushDemoAction action) { MainThread.BeginInvokeOnMainThread(() => { Windows[0].Page?.DisplayAlert("Push notifications demo", $"{action} action received.", "OK") .ContinueWith((task) => { if (task.IsFaulted) throw task.Exception; }); }); }void NotificationActionTriggered(object sender, PushDemoAction e) { ShowActionAlert(e); } void ShowActionAlert(PushDemoAction action) { MainThread.BeginInvokeOnMainThread(() => { Windows[0].Page?.DisplayAlertAsync("Push notifications demo", $"{action} action received.", "OK") .ContinueWith((task) => { if (task.IsFaulted) throw task.Exception; }); }); }The event handler for the
ActionTriggeredevent demonstrates the receipt and propagation of push notification actions. These would typically be handled silently, for example navigating to a specific view or refreshing some data rather than displaying an alert.
Configure the Android app
To configure your .NET MAUI app on Android to receive and process push notifications:
In Visual Studio, add the Xamarin.Firebase.Messaging NuGet package to your .NET MAUI app project.
In Visual Studio, add your google-services.json file to the Platforms/Android folder of your .NET MAUI app project. Once the file has been added to your project it should have been added with a build action of
GoogleServicesJson:<ItemGroup Condition="'$(TargetFramework)' == 'net8.0-android'"> <GoogleServicesJson Include="Platforms\Android\google-services.json" /> </ItemGroup>Tip
Remember to add
google-services.jsonto your.gitignorefile to avoid committing this file to source control.In Visual Studio, edit the project file (*.csproj) and set the
SupportedOSPlatformVersionfor Android to 26.0:<SupportedOSPlatformVersion Condition="$([MSBuild]::GetTargetPlatformIdentifier('$(TargetFramework)')) == 'android'">26.0</SupportedOSPlatformVersion>Google made changes to Android notification channels in API 26. For more information, see Notification channels on developer.android.com.
In the Platforms/Android folder of the project, add a new class named
DeviceInstallationServiceand replace its code with the following code:using Android.Gms.Common; using PushNotificationsDemo.Models; using PushNotificationsDemo.Services; using static Android.Provider.Settings; namespace PushNotificationsDemo.Platforms.Android; public class DeviceInstallationService : IDeviceInstallationService { public string Token { get; set; } public bool NotificationsSupported => GoogleApiAvailability.Instance.IsGooglePlayServicesAvailable(Platform.AppContext) == ConnectionResult.Success; public string GetDeviceId() => Secure.GetString(Platform.AppContext.ContentResolver, Secure.AndroidId); public DeviceInstallation GetDeviceInstallation(params string[] tags) { if (!NotificationsSupported) throw new Exception(GetPlayServicesError()); if (string.IsNullOrWhiteSpace(Token)) throw new Exception("Unable to resolve token for FCMv1."); var installation = new DeviceInstallation { InstallationId = GetDeviceId(), Platform = "fcmv1", PushChannel = Token }; installation.Tags.AddRange(tags); return installation; } string GetPlayServicesError() { int resultCode = GoogleApiAvailability.Instance.IsGooglePlayServicesAvailable(Platform.AppContext); if (resultCode != ConnectionResult.Success) return GoogleApiAvailability.Instance.IsUserResolvableError(resultCode) ? GoogleApiAvailability.Instance.GetErrorString(resultCode) : "This device isn't supported."; return "An error occurred preventing the use of push notifications."; } }This class provides a unique ID, using the
Secure.AndroidIdvalue, and the notification hub registration payload.In the Platforms/Android folder of the project, add a new class named
PushNotificationFirebaseMessagingServiceand replace its code with the following code:using Android.App; using Firebase.Messaging; using PushNotificationsDemo.Services; namespace PushNotificationsDemo.Platforms.Android; [Service(Exported = false)] [IntentFilter(new[] { "com.google.firebase.MESSAGING_EVENT" })] public class PushNotificationFirebaseMessagingService : FirebaseMessagingService { IPushDemoNotificationActionService _notificationActionService; INotificationRegistrationService _notificationRegistrationService; IDeviceInstallationService _deviceInstallationService; int _messageId; IPushDemoNotificationActionService NotificationActionService => _notificationActionService ?? (_notificationActionService = IPlatformApplication.Current.Services.GetService<IPushDemoNotificationActionService>()); INotificationRegistrationService NotificationRegistrationService => _notificationRegistrationService ?? (_notificationRegistrationService = IPlatformApplication.Current.Services.GetService<INotificationRegistrationService>()); IDeviceInstallationService DeviceInstallationService => _deviceInstallationService ?? (_deviceInstallationService = IPlatformApplication.Current.Services.GetService<IDeviceInstallationService>()); public override void OnNewToken(string token) { DeviceInstallationService.Token = token; NotificationRegistrationService.RefreshRegistrationAsync() .ContinueWith((task) => { if (task.IsFaulted) throw task.Exception; }); } public override void OnMessageReceived(RemoteMessage message) { base.OnMessageReceived(message); if (message.Data.TryGetValue("action", out var messageAction)) NotificationActionService.TriggerAction(messageAction); } }This class has an
IntentFilterattribute that includes thecom.google.firebase.MESSAGING_EVENTfilter. This filter enables Android to pass incoming messages to this class for processing.For information about the Firebase Cloud Messaging message format, see About FCM messages on firebase.google.com.
In Visual Studio, open the MainActivity.cs file in the Platforms/Android folder and add the following
usingstatements:using Android.App; using Android.Content; using Android.Content.PM; using Android.OS; using PushNotificationsDemo.Services; using Firebase.Messaging;In the
MainActivityclass, set theLaunchModetoSingleTopso that theMainActivitywon't get created again when opened:[Activity( Theme = "@style/Maui.SplashTheme", MainLauncher = true, LaunchMode = LaunchMode.SingleTop, ConfigurationChanges = ConfigChanges.ScreenSize | ConfigChanges.Orientation | ConfigChanges.UiMode | ConfigChanges.ScreenLayout | ConfigChanges.SmallestScreenSize | ConfigChanges.Density)]In the
MainActivityclass, add backing fields to store references to theIPushDemoNotificationActionServiceandIDeviceInstallationServiceimplementations:IPushDemoNotificationActionService _notificationActionService; IDeviceInstallationService _deviceInstallationService;In the
MainActivityclass, addNotificationActionServiceandDeviceInstallationServiceprivate properties that retrieve their concrete implementations from the app's dependency injection container:IPushDemoNotificationActionService NotificationActionService => _notificationActionService ?? (_notificationActionService = IPlatformApplication.Current.Services.GetService<IPushDemoNotificationActionService>()); IDeviceInstallationService DeviceInstallationService => _deviceInstallationService ?? (_deviceInstallationService = IPlatformApplication.Current.Services.GetService<IDeviceInstallationService>());In the
MainActivityclass, implement theAndroid.Gms.Tasks.IOnSuccessListenerinterface to retrieve and store the Firebase token:public class MainActivity : MauiAppCompatActivity, Android.Gms.Tasks.IOnSuccessListener { public void OnSuccess(Java.Lang.Object result) { DeviceInstallationService.Token = result.ToString(); } }In the
MainActivityclass, add theProcessNotificationActionsmethod that will check whether a givenIntenthas an extra value namedaction, and then conditionally trigger thatactionusing theIPushDemoNotificationActionServiceimplementation:void ProcessNotificationsAction(Intent intent) { try { if (intent?.HasExtra("action") == true) { var action = intent.GetStringExtra("action"); if (!string.IsNullOrEmpty(action)) NotificationActionService.TriggerAction(action); } } catch (Exception ex) { System.Diagnostics.Debug.WriteLine(ex.Message); } }In the
MainActivityclass, override theOnNewIntentmethod to call theProcessNotificationActionsmethod:protected override void OnNewIntent(Intent? intent) { base.OnNewIntent(intent); ProcessNotificationsAction(intent); }Because the
LaunchModefor theActivityis set toSingleTop, anIntentwill be sent to the existingActivityinstance via theOnNewIntentoverride, rather than theOnCreatemethod. Therefore, you must handle an incoming intent in bothOnNewIntentandOnCreate.In the
MainActivityclass, override theOnCreatemethod to call theProcessNotificationActionsmethod, and to retrieve the token from Firebase, addingMainActivityas theIOnSuccessListener:protected override void OnCreate(Bundle? savedInstanceState) { base.OnCreate(savedInstanceState); if (DeviceInstallationService.NotificationsSupported) FirebaseMessaging.Instance.GetToken().AddOnSuccessListener(this); ProcessNotificationsAction(Intent); }Note
The app must be re-registered each time you run it and stop it from a debug session to continue receiving push notifications.
In Visual Studio, add the
POST_NOTIFICATIONSpermission to the AndroidManifest.xml file in the Platforms/Android folder:<uses-permission android:name="android.permission.POST_NOTIFICATIONS" />For more information about this permission, see Notification runtime permission on developer.android.com.
In Visual Studio, open MainPage.xaml.cs and add the following code to the
MainPageclass:#if ANDROID protected override async void OnAppearing() { base.OnAppearing(); PermissionStatus status = await Permissions.RequestAsync<Permissions.PostNotifications>(); } #endifThis code runs on Android when the
MainPageappears, and requests the user to grant thePOST_NOTIFICATIONSpermission. For more information about .NET MAUI permissions, see Permissions.
Configure the iOS app
The iOS simulator supports remote notifications in iOS 16+ when running in macOS 13+ on Mac computers with Apple silicon or T2 processors. Each simulator generates registration tokens that are unique to the combination of that simulator and the Mac hardware it's running on.
Important
The simulator supports the Apple Push Notification Service sandbox environment.
The following instructions assume you are using hardware that supports receiving remote notifications in an iOS simulator. If this is not the case you'll have to run the iOS app on a physical device, which will require you to create a provisioning profile for your app that includes the Push Notifications capability. You'll then need to ensure that your app is built using your certificate and provisioning profile. For more information on how to do this, see Set up your iOS app to work with Azure Notification Hubs, and then follow the instructions below.
To configure your .NET MAUI app on iOS to receive and process push notifications:
In Visual Studio, edit the project file (*.csproj) and set the
SupportedOSPlatformVersionfor iOS to 13.0:<SupportedOSPlatformVersion Condition="$([MSBuild]::GetTargetPlatformIdentifier('$(TargetFramework)')) == 'ios'">13.0</SupportedOSPlatformVersion>Apple made changes to their push service in iOS 13. For more information, see Azure Notification Hubs updates for iOS 13.
In Visual Studio, add an Entitlements.plist file to the Platforms/iOS folder of the project and add the following XML to the file:
<?xml version="1.0" encoding="UTF-8"?>
<!DOCTYPE plist PUBLIC "-//Apple//DTD PLIST 1.0//EN" "http://www.apple.com/DTDs/PropertyList-1.0.dtd">
<plist version="1.0">
<dict>
  <key>aps-environment</key>
  <string>development</string>
</dict>
</plist>
This sets the APS environment entitlement and specifies to use the development Apple Push Notification service environment. In production apps, this entitlement value should be set to
production. For more information about this entitlement, see APS Environment Entitlement on developer.apple.com.For more information about adding an entitlements file, see iOS entitlements.
In Visual Studio, add a new class named
DeviceInstallationServiceto the Platforms/iOS folder of the project and add the following code to the file:using PushNotificationsDemo.Services; using PushNotificationsDemo.Models; using UIKit; namespace PushNotificationsDemo.Platforms.iOS; public class DeviceInstallationService : IDeviceInstallationService { const int SupportedVersionMajor = 13; const int SupportedVersionMinor = 0; public string Token { get; set; } public bool NotificationsSupported => UIDevice.CurrentDevice.CheckSystemVersion(SupportedVersionMajor, SupportedVersionMinor); public string GetDeviceId() => UIDevice.CurrentDevice.IdentifierForVendor.ToString(); public DeviceInstallation GetDeviceInstallation(params string[] tags) { if (!NotificationsSupported) throw new Exception(GetNotificationsSupportError()); if (string.IsNullOrWhiteSpace(Token)) throw new Exception("Unable to resolve token for APNS"); var installation = new DeviceInstallation { InstallationId = GetDeviceId(), Platform = "apns", PushChannel = Token }; installation.Tags.AddRange(tags); return installation; } string GetNotificationsSupportError() { if (!NotificationsSupported) return $"This app only supports notifications on iOS {SupportedVersionMajor}.{SupportedVersionMinor} and above. You are running {UIDevice.CurrentDevice.SystemVersion}."; if (Token == null) return $"This app can support notifications but you must enable this in your settings."; return "An error occurred preventing the use of push notifications"; } }This class provides a unique ID, using the
UIDevice.IdentifierForVendorvalue, and the notification hub registration payload.In Visual Studio, add a new class named
NSDataExtensionsto the Platforms/iOS folder of the project and add the following code to the file:using Foundation; using System.Text; namespace PushNotificationsDemo.Platforms.iOS; internal static class NSDataExtensions { internal static string ToHexString(this NSData data) { var bytes = data.ToArray(); if (bytes == null) return null; StringBuilder sb = new StringBuilder(bytes.Length * 2); foreach (byte b in bytes) sb.AppendFormat("{0:x2}", b); return sb.ToString().ToUpperInvariant(); } }The
ToHexStringextension method will be consumed by code you'll add that parses the retrieved device token.In Visual Studio, open the AppDelegate.cs file in the Platforms/iOS folder and add the following
usingstatements:using System.Diagnostics; using Foundation; using PushNotificationsDemo.Platforms.iOS; using PushNotificationsDemo.Services; using UIKit; using UserNotifications;In the
AppDelegateclass, add backing fields to store references to theIPushDemoNotificationActionService,INotificationRegistrationService, andIDeviceInstallationServiceimplementations:IPushDemoNotificationActionService _notificationActionService; INotificationRegistrationService _notificationRegistrationService; IDeviceInstallationService _deviceInstallationService;In the
AppDelegateclass, addNotificationActionService,NotificationRegistrationService, andDeviceInstallationServiceprivate properties that retrieve their concrete implementations from the app's dependency injection container:IPushDemoNotificationActionService NotificationActionService => _notificationActionService ?? (_notificationActionService = IPlatformApplication.Current.Services.GetService<IPushDemoNotificationActionService>()); INotificationRegistrationService NotificationRegistrationService => _notificationRegistrationService ?? (_notificationRegistrationService = IPlatformApplication.Current.Services.GetService<INotificationRegistrationService>()); IDeviceInstallationService DeviceInstallationService => _deviceInstallationService ?? (_deviceInstallationService = IPlatformApplication.Current.Services.GetService<IDeviceInstallationService>());In the
AppDelegateclass, add theCompleteRegistrationAsyncmethod to set theIDeviceInstallationService.Tokenproperty value:Task CompleteRegistrationAsync(NSData deviceToken) { DeviceInstallationService.Token = deviceToken.ToHexString(); return NotificationRegistrationService.RefreshRegistrationAsync(); }This method also refreshes the registration and caches the device token if it's been update since it was last stored.
In the
AppDelegateclass, add theProcessNotificationActionsmethod for processing theNSDictionarynotification data and conditionally callingNotificationActionService.TriggerAction:void ProcessNotificationActions(NSDictionary userInfo) { if (userInfo == null) return; try { // If your app isn't in the foreground, the notification goes to Notification Center. // If your app is in the foreground, the notification goes directly to your app and you // need to process the notification payload yourself. var actionValue = userInfo.ObjectForKey(new NSString("action")) as NSString; if (!string.IsNullOrWhiteSpace(actionValue?.Description)) NotificationActionService.TriggerAction(actionValue.Description); } catch (Exception ex) { Debug.WriteLine(ex.Message); } }In the
AppDelegateclass, add theRegisteredForRemoteNotificationsmethod passing thedeviceTokenargument to theCompleteRegistrationAsyncmethod:[Export("application:didRegisterForRemoteNotificationsWithDeviceToken:")] public void RegisteredForRemoteNotifications(UIApplication application, NSData deviceToken) { CompleteRegistrationAsync(deviceToken) .ContinueWith((task) => { if (task.IsFaulted) throw task.Exception; }); }This method will be called when the app is registered to receive remote notification, and is used to request the unique device token, which is effectively the address of your app on the device.
In the
AppDelegateclass, add theReceivedRemoteNotificationmethod passing theuserInfoargument to theProcessNotificationActionsmethod:[Export("application:didReceiveRemoteNotification:")] public void ReceivedRemoteNotification(UIApplication application, NSDictionary userInfo) { ProcessNotificationActions(userInfo); }This method will be called when the app has received a remote notification, and is used to process the notification.
In the
AppDelegateclass, add theFailedToRegisterForRemoteNotificationsmethod to log any errors:[Export("application:didFailToRegisterForRemoteNotificationsWithError:")] public void FailedToRegisterForRemoteNotifications(UIApplication application, NSError error) { Debug.WriteLine(error.Description); }This method will be called when the app has failed to register to receive remote notifications. Registration might fail if the device isn't connected to the network, if the APNS server is unreachable, or if the app is incorrectly configured.
Note
For production scenarios, you'll want to implement proper logging and error handling in the
FailedToRegisterForRemoteNotificationsmethod.In the
AppDelegateclass, add theFinishedLaunchingmethod to conditionally request permission to use notifications and register for remote notifications:[Export("application:didFinishLaunchingWithOptions:")] public override bool FinishedLaunching(UIApplication application, NSDictionary launchOptions) { if (DeviceInstallationService.NotificationsSupported) { UNUserNotificationCenter.Current.RequestAuthorization( UNAuthorizationOptions.Alert | UNAuthorizationOptions.Badge | UNAuthorizationOptions.Sound, (approvalGranted, error) => { if (approvalGranted && error == null) { MainThread.BeginInvokeOnMainThread(() => { UIApplication.SharedApplication.RegisterForRemoteNotifications(); }); } }); } using (var userInfo = launchOptions?.ObjectForKey(UIApplication.LaunchOptionsRemoteNotificationKey) as NSDictionary) { ProcessNotificationActions(userInfo); } return base.FinishedLaunching(application, launchOptions); }For information about asking permission to use notifications, see Asking permission to use notifications on developer.apple.com.
For information about notifications in iOS, see User Notifications on developer.apple.com.
Register types with the app's dependency injection container
In Visual Studio, open MauiProgram.cs and add a
usingstatement for thePushNotificationsDemo.Servicesnamespace:using PushNotificationsDemo.Services;In the
MauiProgramclass, add code for theRegisterServicesextension method that registers theDeviceInstallationServiceon each platform, and the cross-platformPushDemoNotificationActionServiceandNotificationRegistrationServiceservices, and which returns aMauiAppBuilderobject:public static MauiAppBuilder RegisterServices(this MauiAppBuilder builder) { #if IOS builder.Services.AddSingleton<IDeviceInstallationService, PushNotificationsDemo.Platforms.iOS.DeviceInstallationService>(); #elif ANDROID builder.Services.AddSingleton<IDeviceInstallationService, PushNotificationsDemo.Platforms.Android.DeviceInstallationService>(); #endif builder.Services.AddSingleton<IPushDemoNotificationActionService, PushDemoNotificationActionService>(); builder.Services.AddSingleton<INotificationRegistrationService>(new NotificationRegistrationService(Config.BackendServiceEndpoint, Config.ApiKey)); return builder; }In the
MauiProgramclass, add code for theRegisterViewsextension method that registers theMainPagetype as a singleton and which returns aMauiAppBuilderobject:public static MauiAppBuilder RegisterViews(this MauiAppBuilder builder) { builder.Services.AddSingleton<MainPage>(); return builder; }The
MainPagetype is registered because it requires aINotificationRegistrationServicedependency, and any types that require a dependency must be registered with the dependency injection container.In the
MauiProgramclass, modify theCreateMauiAppmethod so that it calls theRegisterServicesandRegisterViewsextension methods:public static MauiApp CreateMauiApp() { var builder = MauiApp.CreateBuilder(); builder .UseMauiApp<App>() .ConfigureFonts(fonts => { fonts.AddFont("OpenSans-Regular.ttf", "OpenSansRegular"); fonts.AddFont("OpenSans-Semibold.ttf", "OpenSansSemibold"); }) .RegisterServices() .RegisterViews(); #if DEBUG builder.Logging.AddDebug(); #endif return builder.Build(); }
For more information about dependency injection in .NET MAUI, see Dependency injection.
Test the app
You can test your app by sending push notifications to the app using the backend service, or via the Azure portal.
The iOS simulator supports remote notifications in iOS 16+ when running in macOS 13+ on Mac computers with Apple silicon or T2 processors. If you don't meet these hardware requirements you'll have to test your iOS app on a physical device. On Android you can test your app on a developer unlocked physical device, or an emulator.
Android and iOS display push notifications on behalf of the app when it's running in the background. If the app is running in the foreground when the notification is received, the app's code determines the behavior. For example, you could update your app’s interface to reflect new information contained in the notification.
Test using the backend service
To send a test push notification to your app via the backend service that's published to Azure App Service:
In Visual Studio, run the PushNotificationsDemo app on Android or iOS and select the Register button.
Note
If you're testing on Android ensure that you're not running using the debug configuration. Alternatively, if the app has previously been deployed ensure that it's been force closed and then start it again from the launcher.
In the REST tooling of your choice, send a
POSTrequest to the following address:https://<app_name>.azurewebsites.net/api/notifications/requestsEnsure that you configure the request headers to include the key
apikeyand its value, set the body to raw, and use the following JSON content:{ "text": "Message from REST tooling!", "action": "action_a" }The overall request should be similar to the following example:
POST /api/notifications/requests HTTP/1.1
Host: https://<app_name>.azurewebsites.net
apikey: <your_api_key>
Content-Type: application/json

{
    "text": "Message from REST tooling!",
    "action": "action_a"
}
In the REST tooling of your choice, validate that you receive a 200 OK response.
In the app on Android or iOS, an alert should appear showing ActionA action received.
For more information about calling REST APIs, see Use .http files in Visual Studio and Test web APIs with the Http Repl. In Visual Studio Code, REST Client can be used to test REST APIs.
Test using the Azure portal
Azure Notification Hubs enable you to check that your app can receive push notifications.
To send a test push notification to your app via the Azure portal:
In Visual Studio, run the PushNotificationsDemo app on Android or iOS and select the Register button.
Note
If you're testing on Android ensure that you're not running using the debug configuration. Alternatively, if the app has previously been deployed ensure that it's been force closed and then start it again from the launcher.
In the Azure portal, browse to your notification hub and select the Test Send button on the Overview blade.
In the Test Send blade, select your required Platform and modify the payload.
For Apple, use the following payload:
{
  "aps": {
    "alert": "Message from Notification Hub!"
  },
  "action": "action_a"
}
For Android, use the following payload:
{
  "message": {
    "notification": {
      "title": "PushDemo",
      "body": "Message from Notification Hub!"
    },
    "data": {
      "action": "action_a"
    }
  }
}
The Azure portal should indicate that the notification has been successfully sent.
For information about the Firebase Cloud Messaging message format, see About FCM messages on developer.android.com.
In the app on Android or iOS, an alert should appear showing ActionA action received.
Troubleshooting
The following sections discuss the common issues encountered when attempting to consume push notifications in a client app.
No response from the backend service
When testing locally, ensure that the backend service is running and is using the correct port.
If testing against the Azure API app, check that the service is running and has been deployed and has started without error.
Ensure that you've specified the base address correctly in your REST tooling, or in your .NET MAUI app configuration. The base address should be https://<api_name>.azurewebsites.net or https://localhost:7020 when testing locally.
Receiving a 401 status code from the backend service
Validate that you're setting the apikey request header correctly and that this value matches the one you configured for the backend service.
If you receive this error when testing locally, ensure that the key value you defined in your .NET MAUI app matches the Authentication:ApiKey user-secrets value used by the backend service.
If you're testing with an Azure API app, ensure that the key value defined in your .NET MAUI app matches the Authentication:ApiKey app-setting value defined in the Azure portal. If you created or changed this app-setting after you had deployed the backend service then you must restart the service for the value to take effect.
Receiving a 404 status code from the backend service
Validate that the endpoint and HTTP request method is correct:
- PUT -
https://<api_name>.azurewebsites.net/api/notifications/installations - DELETE -
https://<api_name>.azurewebsites.net/api/notifications/installations/<installation_id> - POST -
https://<api_name>.azurewebsites.net/api/notifications/requests
Or when testing locally:
- PUT -
https://localhost:7020/api/notifications/installations - DELETE -
https://localhost:7020/api/notifications/installations/<installation_id> - POST -
https://localhost:7020/api/notifications/requests
Important
When specifying the base address in the .NET MAUI app, ensure it ends with a /. The base address should be https://<api_name>.azurewebsites.net or https://localhost:7020/ when testing locally.
Not receiving notifications on Android after starting or stopping a debug session
Ensure you register each time you start a debug session. The debugger will cause a new Firebase token to be generated, and so the notification hub installation must be updated.
Unable to register and a notification hub error message is displayed
Verify that the test device has network connectivity. Then determine the HTTP response status code by setting a breakpoint to inspect the StatusCode property in the HttpResponse.
Review the previous troubleshooting suggestions, where applicable, based on the status code.
Set a breakpoint on the lines that return specific status codes for the respective API. Then try calling the backend service when debugging locally.
Validate the backend service is working as expected by your REST tooling of choice, and use the payload created by the .NET MAUI app for your chosen platform.
Review the platform-specific configuration sections to ensure that no steps have been missed. Check that suitable values are being resolved for InstallationId and Token variables for your chosen platform.
Unable to resolve an ID for the device the device error message
Review the platform-specific configuration sections to ensure that no steps have been missed.
Collaborate with us on GitHub
The source for this content can be found on GitHub, where you can also create and review issues and pull requests. For more information, see our contributor guide.