iOS capabilities
On iOS, .NET Multi-platform App UI (.NET MAUI) apps run in a sandbox that provides a set of rules that limit access between the app and system resources or user data. Apple provides capabilities, also known as app services, as a means of extending functionality and widening the scope of what iOS apps can do. Capabilities enable you to add a deeper integration with platform features to your app, such as integration with Siri. For more information about capabilities, see Capabilities on developer.apple.com.
Capabilities are added to your app's provisioning profile, and are used when code signing your app. The provisioning profile must contain an App ID, that matches your app's bundle identifier, with the required capabilities enabled. The provisioning profile can be created automatically in Visual Studio, or manually in your Apple Developer Account.
Capabilities are closely related to the concept of entitlements. They both request the expansion of the sandbox your app runs in, to give it additional capabilities. Entitlements are typically added when developing your app, while capabilities are typically added when code signing your app for distribution. However, when automatic provisioning is enabled, adding certain entitlements to your app will also update the capabilities for your app in its provisioning profile. For more information about entitlements, see Entitlements.
Add capabilities with Visual Studio
Capabilities can be added to a provisioning profile in Visual Studio. This approach requires the use of automatic provisioning, and only works for a subset of capabilities. For more information about automatic provisioning, see Automatic provisioning for iOS apps.
The following list shows the capabilities that can be automatically provisioned using Visual Studio:
- HealthKit
- HomeKit
- Hotspot configuration
- Inter-app audio
- Multipath
- Network extensions
- Near field communication tag reader
- Personal VPN
- Siri
- Wireless accessory configuration
In Visual Studio, all capabilities are added to your app's Entitlements.plist file. The capabilities listed above are also added to your provisioning profile. For more information about entitlements, including how to add an entitlements file to your project, see Entitlements.
To add a capability in Visual Studio:
In Visual Studio, ensure that the IDE is paired to a Mac Build host. For more information, see Pair to Mac for iOS development.
In Visual Studio, enable automatic provisioning for your project. For more information, see Enable automatic provisioning.
In Visual Studio, add an Entitlements.plist file to your project. For more information, see Add an Entitlements.plist file.
In Solution Explorer, double-click the Entitlements.plist file from the Platforms > iOS folder of your .NET MAUI app project to open it in the entitlements editor.
In the entitlements editor, select and configure any entitlements required for your app:
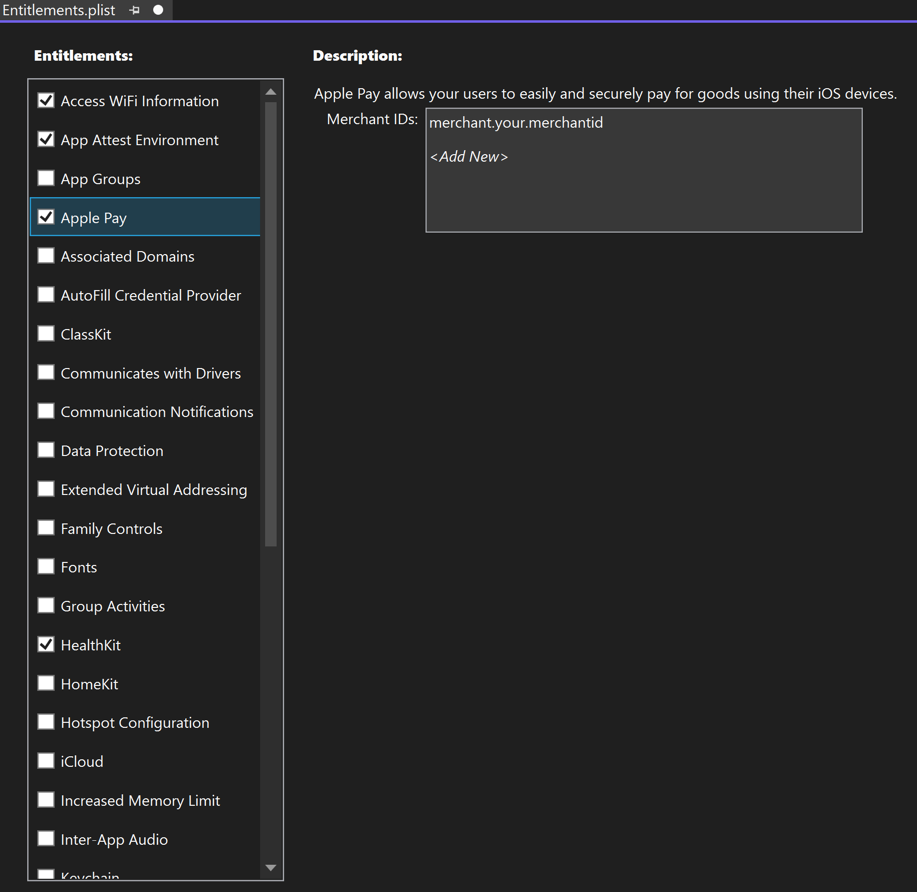
Save the changes to your Entitlements.plist file to add the entitlement key/value pairs to the file, and add the app service to your App ID.
It may also be necessary to set privacy keys in Info.plist, for certain capabilities.
Add capabilities in your Apple Developer Account
All capabilities can be added to your app's provisioning profile in your Apple Developer Account. This approach requires the use of manual provisioning, and works for all capabilities. For more information about manual provisioning, see Manual provisioning for iOS apps.
Adding a capability in your Apple Developer Account is a multi-step process that requires creating an App ID, creating a provisioning profile, and enabling manual provisioning.
When adding a new capability to your provisioning profile, you should also add the same capability to your app's Entitlements.plist file and ensure that the app consumes this file. For more information, see Entitlements. It may also be necessary to set privacy keys in Info.plist, for certain capabilities.
Create an App ID with an app service
An App ID is similar to a reverse-DNS string, that uniquely identifies an app, and is required to identify the app that you are distributing. The App ID should be identical to the bundle identifier for your app.
Important
The bundle identifier for a .NET MAUI app is stored in the project file as the Application ID property. In Visual Studio, in Solution Explorer right-click on your .NET MAUI app project and select Properties. Then, navigate to the MAUI Shared > General tab. The Application ID field lists the bundle identifier.
When the value of the Application ID field is updated, the value of the Bundle identifier in the Info.plist will be automatically updated.
There are two types of App ID - explicit and wildcard. An explicit App ID is unique to a single app, and typically takes the form com.domainname.myid. An explicit App ID allows the installation of one app, with a matching bundle identifier, to a device. Explicit App IDs are required for apps that enable app-specific capabilities.
An explicit App ID can be created with the following steps:
In a web browser, go to the Identifiers section of your Apple Developer Account and click the + button.
In the Register a new identifier page, select App IDs and click the Continue button.
In the Register a new identifier page, select the App type and click the Continue button.
In the Register an App ID page, provide a Description and set the Bundle ID to Explicit. Then, enter an App ID in the format
com.domainname.myid: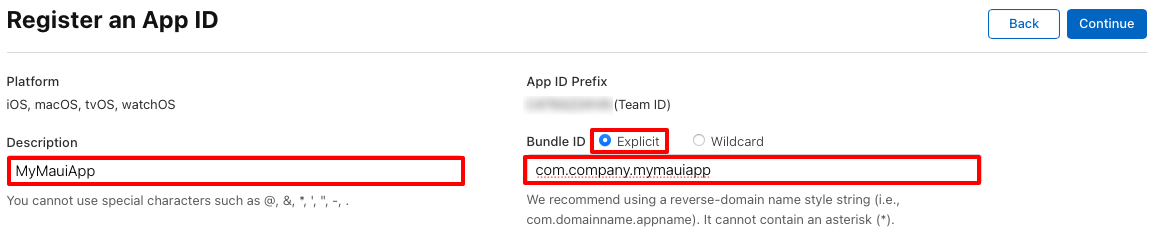
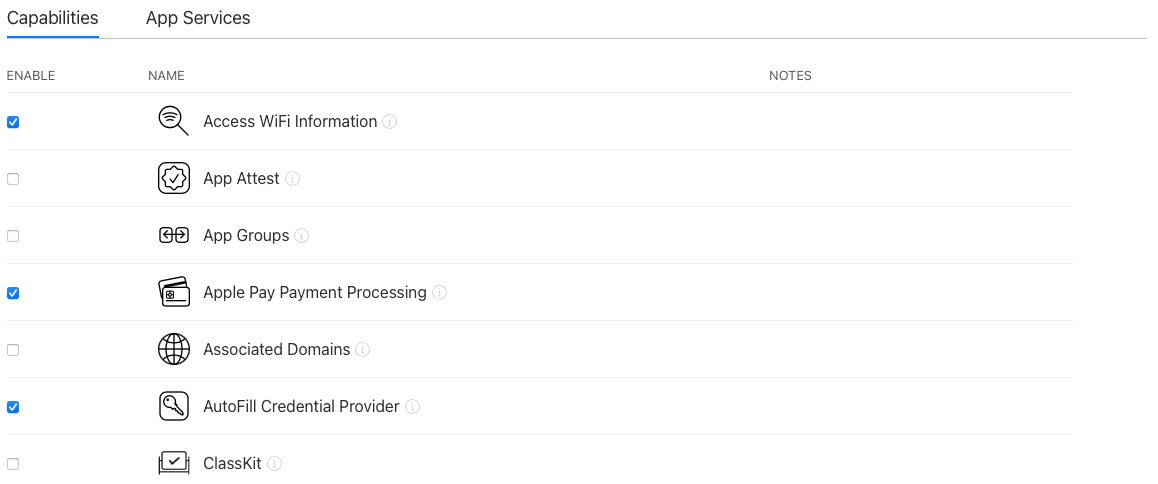
In the Register an App ID page, enable your required capabilities under the Capabilities and App Services tabs:
In the Register an App ID page, click the Continue button.
In the Confirm your App ID page, review the information and then click the Register button. Provided that your App ID successfully registers, you'll be returned to the Identifiers section of your Apple Developer Account.
In the Identifiers page, click on the App ID you just created.
In the Edit your App ID Configuration page, any of your enabled capabilities that require additional setup will have a Configure button:

Click any Configure buttons to configure your enabled capabilities. For more information, see Configure app capabilities on developer.apple.com.
Create a provisioning profile
Once you've created an App ID you must create a provisioning profile for the App ID. This requires you to have previously created a signing certificate and added a device to your Apple Developer Account. For more information, see Create a signing certificate and Add a device.
A provisioning profile can be created with the following steps:
In a web browser, go to the Profiles section of your Apple Developer Account and click the + button.
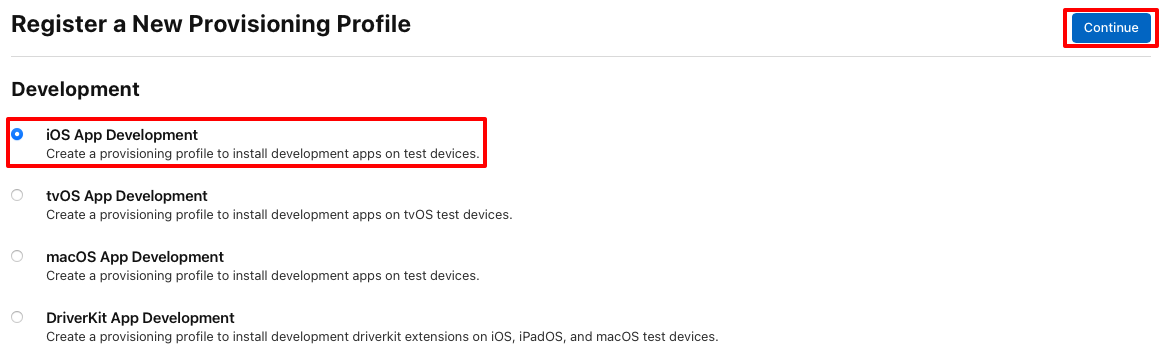
In the Register a New Provisioning Profile page, in the Development section select iOS App Development (or a distribution profile type from the Distribution section), and click the Continue button:
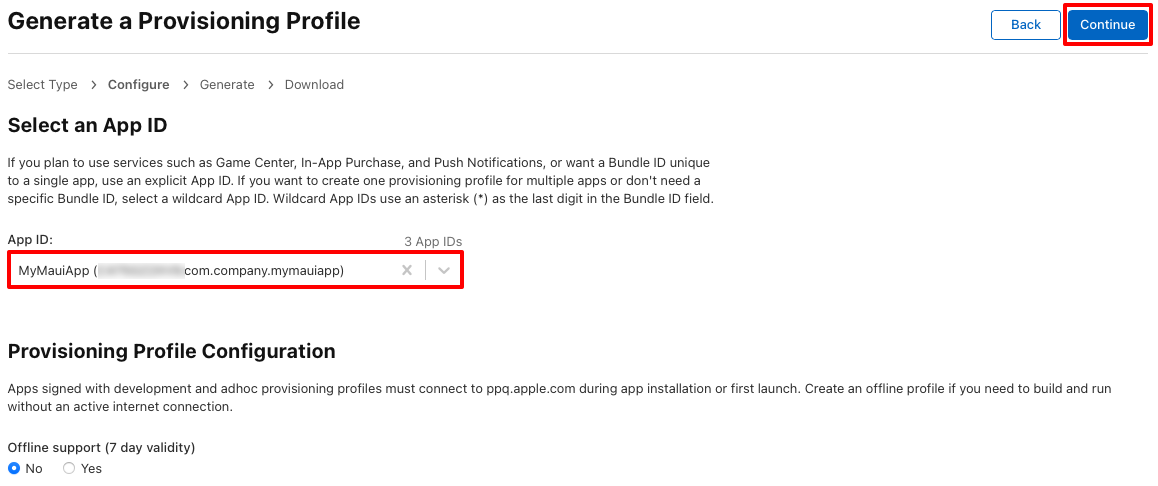
In the Generate a Provisioning Profile page, select your App ID and then click the Continue button:
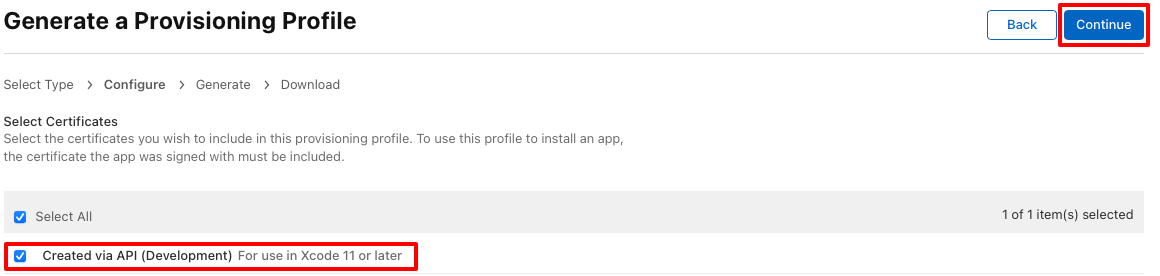
In the Generate a Provisioning Profile page, select the certificates to include in the provisioning profile and then click the Continue button:
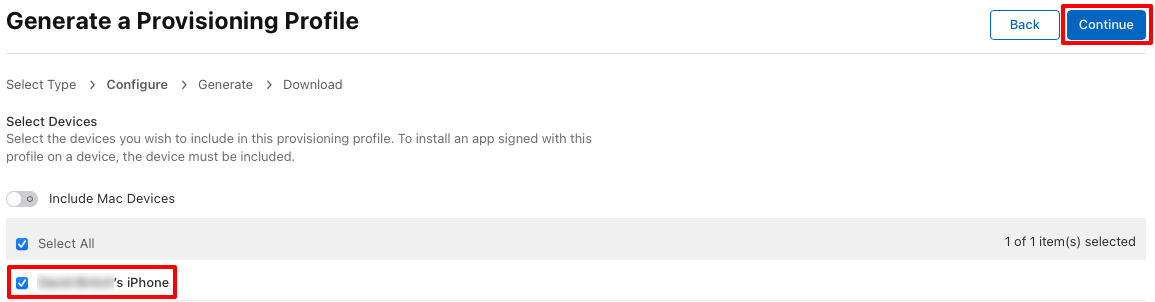
In the Generate a Provisioning Profile page, select the devices that the app will be installed on and then click the Continue button:
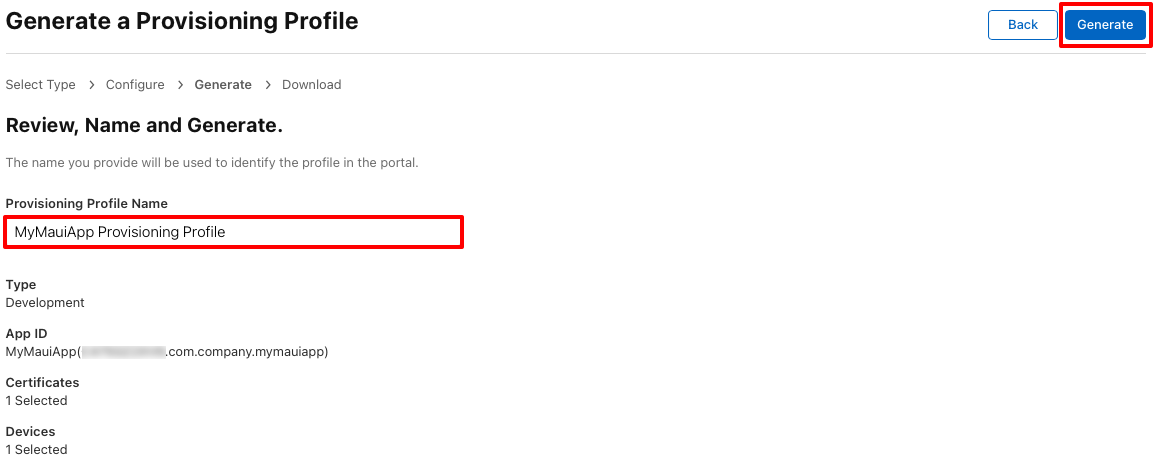
In the Generate a Provisioning Profile page, provide a provisioning profile name and then click the Generate button:
Enable manual provisioning
Once you've created a provisioning profile it must be downloaded by Visual Studio, and set as the provisioning profile for your project:
- In Visual Studio, download the provisioning profile you've just created so that it's available for signing your app. For more information, see Download provisioning profiles in Visual Studio.
- In Visual Studio, enable manual provisioning for your project. For more information, see Enable manual provisioning.
Troubleshoot
The following list details the common issues that can cause issues when developing a .NET MAUI iOS app that uses capabilities:
- Ensure that the correct App ID has been created and registered in the Identifiers section of your Apple Developer Account.
- Ensure that the capability has been added to the App ID and that the capability is configured using the correct values.
- Ensure that the provisioning profile has been installed on your development machine and that the app's Info.plist file is using a bundle identifier that's identical to your App ID.
- Ensure that the app's Entitlements.plist file has the correct entitlements enabled.
- Ensure that any required privacy keys are set in Info.plist.
- Ensure that the app consumes the Entitlements.plist file.