Note
Access to this page requires authorization. You can try signing in or changing directories.
Access to this page requires authorization. You can try changing directories.
In this tutorial, you'll learn how to create and run a .NET Multi-platform App UI (.NET MAUI) app on Mac Catalyst using .NET Command Line Interface (CLI) on macOS:
To create .NET MAUI apps, you'll need to download and run the installer for the latest .NET runtime. You'll also need to download and install the version of Xcode that's required by the version of .NET MAUI that you're using. For information, see Release versions.
On your Mac, open Terminal and check that you have the latest .NET runtime installed:
dotnet --versionIn Terminal, install the latest public build of .NET MAUI:
sudo dotnet workload install maui --source https://api.nuget.org/v3/index.jsonThis command will install the latest released version of .NET MAUI, including the required platform SDKs.
In Terminal, create a new .NET MAUI app using .NET CLI:
dotnet new maui -n "MyMauiApp"
In Terminal, change directory to MyMauiApp, and build and run the app:
cd MyMauiApp
dotnet build -t:Run -f net8.0-maccatalyst
The
dotnet buildcommand will restore the project dependencies, build the app, and launch it.If you see a build error and a warning that the Xcode app bundle could not be found, you may need to run the following command:
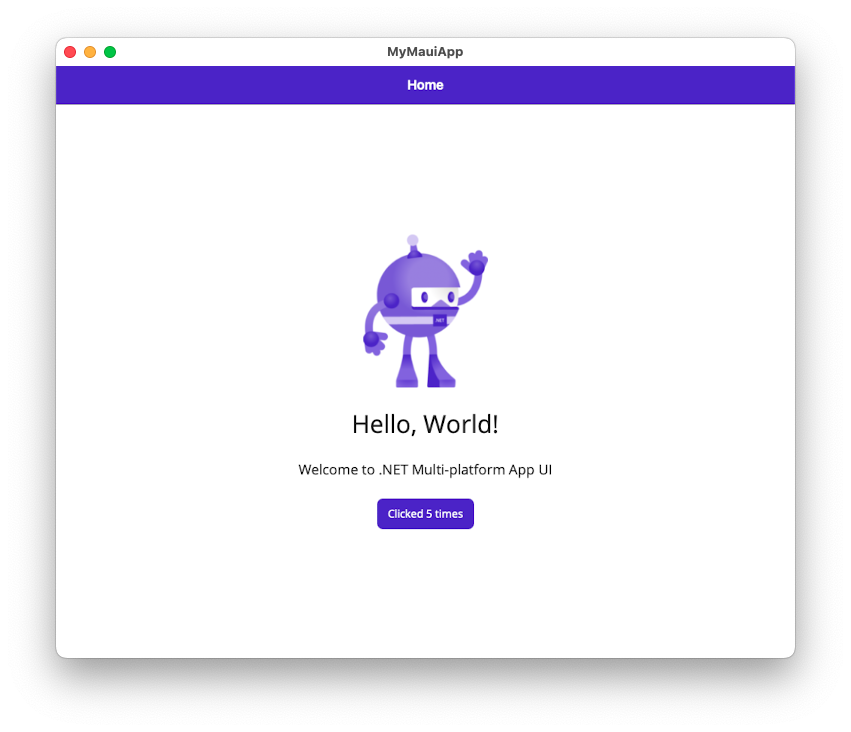
xcode-select --resetIn the running app, press the Click me button several times and observe that the count of the number of button clicks is incremented.
Build with a specific version of Xcode
If you have multiple versions of Xcode installed on your Mac, it's possible to specify which Xcode version should be used when building your app. There are a number of approaches that can be used to accomplish this, but there are two recommended approaches:
Use
sudo xcode-select --switch ...to choose the system's currently selected version of Xcode (this requires admin credentials). It's also possible to do this from inside Xcode (Settings -> Locations -> Command Line Tools).Use the
DEVELOPER_DIRenvironment variable for the duration of the current terminal session:Open the Terminal application.
Type the following command, substituting in your version of Xcode, and press Enter:
export DEVELOPER_DIR=/Applications/Xcode_14.1.0.app
If you want to set this environment variable permanently, you can add the
exportcommand to your shell profile, such as .zprofile.
Collaborate with us on GitHub
The source for this content can be found on GitHub, where you can also create and review issues and pull requests. For more information, see our contributor guide.