Note
Access to this page requires authorization. You can try signing in or changing directories.
Access to this page requires authorization. You can try changing directories.
The .NET Multi-platform App UI (.NET MAUI) BlazorWebView is a control that enables you to host a Blazor web app in your .NET MAUI app. These apps, known as Blazor Hybrid apps, enable a Blazor web app to be integrated with platform features and UI controls. The BlazorWebView control can be added to any page of a .NET MAUI app, and pointed to the root of the Blazor app. The Razor components run natively in the .NET process and render web UI to an embedded web view control. In .NET MAUI, Blazor Hybrid apps can run on all the platforms supported by .NET MAUI.
BlazorWebView defines the following properties:
- HostPage, of type
string?, which defines the root page of the Blazor web app. - RootComponents, of type
RootComponentsCollection, which specifies the collection of root components that can be added to the control. - StartPath, of type
string, which defines the path for initial navigation within the Blazor navigation context when the Blazor component is finished loading.
The RootComponent class defines the following properties:
- Selector, of type
string?, which defines the CSS selector string that specifies where in the document the component should be placed. - ComponentType, of type
Type?, which defines the type of the root component. - Parameters, of type
IDictionary<string, object?>?, which represents an optional dictionary of parameters to pass to the root component.
In addition, BlazorWebView defines the following events:
- BlazorWebViewInitializing, with an accompanying
BlazorWebViewInitializingEventArgsobject, which is raised before the BlazorWebView is initialized. This event enables customization of the BlazorWebView configuration. - BlazorWebViewInitialized, with an accompanying
BlazorWebViewInitializedEventArgsobject, which is raised after the BlazorWebView is initialized but before any component has been rendered. This event enables retrieval of the platform-specific web view instance. - UrlLoading, with an accompanying
UrlLoadingEventArgsobject, is raised when a hyperlink is clicked within a BlazorWebView. This event enables customization of whether a hyperlink is opened in the BlazorWebView, in an external app, or whether the URL loading attempt is cancelled.
Existing Razor components can be used in a .NET MAUI Blazor app by moving the code into the app, or by referencing an existing class library or package that contains the component. For more information, see Reuse Razor components in ASP.NET Core Blazor Hybrid.
Browser developer tools can be used to inspect .NET MAUI Blazor apps. For more information, see Use browser developer tools with ASP.NET Core Blazor Hybrid.
Note
While Visual Studio installs all the required tooling to develop .NET MAUI Blazor apps, end users of .NET MAUI Blazor apps on Windows must install the WebView2 runtime.
Warning
On Windows, apps using WebView2-based controls that are installed to the Program Files directory may fail to render content properly. This occurs because WebView2 attempts to write its cache and user data files to the app's installation directory, which has restricted write permissions in Program Files. To resolve this issue, set the WEBVIEW2_USER_DATA_FOLDER environment variable before any WebView control is initialized:
#if WINDOWS
var userDataFolder = Path.Combine(FileSystem.AppDataDirectory, "WebView2");
Environment.SetEnvironmentVariable("WEBVIEW2_USER_DATA_FOLDER", userDataFolder);
#endif
Place this code in your App.xaml.cs constructor or in Platforms\Windows\App.xaml.cs before any WebView control is created. This directs WebView2 to use a writable location in the user's AppData directory instead of the restricted Program Files location.
For more information about Blazor Hybrid apps, see ASP.NET Core Blazor Hybrid.
Browser engines
WebView uses different browser engines on each platform to render web content:
- Windows: Uses WebView2, which is based on the Microsoft Edge (Chromium) browser engine. This provides modern web standards support and consistent behavior with the Edge browser.
- Android: Uses
android.webkit.WebView, which is based on the Chromium browser engine. The specific version depends on the Android WebView system component installed on the device. - iOS and Mac Catalyst: Uses
WKWebView, which is based on the Safari WebKit browser engine. This is the same engine used by the Safari browser on iOS and macOS.
These platform-specific implementations mean that web content may render differently between platforms, and some platform-specific web APIs may only be available on certain platforms. When developing cross-platform apps, test your web content on all target platforms to ensure consistent behavior.
Create a .NET MAUI Blazor app
A .NET MAUI Blazor app can be created in Visual Studio by the .NET MAUI Blazor app template:
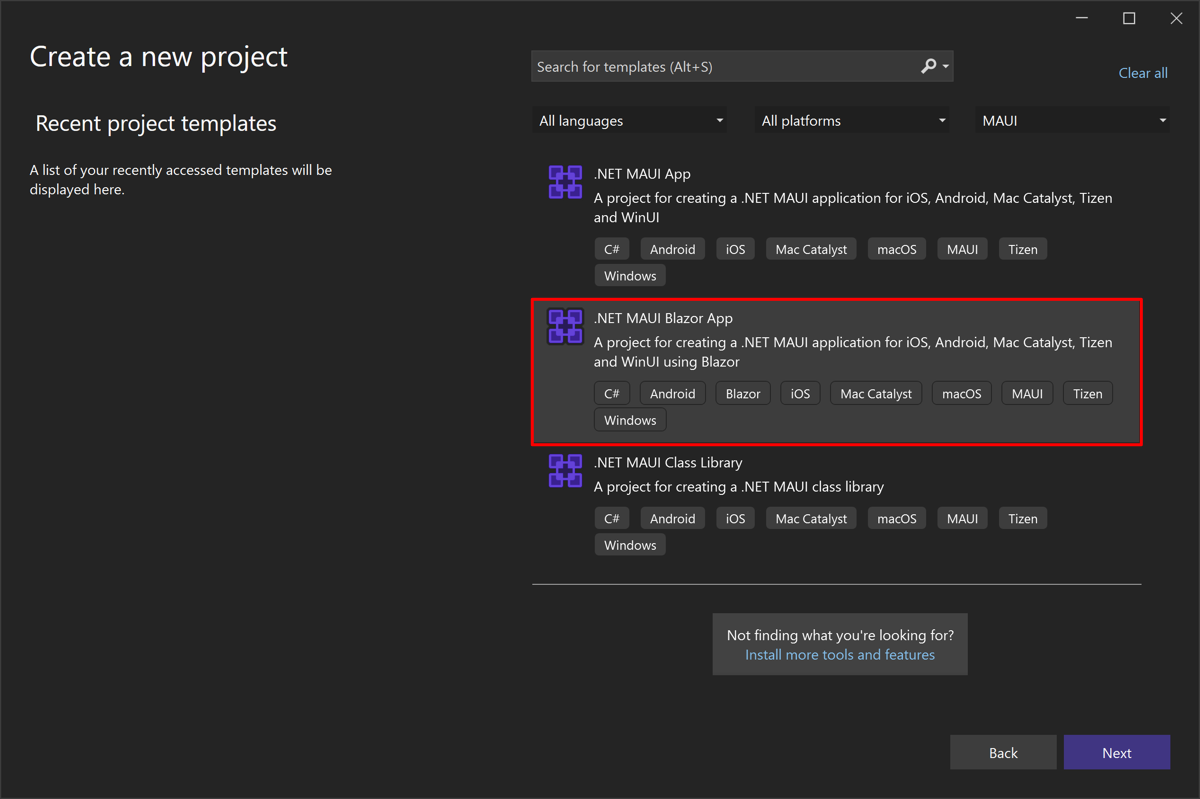
This project template creates a multi-targeted .NET MAUI Blazor app that can be deployed to Android, iOS, macOS, and Windows. For step-by-step instructions on creating a .NET MAUI Blazor app, see Build a .NET MAUI Blazor app.
The BlazorWebView created by the project template is defined in MainPage.xaml, and points to the root of the Blazor app:
<ContentPage xmlns="http://schemas.microsoft.com/dotnet/2021/maui"
             xmlns:x="http://schemas.microsoft.com/winfx/2009/xaml"
             xmlns:local="clr-namespace:BlazorWebViewDemo"
             x:Class="BlazorWebViewDemo.MainPage"
             BackgroundColor="{DynamicResource PageBackgroundColor}">

    <BlazorWebView HostPage="wwwroot/index.html">
        <BlazorWebView.RootComponents>
            <RootComponent Selector="#app" ComponentType="{x:Type local:Main}" />
        </BlazorWebView.RootComponents>
    </BlazorWebView>

</ContentPage>
The root Razor component for the app is in Main.razor, which Razor compiles into a type named Main in the application's root namespace. The rest of the Razor components are in the Pages and Shared project folders, and are identical to the components used in the default Blazor web template. Static web assets for the app are in the wwwroot folder.
Add a BlazorWebView to an existing app
The process to add a BlazorWebView to an existing .NET MAUI app is as follows:
Add the Razor SDK,
Microsoft.NET.Sdk.Razorto your project by editing its first line of the CSPROJ project file:<Project Sdk="Microsoft.NET.Sdk.Razor">The Razor SDK is required to build and package projects containing Razor files for Blazor projects.
Add the root Razor component for the app to the project.
Add your Razor components to project folders named Pages and Shared.
Add your static web assets to a project folder named wwwroot.
Add any optional _Imports.razor files to your project.
Add a BlazorWebView to a page in your .NET MAUI app, and point it to the root of the Blazor app:
<ContentPage xmlns="http://schemas.microsoft.com/dotnet/2021/maui"
             xmlns:x="http://schemas.microsoft.com/winfx/2009/xaml"
             xmlns:local="clr-namespace:MyBlazorApp"
             x:Class="MyBlazorApp.MainPage">

    <BlazorWebView HostPage="wwwroot/index.html">
        <BlazorWebView.RootComponents>
            <RootComponent Selector="#app" ComponentType="{x:Type local:Main}" />
        </BlazorWebView.RootComponents>
    </BlazorWebView>

</ContentPage>
Modify the
CreateMauiAppmethod of yourMauiProgramclass to register the BlazorWebView control for use in your app. To do this, on the IServiceCollection object, call theAddMauiBlazorWebViewmethod to add component web view services to the services collection:public static class MauiProgram { public static MauiApp CreateMauiApp() { var builder = MauiApp.CreateBuilder(); builder .UseMauiApp<App>() .ConfigureFonts(fonts => { fonts.AddFont("OpenSans-Regular.ttf", "OpenSansRegular"); }); builder.Services.AddMauiBlazorWebView(); #if DEBUG builder.Services.AddBlazorWebViewDeveloperTools(); #endif // Register any app services on the IServiceCollection object // e.g. builder.Services.AddSingleton<WeatherForecastService>(); return builder.Build(); } }This code also enables developer tools on the underlying WebView controls, when the app is running in debug configuration.
Access scoped services from native UI
BlazorWebView has a TryDispatchAsync method that can call a specified Action<ServiceProvider> asynchronously and pass in the scoped services available in Razor components. This enables code from the native UI to access scoped services such as NavigationManager:
private async void OnMyMauiButtonClicked(object sender, EventArgs e)
{
    var wasDispatchCalled = await blazorWebView.TryDispatchAsync(sp =>
    {
        var navMan = sp.GetRequiredService<NavigationManager>();
        navMan.CallSomeNavigationApi(...);
    });

    if (!wasDispatchCalled)
    {
        // Consider what to do if it the dispatch fails - that's up to your app to decide.
    }
}
Diagnosing issues
BlazorWebView has built-in logging that can help you diagnose issues in your Blazor Hybrid app. There are two steps to enable this logging:
- Enable BlazorWebView and related components to log diagnostic information.
- Configure a logger to write the log output to where you can view it.
For more information about logging, see Logging in C# and .NET.
Enable BlazorWebView logging
All logging configuration can be performed as part of service registration in the dependency injection system. To enable maximum logging for BlazorWebView and related components under the Microsoft.AspNetCore.Components.WebView namespace, add the following code to where your app's services are registered:
services.AddLogging(logging =>
{
    logging.AddFilter("Microsoft.AspNetCore.Components.WebView", LogLevel.Trace);
});
Alternatively, to enable maximum logging for every component that uses Microsoft.Extensions.Logging, you could use the following code:
services.AddLogging(logging =>
{
    logging.SetMinimumLevel(LogLevel.Trace);
});
Configure logging output and viewing the output
After configuring components to write log information you need to configure where the loggers should write the logs to, and then view the log output.
The Debug logging providers write the output using Debug statements, and the output can be viewed from Visual Studio.
To configure the Debug logging provider, first add a reference in your project to the Microsoft.Extensions.Logging.Debug NuGet package. Then, register the provider inside the call to AddLogging that you added in the previous step by calling the AddDebug extension method:
services.AddLogging(logging =>
{
    logging.AddFilter("Microsoft.AspNetCore.Components.WebView", LogLevel.Trace);
    logging.AddDebug();
});
When you run the app from Visual Studio (with debugging enabled), you can view the debug output in Visual Studio's Output window.
Play inline video on iOS
To play inline video in a Blazor hybrid app on iOS, in a BlazorWebView, you should:
Set the UrlLoadingStrategy property to
OpenInWebView. This can be accomplished in the event handler for the UrlLoading event:private void BlazorUrlLoading(object? sender, UrlLoadingEventArgs e) { #if IOS e.UrlLoadingStrategy = UrlLoadingStrategy.OpenInWebView; #endif }Ensure that the
AllowsInlineMediaPlaybackproperty in aConfigurationobject is set totrue. This can be accomplished in the event handler for the BlazorWebViewInitializing event:private void BlazorWebViewInitializing(object? sender, BlazorWebViewInitializingEventArgs e) { #if IOS e.Configuration.AllowsInlineMediaPlayback = true; #endif }
Disposal deadlocks on Android
By default, BlazorWebView fires and forgets the async disposal of the underlying WebViewManager. This reduces the potential for disposal deadlocks to occur on Android.
Warning
This fire-and-forget default behavior means that disposal can return before all objects are disposed, which can cause behavioral changes in your app. The items that are disposed are partially Blazor's own internal types, but also app-defined types such as scoped services used within the BlazorWebView portion of your app.
To opt out of this behavior, you should configure your app to block on dispose via an AppContext switch in your MauiProgram class:
static MauiProgram()
{
    AppContext.SetSwitch("BlazorWebView.AndroidFireAndForgetAsync", false);
}
If your app is configured to block on dispose via this switch, BlazorWebView performs async-over-sync disposal, which means that it blocks the thread until the async disposal is complete. However, this can cause deadlocks if the disposal needs to run code on the same thread (because the thread is blocked while waiting).
Host content using the legacy behavior
The default behavior for hosting content in a BlazorWebView has changed to 0.0.0.1. The internal 0.0.0.0 address used to host content no longer works and results in the BlazorWebView not loading any content and rendering as an empty rectangle.
To opt into using the 0.0.0.0 address, add the following code to your MauiProgram class:
static MauiProgram()
{
    // Set this switch to use the LEGACY behavior of always using 0.0.0.0 to host BlazorWebView
    AppContext.SetSwitch("BlazorWebView.AppHostAddressAlways0000", true);
}
Intercept web requests
BlazorWebView can intercept and respond to web requests initiated from within the embedded web view. This enables scenarios such as modifying headers, redirecting requests, or supplying local responses.
To intercept web requests, handle the WebResourceRequested event. In the event handler, set Handled to true and provide a response via SetResponse(statusCode, statusDescription, contentType, streamOrTaskOfStream) when you intend to fully handle the request:
blazorWebView.WebResourceRequested += (s, e) =>
{
    // Example: short-circuit a specific API call with a local JSON response
    if (e.Uri.ToString().Contains("/api/secure", StringComparison.OrdinalIgnoreCase))
    {
        e.Handled = true;
        e.SetResponse(200, "OK", "application/json", GetLocalJsonStreamAsync());
        return;
    }

    // Example: add an auth header for a particular host and allow normal processing
    if (e.Uri.Host.Equals("api.contoso.com", StringComparison.OrdinalIgnoreCase))
    {
        e.RequestHeaders["Authorization"] = $"Bearer {GetToken()}";
        // Don't set Handled; let the request proceed
    }
};

private Task<Stream> GetLocalJsonStreamAsync()
{
    // Return a stream containing JSON (for example from an embedded asset)
    var json = Encoding.UTF8.GetBytes("{\"message\":\"Hello from local\"}");
    return Task.FromResult<Stream>(new MemoryStream(json));
}
Caution
The WebResourceRequested callback must execute synchronously on the WebView thread. If you set Handled = true, you must call SetResponse immediately to provide a response. For asynchronous content generation, pass a Task<Stream> to SetResponse so the WebView can continue while the stream completes.
Common patterns include:
- Injecting or rewriting headers for specific hosts.
- Returning local files or in-memory content for offline or testing scenarios.
- Redirecting to a different URI by returning a 3xx status with a
Locationheader.
Collaborate with us on GitHub
The source for this content can be found on GitHub, where you can also create and review issues and pull requests. For more information, see our contributor guide.