Note
Access to this page requires authorization. You can try signing in or changing directories.
Access to this page requires authorization. You can try changing directories.
This chapter contains the procedures you need to follow to perform an upgrade of the Dynamics GP web client in the scale out configuration. The following sections are included:
Preparing for the upgrade
The first step to performing the upgrade for a scale out installation is to upgrade for the database and the desktop client components for Dynamics GP. Use Dynamics GP Utilities to upgrade the system database and the company databases. Refer to the procedures described in the upgrade documentation for Dynamics GP to complete this process.
You should verify that at least one desktop client installation is working properly before you continue with the Dynamics GP web client upgrade. Resolve any issues before you continue.
Be sure that all of the users have signed out of the system before you start the web client upgrade process.
If you are using Tenant Services with your Dynamics GP web client installation, you must apply the update to Tenant Services before you update the web client components. Refer to the Tenant Services Installation and Administration Guide for information about updating Tenant Services. The Dynamics GP upgrade can take place after the upgrade of the web client since older versions of the Dynamics GP runtime can be used with the latest version of the web components.
Updating the web site and Session Central Service
To install the upgrade for the web site and the Session Central Service, complete the following procedure.
Log in to the machine that is running the web site and the Session Central Service for the Dynamics GP web client installation.
From the Dynamics GP installation media, double-click the Setup.exe file to open the Dynamics GP installation window.
Click Web Components and then click Install.
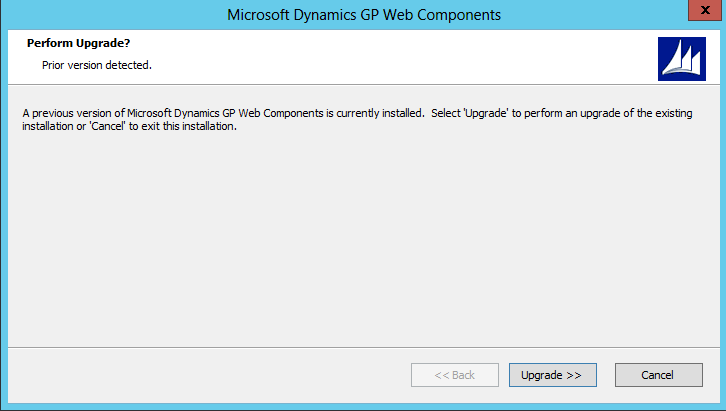
Select to upgrade your existing web client installation.

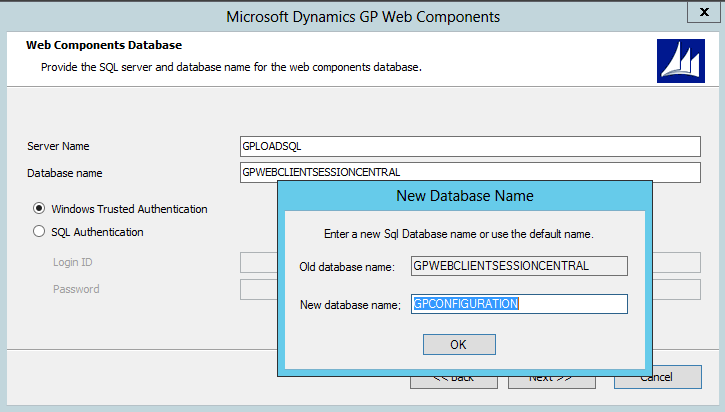
- The installation wizard will default with the selections from the installation being upgraded. You can change settings as needed. You can also select to add the service based architecture components to the installation. Upgrading the database will ask you for a new database name, defaulting to GPCONFIGURATION. The data will be migrated to the new database when running the configuration wizard.

When the installation is complete, run the Dynamics GP Web Components Configuration Wizard. You can access this from the Start menu.
At the Welcome screen, click Next.
Specify the type of authentication you want to use to connect to the SQL Server where the database for the Web Components is located. Click Next to continue.
Review the configuration actions that will be performed. Click Next to continue.
Click Exit.
The Dynamics GP Web Client Help installer will be started. Click Install to complete the help installation process.
Click Finish to close the installer.
Updating session host machines
To install the upgrade for each session host machine in the scale out installation, complete the following procedure.
Log in to the session host machine.
If you haven’t already done so, perform the update for the Dynamics GP desktop client components. Be sure that the desktop client on the session host machine is working properly before you continue this upgrade procedure.
From the Dynamics GP installation media, double-click the Setup.exe file to open the Dynamics GP installation window.
Click Web Components and then click Install.
Select to upgrade your existing web client installation.
The installation wizard will default with the selections from the installation being upgraded. You can change settings as needed. You can also select to add the service based architecture components to the installation. When asked for the web components database, provide the new database name selected when upgrading the web server.
When the installation is complete, run the Dynamics GP Web Components Configuration Wizard. You can access this from the Start menu.
When the installation is complete, run the Dynamics GP Web Components Configuration Wizard. You can access this from the Start menu.
At the Welcome screen, click Next.
Specify the type of authentication you want to use to connect to the SQL Server where the database for the Web Components is located. Click Next to continue.
Review the configuration actions that will be performed. Click Next to continue.
Click Exit.
Start the installer for the updated help content. The installer has the following name:
Microsoft_DynamicsGP18_GPWebClientHelp.msi.
At the Welcome screen, click Install. The installation process may take a few minutes.
Click Finish.
Verifying the services
When all of the components of the web client installation have been updated, • On the machine that is hosting the web site for the web client installation, verify that the Session Central Service is running.
On each session host machine, verify that the Session Service is running.
In the Session Management snap-in for the Web Management Console, all of the session host machines should be listed. Be sure that each machine is set to allow new web client sessions.
At this point, you can allow users to sign in to the Dynamics GP web client installation.
Client machine update steps
To ensure that the updated Dynamics GP web client is working properly, you should perform the following steps on each of the client machines that access the web client.
Clear the Internet Explorer browser cache. This helps to ensure that the updated application and help files are being used for the web client.
To clear the browser cache, open Internet Explorer. In the Tools menu, choose Internet options. In the Browsing history group, click Delete.
In the Delete Browsing History window, be sure to remove the temporary
Internet files. Click Delete.
After the browser cache has been cleared, click OK.
In Internet Explorer, go to the Dynamics GP web client site. Sign in to the web client.
Note
If you watch closely, you should see a new Silverlight application is downloaded for the Dynamics GP web client.
Look in the lower-right corner to verify the trust level for the web client. If you see the icon indicating that the web client is running in sandboxed mode, you have an additional step to perform.
The Silverlight application included with the updated web client may have been signed with a security certificate that is not available on the client machine. To get this certificate, you must run the DynamicsGPTrustedApp.msi that is included with the updated web client code.