Events
Microsoft Cloud for Sustainability Technical Summit November 4-7
Nov 4, 11 PM - Nov 7, 11 PM
Gain insights from expert-led sessions, interactive demos, and live Q&A!
Register nowThis browser is no longer supported.
Upgrade to Microsoft Edge to take advantage of the latest features, security updates, and technical support.
Important
Data virtualization is part of the fabric or tools to integrate Business Central online with Microsoft Dataverse. To learn more about Dataverse integration, consult Business Central & Dataverse integration. Data virtualization allows users with Business Central licenses and entitlements to access data stored in Business Central online by performing (Create/Read/Update/Delete) API operations on Business Central tables that are available as virtual tables in Dataverse.
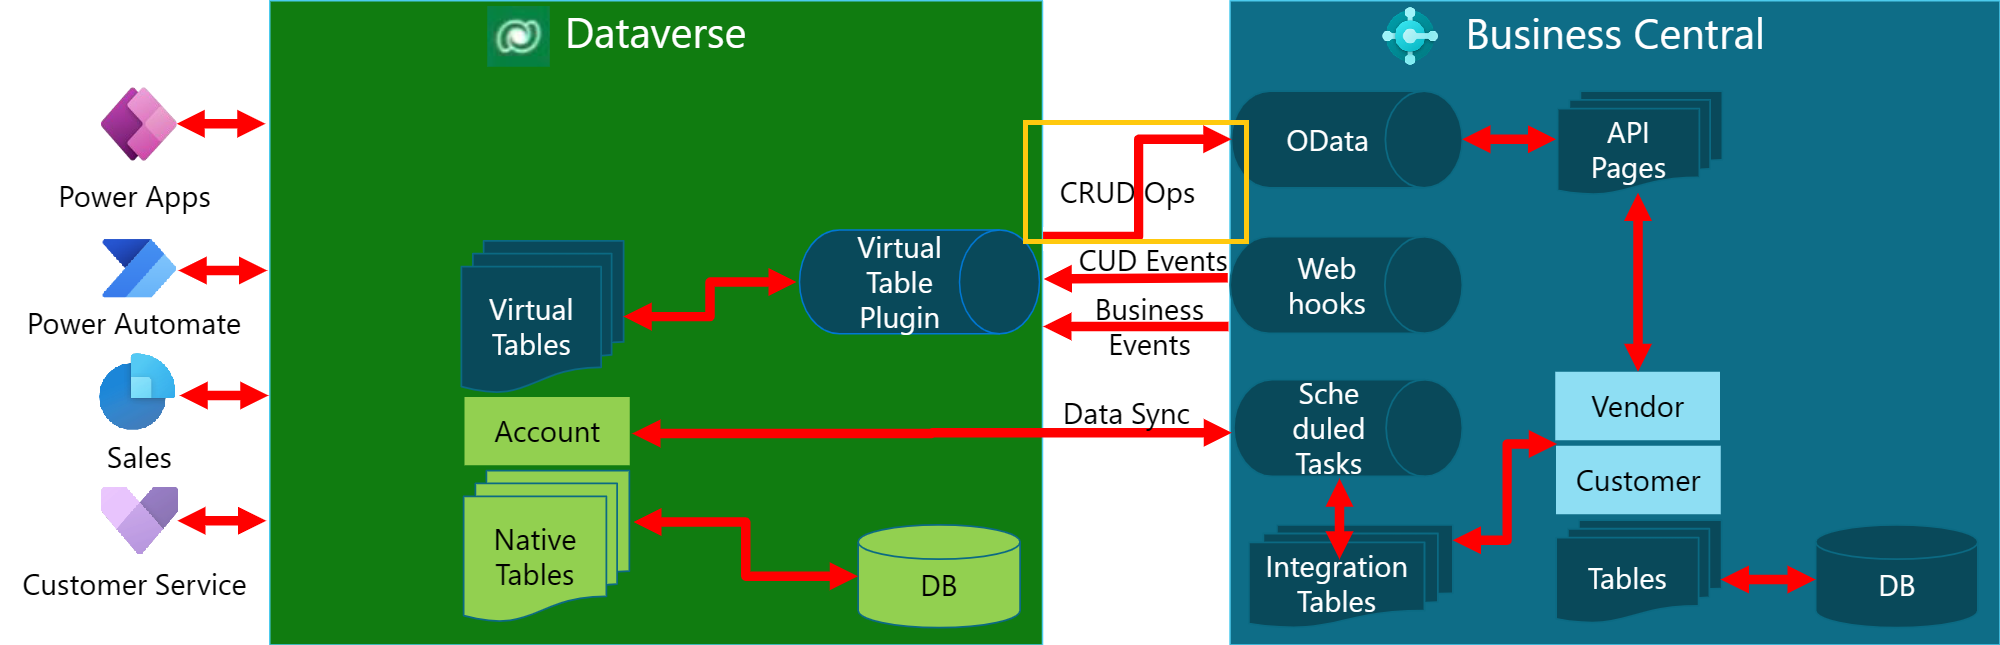
These licensed users are considered as internal users to the organizations or companies that purchase the licenses. They're in employee-like relationships with the companies and perform business processes on the companies' behalf. They can access data stored in Business Central online using Power Apps and Power Automate, which operate on virtual tables in Dataverse.
Business Central 2023 release wave 2, version 23.1, introduced Power Pages on virtual tables feature. This feature allows unlicensed external users to access data stored in Business Central online by using Power Pages that operates on virtual tables in Dataverse. For more info on internal and external users, consult the Dynamics 365 licensing guide and refer to the Licensing requirements for external users and Multiplexing sections.

External users are typically users from the customer or vendor organizations of companies that purchase Business Central licenses. In some commerce or collaboration scenarios, these users might need to participate in processes that involve data stored in Business Central online, such as customer onboarding, vendor bidding, and so on—even if they aren’t Business Central users. This new feature enables those companies to build business-to-business (B2B) portals using Power Pages that serve their customers and vendors, so external users can have anonymous and authenticated access to data stored in Business Central online.
Anonymous access via Power Pages allows external users to perform API operations on Business Central tables without signing in. Authenticated access via Power Pages requires external users to sign in to perform API operations on Business Central tables or rows that are accessible to them. Business Central admins can select only the necessary API operations, tables, and rows to be enabled for anonymous and authenticated access by external users. Additionally, this feature also enables authenticated access via Power Pages for internal and existing Business Central users, similar to authenticated access via Power Apps and Power Automate.
This article highlights the new feature of Power Pages on virtual tables, the prerequisites and step-by-step instructions to preview it, its current limitations, and future improvements.
To preview the new feature of Power Pages on virtual tables, complete the following tasks:
Create or upgrade a Business Central environment with Dynamics 365 Business Central 2023 release Wave 2 (version 23.1 or later).
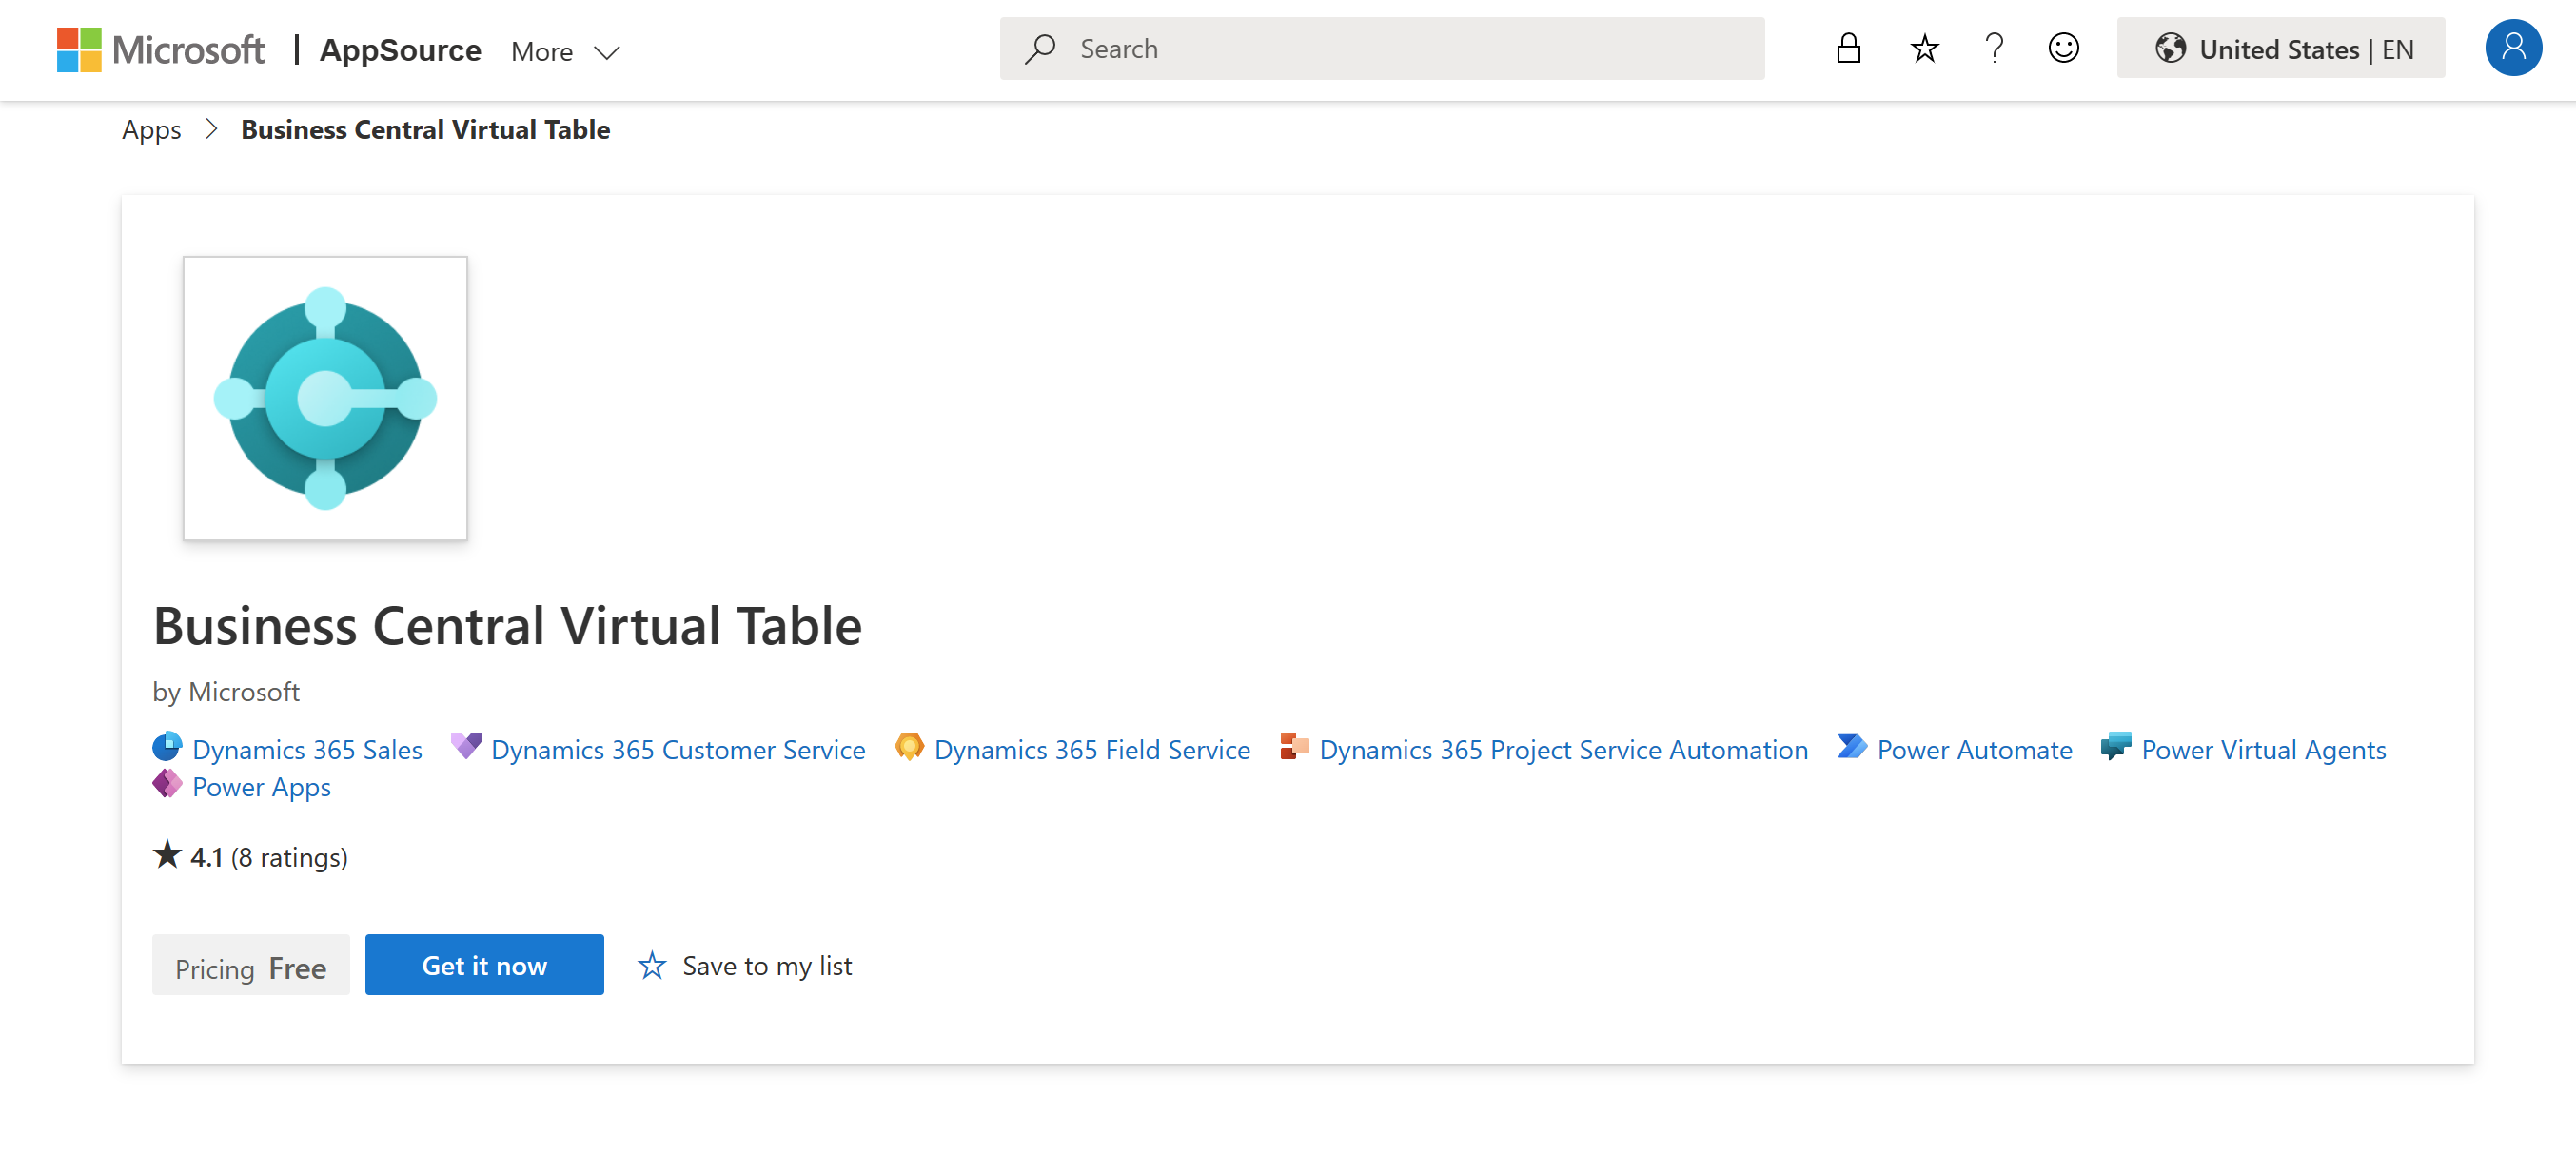
In Business Central, use the assisted setup guide to connect your Business Central environment to a Dataverse environment in which you want to make your Business Central tables available as virtual tables. This task guides you to install the Business Central Virtual Table app from AppSource.
For more information, go to Connect Business Central online to Dataverse in this article.
In Business Central, admins can assign permission sets to the built-in app/service-to-service (S2S) users that must access data stored in Business Central online via Power Pages on behalf of anonymous and authenticated external users.
For more information, go to Assign permission sets to anonymous and authenticated external users in this article.
In Power Apps maker portal, launch the Business Central Configuration app to select virtual Business Central tables, such as Customer/Item/Sales Order/Sales Invoice/Sales Shipment/Vendor tables, and make them visible.
For more information, go to Make virtual Business Central tables visible on Dataverse in this article.
In Power Apps maker portal, open the native Dataverse Contact table and add lookup columns to the virtual Business Central Customer/Vendor tables.
For more information, go to Add lookup columns on Dataverse Contact table in this article.
In the Business Central Configuration app, create synthetic relations between the native Dataverse Contact table and virtual Business Central tables, such as Sales Order, Sales Invoice, and Sales Shipment.
For more information, go to Create synthetic relations for Dataverse Contact table in this article.
In Power Platform admin center, select the Environments section, your environment where you'll build your Power Pages portals, and the Power Pages sites item in Resources panel. Turn on both the Switch to enhanced data model and Enable Bootstrap v5 for new sites (preview) switches.
In Power Pages maker portal, create pages for anonymous access of external users.
For more information, go to Enable anonymous access for external users via Power Pages in this article.
In Power Pages maker portal, create pages for authenticated access of external users.
For more information, go to Enable authenticated access for external users via Power Pages in this article.
(Optional) In Power Pages maker portal, create pages for authenticated access of internal users.
For more information, go to Enable authenticated access for internal users via Power Pages in this article.
(Optional) In Power Pages maker portal, make virtual Business Central tables editable as Power Pages lists.
For more information, go to Enable edit mode on Power Pages lists in this article.
(Optional) In Power Pages maker portal, make virtual Business Central tables editable as Power Pages subgrids.
For more information, go to Enable edit mode on Power Pages subgrids in this article.
To connect your Business Central environment to a Dataverse environment in which you want to make your Business Central tables available as virtual tables, complete the following steps:
Sign in to Business Central.
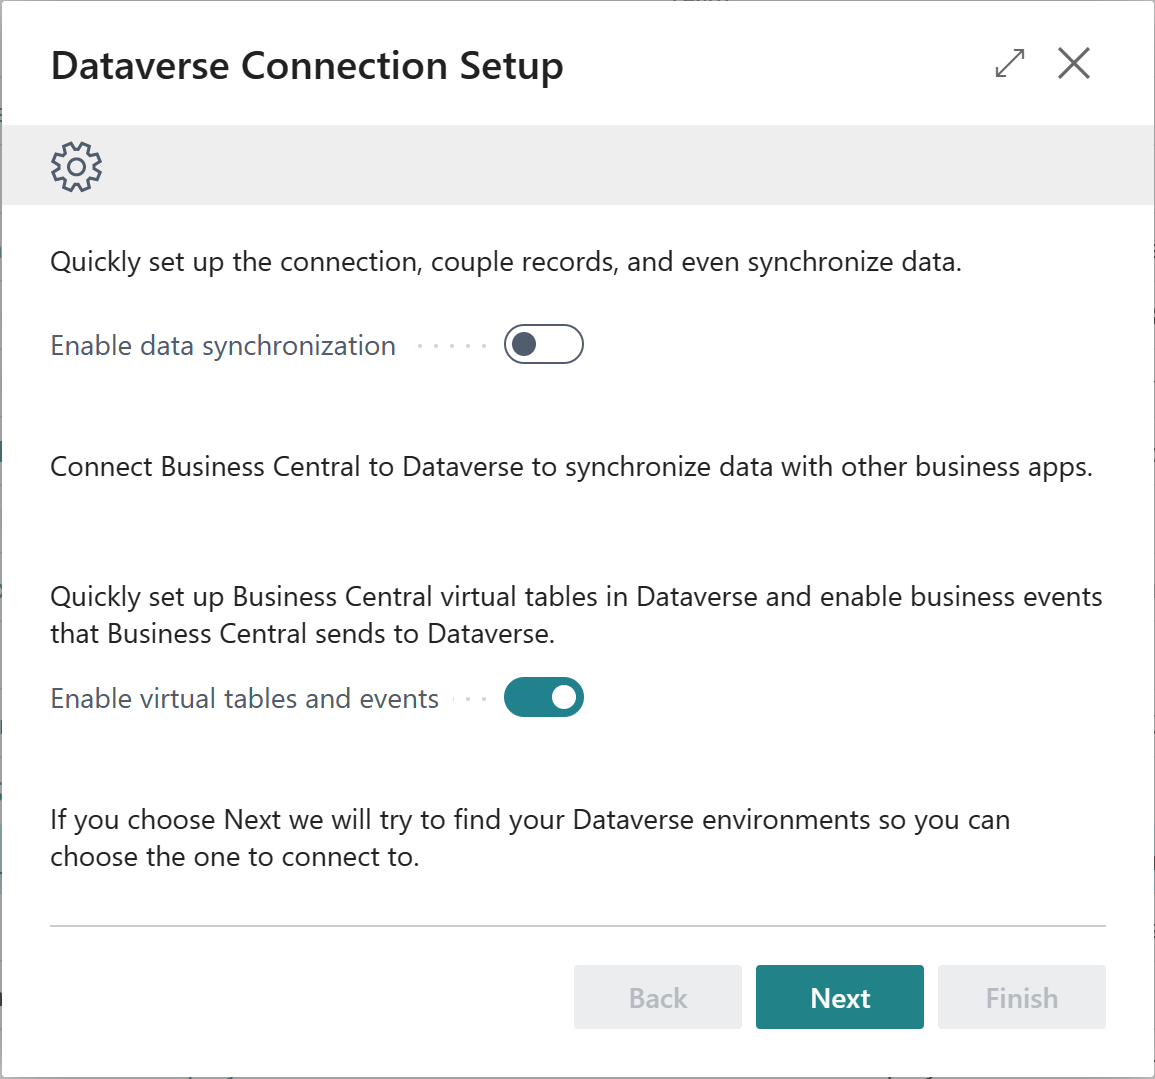
Select the Settings icon > Assisted setup > Set up a connection to Dataverse to open the Dataverse Connection Setup assisted setup guide.
Turn on the Enable virtual tables and events switch and then select Next.
Review the terms and conditions. If you want to accept, turn on the I accept switch, and then select Next.
Specify your Dataverse environment URL, sign in as an administrator user, and then select Next.
Install the Business Central Virtual Table app from AppSource, and then select Finish.
Because external users have no Business Central license or entitlements, we included built-in app/S2S users to access data stored in Business Central online on their behalf. Permission sets can be assigned to these app/S2S users to control data access by external users. To do so, complete the following steps:
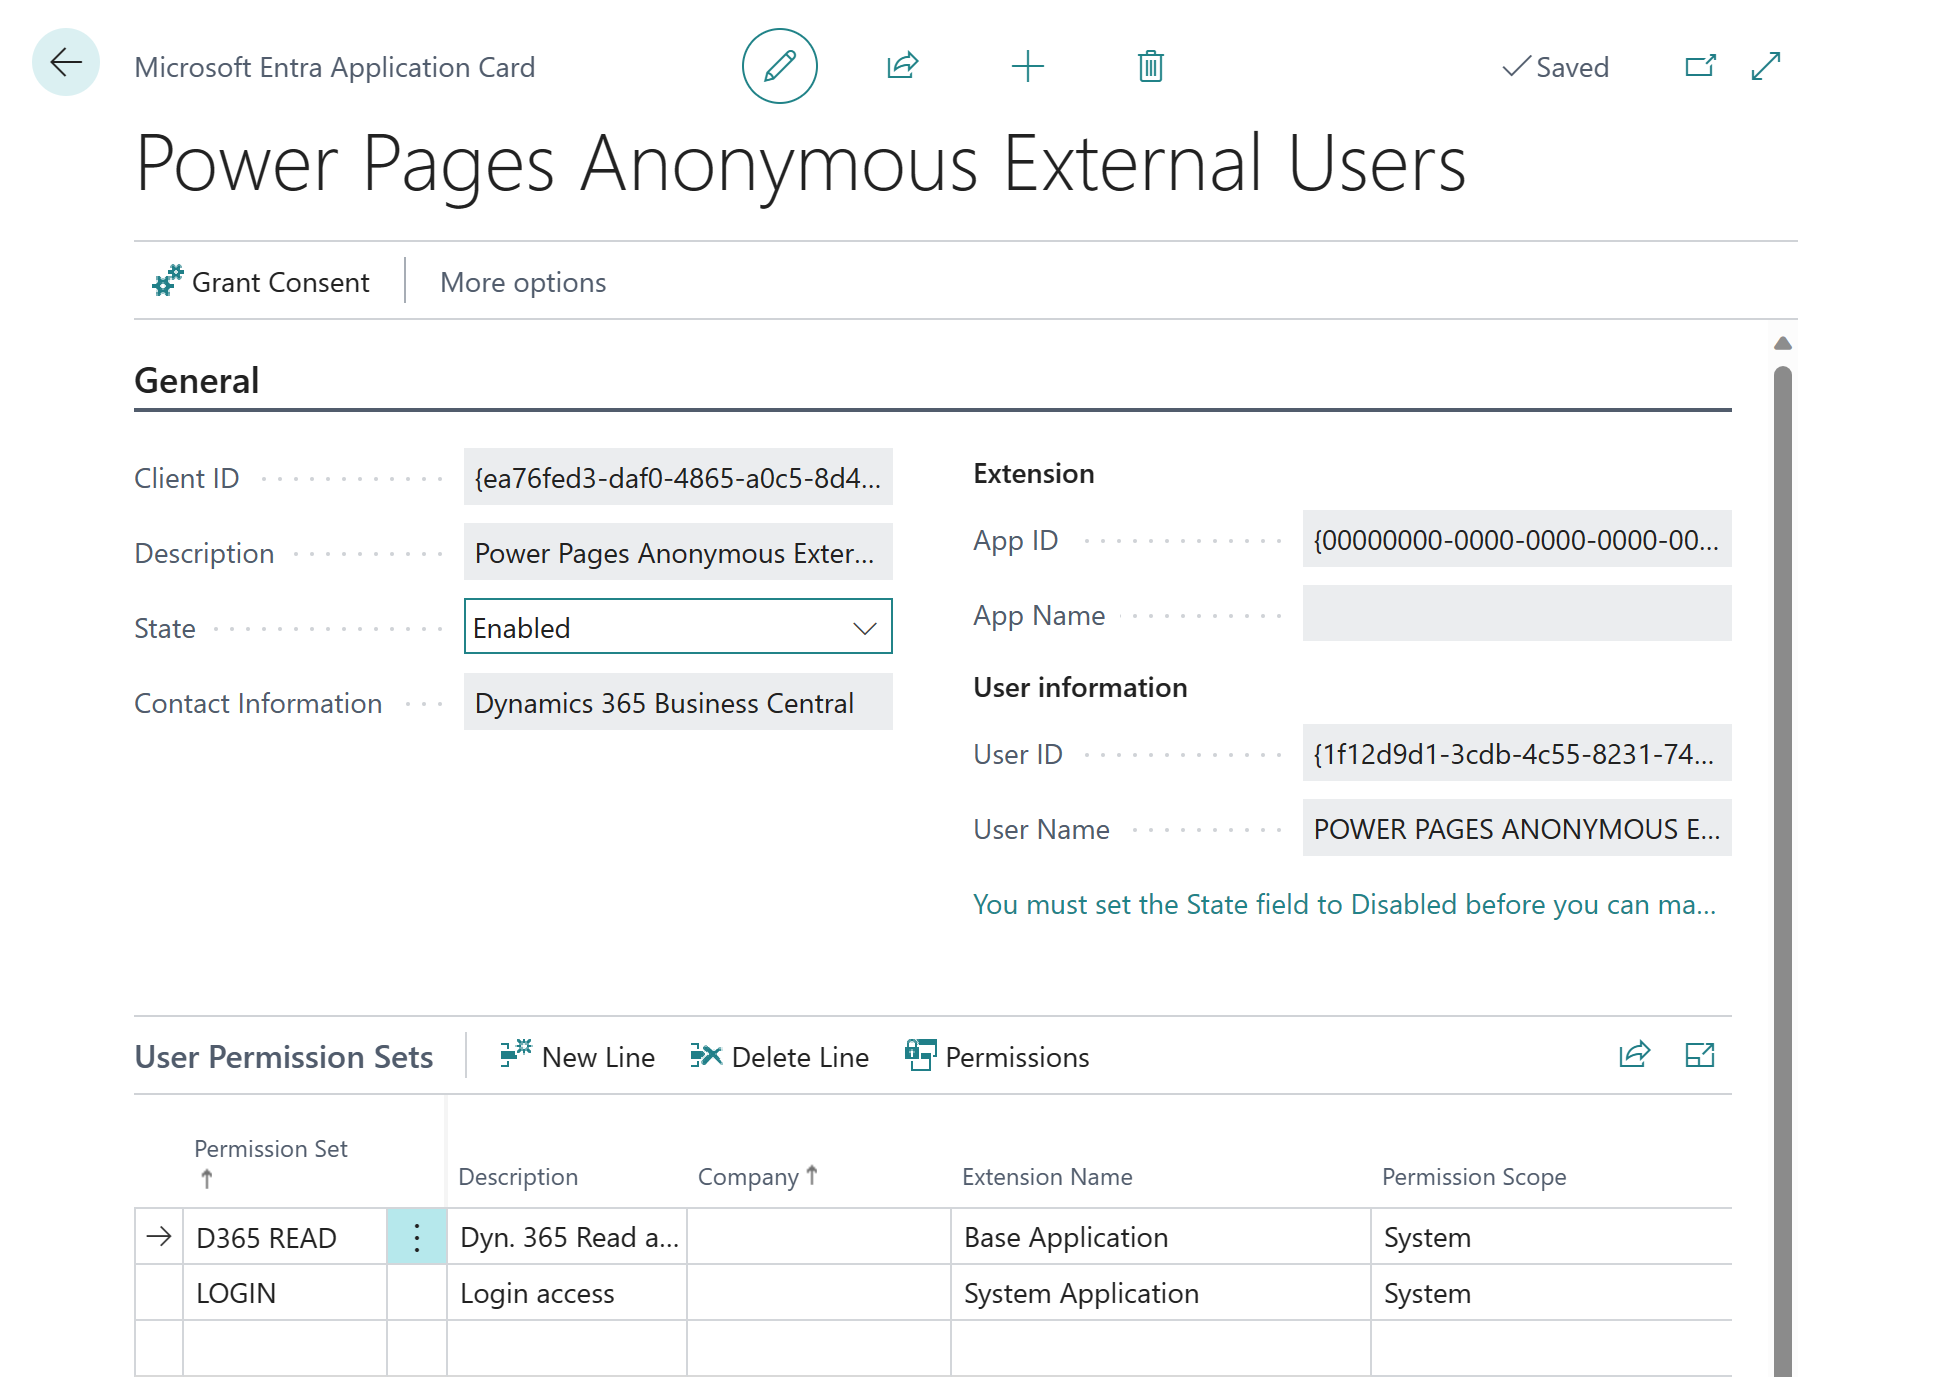
In Business Central, search for and open the Microsoft Entra Applications page.
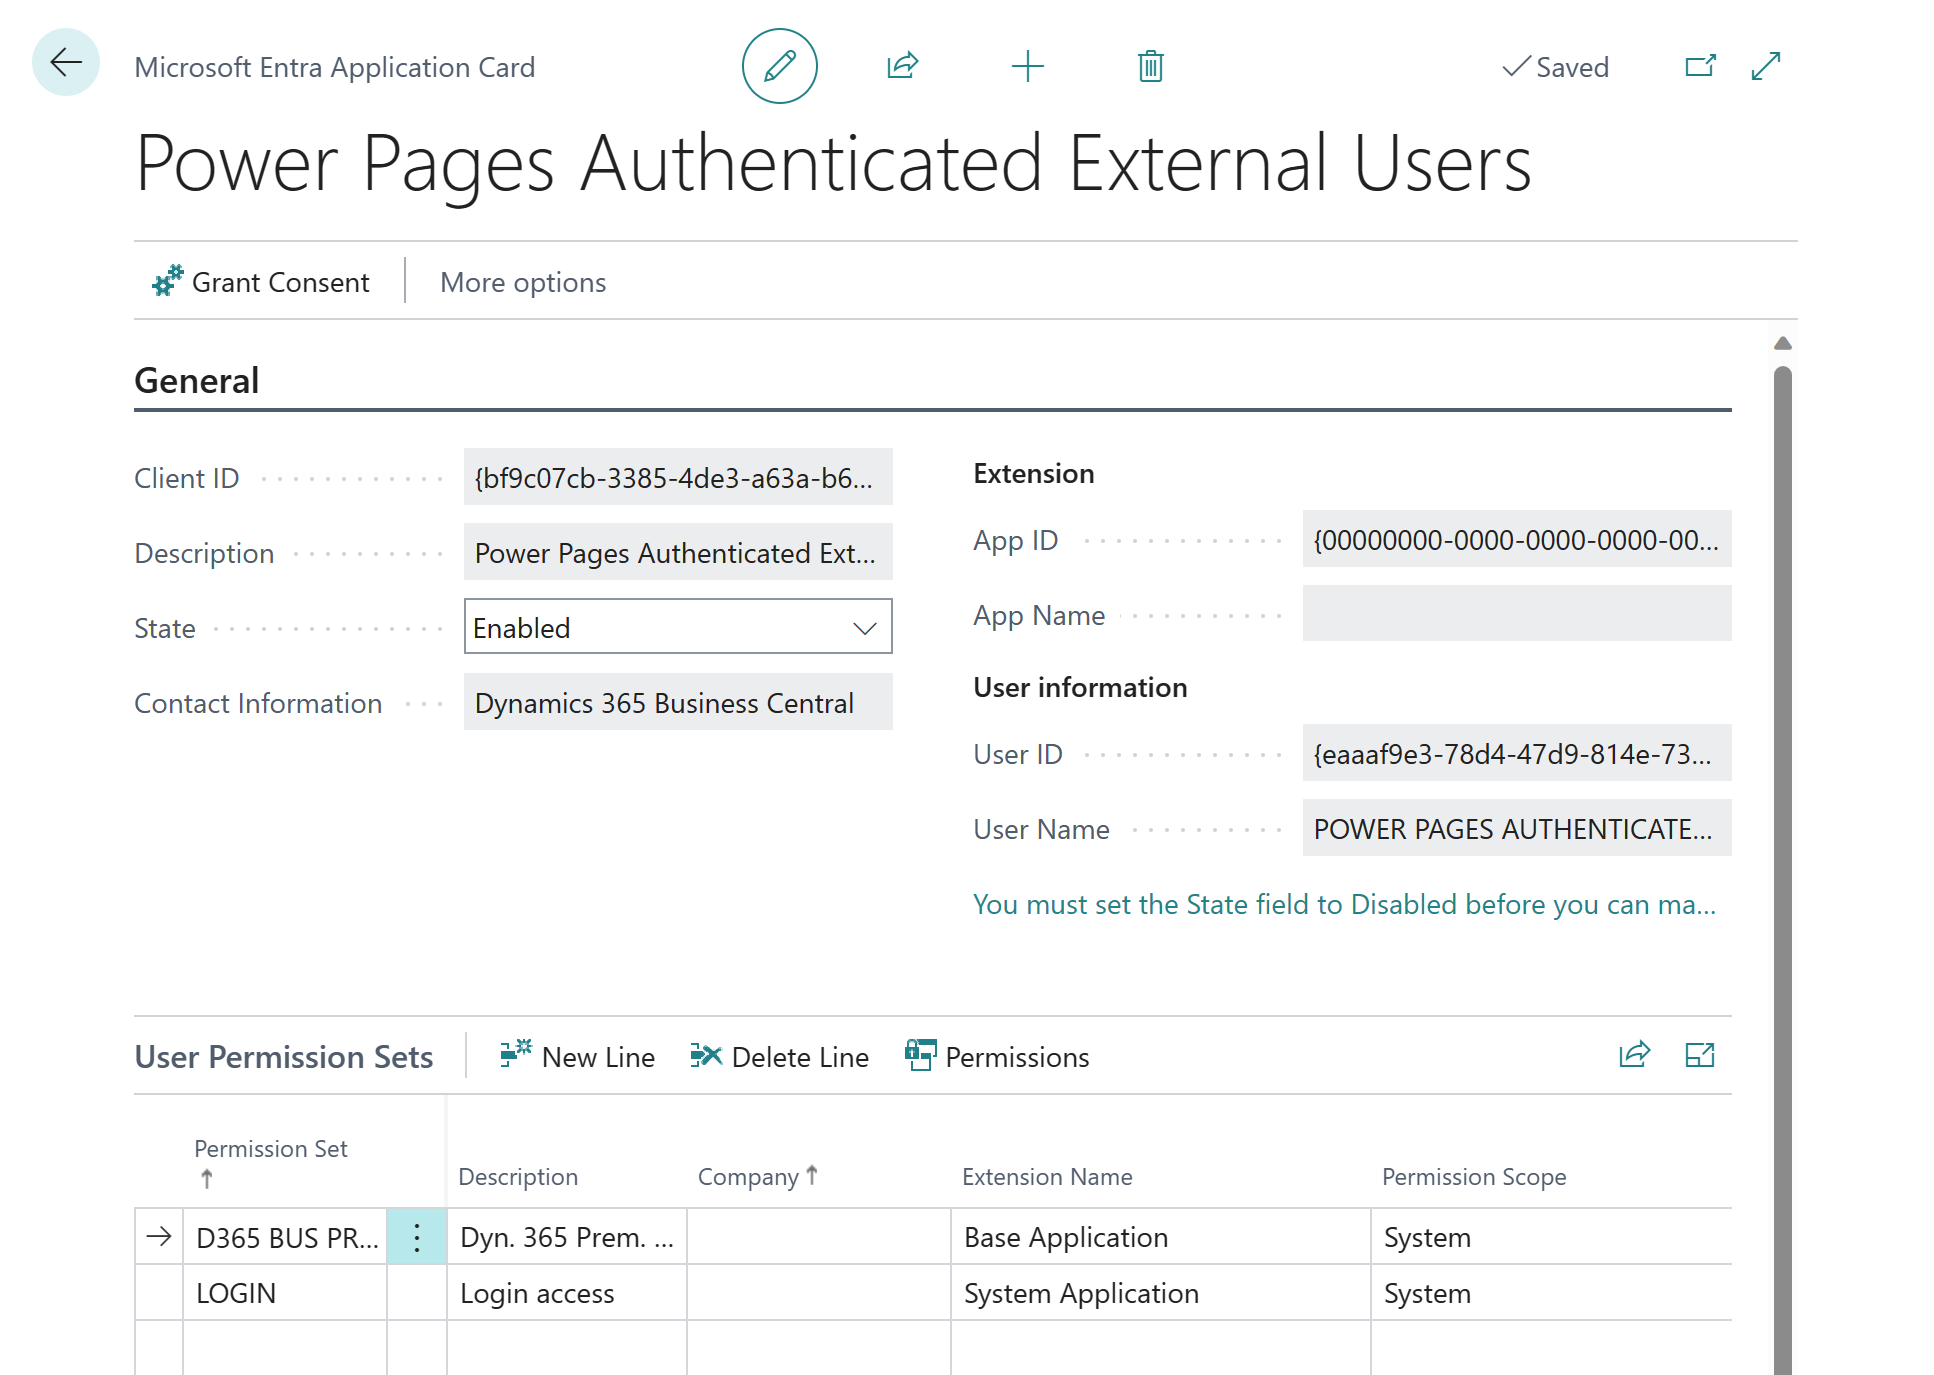
There are three built-in app/S2S users:
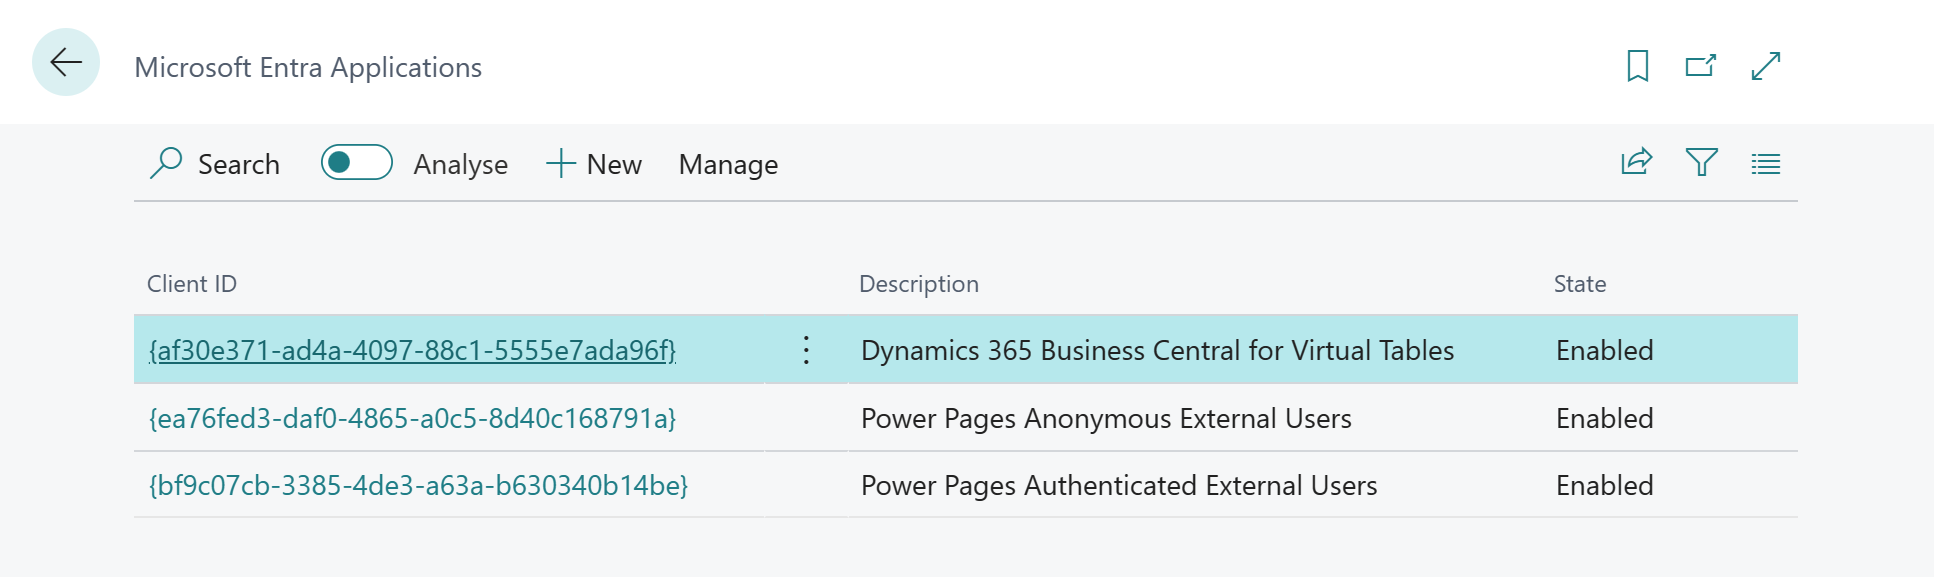
Open the Power Pages Anonymous External Users card, set the State field to Enabled, and assign permission sets with the appropriate scope for anonymous external users, for example read-only for certain tables and LOGIN permission set as a minimum.
Open the Power Pages Authenticated External Users card, set the State field to Enabled, and assign permission sets with the appropriate scope for authenticated external users, for example read-write for certain tables and LOGIN permission set as a minimum.
To make virtual Business Central tables visible on Dataverse, complete the following steps:
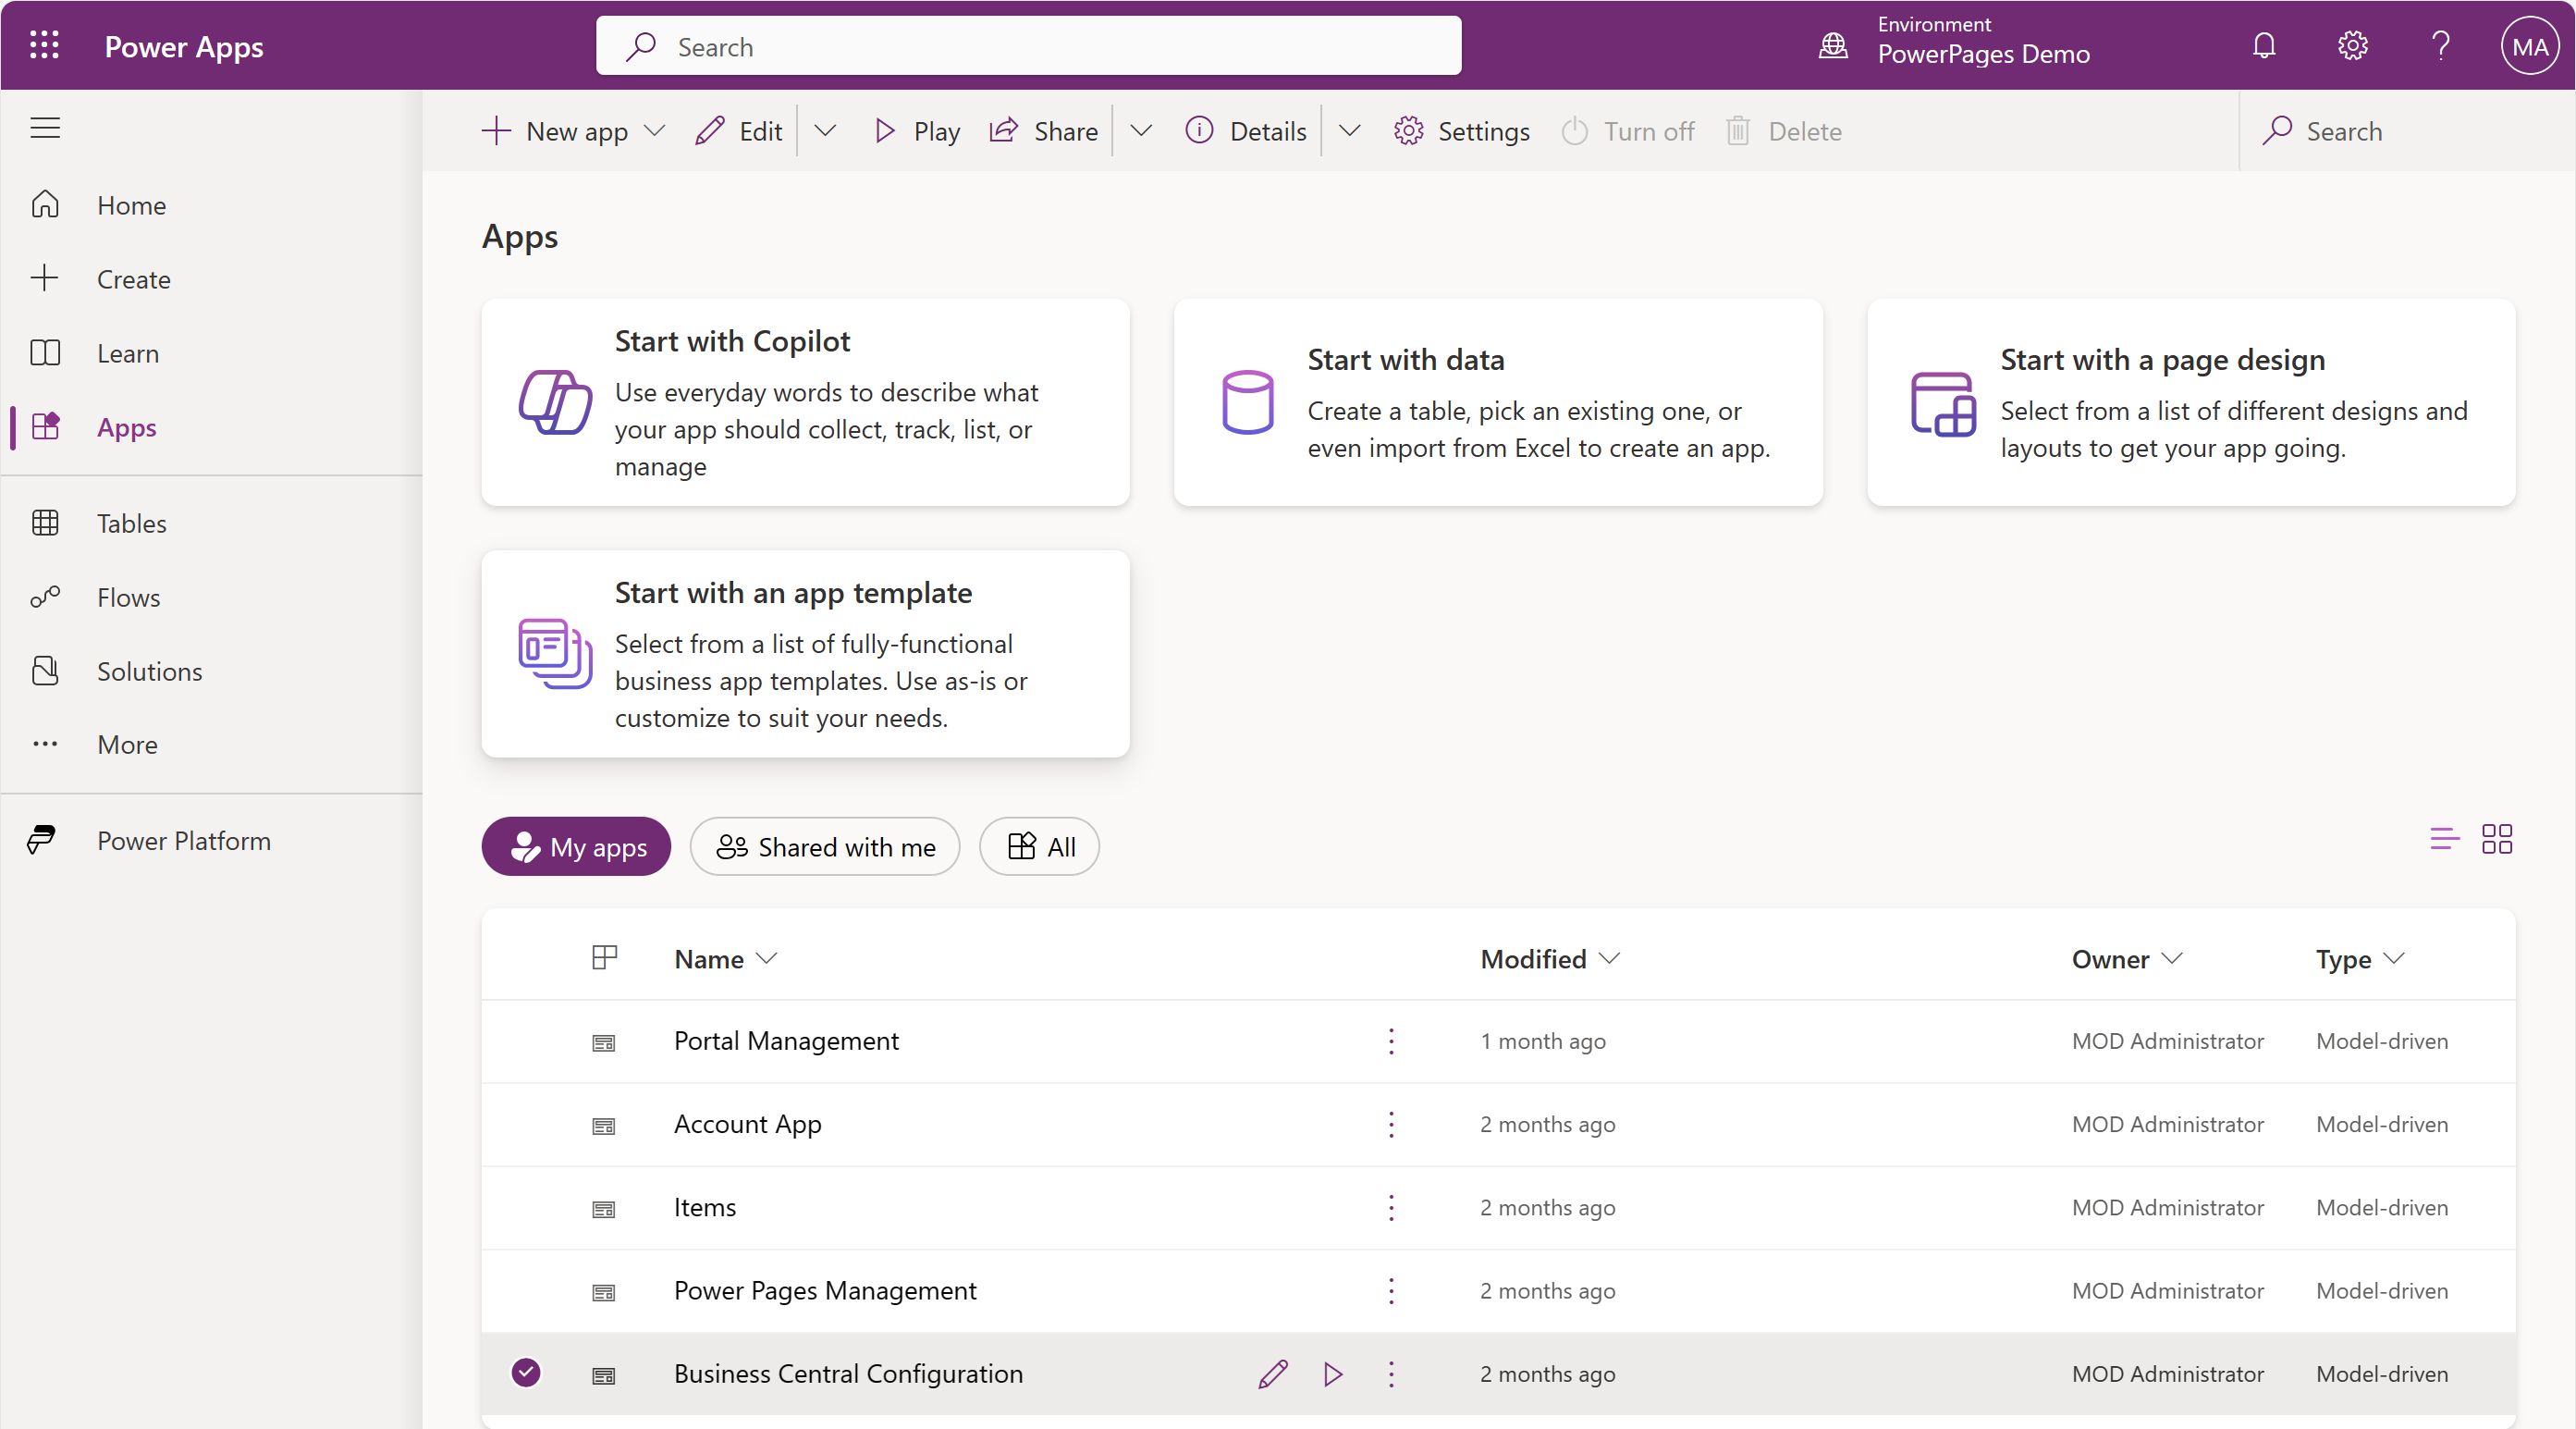
In Power Apps maker portal, select the Apps section, and launch the Business Central Configuration app.
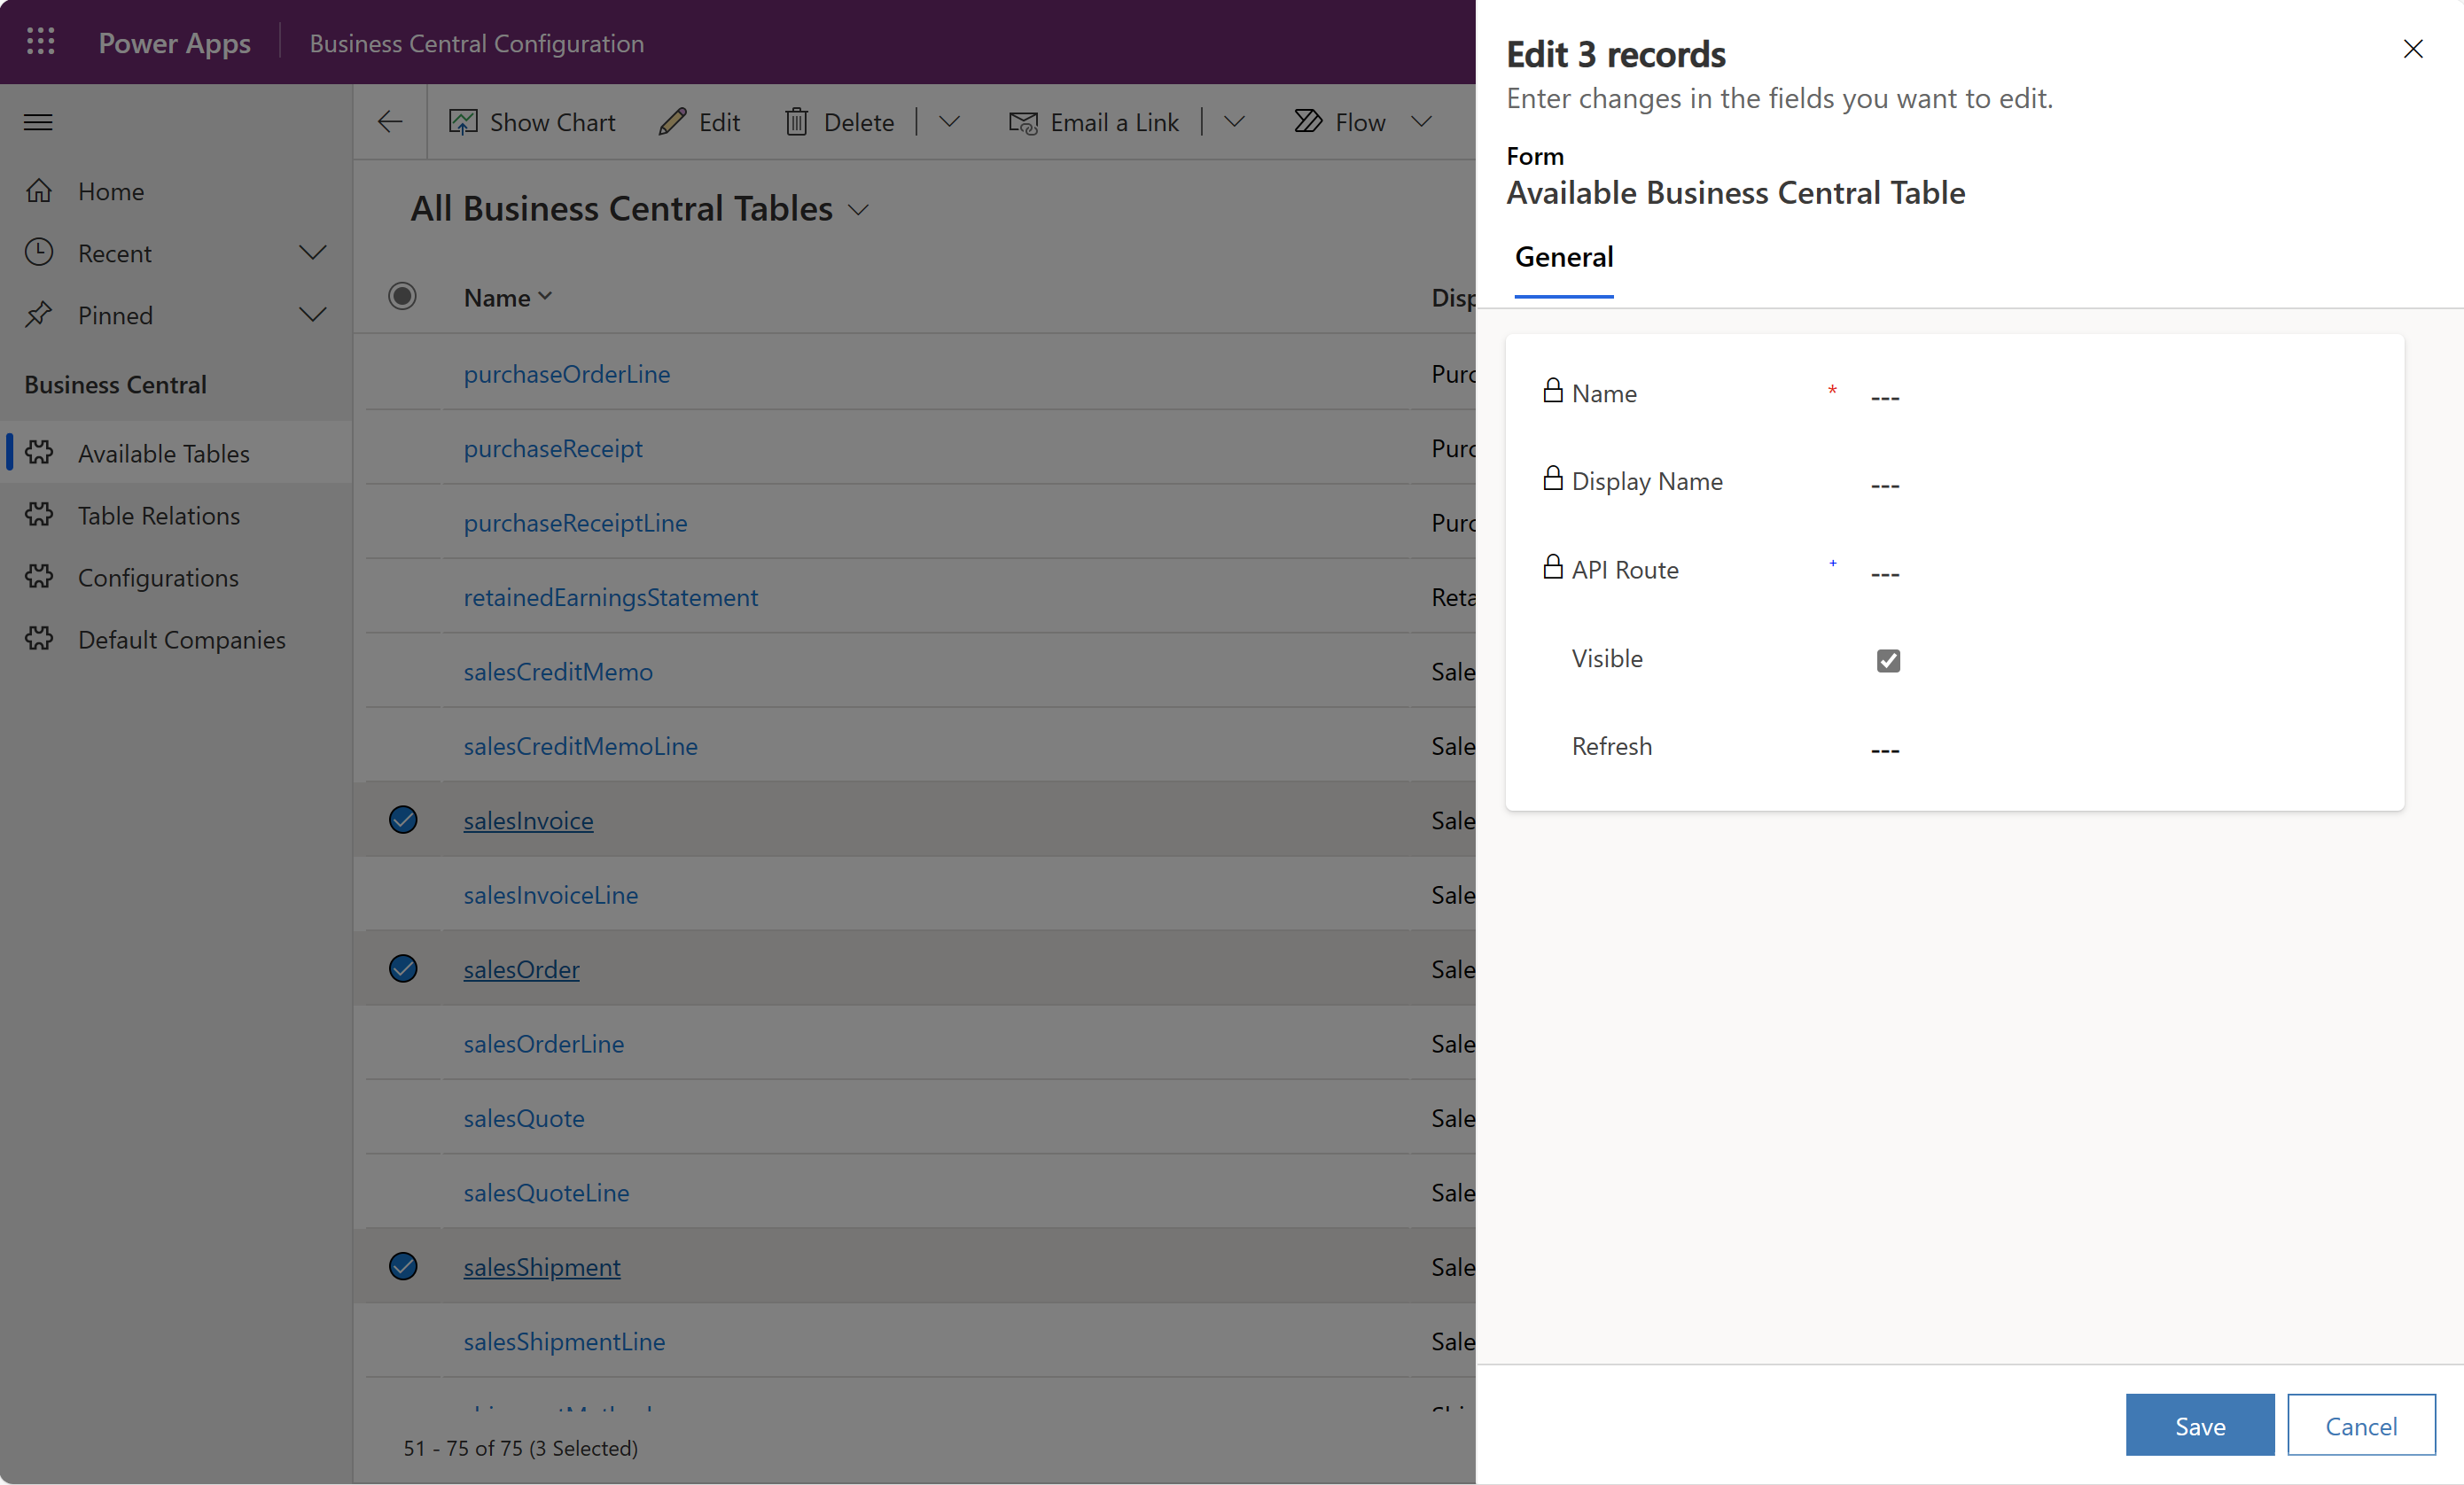
In the Business Central Configuration app, complete the following steps:
Because Power Pages authentication is linked to Dataverse Contact table, external users who sign in as contacts from customer or vendor organizations should only access their customer-specific or vendor-specific data. You can set up this behavior by first adding lookup columns on Dataverse Contact table to the virtual Business Central Customer or Vendor tables. To do so, complete the following steps:
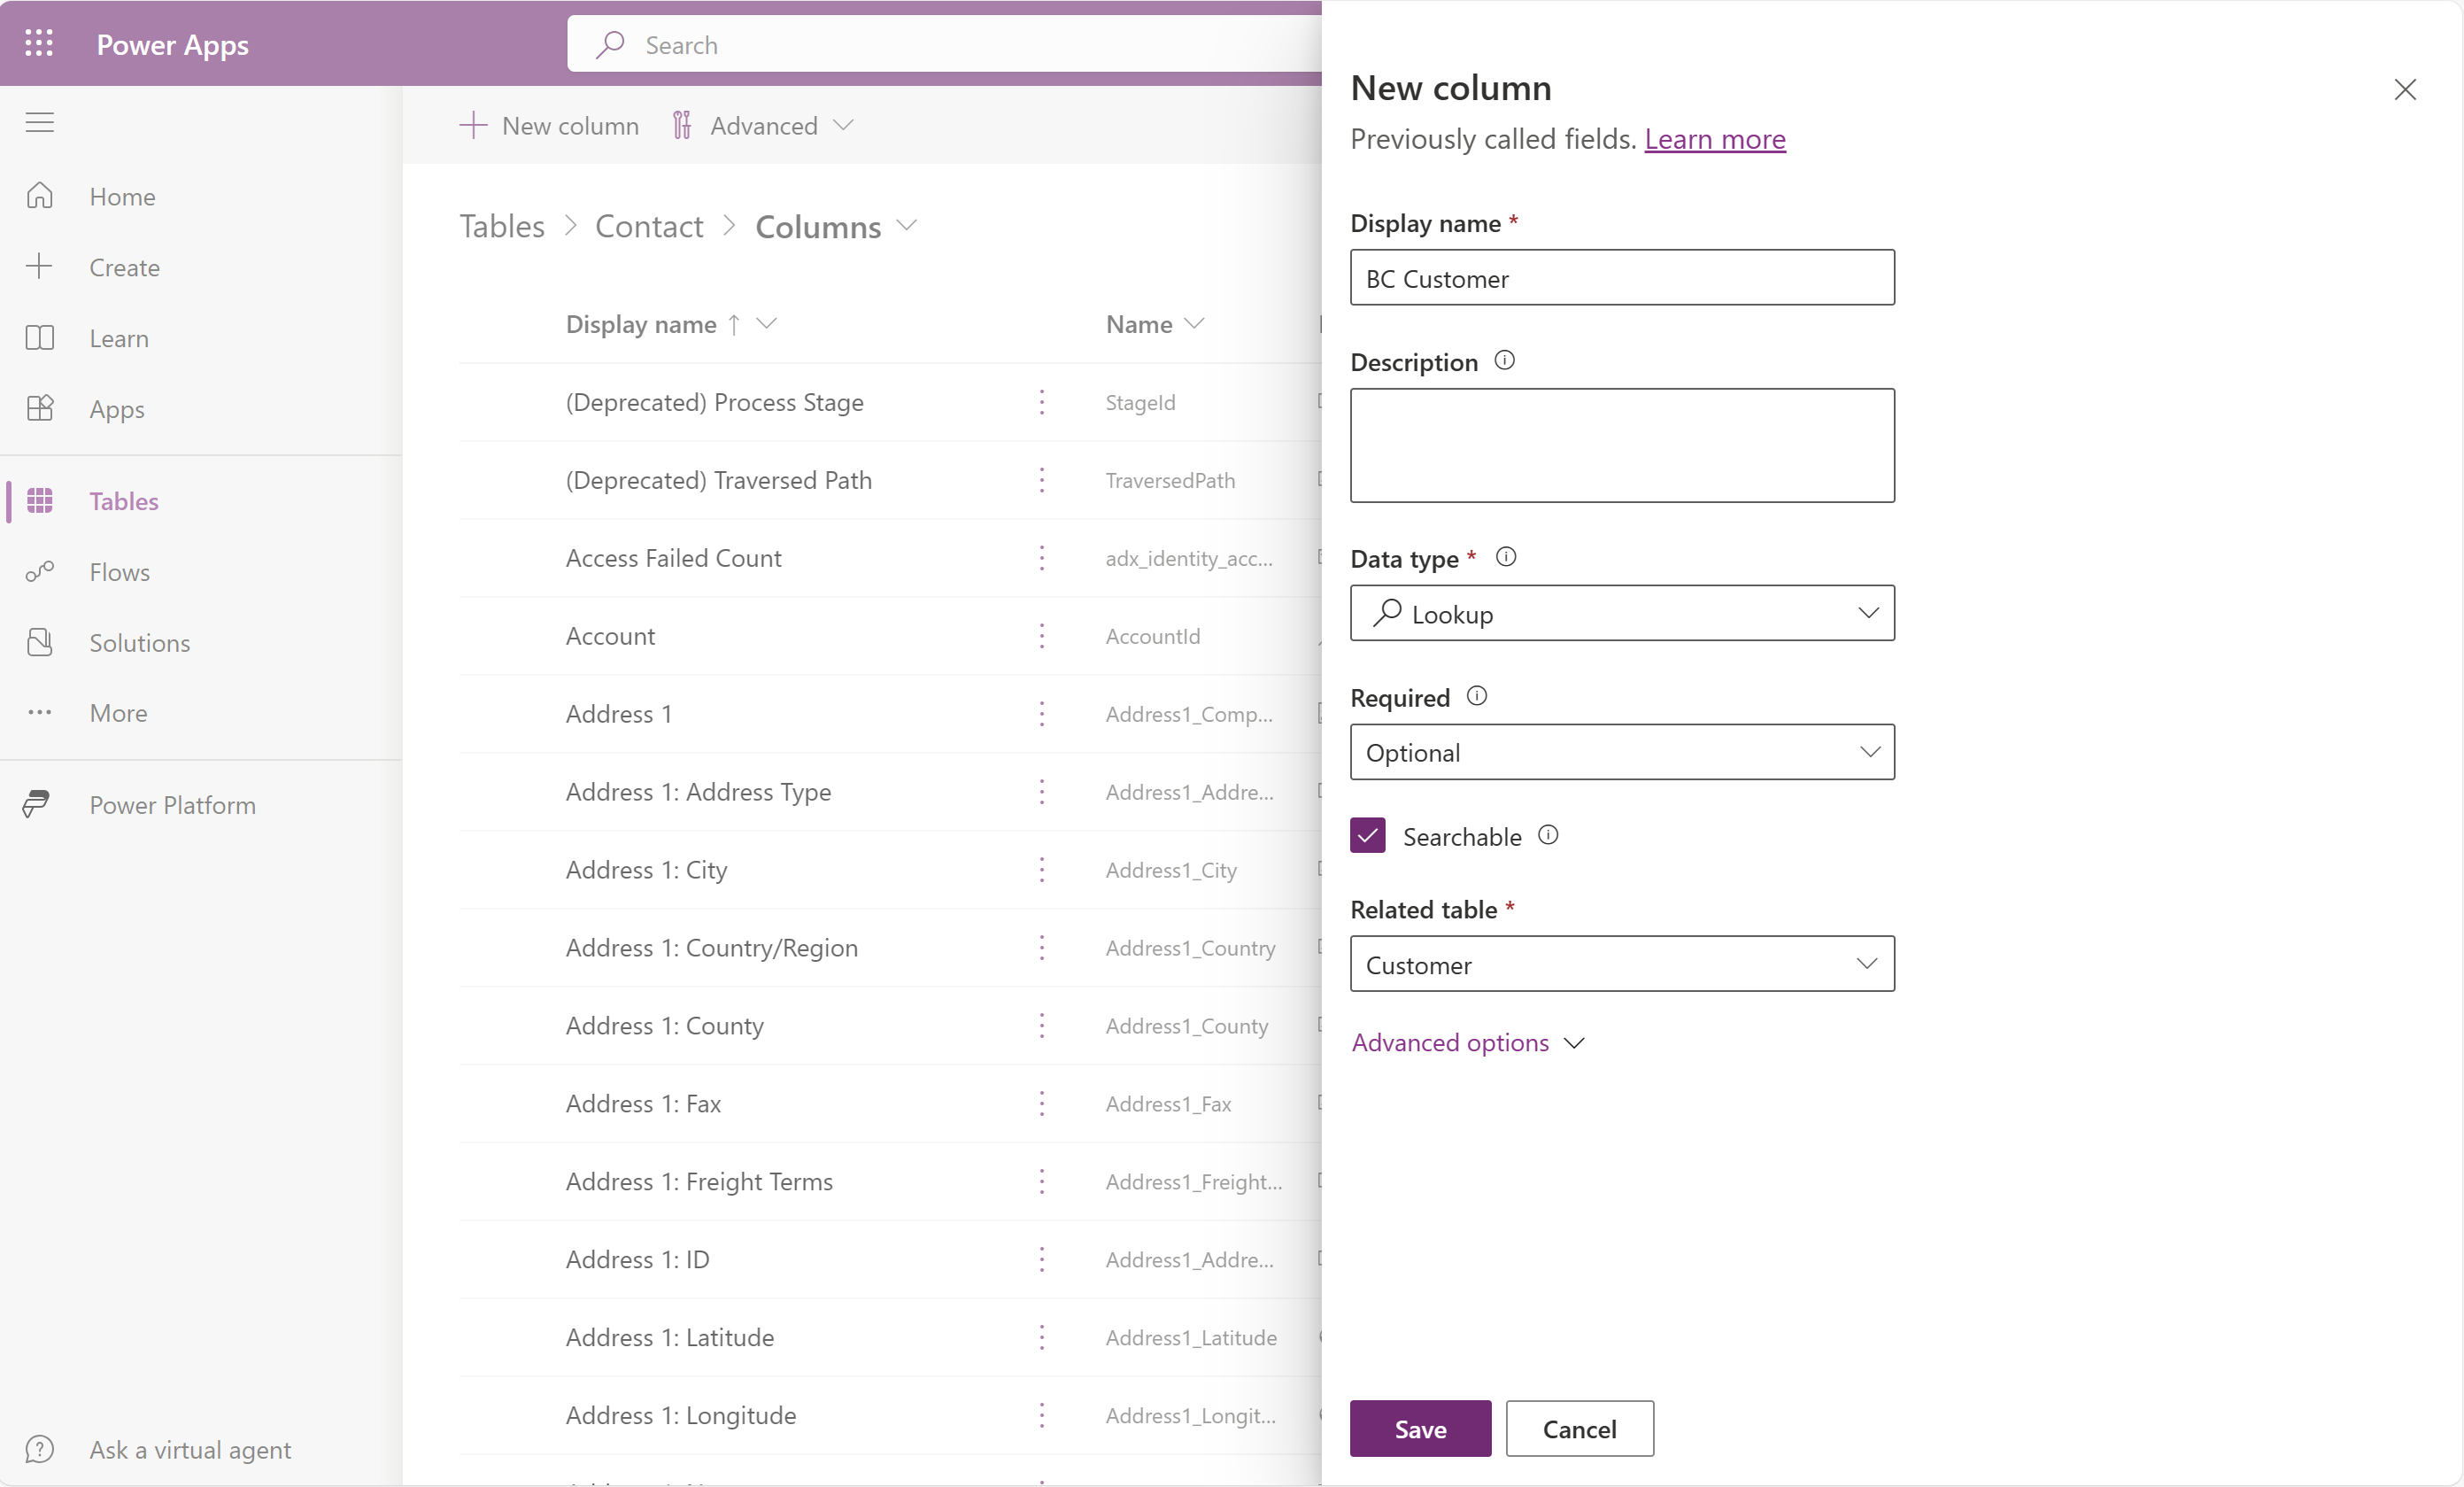
In Power Apps maker portal, select the Tables section, Contact table, Columns icon, and then select + New column.
Enter a descriptive display name for the lookup column, for example, BC Customer or BC Vendor.
Set the Data type field to Lookup, Related table field to Customer or Vendor, and then select Save.
Because Power Pages authentication is linked to Dataverse Contact table, external users who sign in as contacts from customer or vendor organizations should only access their customer-specific or vendor-specific data. Only rows in virtual Business Central tables that are associated with the signed-in contacts should be shown. You can set up this behavior by creating synthetic relations between the native Dataverse Contact table and virtual Business Central tables, such as Sales Order, Sales Invoice, and Sales Shipment tables. To do so, complete the following steps:
In Power Apps maker portal, add lookup columns on Dataverse Contact table. To learn more, go to Add lookup columns on Dataverse Contact table.
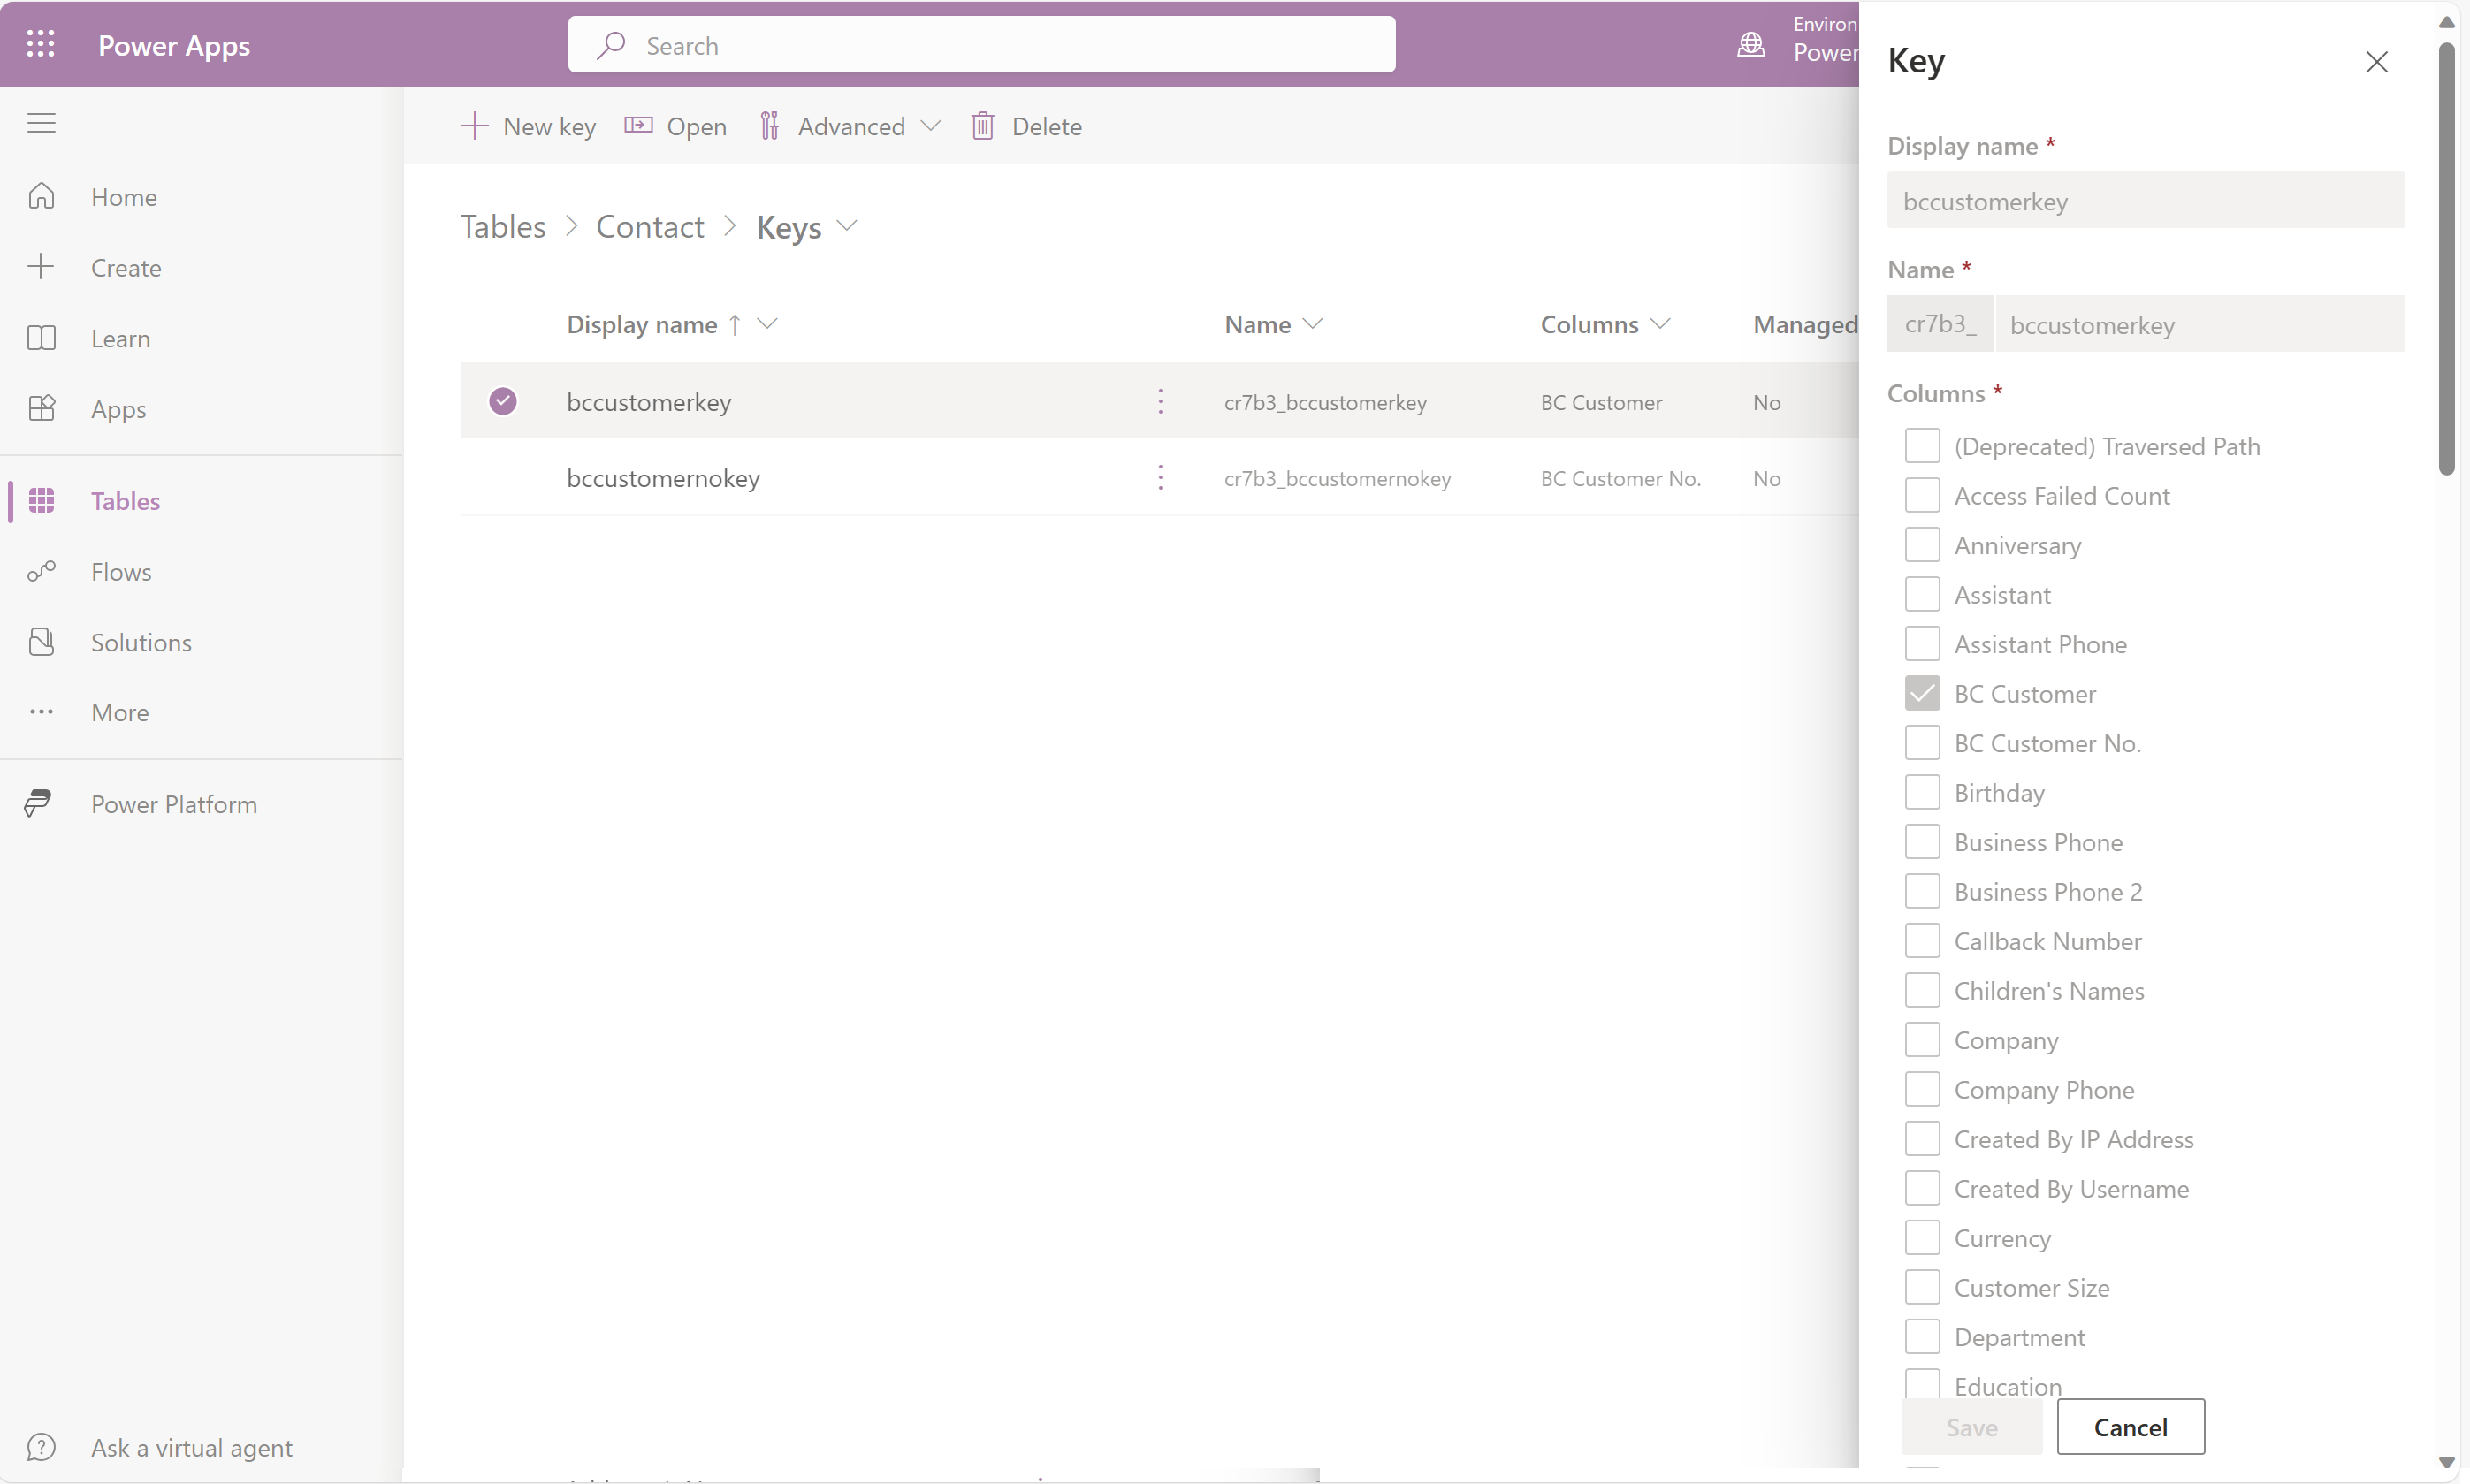
Select the Tables section, Contact table, Keys icon, and then select + New key.
Enter a descriptive display name for your key, for example bccustomerkey or bcvendorkey.
Select BC Customer or BC Vendor in the Columns fields, and then select Save.
If multiple contacts are associated with one customer or vendor, you can select more columns, such as Business Phone or Email, to show only rows in virtual Business Central tables that are associated with the specific signed-in contacts.
Select the Apps section, and launch the Business Central Configuration app.
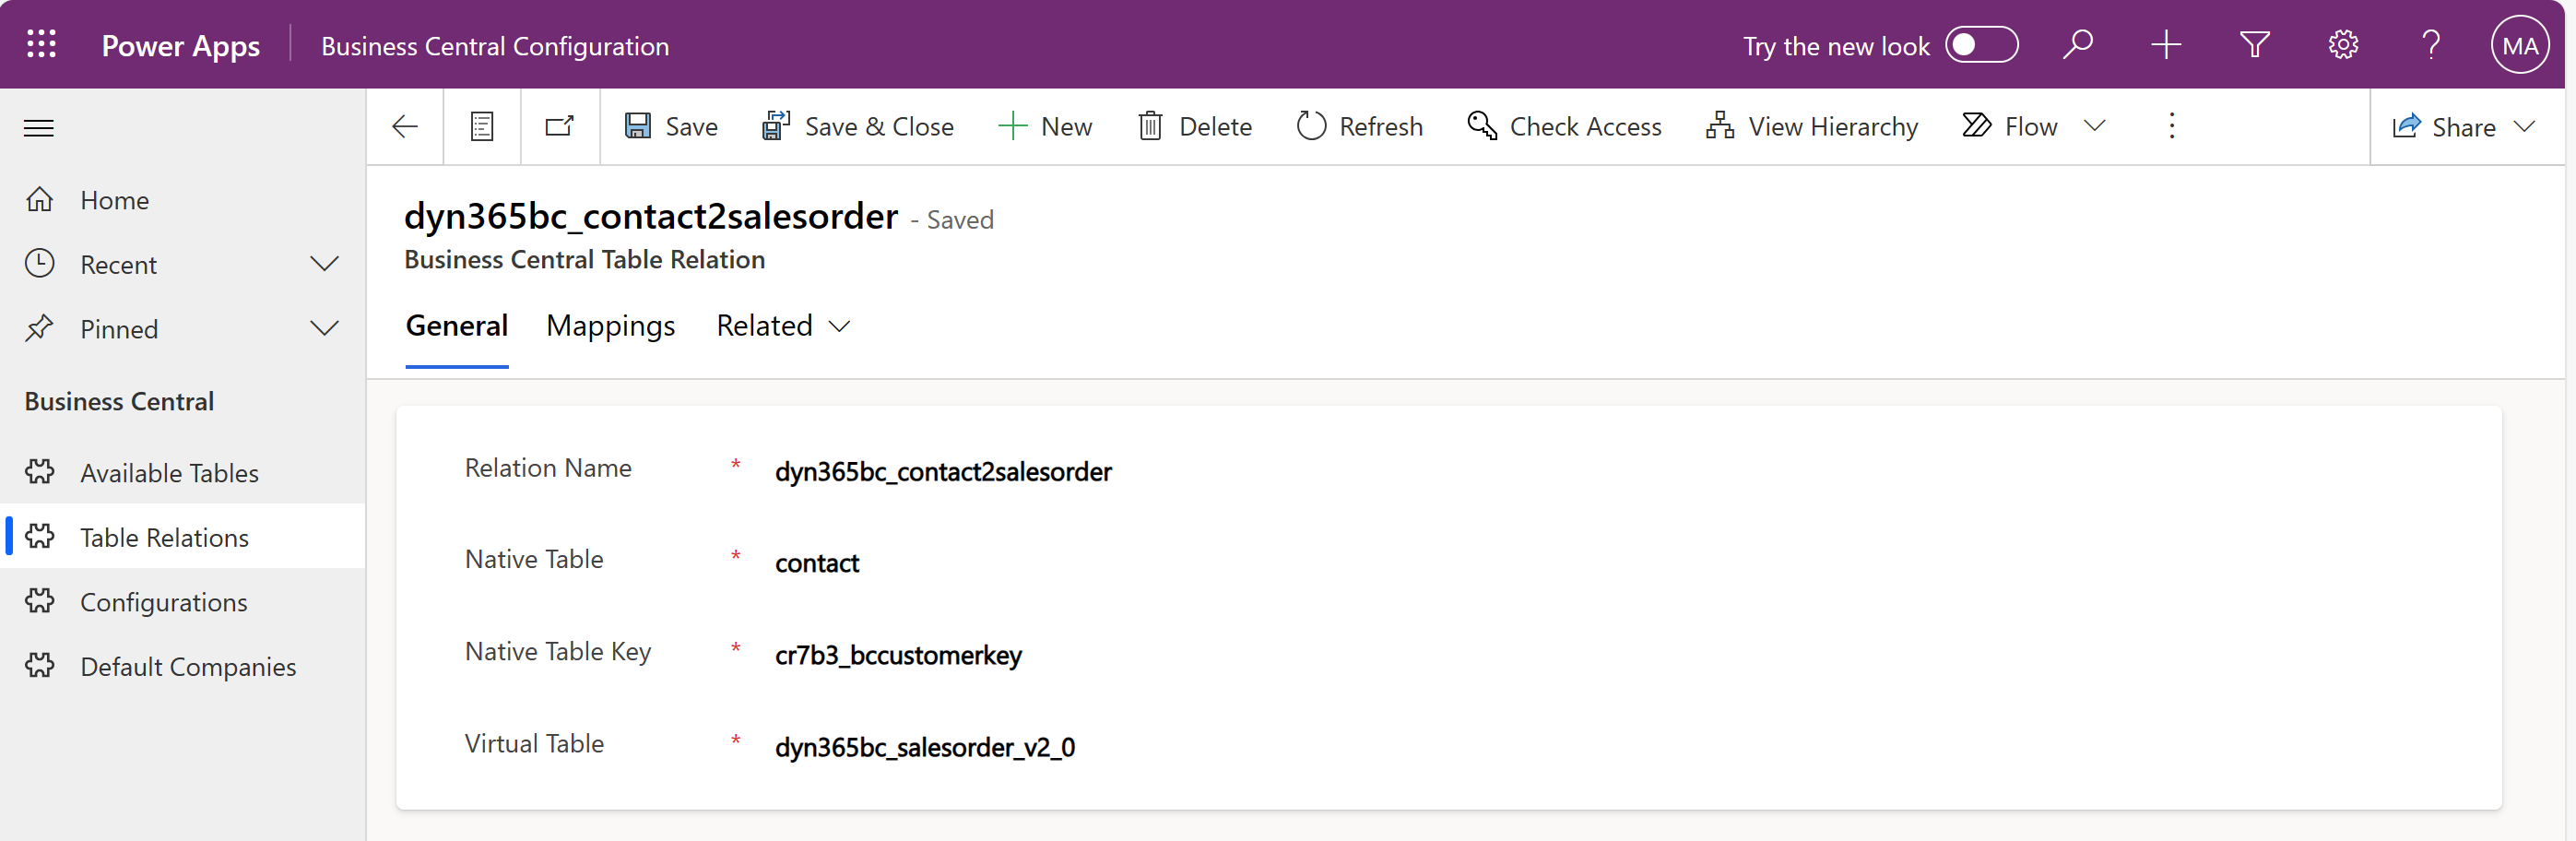
In the Business Central Configuration app, select the Table Relations section, and then select + New.
On the General tab, enter the appropriate field values. For example, to create a synthetic relation between the native Dataverse Contact table and virtual Business Central Sales Order table, fill in the fields as follows:
On the Mappings tab, enter the schema names of Native columns that map to those of Virtual columns. For example, cr7b3_bccustomer that maps to dyn365bc_customer_customerid.
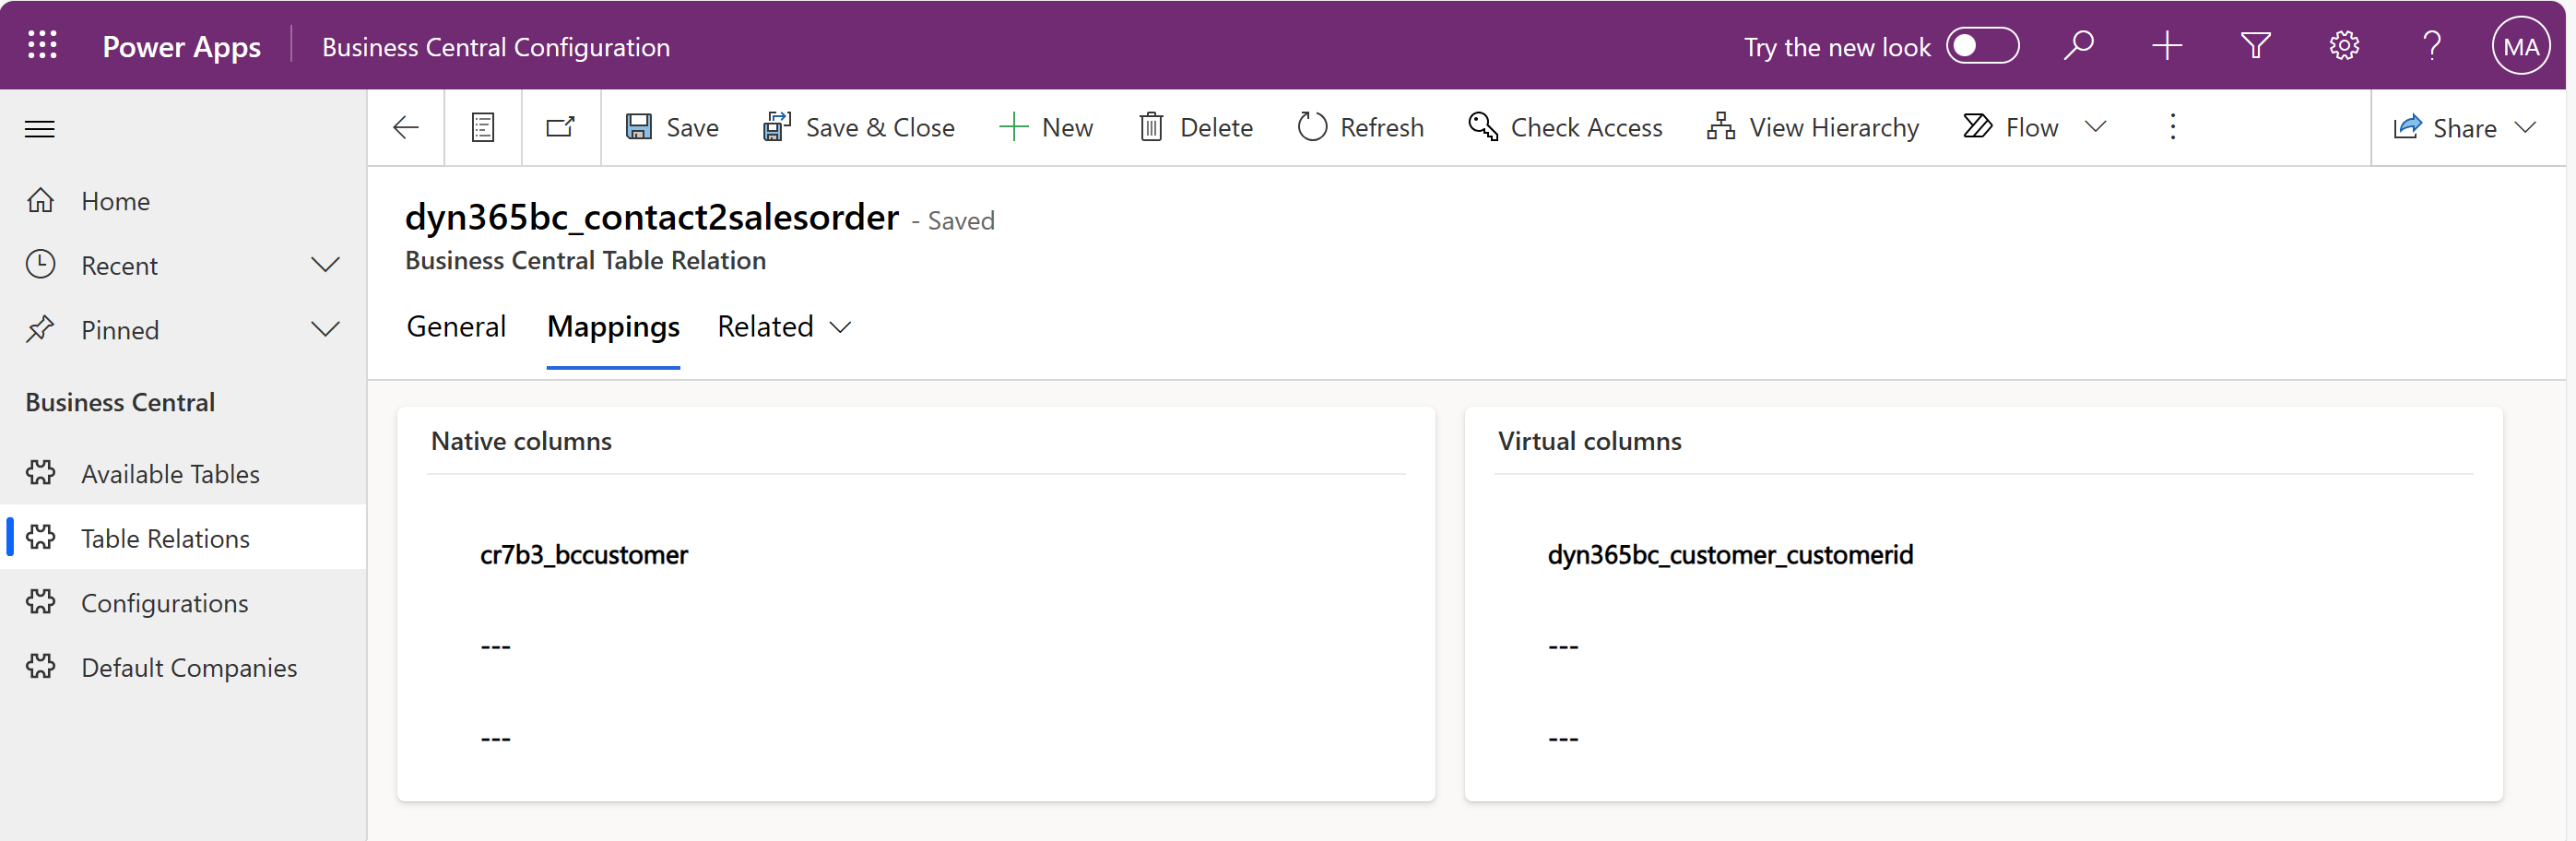
Select the Save & Close button.
To create pages for anonymous access of external users, complete the following steps:
In Power Pages maker portal, create a new B2B portal by selecting a template from the Templates section, and then selecting Done.
Select the Edit button for your portal.
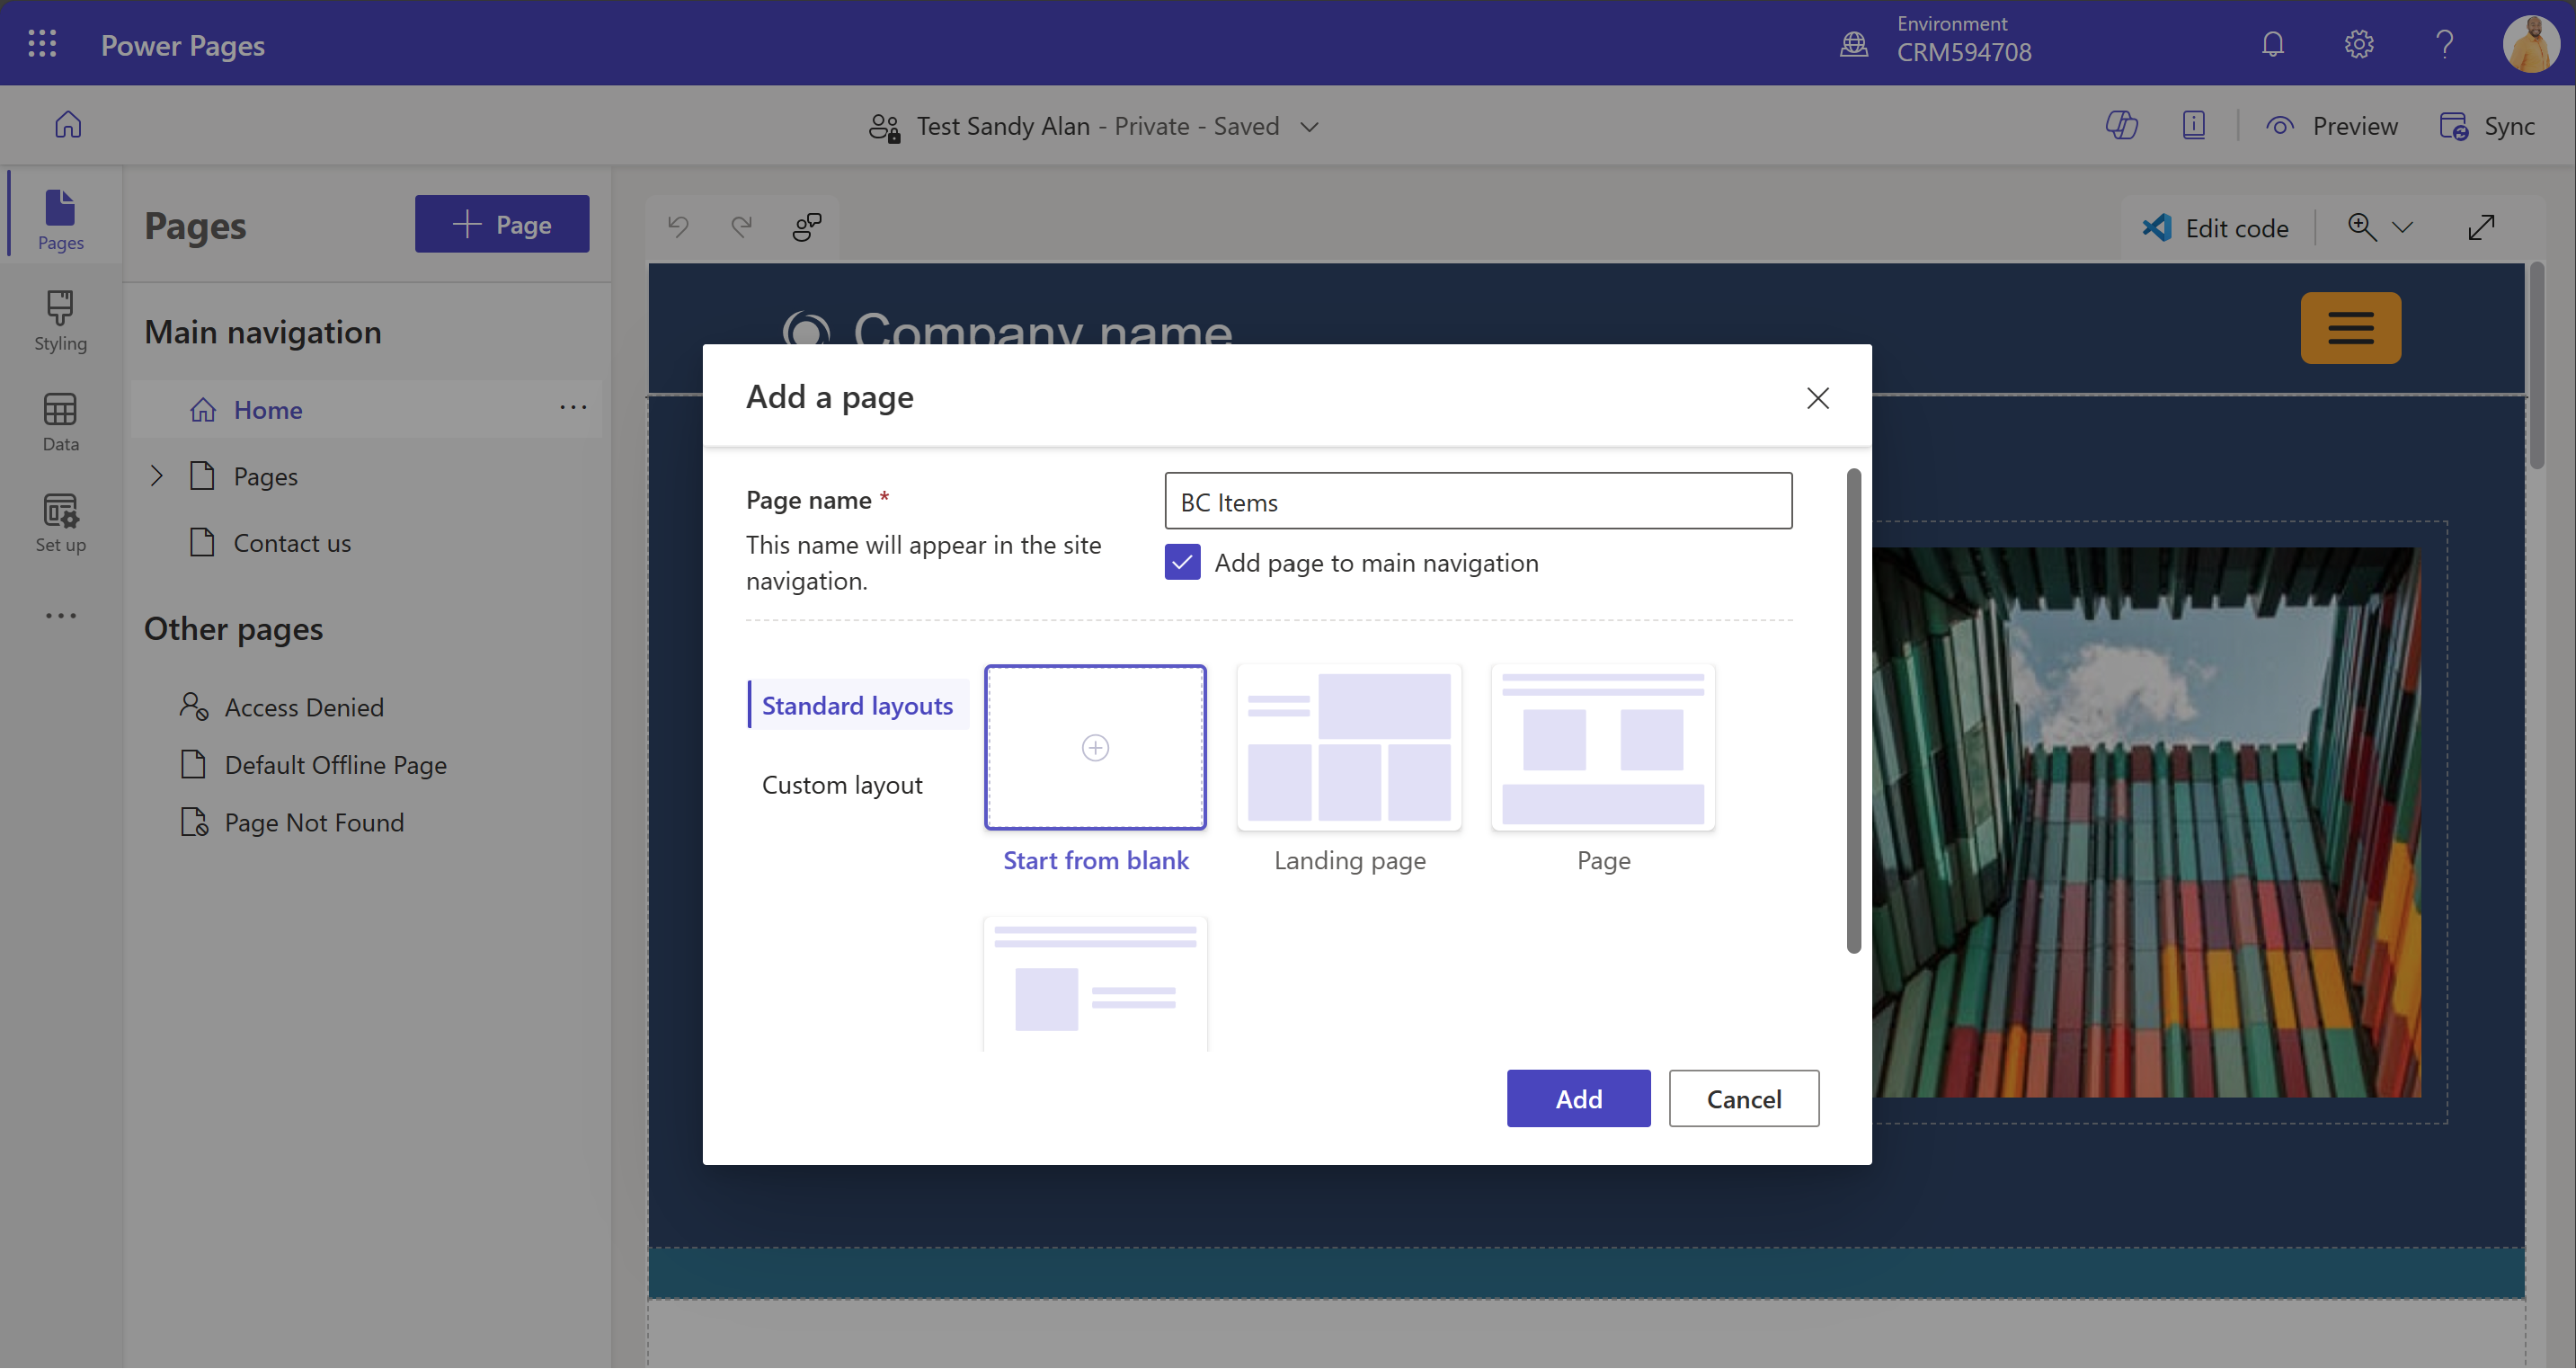
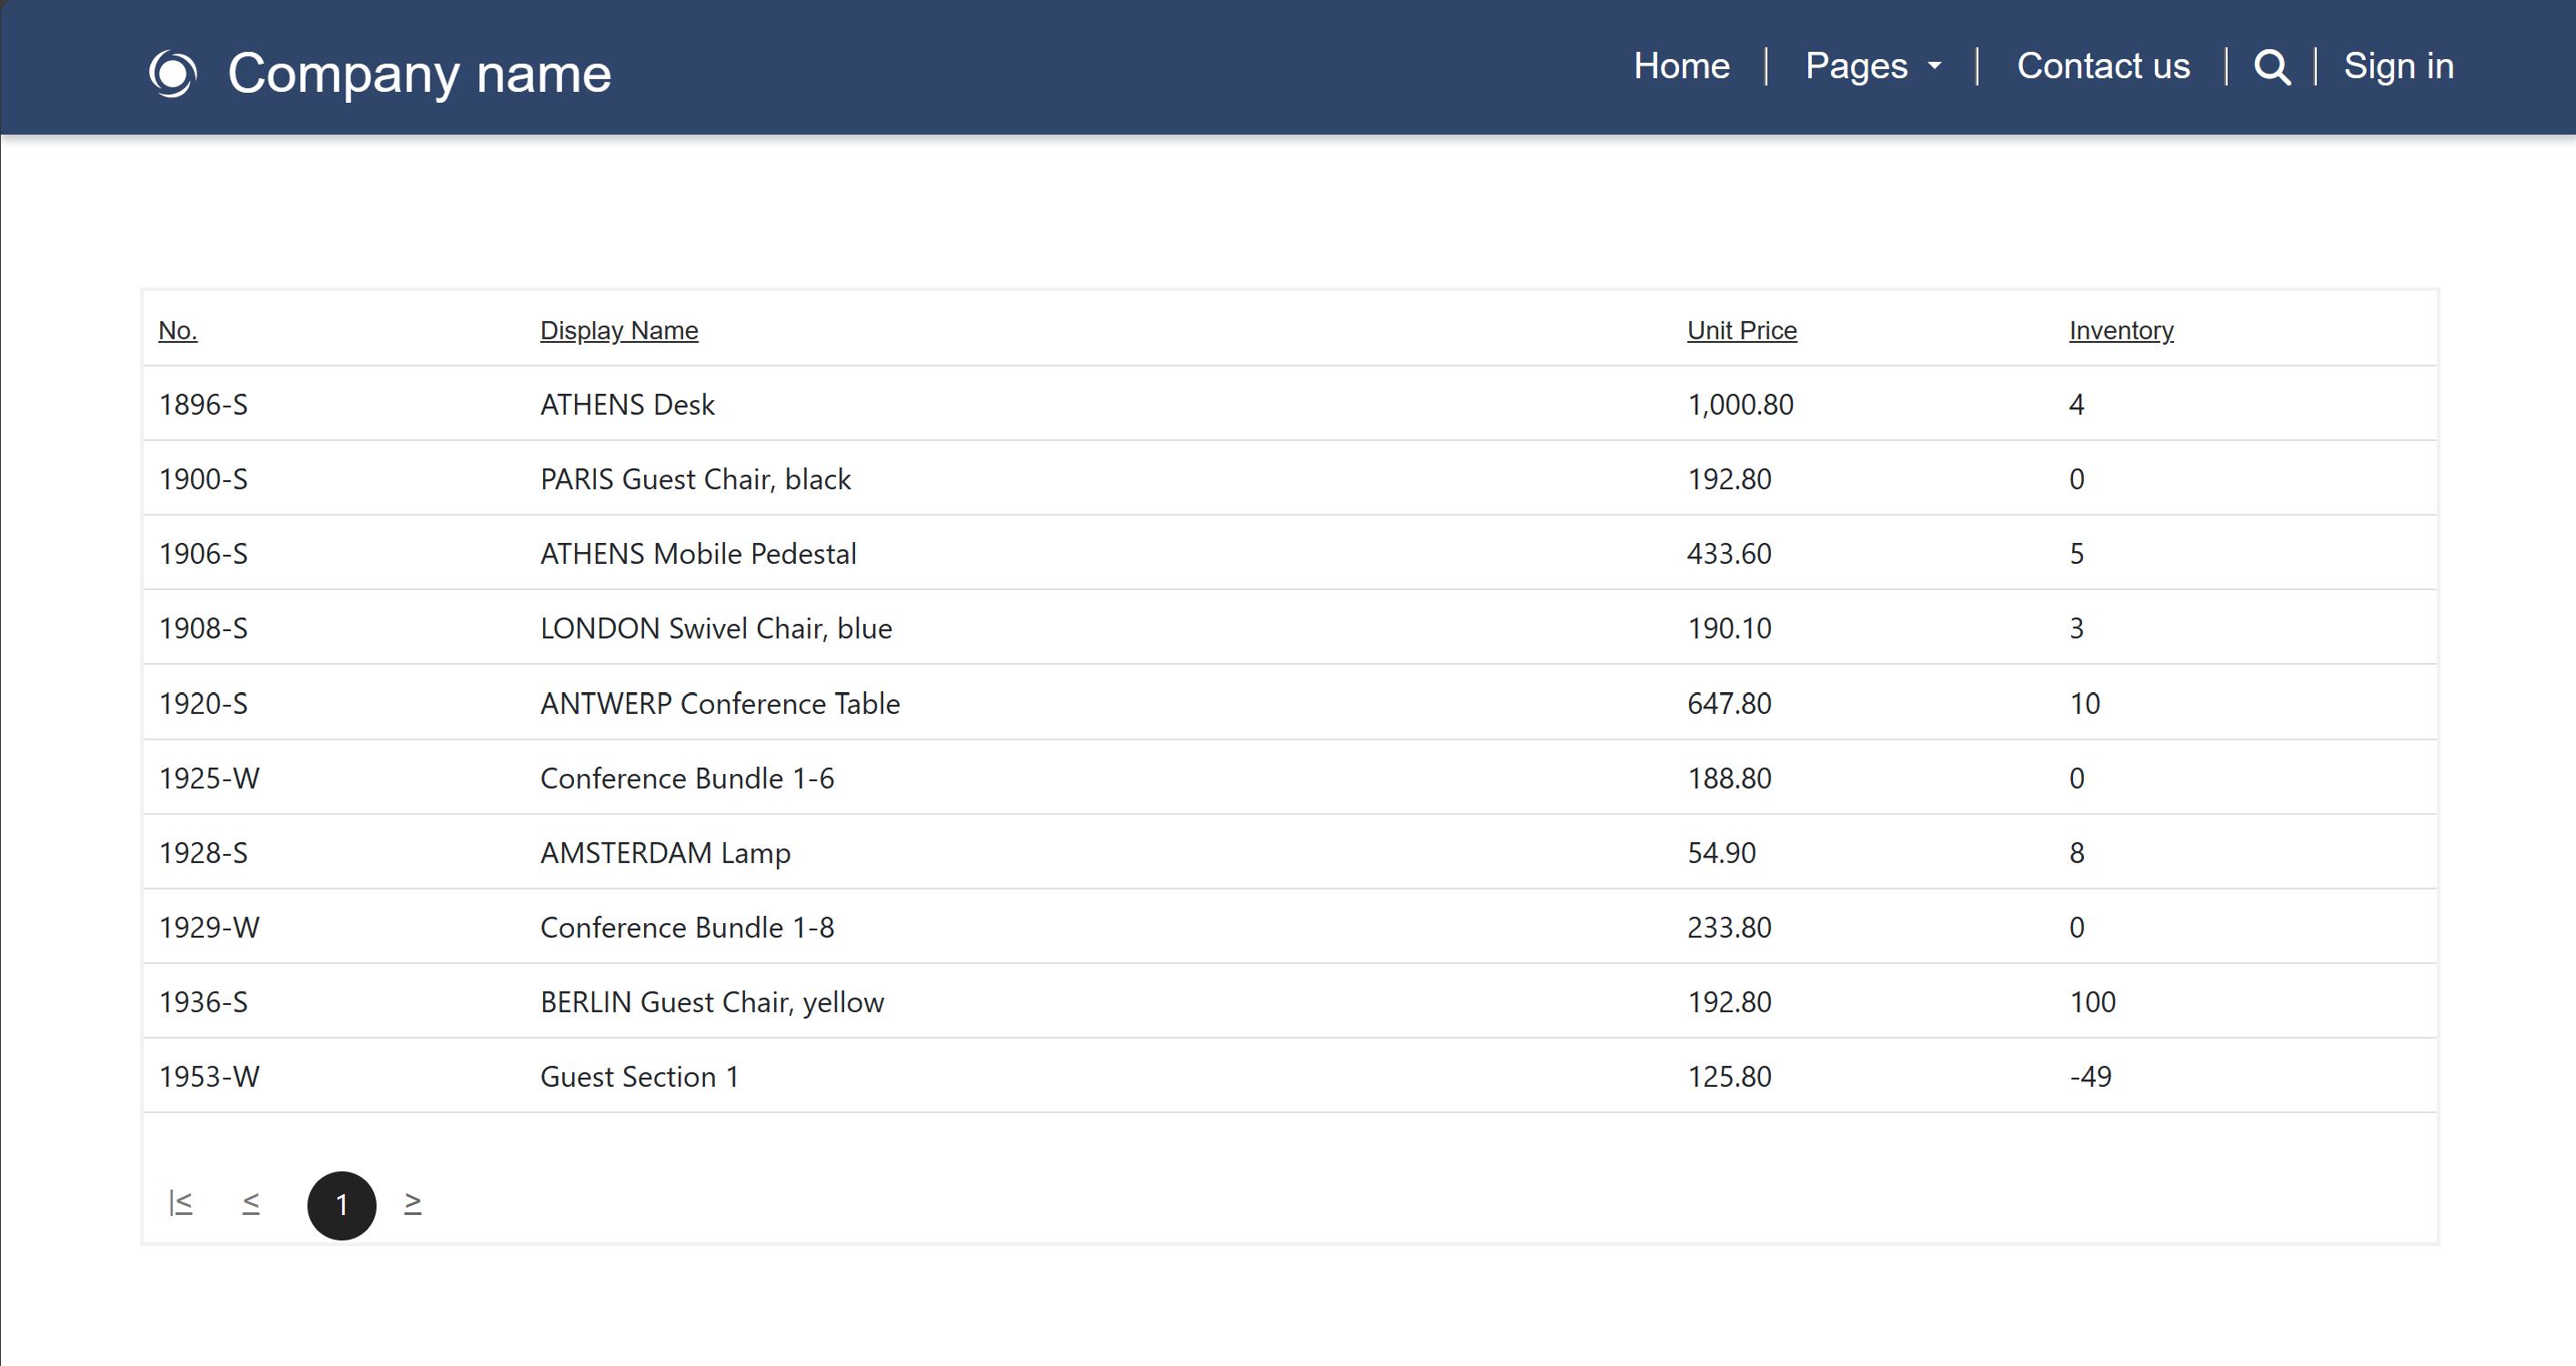
Select the + Page button, enter a descriptive display name for your page, for example BC Items for a page showing the virtual Business Central Item table, and then select Add.
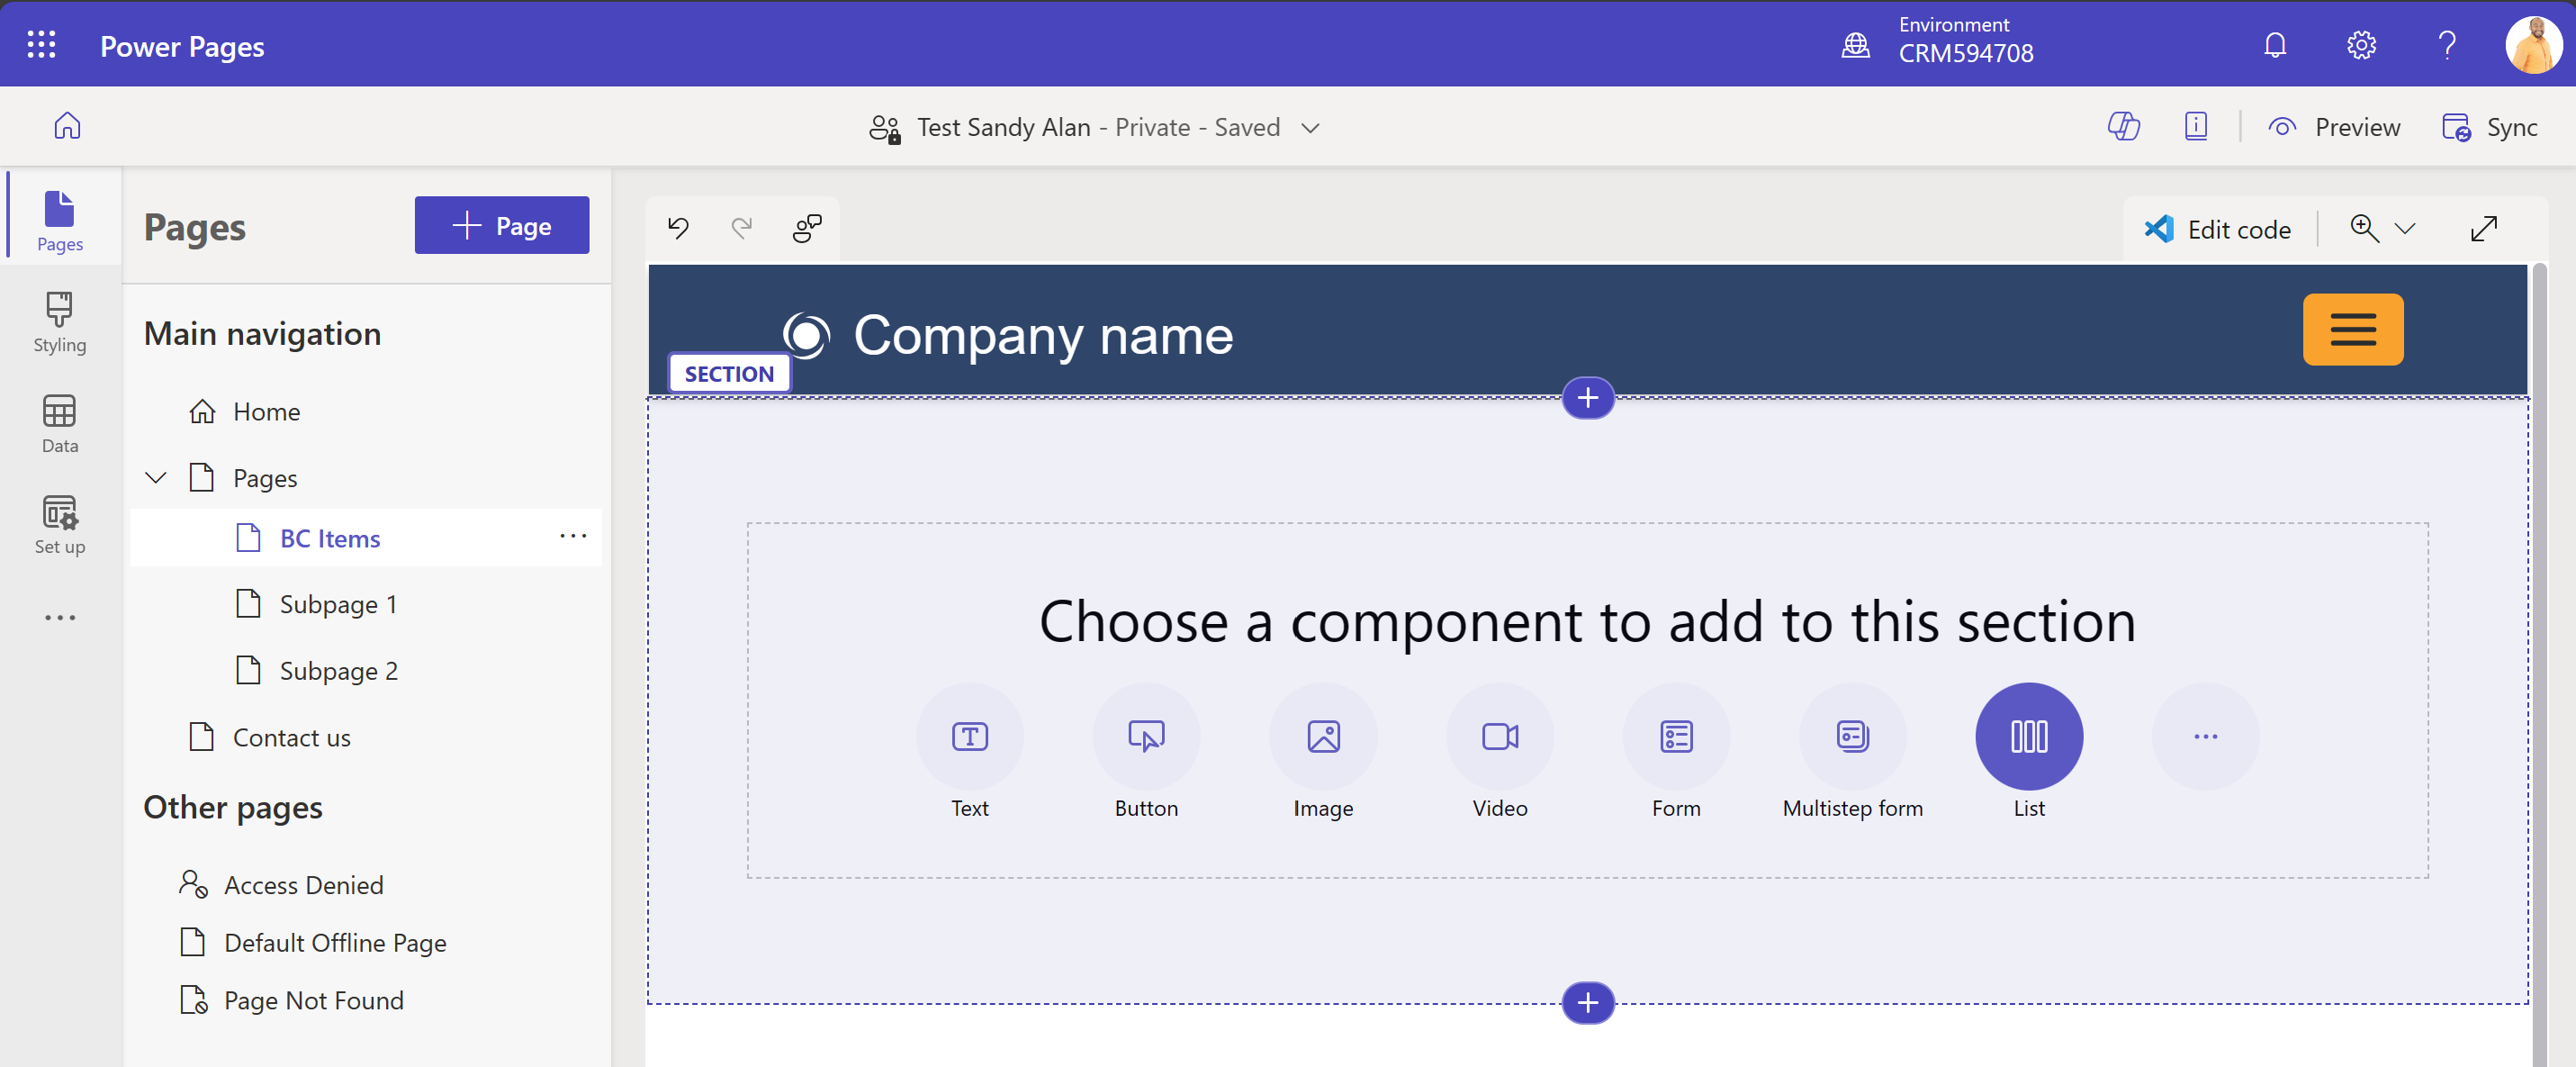
Drag BC Items to the Pages section.
Select the List item, and then select + New list.
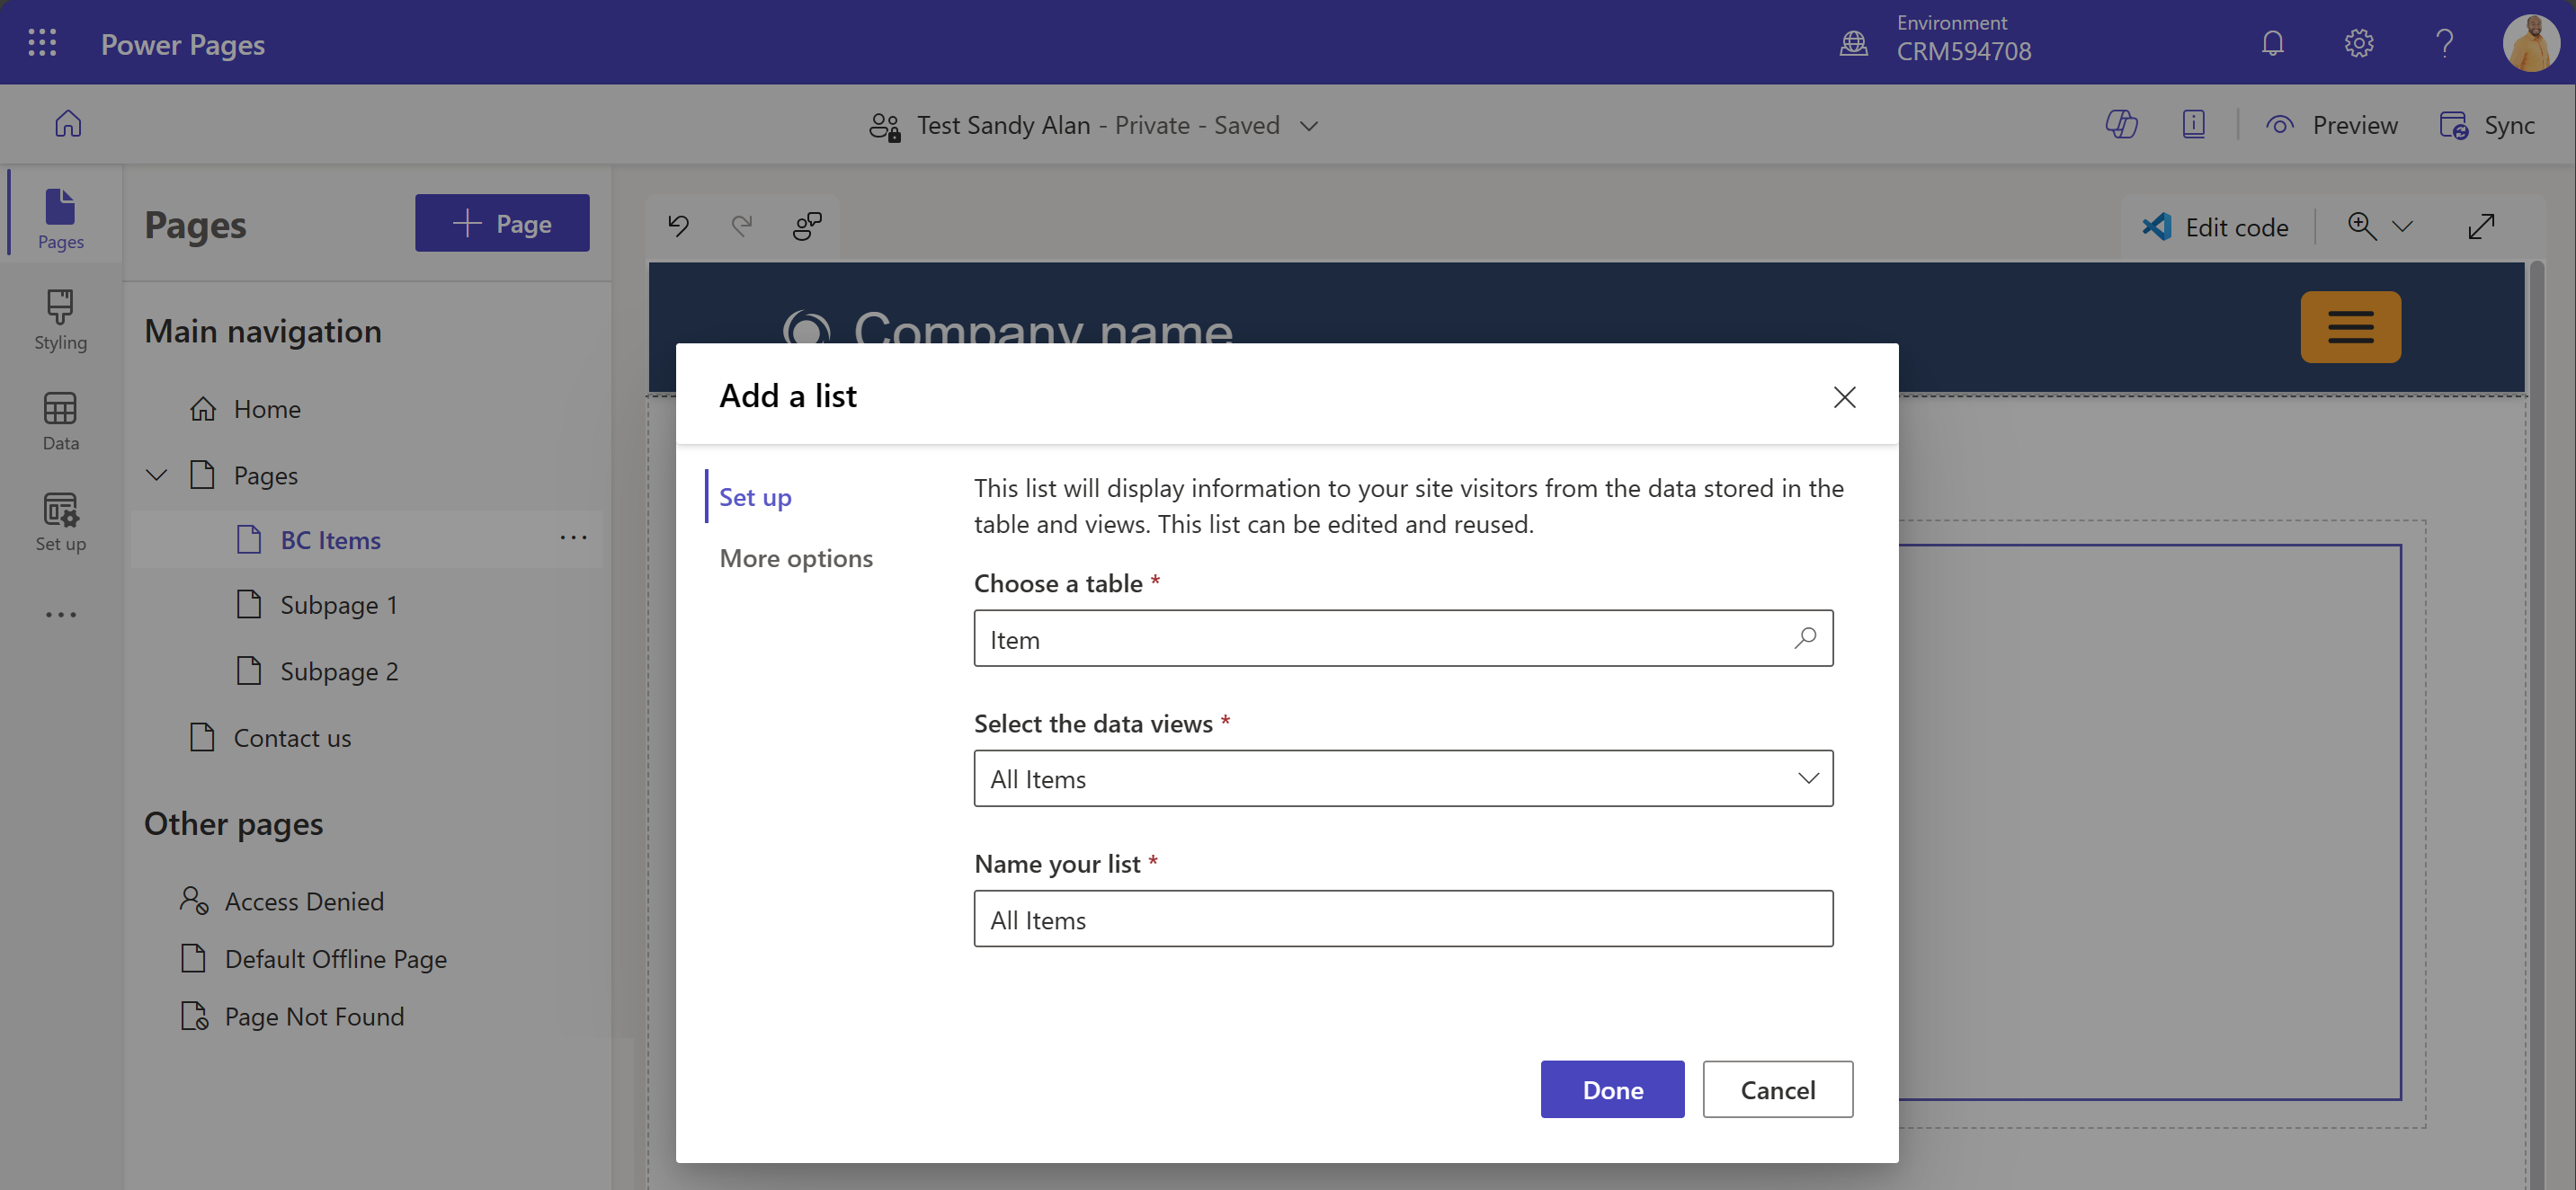
Search and select the virtual Business Central Item table.
Select the All Items view, and then select Done.
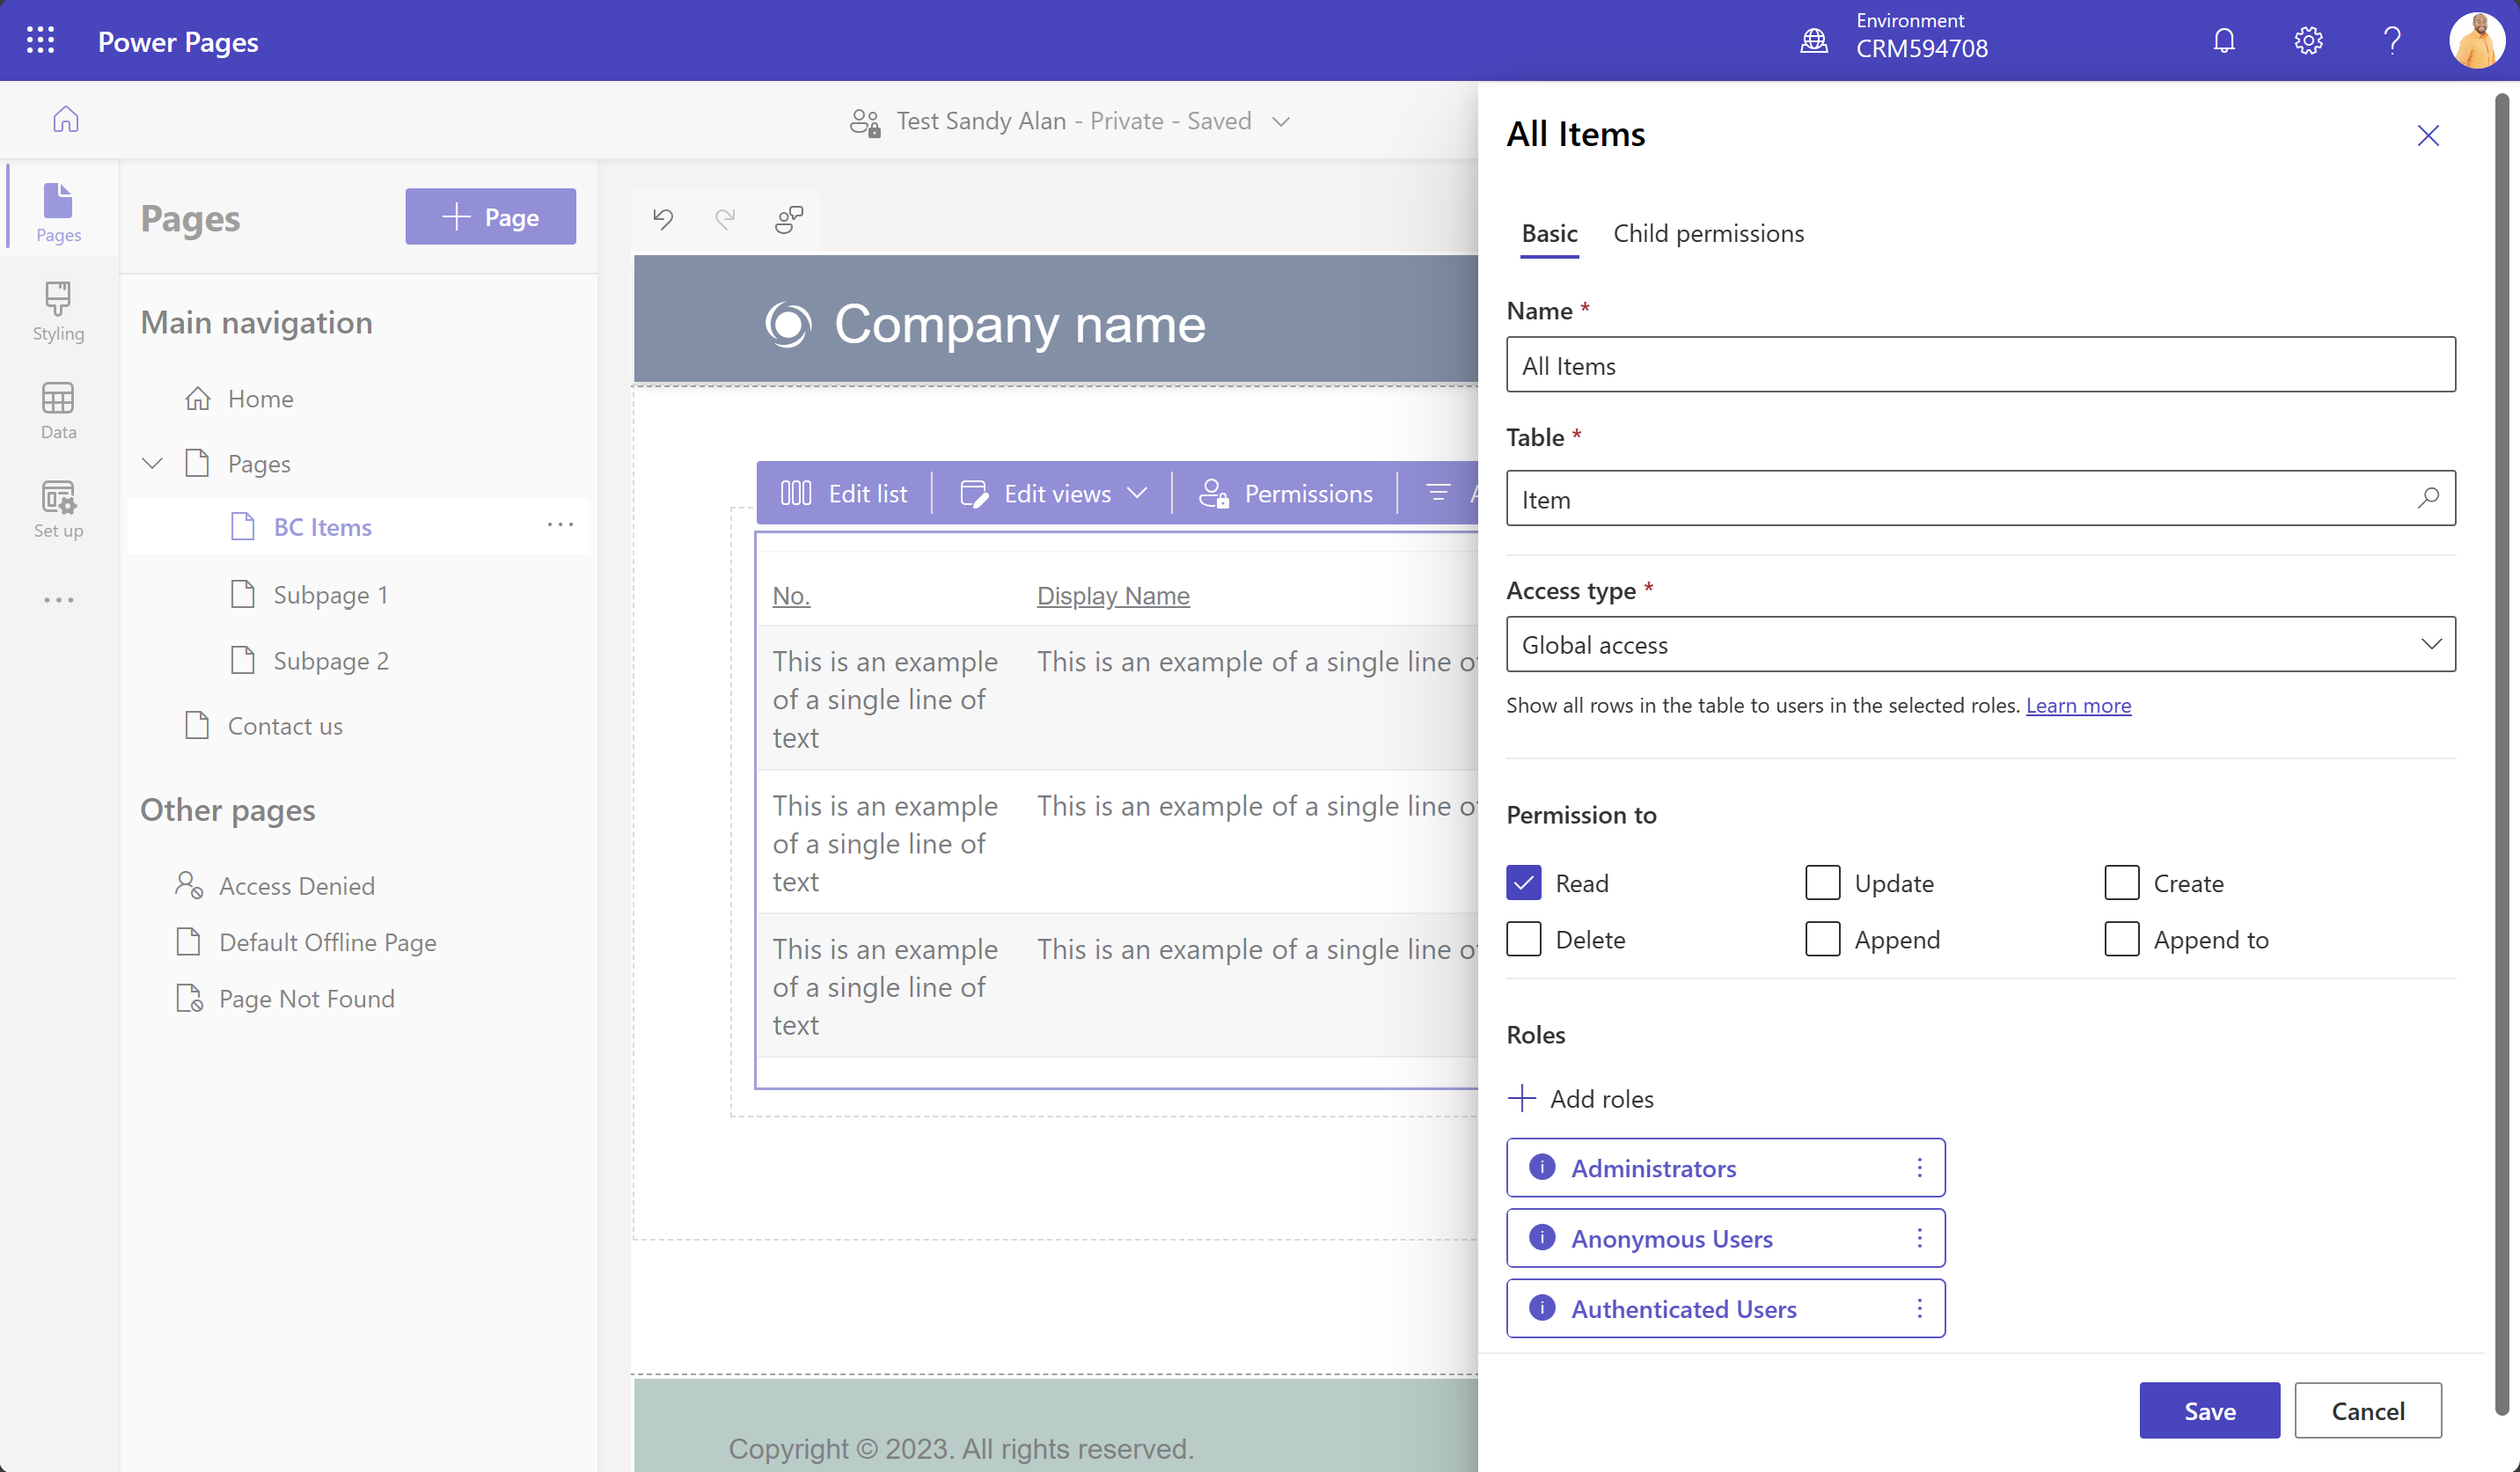
Select the Permission button, All Items permission, and then select Global access type.
Add the Read permission and Anonymous Users role. This step enables external users to visit your portal without signing in and the Business Central Virtual Table app will use Power Pages Anonymous External Users app/S2S user to access data stored in Business Central online on their behalf.
Select the Save button, and then select Sync.
Select the Preview button to check that external users can see the Item table from Business Central without signing in.
To create pages for authenticated access of external users, complete the following steps:
In Power Pages maker portal, create a new B2B portal by selecting a template from the Templates section, and then selecting Done.
Select the Edit button for your portal.
Select the + Page button, enter a descriptive display name for your page, for example BC Sales Orders for a page showing the virtual Business Central Sales Order table, and then select Add.
Drag BC Sales Orders to the Pages section.
Select the List item, and then select + New list.
Search and select the virtual Business Central Sales Order table.
Select the All Sales Orders view, and then select Done.
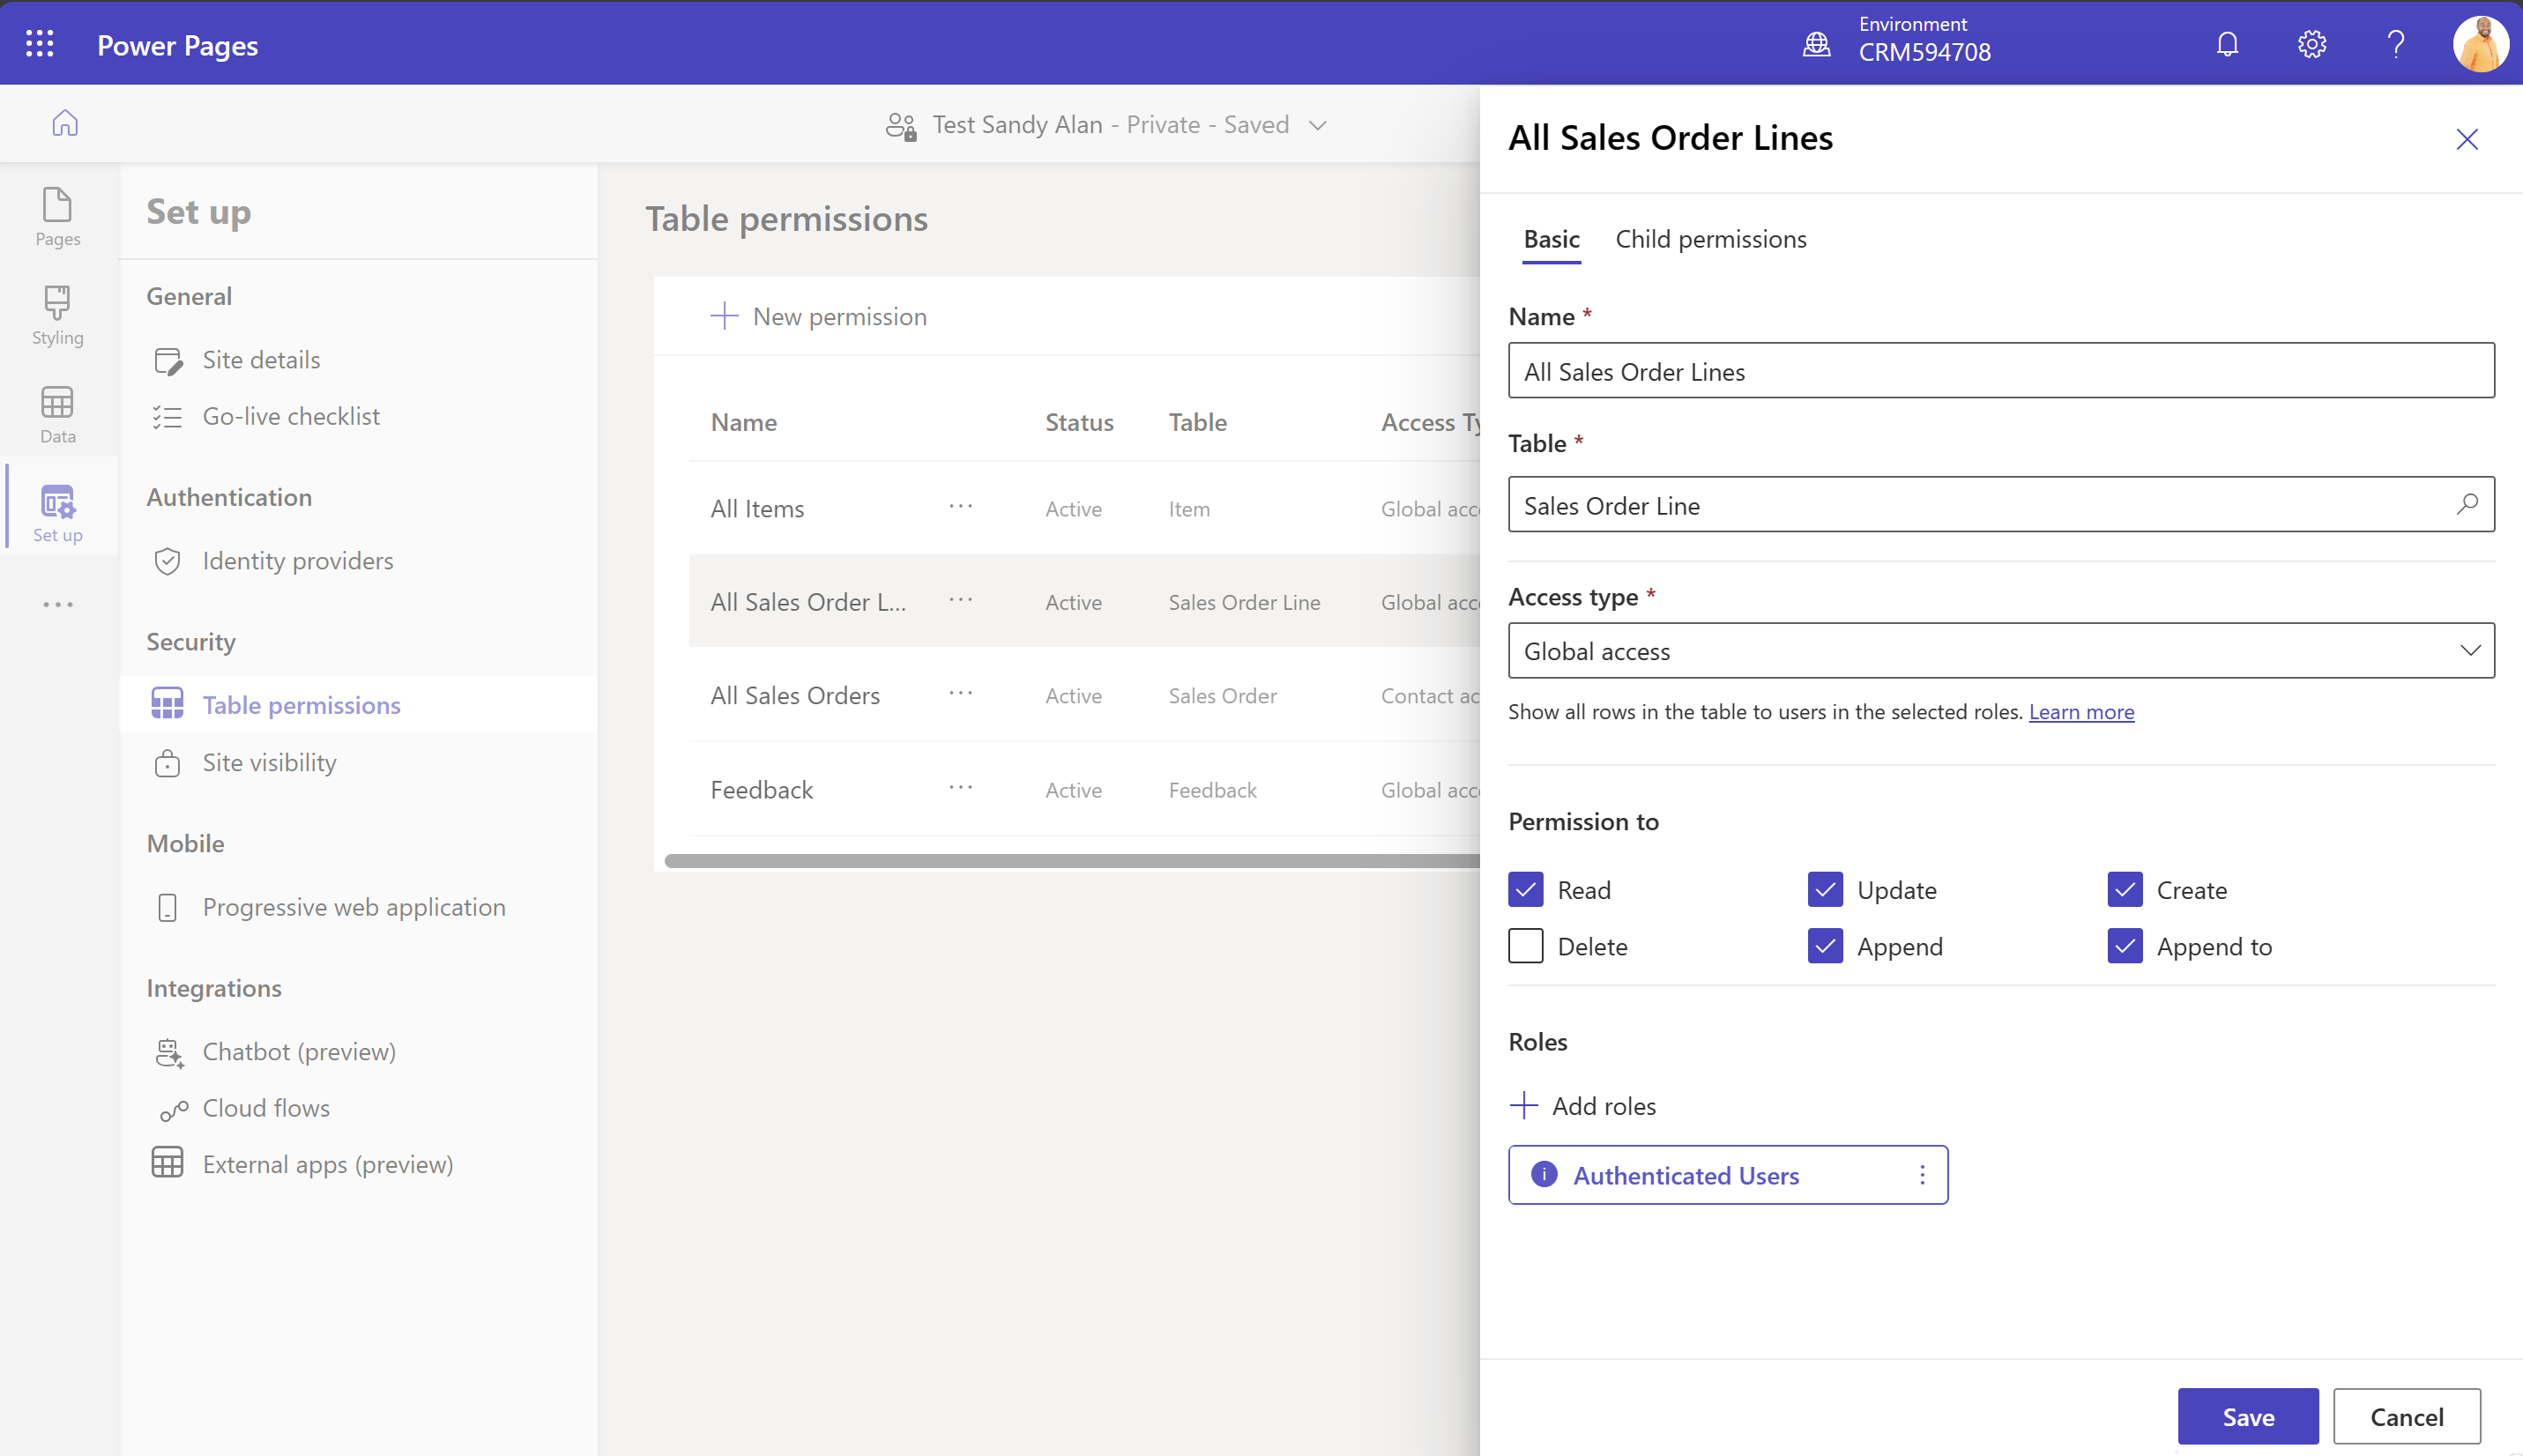
Select the Permission button, All Sales Orders permission, and then select Contact access type.
Select a synthetic relation between the native Dataverse Contact table and virtual Business Central Sales Order table, for example dyn365bc_contact2salesorder.
Add all except Delete permissions and Authenticated Users role. This step enables external users to sign in to your portal with their contact user identity and the Business Central Virtual Table app will use Power Pages Authenticated External Users app/S2S user to access data stored in Business Central online on their behalf.
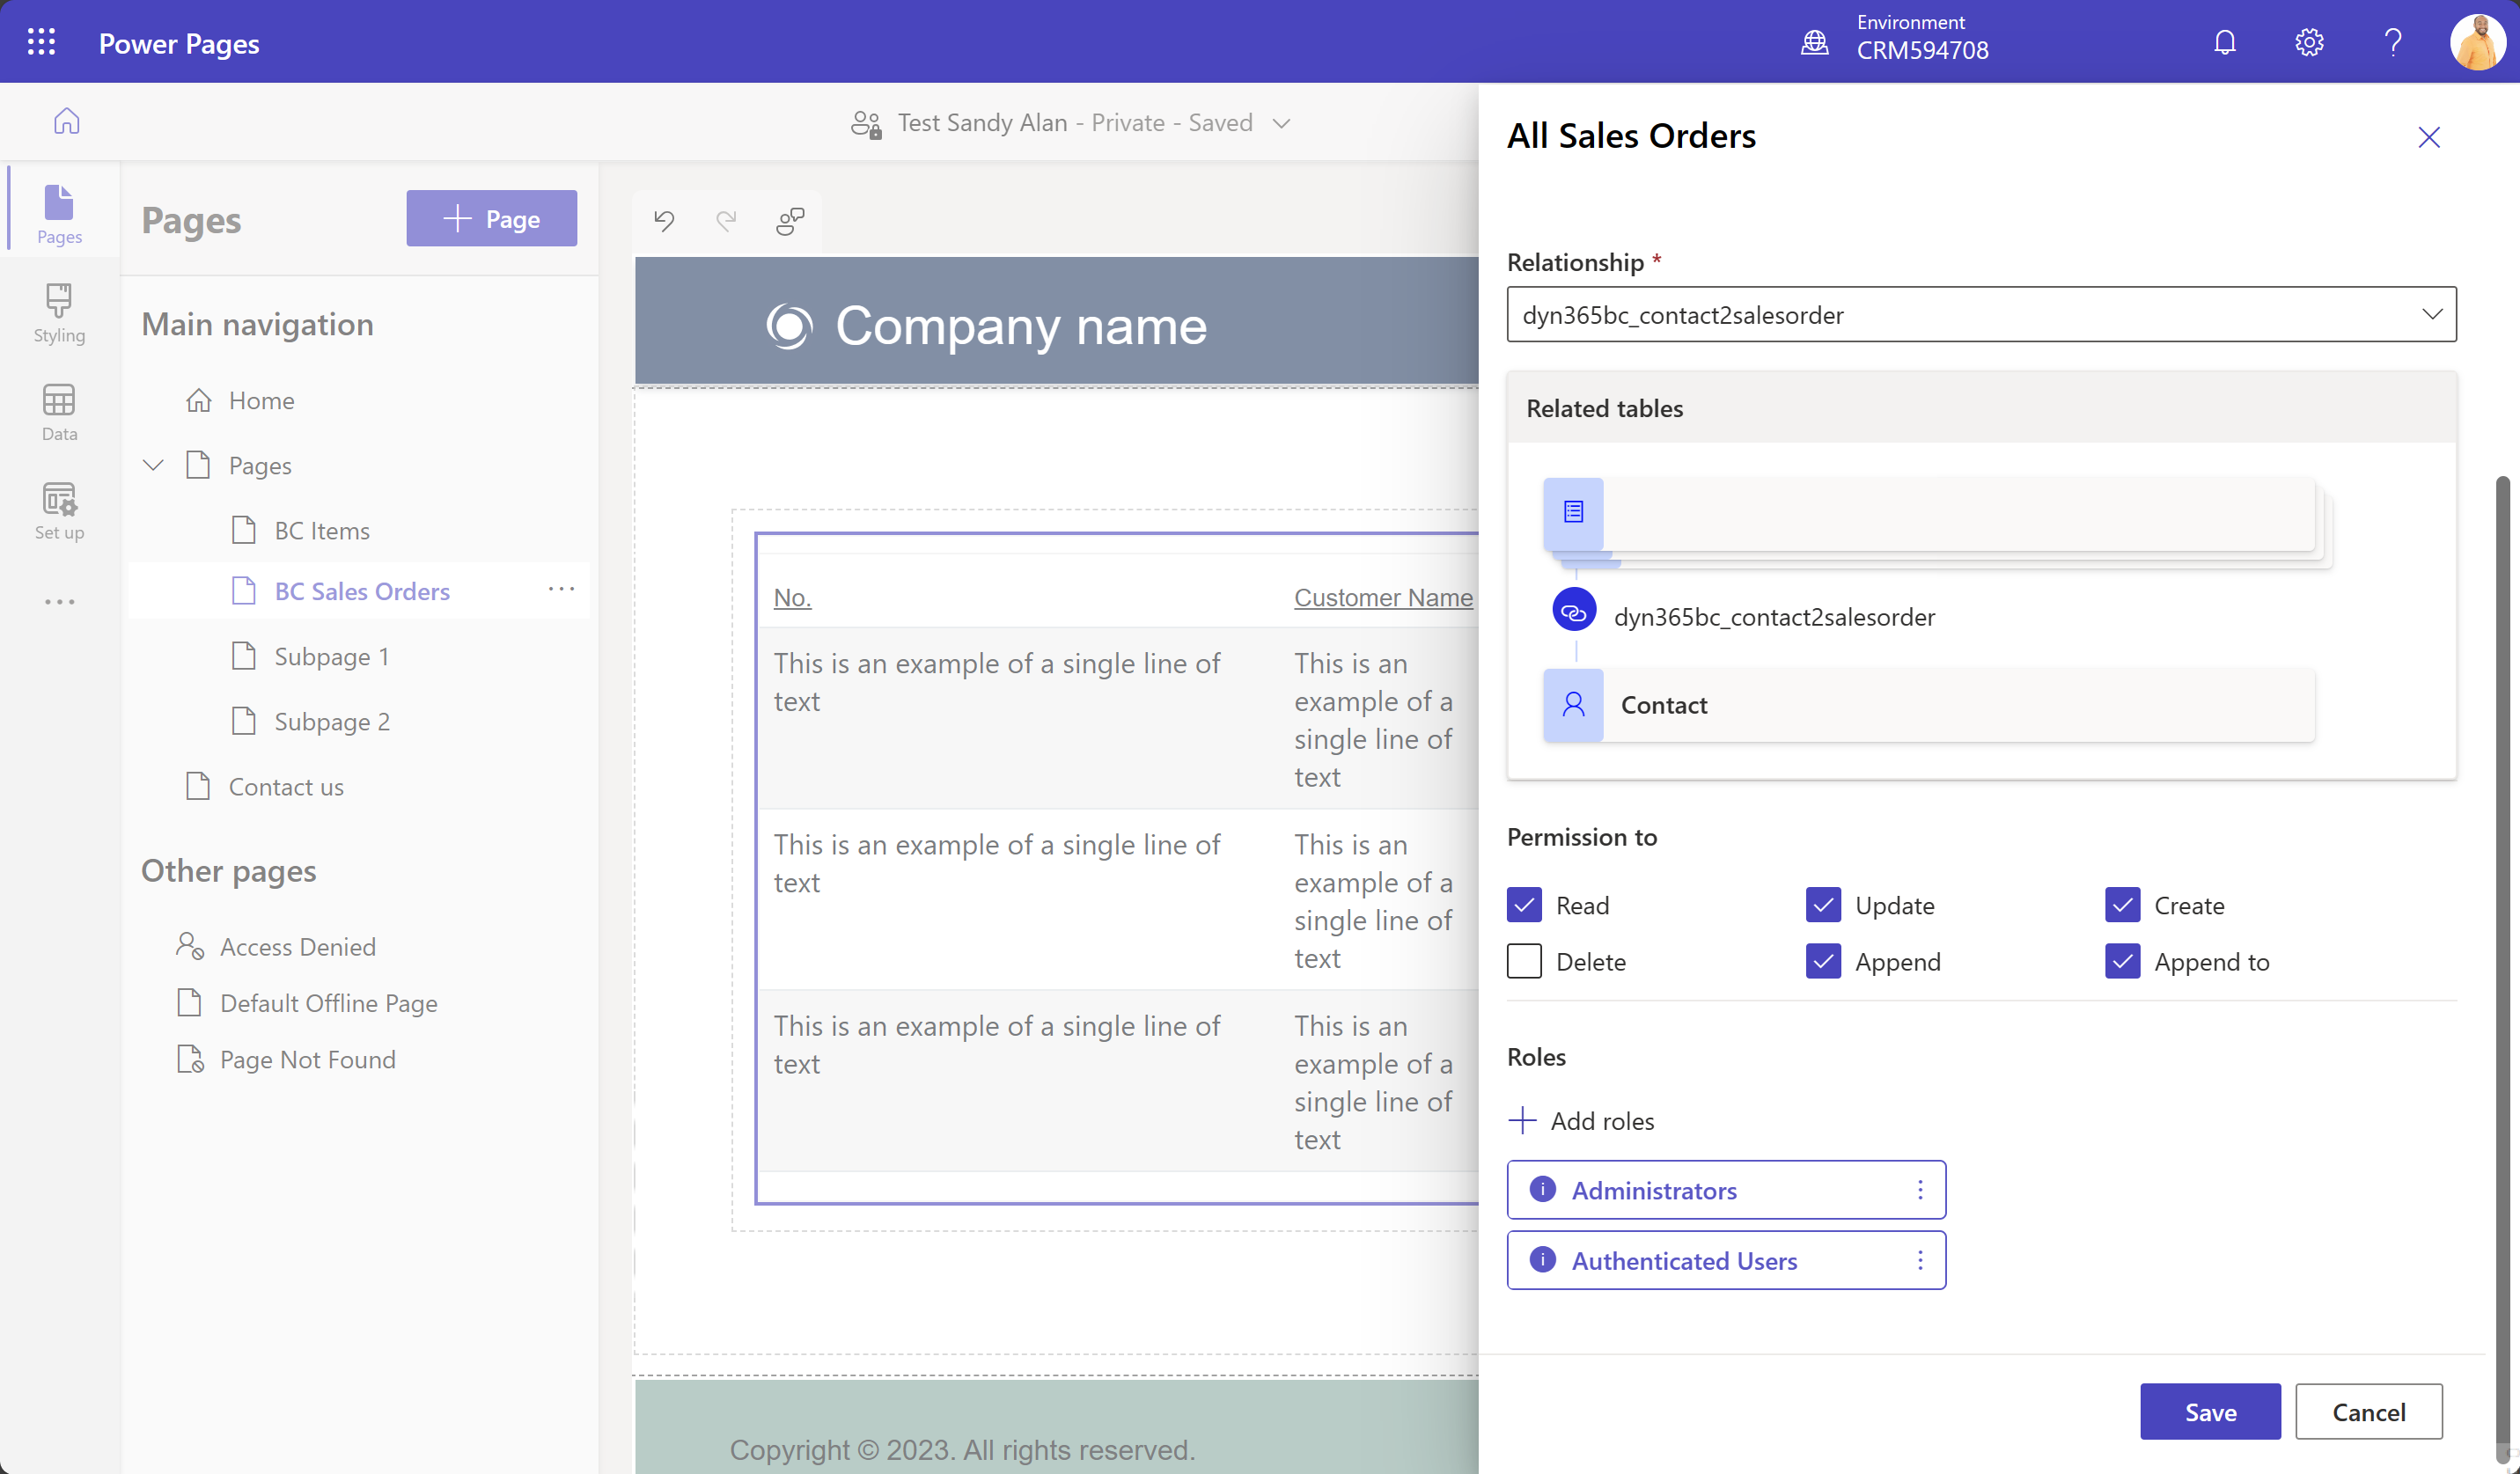
Select the Save button, and then select Sync.
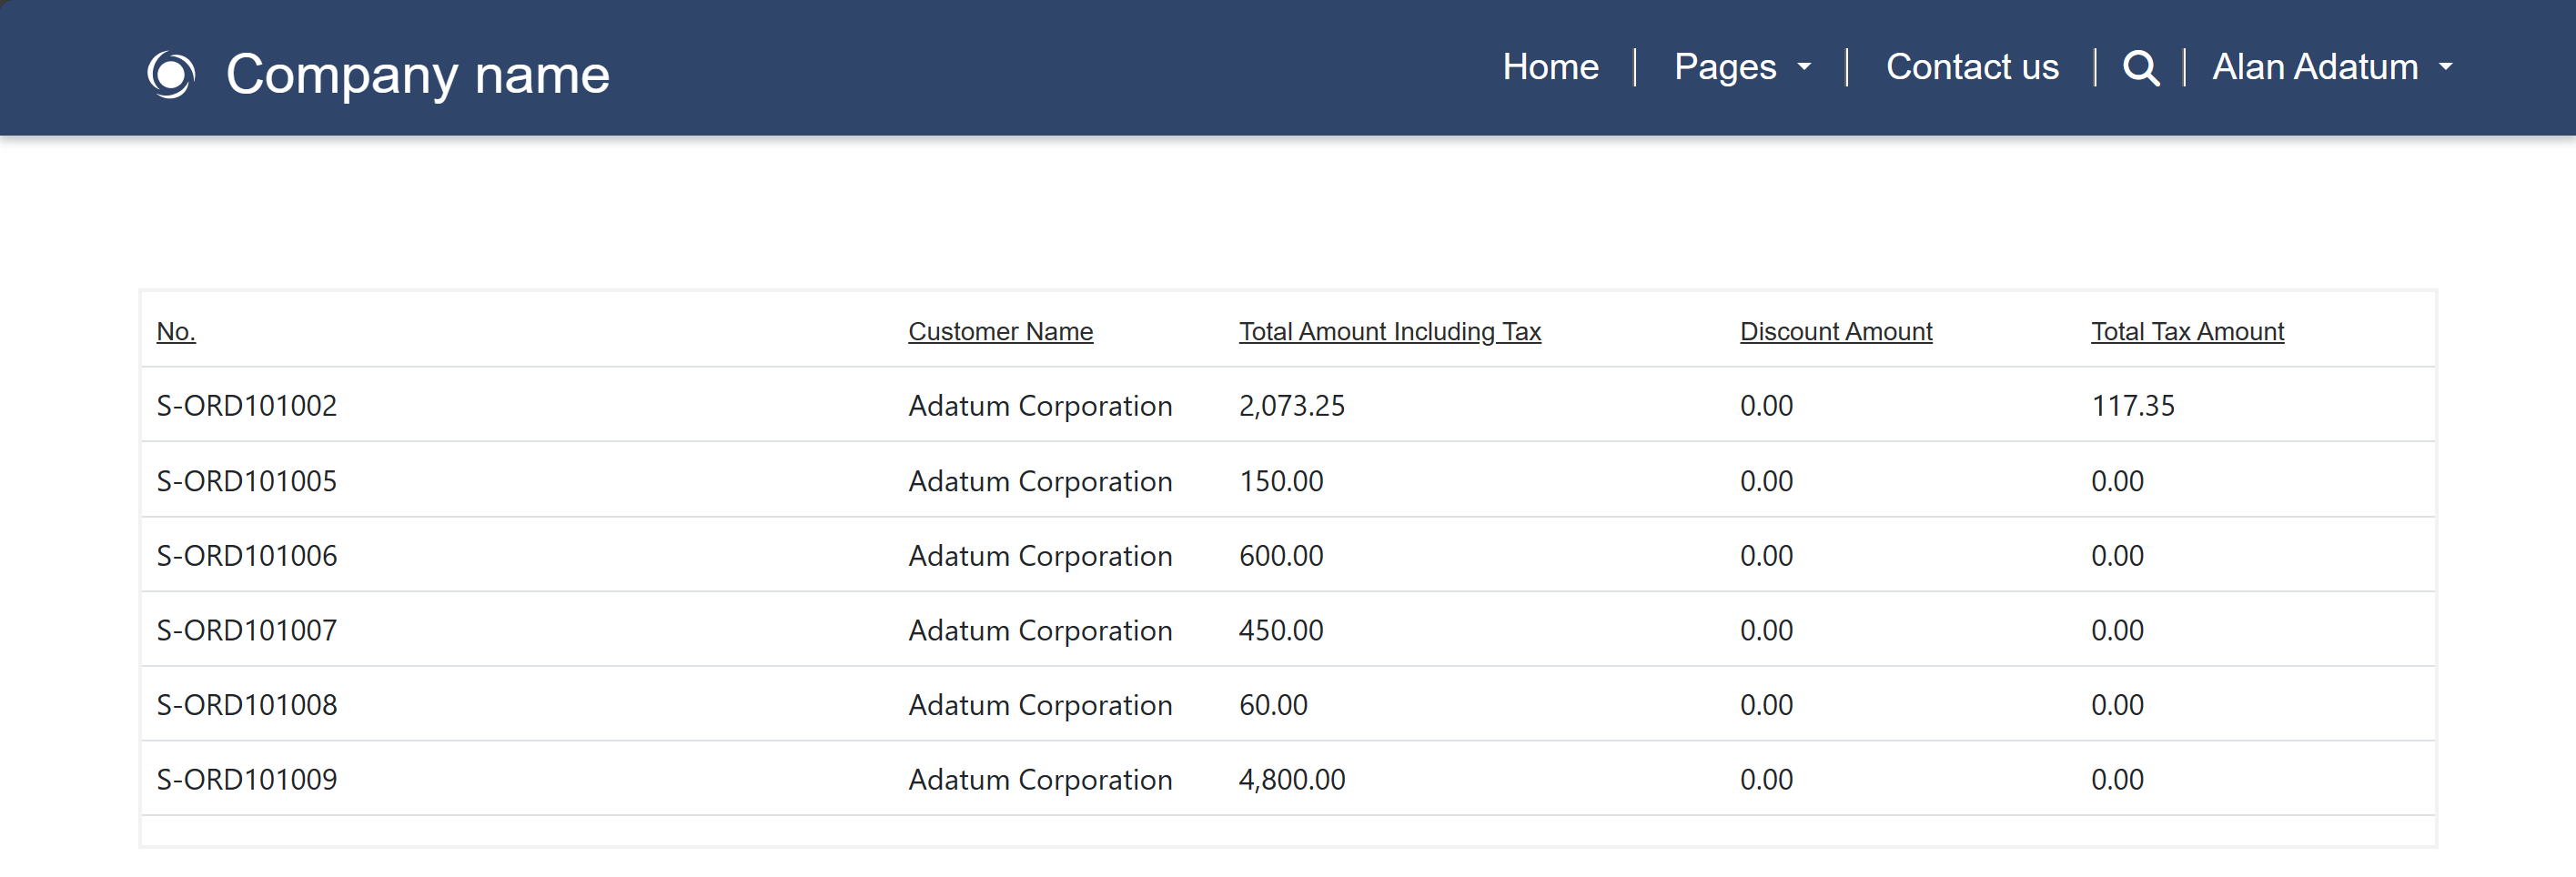
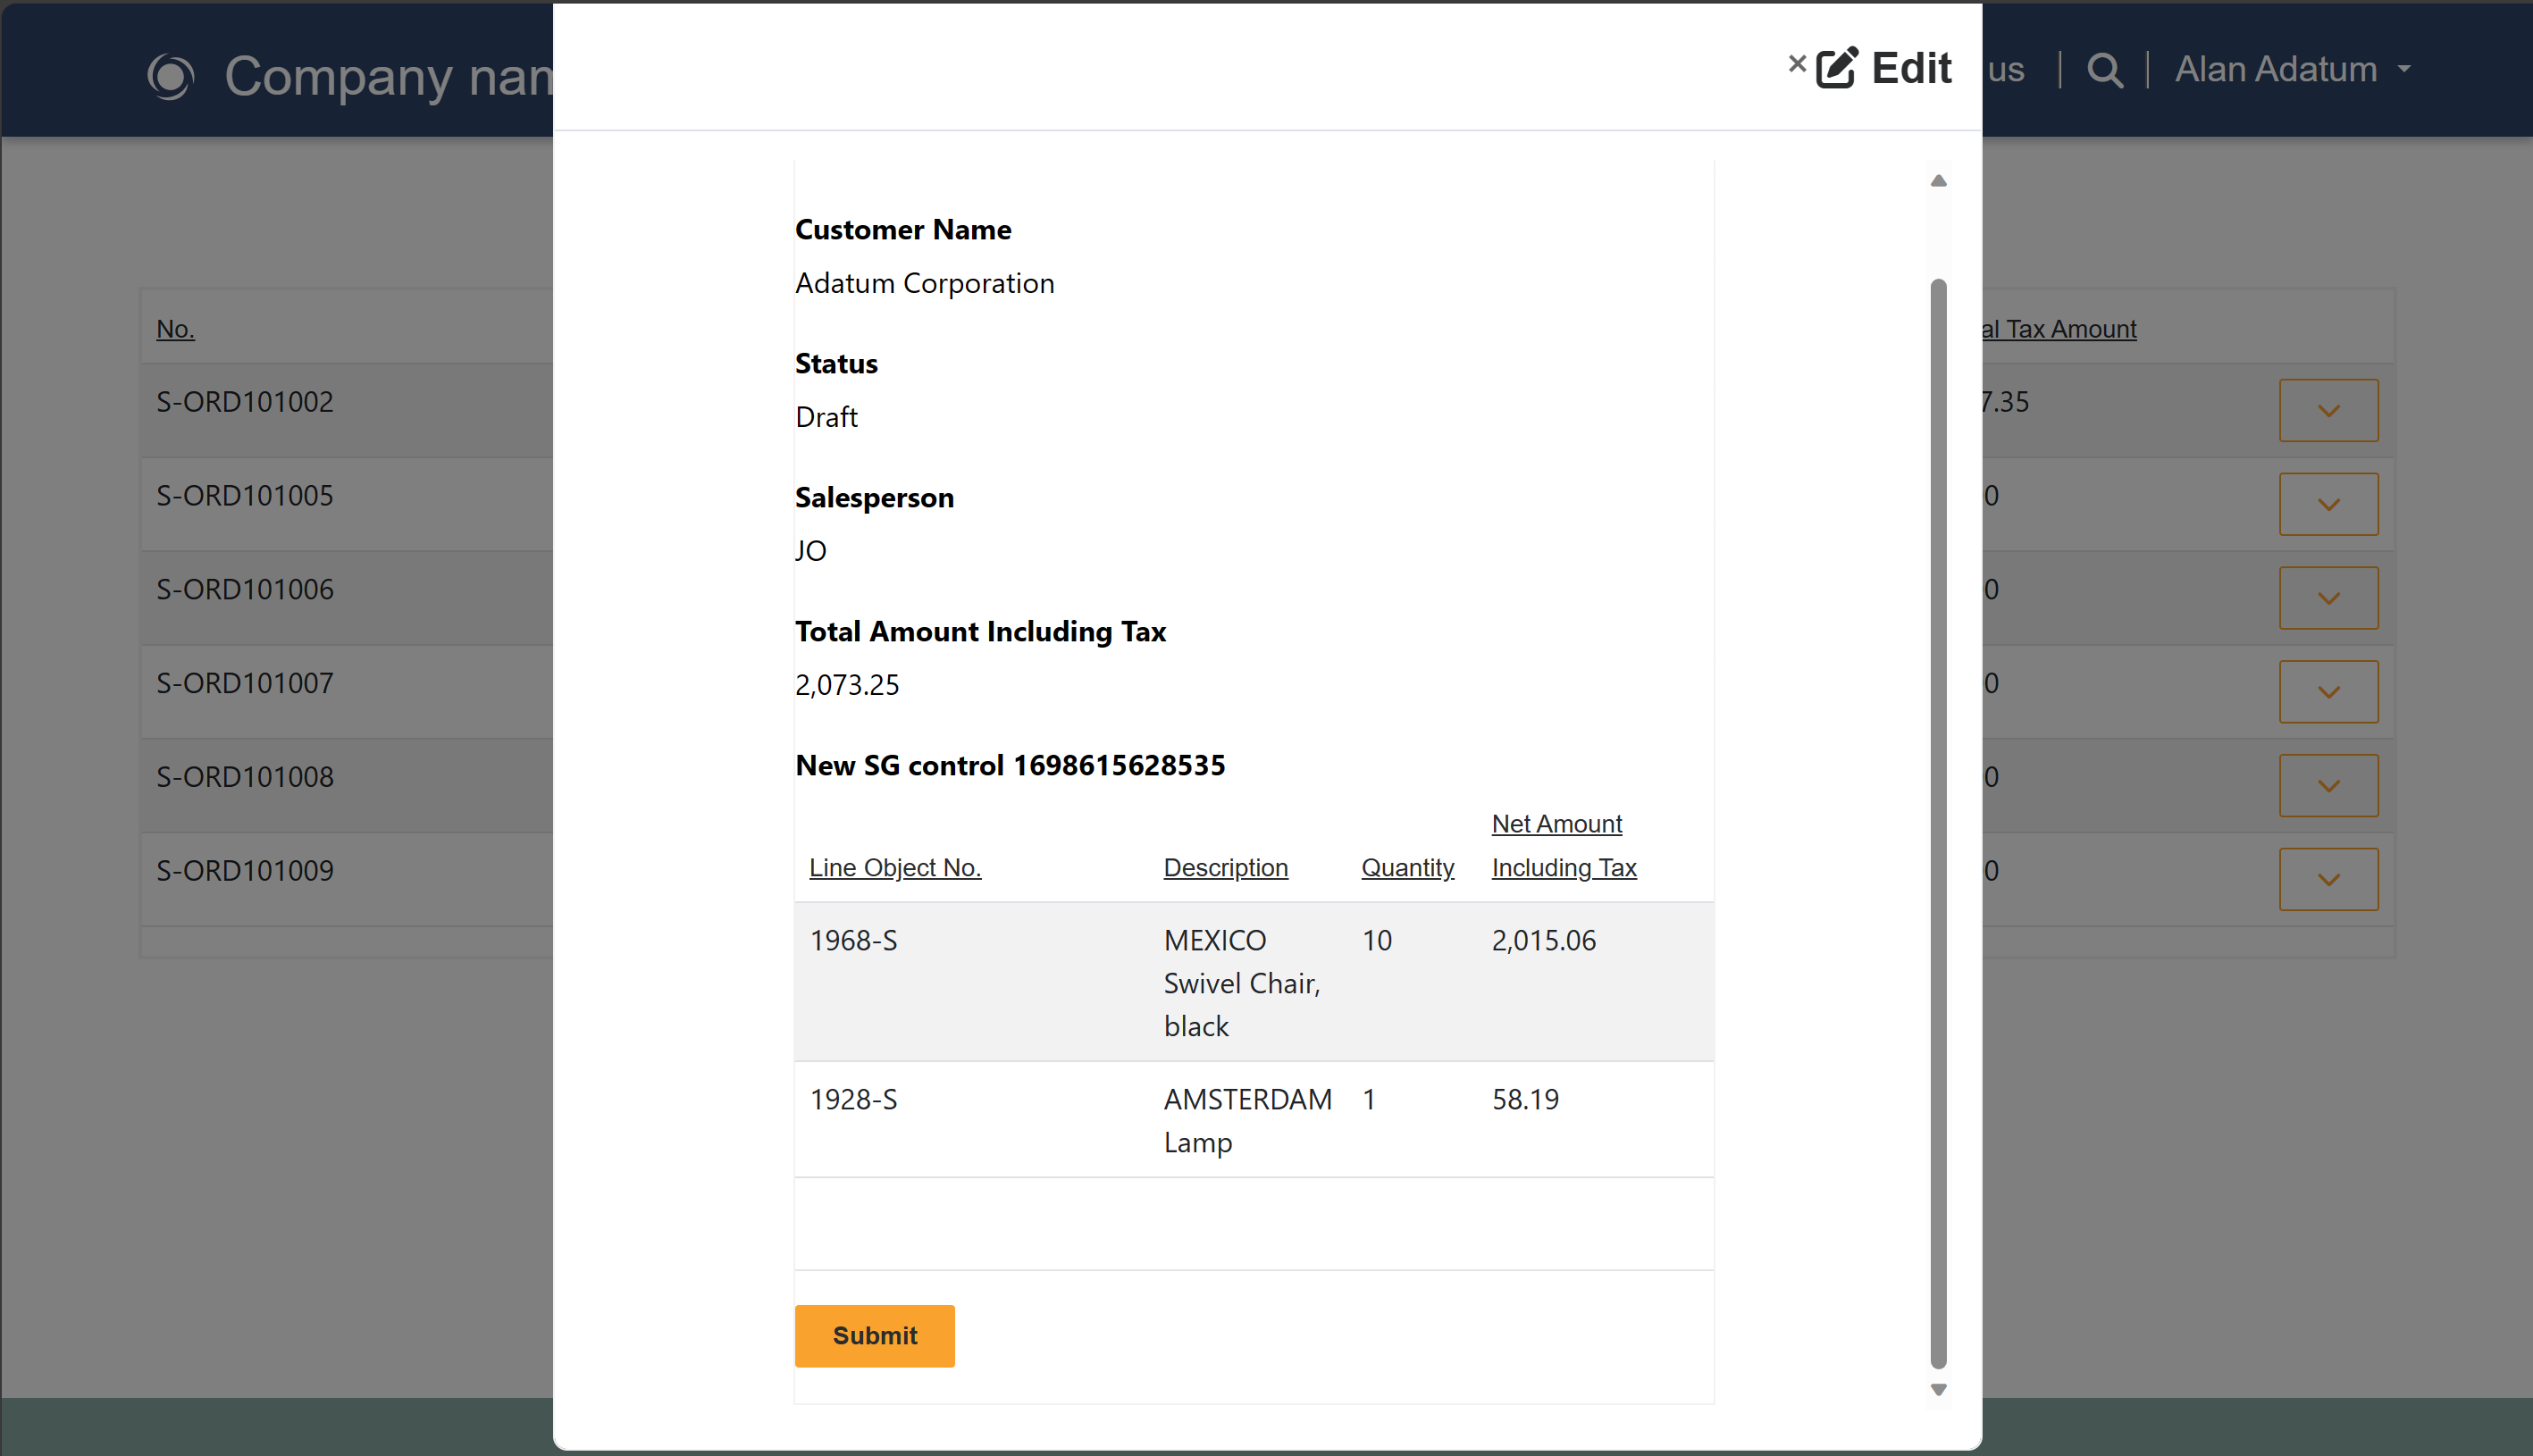
Select the Preview button to check that external users can see the Sales Order table from Business Central after signing in.
To create pages for authenticated access of internal users, follow the same steps as described in the Enable anonymous access for external users via Power Pages and Enable authenticated access for external users via Power Pages sections and add Administrators role. This task enables internal users to sign in to your portal with their Microsoft Entra user identity and the Business Central Virtual Table app will personify them using Dynamics 365 Business Central for Virtual Tables app/S2S user to access data stored in Business Central online.
To enable edit mode on Power Pages lists, complete the following steps:
In Power Pages maker portal, select the Edit button for your portal.
Below the Set up section, select ..., and then select the Power Pages Management option to open Power Pages Management portal in another tab.
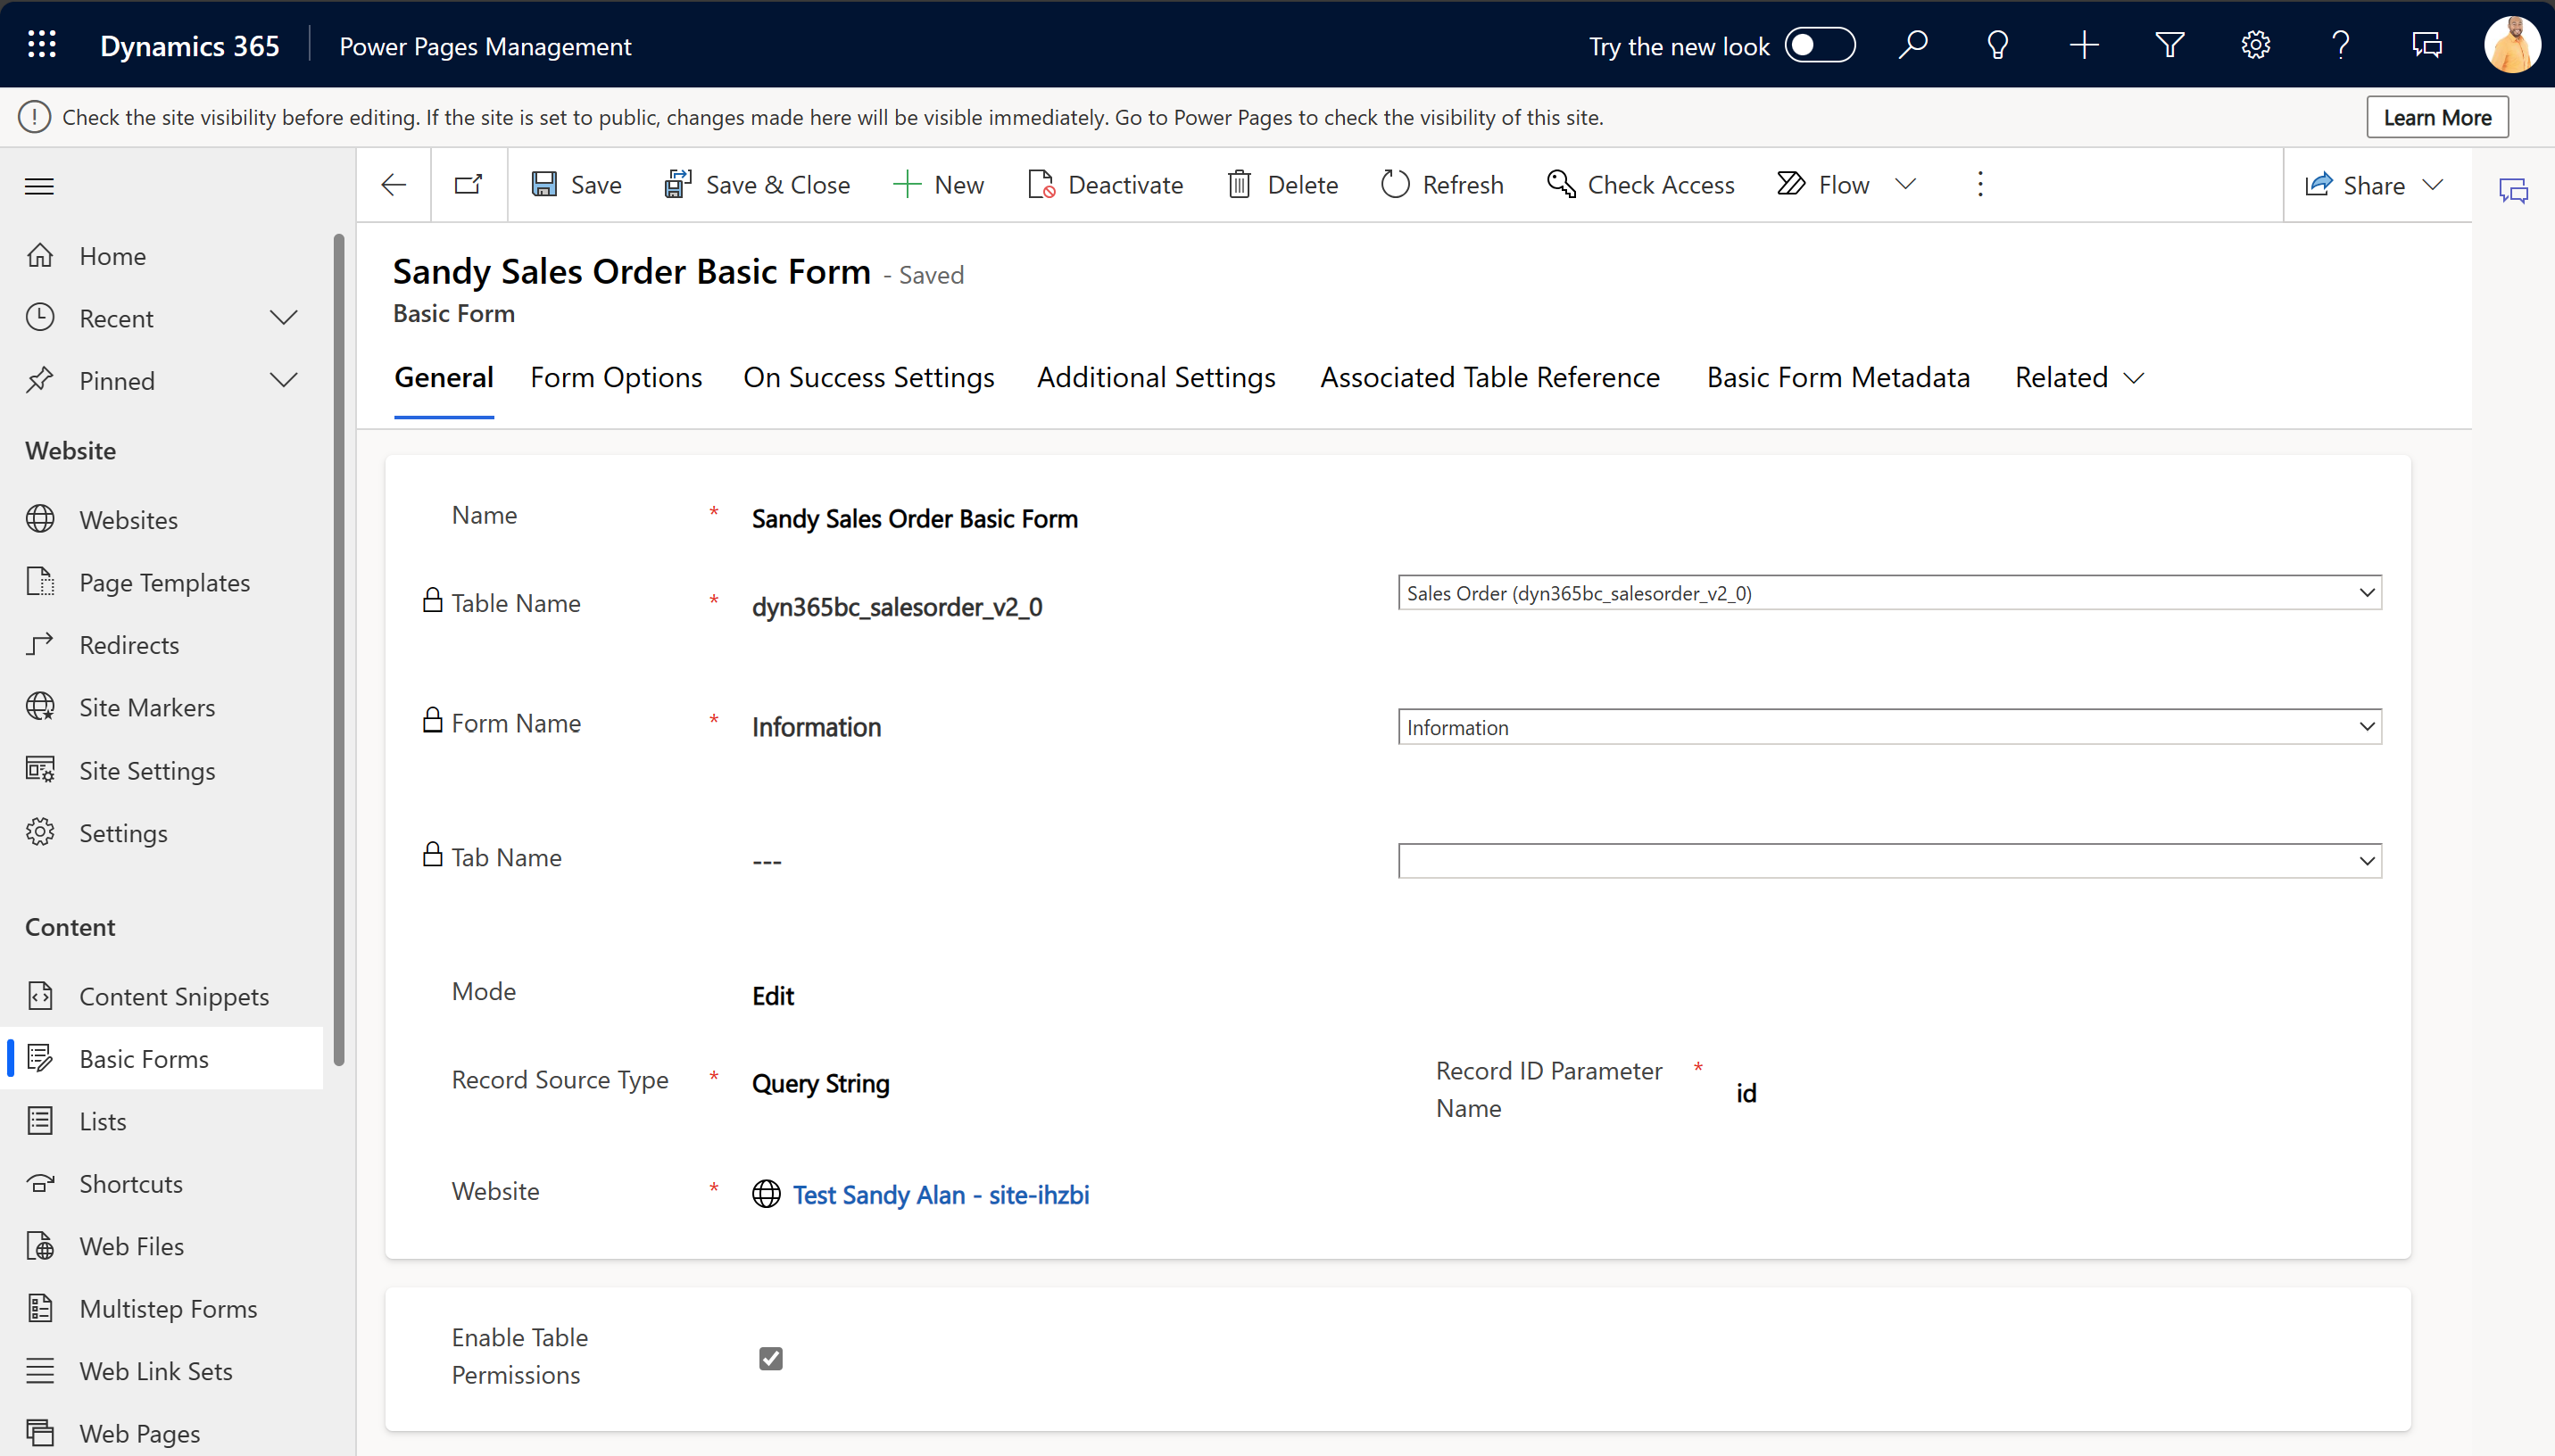
In the Power Pages Management portal, select the Basic Forms section, and then select + New.
Enter a descriptive display name for the Name field, for example YourAlias Sales Order Basic Form, and id for the Record ID Parameter Name field.
Select the appropriate field values as follows:
Select the Save button.
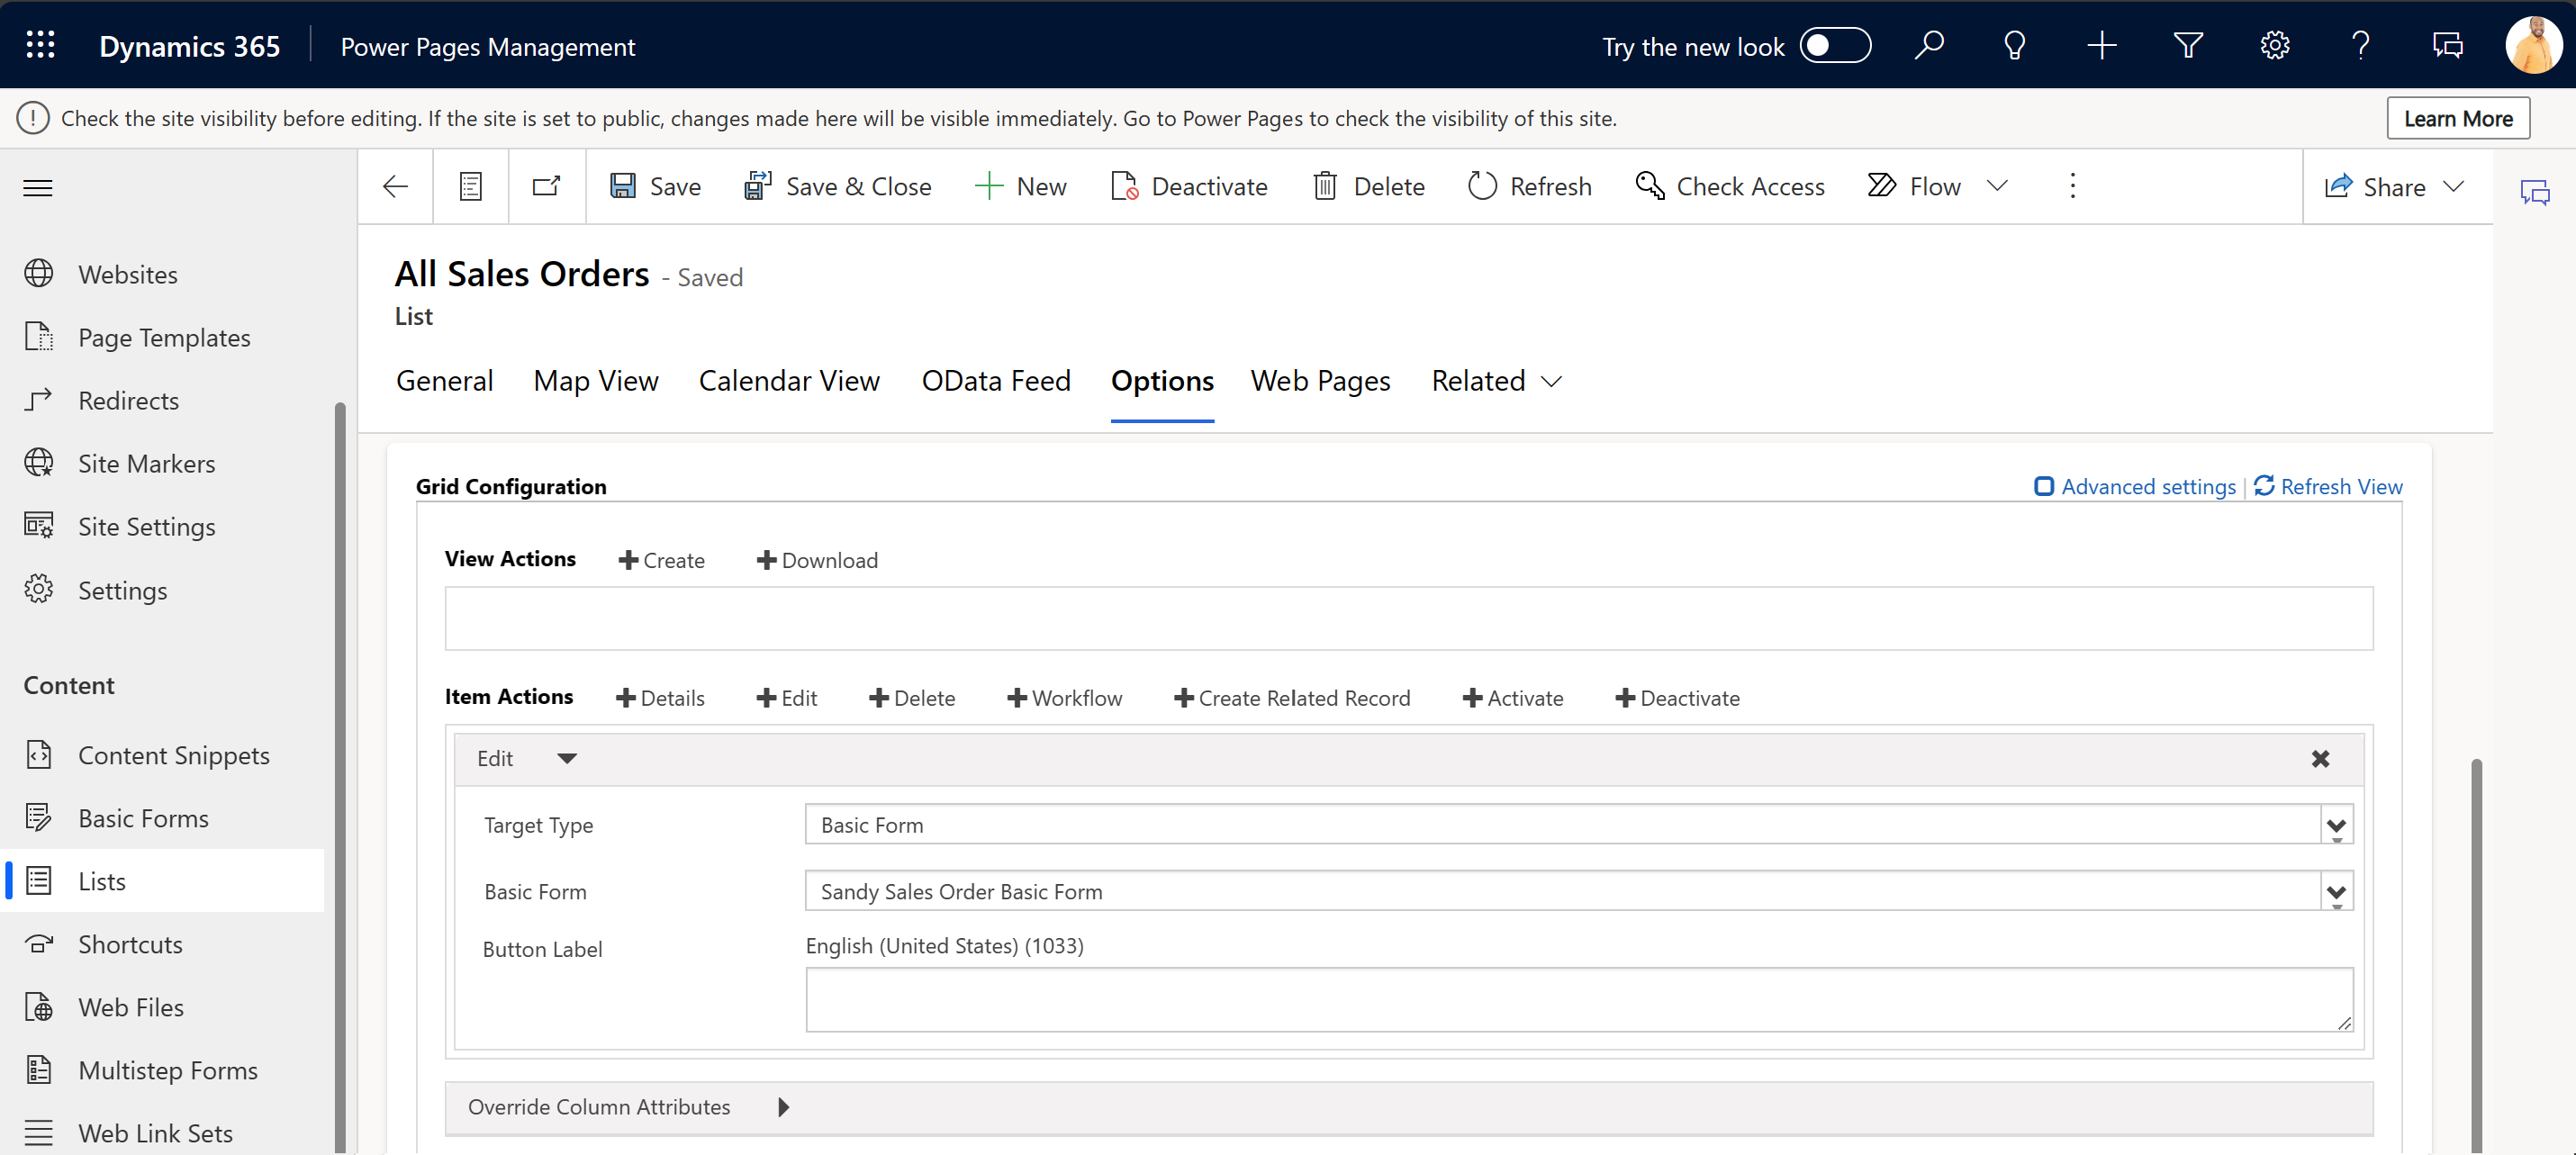
Select the List section, All Sales Orders list, Options tab, and then select + Edit in Grid configuration section.
Select the appropriate field values as follows:
Select the Save button.
Because the default sales order form has been designed to include a subgrid of sales order lines, authenticated users also need to be assigned all except Delete permissions to access the virtual Business Central Sales Order Line table.
Select the Save button, and then select Sync.
Select the Preview button to check that external users can edit sales order lists from Business Central after signing in.
To enable edit mode on Power Pages subgrids, complete the following steps:
In Power Pages maker portal, select the Edit button for your portal.
Below the Set up section, select ..., and then select the Power Pages Management option to open Power Pages Management portal in another tab.
In the Power Pages Management portal, select the Basic Forms section, and then select + New.
Enter a descriptive display name for the Name field, for example YourAlias Sales Order Line Basic Form, and id for the Record ID Parameter Name field.
Select the appropriate field values as follows:
Select the Save button.
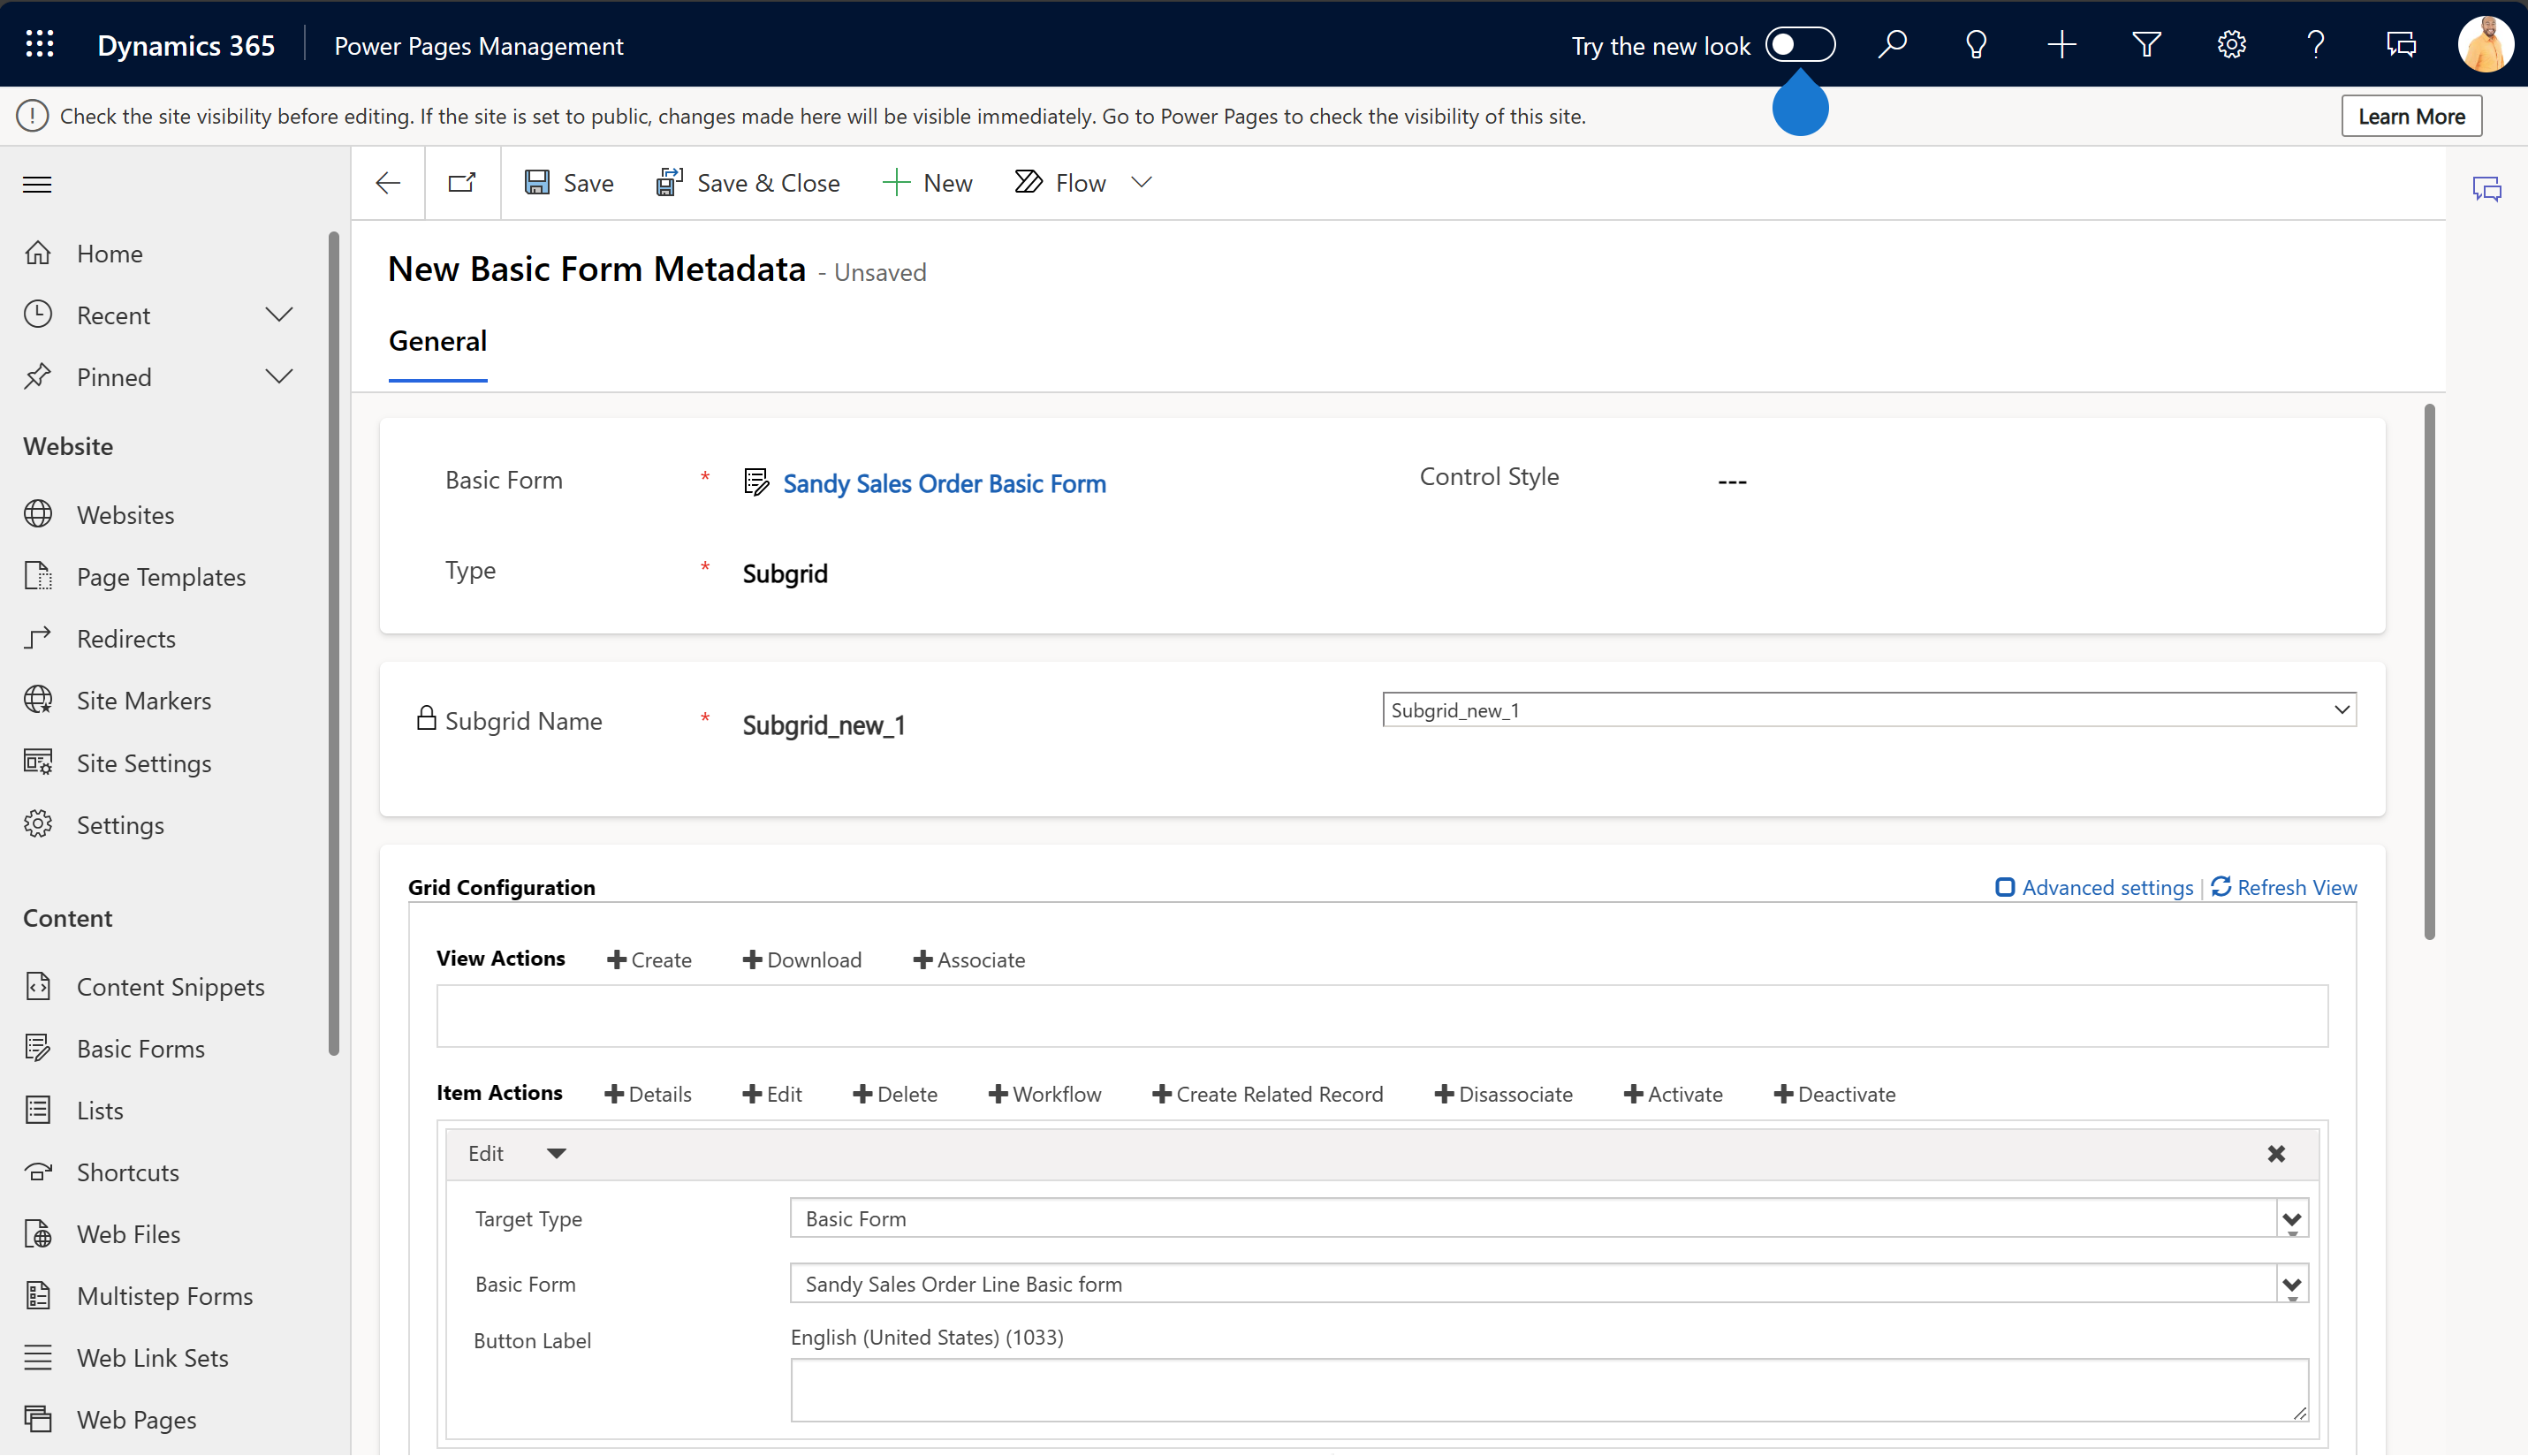
Select YourAlias Sales Order Basic Form, Basic Form Metadata tab, and then select + New Basic Form Metadata.
Select the appropriate field values as follows:
Select the + Edit button in Grid configuration section.
Select the appropriate field values as follows:
Select the Save button, and then select Sync.
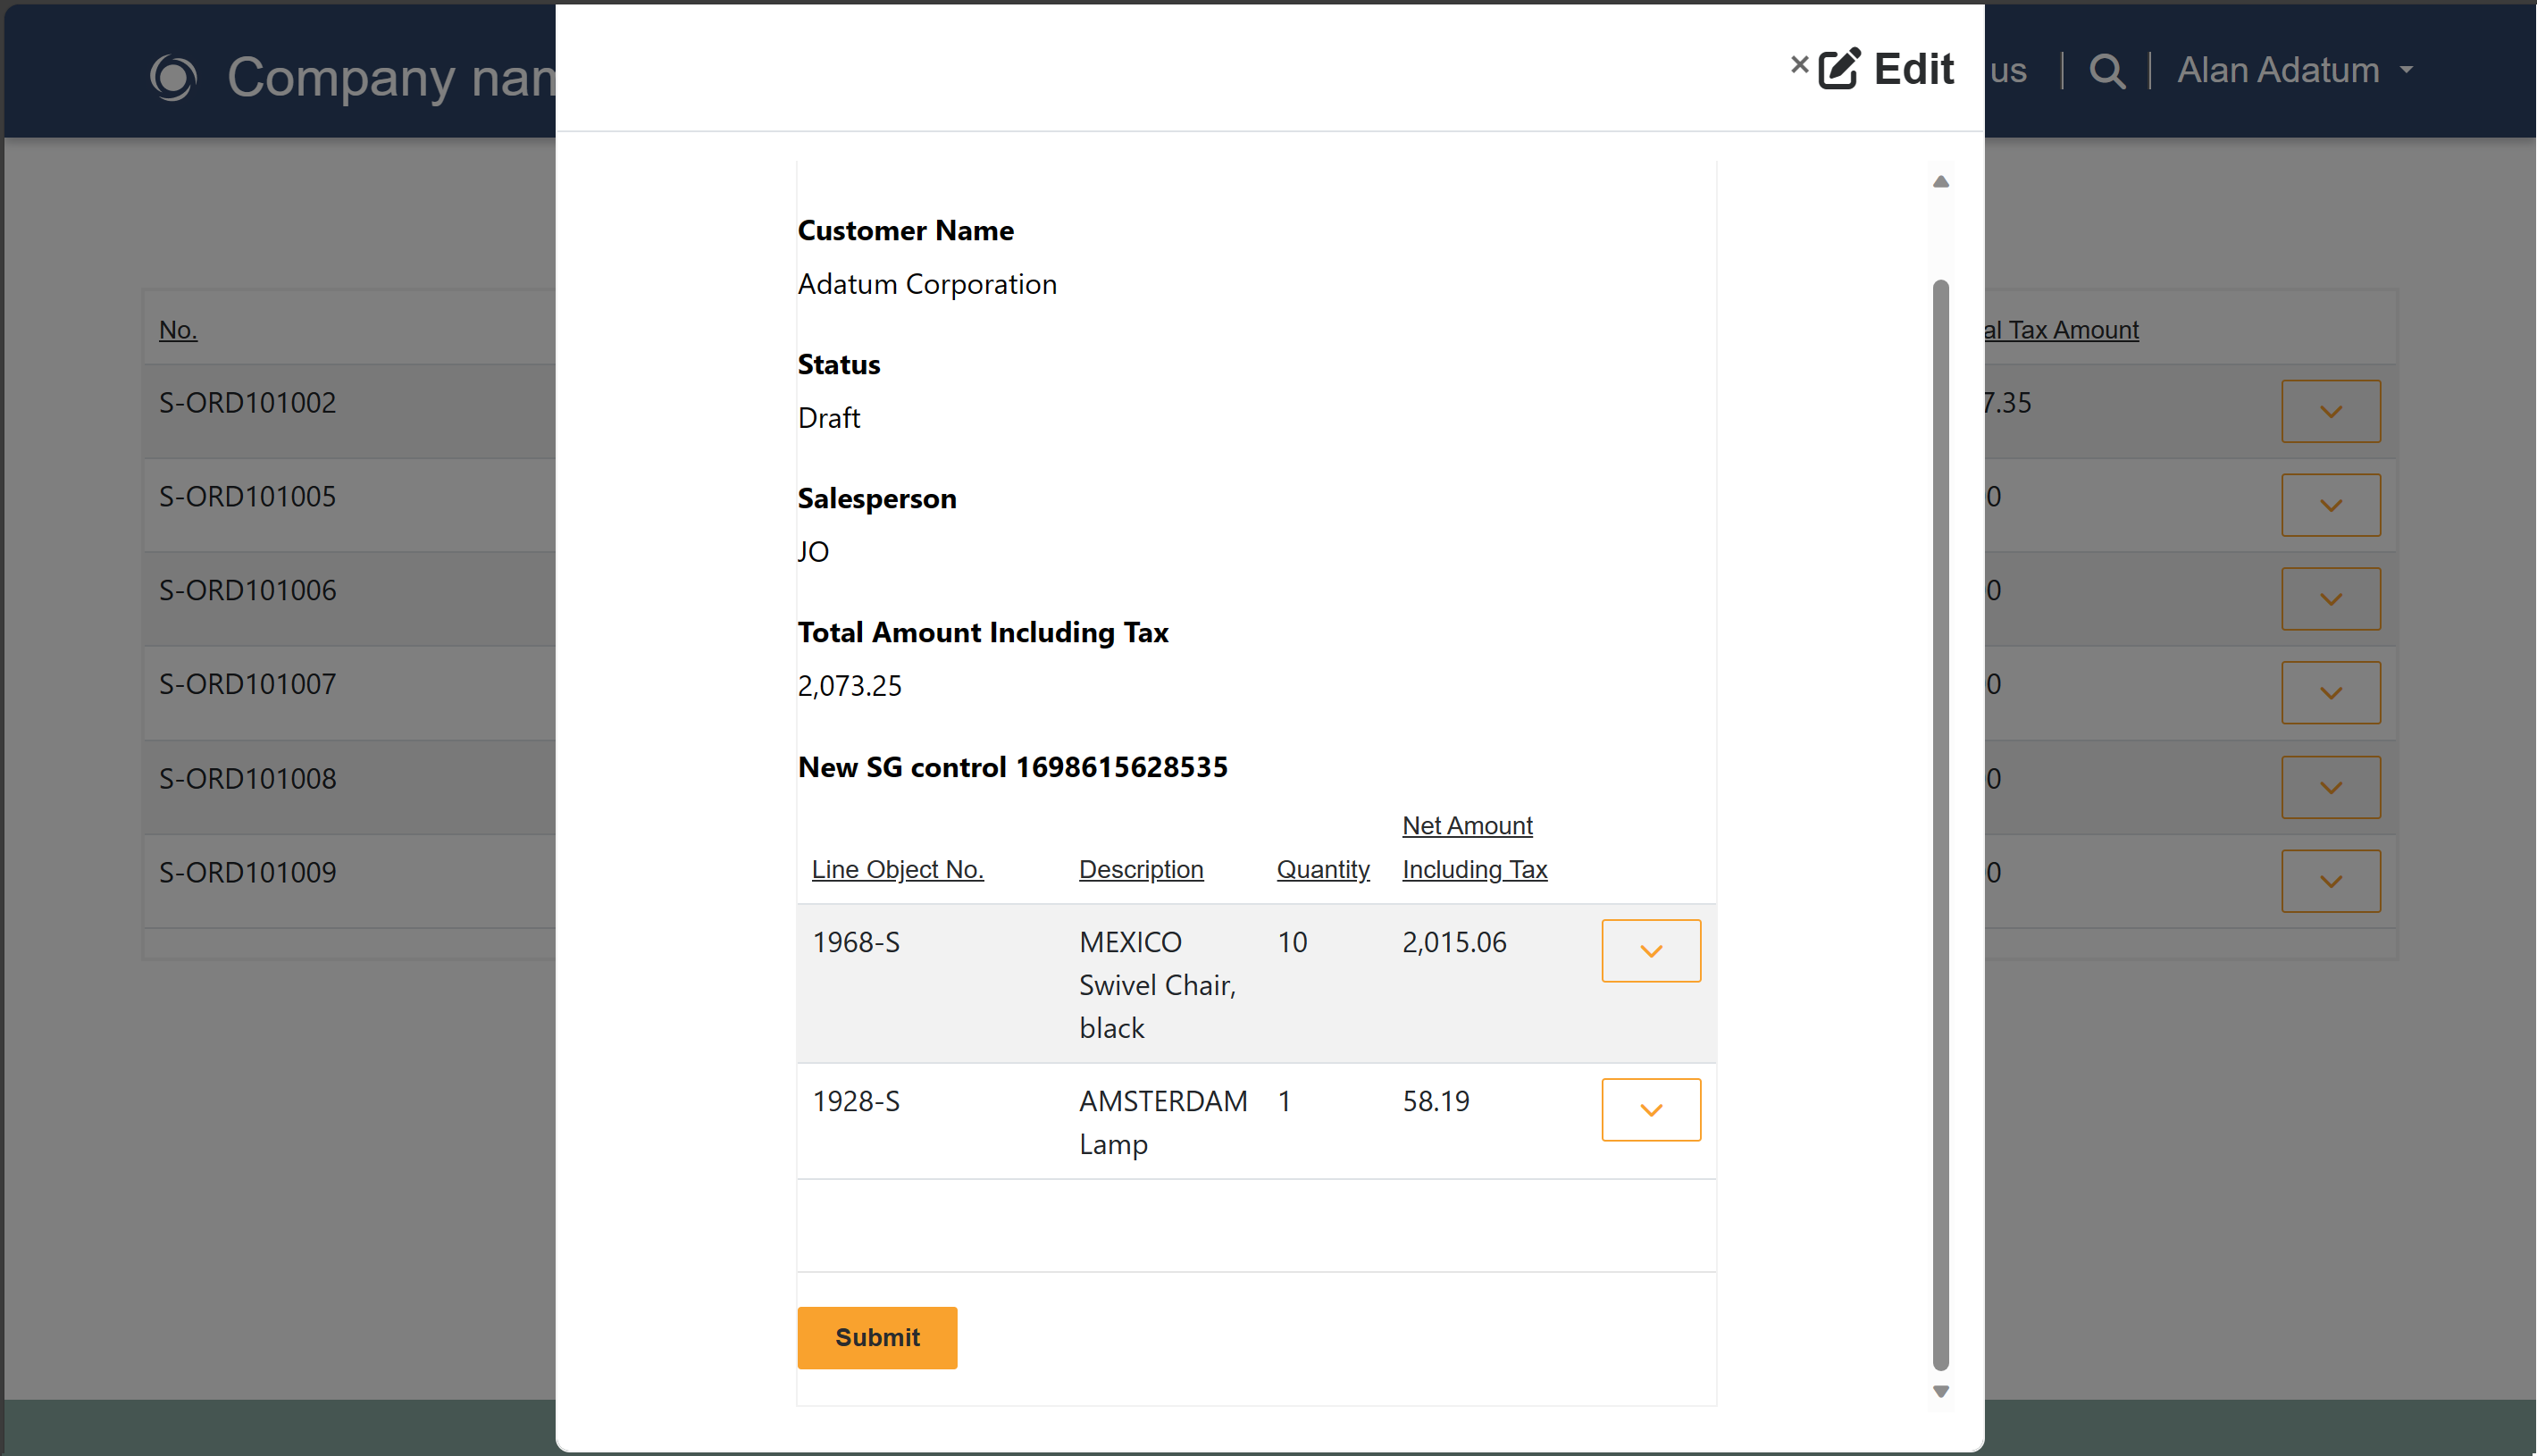
Select the Preview button to check that external users can edit sales order line subgrids linked to sales order lists from Business Central after signing in.
The following list includes the current limitations for Power Pages on virtual tables that will be removed or improved in future updates:
Events
Microsoft Cloud for Sustainability Technical Summit November 4-7
Nov 4, 11 PM - Nov 7, 11 PM
Gain insights from expert-led sessions, interactive demos, and live Q&A!
Register nowTraining
Learning path
Embed Power BI analytics - Training
This learning path teaches you how to embed Power BI content in apps, develop programmatic solutions using the Power BI REST API and the Power BI Client APIs, enforce row-level security (RLS) for embedded content, automate common Power BI setup tasks, configure a development environment, and determine appropriate licensing.
Certification
Microsoft Certified: Power Platform Functional Consultant Associate - Certifications
Demonstrate the use of Microsoft Power Platform solutions to simplify, automate, and empower business processes for organizations in the role of a Functional Consultant.